
In this section, developing another Java-based REST/JSON Spring Boot service using STS will be demonstrated.
- Open STS, right-click within the Project Explorer window, navigate to New | Project, and select Spring Starter Project, as shown in the following screenshot, and click on Next:

Spring Starter Project is a basic template wizard that provides a number of other starter libraries to select from.
- Type the project name as
chapter2.bootrestor any other name of your choice. It is important to choose the packaging as JAR. In traditional web applications, a war file is created and then deployed to a servlet container, whereas Spring Boot packages all the dependencies to a self-contained, autonomous JAR file with an embedded HTTP listener. - Select 1.8 under Java Version. Java 1.8 is recommended for Spring 4 applications. Change the other Maven properties such as Group, Artifact, and Package, as shown in the following screenshot:

- Once completed, click on Next.
- The wizard will show the library options. In this case, as the REST service is developed, select Web under Web. This is an interesting step that tells Spring Boot that a Spring MVC web application is being developed so that Spring Boot can include the necessary libraries, including Tomcat as the HTTP listener and other configurations, as required:

- Click on Finish.
This will generate a project named
chapter2.bootrestin Project Explorer in STS:
- Take a moment to examine the generated application. Files that are of interest are:
pom.xmlApplication.javaApplication.propertiesApplicationTests.java
The parent element is one of the interesting aspects in the pom.xml file. Take a look at the following:
<parent>
  <groupId>org.springframework.boot</groupId>
    <artifactId>spring-boot-starter-parent</artifactId>
    <version>1.3.4.RELEASE</version>
</parent>
The spring-boot-starter-parent pattern is a
bill of materials (BOM), a pattern used by Maven's dependency management. BOM is a special kind of POM file used to manage different library versions required for a project. The advantage of using the spring-boot-starter-parent POM file is that developers need not worry about finding the right compatible versions of different libraries such as Spring, Jersey, JUnit, Logback, Hibernate, Jackson, and so on. For instance, in our first legacy example, a specific version of the Jackson library was added to work with Spring 4. In this example, these are taken care of by the spring-boot-starter-parent pattern.
The starter POM file has a list of Boot dependencies, sensible resource filtering, and sensible plug-in configurations required for the Maven builds.
Tip
Refer to https://github.com/spring-projects/spring-boot/blob/1.3.x/spring-boot-dependencies/pom.xml to take a look at the different dependencies provided in the starter parent (version 1.3.x). All these dependencies can be overridden if required.
The starter POM file itself does not add JAR dependencies to the project. Instead, it will only add library versions. Subsequently, when dependencies are added to the POM file, they refer to the library versions from this POM file. A snapshot of some of the properties are as shown as follows:
<spring-boot.version>1.3.5.BUILD-SNAPSHOT</spring-boot.version>
<hibernate.version>4.3.11.Final</hibernate.version>
<jackson.version>2.6.6</jackson.version>
<jersey.version>2.22.2</jersey.version>
<logback.version>1.1.7</logback.version>
<spring.version>4.2.6.RELEASE</spring.version>
<spring-data-releasetrain.version>Gosling-SR4</spring-data-releasetrain.version>
<tomcat.version>8.0.33</tomcat.version>
Reviewing the dependency section, one can see that this is a clean and neat POM file with only two dependencies, as follows:
<dependencies>
   <dependency>
  <groupId>org.springframework.boot</groupId>
  <artifactId>spring-boot-starter-web</artifactId>
   </dependency>

   <dependency>
  <groupId>org.springframework.boot</groupId>
  <artifactId>spring-boot-starter-test</artifactId>
  <scope>test</scope>
   </dependency>
</dependencies>
As web is selected, spring-boot-starter-web adds all dependencies required for a Spring MVC project. It also includes dependencies to Tomcat as an embedded HTTP listener. This provides an effective way to get all the dependencies required as a single bundle. Individual dependencies could be replaced with other libraries, for example replacing Tomcat with Jetty.
Similar to web, Spring Boot comes up with a number of spring-boot-starter-* libraries, such as amqp, aop, batch, data-jpa, thymeleaf, and so on.
The last thing to be reviewed in the pom.xml file is the Java 8 property. By default, the parent POM file adds Java 6. It is recommended to override the Java version to 8 for Spring:
<java.version>1.8</java.version>
Spring Boot, by default, generated a org.rvslab.chapter2.Application.java class under src/main/java to bootstrap, as follows:
@SpringBootApplication
public class Application {
    public static void main(String[] args) {
        SpringApplication.run(Application.class, args);
    }
}
There is only a main method in Application, which will be invoked at startup as per the Java convention. The main method bootstraps the Spring Boot application by calling the run method on SpringApplication. Application.class is passed as a parameter to tell Spring Boot that this is the primary component.
More importantly, the magic is done by the @SpringBootApplication annotation. The @SpringBootApplication annotation is a top-level annotation that encapsulates three other annotations, as shown in the following code snippet:
@Configuration
@EnableAutoConfiguration
@ComponentScan
public class Application {
The @Configuration annotation hints that the contained class declares one or more @Bean definitions. The @Configuration annotation is meta-annotated with @Component; therefore, it is a candidate for component scanning.
The @EnableAutoConfiguration annotation tells Spring Boot to automatically configure the Spring application based on the dependencies available in the class path.
A default application.properties file is placed under src/main/resources. It is an important file to configure any required properties for the Spring Boot application. At the moment, this file is kept empty and will be revisited with some test cases later in this chapter.
The last file to be examined is ApplicationTests.java under src/test/java. This is a placeholder to write test cases against the Spring Boot application.
To implement the first RESTful service, add a REST endpoint, as follows:
- One can edit
Application.javaundersrc/main/javaand add a RESTful service implementation. The RESTful service is exactly the same as what was done in the previous project. Append the following code at the end of theApplication.javafile:@RestController class GreetingController{ @RequestMapping("/") Greet greet(){ return new Greet("Hello World!"); } } class Greet { private String message; public Greet() {} public Greet(String message) { this.message = message; } //add getter and setter } - To run, navigate to Run As | Spring Boot App. Tomcat will be started on the
8080port: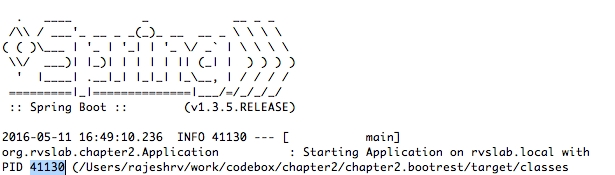
We can notice from the log that:
- Spring Boot get its own process ID (in this case, it is
41130) - Spring Boot is automatically started with the Tomcat server at the localhost, port
8080.
- Spring Boot get its own process ID (in this case, it is
- Next, open a browser and point to
http://localhost:8080. This will show the JSON response as shown in the following screenshot:
A key difference between the legacy service and this one is that the Spring Boot service is self-contained. To make this clearer, run the Spring Boot application outside STS. Open a terminal window, go to the project folder, and run Maven, as follows:
$ maven install
This will generate a fat JAR file under the target folder of the project. Running the application from the command line shows:
$java -jar target/bootrest-0.0.1-SNAPSHOT.jar
As one can see, bootrest-0.0.1-SNAPSHOT.jar is self-contained and could be run as a standalone application. At this point, the JAR is as thin as 13 MB. Even though the application is no more than just "Hello World", the Spring Boot service just developed, practically follows the principles of microservices.
There are multiple ways to test REST/JSON Spring Boot microservices. The easiest way is to use a web browser or a curl command pointing to the URL, as follows:
curl http://localhost:8080
There are number of tools available to test RESTful services, such as Postman, Advanced REST client, SOAP UI, Paw, and so on.
In this example, to test the service, the default test class generated by Spring Boot will be used.
Adding a new test case to ApplicatonTests.java results in:
@RunWith(SpringJUnit4ClassRunner.class)
@SpringApplicationConfiguration(classes = Application.class)
@WebIntegrationTest
public class ApplicationTests {
  @Test
  public void testVanillaService() {
    RestTemplate restTemplate = new RestTemplate();
    Greet greet = restTemplate.getForObject("http://localhost:8080", Greet.class);
    Assert.assertEquals("Hello World!", greet.getMessage());
  }
}
Note that @WebIntegrationTest is added and @WebAppConfiguration removed at the class level. The @WebIntegrationTest annotation is a handy annotation that ensures that the tests are fired against a fully up-and-running server. Alternately, a combination of @WebAppConfiguration and @IntegrationTest will give the same result.
Also note that RestTemplate is used to call the RESTful service. RestTemplate is a utility class that abstracts the lower-level details of the HTTP client.
To test this, one can open a terminal window, go to the project folder, and run mvn install.