
The next diagram represents the implementation view of the BrownField PSS microservices system:

As shown in the preceding diagram, we are implementing four microservices as an example: Search, Fare, Booking, and Check-in. In order to test the application, there is a website application developed using Spring MVC with Thymeleaf templates. The asynchronous messaging is implemented with the help of RabbitMQ. In this sample implementation, the default H2 database is used as the in-memory store for demonstration purposes.
The code in this section demonstrates all the capabilities highlighted in the Reviewing the microservices capability model section of this chapter.
The basic implementation of the BrownField Airline's PSS microservices system has five core projects as summarized in the following table. The table also shows the port range used for these projects to ensure consistency throughout the book:
|
Microservice |
Projects |
Port Range |
|---|---|---|
|
Book microservice |
|
|
|
Check-in microservice |
|
|
|
Fare microservice |
|
|
|
Search microservice |
|
|
|
Website |
|
|
The website is the UI application for testing the PSS microservices.
All microservice projects in this example follow the same pattern for package structure as shown in the following screenshot:
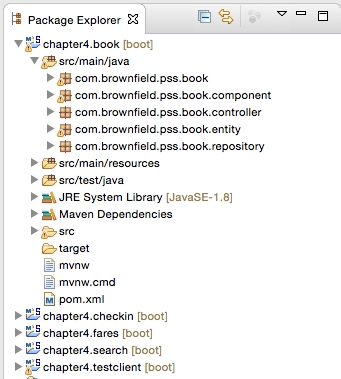
The different packages and their purposes are explained as follows:
- The root folder (
com.brownfield.pss.book) contains the default Spring Boot application. - The
componentpackage hosts all the service components where the business logic is implemented. - The
controllerpackage hosts the REST endpoints and the messaging endpoints. Controller classes internally utilize the component classes for execution. - The
entitypackage contains the JPA entity classes for mapping to the database tables. - Repository classes are packaged inside the
repositorypackage, and are based on Spring Data JPA.
Follow the steps listed next to build and test the microservices developed in this chapter:
- Build each of the projects using Maven. Ensure that the
testflag is switched off. The test programs assume other dependent services are up and running. It fails if the dependent services are not available. In our example, Booking and Fare have direct dependencies. We will learn how to circumvent this dependency in Chapter 7, Logging and Monitoring Microservices:mvn -Dmaven.test.skip=true install - Run the RabbitMQ server:
rabbitmq_server-3.5.6/sbin$ ./rabbitmq-server - Run the following commands in separate terminal windows:
java -jar target/fares-1.0.jar
java -jar target/search-1.0.jar
java -jar target/checkin-1.0.jar
java -jar target/book-1.0.jar
java -jar target/website-1.0.jar
- The website project has a
CommandLineRunner, which executes all the test cases at startup. Once all the services are successfully started, openhttp://localhost:8001in a browser. - The browser asks for basic security credentials. Use
guestorguest123as the credentials. This example only shows the website security with a basic authentication mechanism. As explained in Chapter 2, Building Microservices with Spring Boot, service-level security can be achieved using OAuth2. - Entering the correct security credentials displays the following screen. This is the home screen of our BrownField PSS application:

- The SUBMIT button invokes the Search microservice to fetch the available flights that meet the conditions mentioned on the screen. A few flights are pre-populated at the startup of the Search microservice. Edit the Search microservice code to feed in additional flights, if required.
- The output screen with a list of flights is shown in the next screenshot. The Book link will take us to the booking screen for the selected flight:

- The following screenshot shows the booking screen. The user can enter the passenger details, and create a booking by clicking on the CONFIRM button. This invokes the Booking microservice, and internally, the Fare service as well. It also sends a message back to the Search microservice:

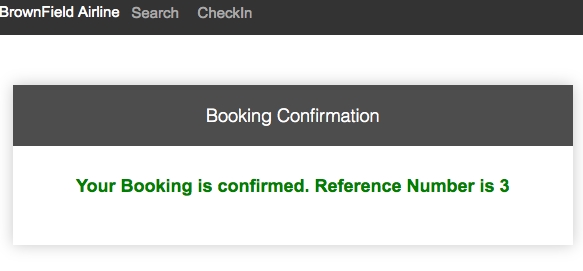
- If booking is successful, the next confirmation screen is displayed with a booking reference number:
- Let us test the Check-in microservice. This can be done by clicking on CheckIn in the menu at the top of the screen. Use the booking reference number obtained in the previous step to test Check-in. This is shown in the following screenshot:

- Clicking on the SEARCH button in the previous screen invokes the Booking microservice, and retrieves the booking information. Click on the CheckIn link to perform the check-in. This invokes the Check-in microservice:

- If check-in is successful, it displays the confirmation message, as shown in the next screenshot, with a confirmation number. This is done by calling the Check-in service internally. The Check-in service sends a message to Booking to update the check-in status:
