
15
Understanding the Boot Process
The boot process is what happens between the moment you power on a machine (physical or virtual) and when the operating system has been completely loaded.
Like in many good video games, there are three stages for it: the initial startup performed by the hardware (again physical or virtual), the loading of the initial stages of the operating system, and then the mechanism that helps run the required services in the system. We will review the three stages in this chapter, and we will also add tips and tricks in order to intervene in a system and perform rescue operations.
In this chapter, we will cover the following topics:
- Understanding the boot process – BIOS and Unified Extensible Firmware Interface (UEFI) booting
- Working with GRUB, the bootloader, and the initrd system images
- Managing the boot sequence with systemd
- Intervening in the boot process to gain access to a system
It is very likely that you will not need to make many changes in the first two stages of the boot process, but these are the points that could be extremely helpful in cases of emergency, forensics, or major failures. That’s why it’s important to go through them carefully.
The third stage, the one managed by systemd, is where more actions and changes will be performed in order to manage which services are running, by default, in the system. We have already seen examples of most of the tasks to be performed in previous chapters; however, in this one, we will provide a comprehensive review.
Let’s get started with stage one.
Understanding the boot process – BIOS and UEFI booting
Computers have hardware-embedded software controllers, also called firmware, that let you manage the very lowest layers of the hardware. This firmware performs the first recognition of what hardware is available in the system and what hardware features are enabled (such as pre-boot network execution, also called PXE).
In the architecture known as PC (short for Personal Computer), also referred to as x86, which Intel and IBM popularized, the embedded firmware is referred to as Basic Input and Output System (BIOS).
The BIOS boot process, with Linux, takes the following steps:
- The machine is powered on, and the BIOS firmware is loaded.
- The firmware initializes devices such as the keyboard, mouse, storage, and other peripherals.
- The firmware reads the configuration, including the boot order, specifying which storage device is the one to continue the boot process with.
- Once the storage device has been selected, BIOS will load the Master Boot Record (MBR) on it, which will enable the running of the operating system loader. In RHEL, the operating system loader is called Grand Unified Bootloader (GRUB).
- GRUB loads the configuration and the operating system kernel and initial RAM disk, as specified in its configuration. In Red Hat Enterprise Linux (RHEL), the kernel is stored in a file called vmlinuz, and the initial boot image is in a file called initrd. All of the GRUB configuration and the vmlinuz and initrd files are stored in the /boot partition.
- The initial boot image enables the loading of the first process of the system, also referred to as init, which, in RHEL 9, is systemd.
- Finally, systemd loads the rest of the operating system.
For this process to happen, the disk has to have an MBR partition table, and the partition assigned to /boot has to be marked as bootable.
Tip
The MBR partition table format is very limited, allowing only four primary partitions and using extensions such as extended partitions to overcome this limit. It is not recommended that you use this type of partition unless it is necessary.
The UEFI boot process is very similar to the BIOS boot process. The main difference in the boot sequence is that UEFI can access and read disk partitions directly. The flow for it is as follows:
- The machine is powered on, and the UEFI firmware is loaded.
- The firmware initializes devices such as the keyboard, mouse, storage, and other peripherals.
- The firmware reads the configuration, where it is specified which storage device and bootable partition to continue the boot process with (UEFI does not need an MBR to boot).
- Once the storage device has been selected, the partitions on it are read from the GUID Partition Table (GPT). The first partition with the VFAT format is accessed. Then, the EFI bootloader is loaded and run. The EFI bootloader in RHEL lives in the /boot/efi partition, and it continues to load GRUB.
- Then, GRUB loads the operating system kernel, which, in RHEL, is stored in a file called vmlinuz, and the initial boot image, which is stored in a file called initrd. The GRUB configuration and the vmlinuz and initrd files are stored in the /boot partition.
- The initial boot image enables the loading of the first process of the system, also referred to as init, which, in RHEL 9, is systemd.
- Finally, systemd loads the rest of the operating system.
UEFI has several advantages over BIOS, enabling more complete pre-boot environments and other capabilities such as secure boot and support for GPT partitions that can go beyond the 2 TB limit that MBR partitions have.
The installer will take care of creating the boot and, if needed, UEFI partitions and binaries.
The part of pre-boot that needs to be known for the Red Hat Certified System Administrator certification is how to load the operating system loader from it. Through BIOS or UEFI, we can select from which storage device the operating system will load and move on to the next phase. Let’s go to this next phase of the boot process.
Working with GRUB, the bootloader, and the initrd system images
Once the pre-boot execution has been completed, the system will be running the GRUB bootloader.
GRUB has the mission to load the main file of an operating system, the kernel, pass parameters and options to it, and load the initial RAM disk, also known as initrd.
GRUB can be installed using the grub2-install command. We will need to know which disk device will be used to boot, in this case, /dev/vda:
[root@rhel-instance ~]# grub2-install /dev/vda
Installing for i386-pc platform.
Installation finished. No error reported.
Important Note
You should point grub-install to the disk you will use to boot the system; this is the same one that you configured in the BIOS/UEFI to boot from.
This is intended to be used to manually rebuild a system or to fix a broken boot.
GRUB files are stored in /boot/grub2. The main configuration file is /boot/grub2/grub.cfg. However, if you take a close look at this file, you will see the following header:
[root@rhel-instance ~]# head -n 6 /boot/grub2/grub.cfg
#
# DO NOT EDIT THIS FILE
#
# It is automatically generated by grub2-mkconfig using templates
# from /etc/grub.d and settings from /etc/default/grub
#
As you can see, this file is automatically generated and, therefore, not intended to be edited manually. How do we make changes to it then? There are two ways to do so:
- The first way is by following the instructions mentioned in the grub.cfg file. This means editing the /etc/default/grub file and/or the contents of the /etc/grub.d/ directory and then regenerating the GRUB configuration by running grub2-mkconfig.
- The second way is by using the grubby command-line tool.
Important Note
In RHEL, when there is a new version of the kernel, it is not updated, but a new kernel is installed alongside the previous one, adding a new entry in GRUB. In this way, there is an easy way to roll back to a previous working kernel if it’s needed. During the installation, a new and updated initrd file is created for the new kernel.
Let’s take a look at the current kernel configuration with grubby. The --default-kernel option will show which kernel file is loaded by default:
[root@rhel-instance ~]# grubby --default-kernel
/boot/vmlinuz-5.14.0-70.13.1.el9_0.x86_64
The --default-title option will show the name used during the boot:
[root@rhel-instance ~]# grubby --default-title
Red Hat Enterprise Linux (5.14.0-70.13.1.el9_0.x86_64) 9.0 (Plow)
We can see more information for the default kernel by using the --info option:
[root@rhel-instance ~]# grubby --info=/boot/ vmlinuz-5.14.0-70.13.1.el9_0.x86_64
index=0
kernel="/boot/vmlinuz-5.14.0-70.13.1.el9_0.x86_64"
args="ro crashkernel=1G-4G:192M,4G-64G:256M,64G-:512M resume=/dev/mapper/rhel-swap rd.lvm.lv=rhel/root rd.lvm.lv=rhel/swap"
root="/dev/mapper/rhel-root"
initrd="/boot/initramfs-5.14.0-70.13.1.el9_0.x86_64.img"
title="Red Hat Enterprise Linux (5.14.0-70.13.1.el9_0.x86_64) 9.0 (Plow)"
id="4353c8e5ca804a028005a3f1f8564cfc-5.14.0-70.13.1.el9_0.x86_64"
We can see the following options passed to GRUB:
- index: This shows the index number of the entry.
- kernel: This is the file containing the kernel that will be loaded to run the core of the operating system.
- args: This refers to the arguments used by the kernel to boot the system.
- root: This is the partition, or logical volume, that will be assigned to the root / directory and mounted.
- initrd: This is the file containing the RAM disk to perform the initial part of the boot process.
- title: This is a descriptive title to be shown to the user during the boot process.
- id: This is the identifier of the boot entry.
Tip
You might want to run the grubby command to obtain the information for the kernel configured as default. To do so, you can do it by running the following command: grubby --info=$(grubby --default-kernel).
Let’s make the boot process less verbose by adding the quiet and rhbg arguments that have been passed to the kernel:
[root@rhel-instance ~]# grubby --args="rhgb quiet"
--update-kernel=/boot/vmlinuz-5.14.0-70.13.1.el9_0.x86_64
[root@rhel-instance ~]# grubby
--info=/boot/vmlinuz-5.14.0-70.13.1.el9_0.x86_64
index=0
kernel="/boot/vmlinuz-5.14.0-70.13.1.el9_0.x86_64"
args="ro crashkernel=1G-4G:192M,4G-64G:256M,64G-:512M resume=/dev/mapper/rhel-swap rd.lvm.lv=rhel/root rd.lvm.lv=rhel/swap rhgb quiet"
root="/dev/mapper/rhel-root"
initrd="/boot/initramfs-5.14.0-70.13.1.el9_0.x86_64.img"
title="Red Hat Enterprise Linux (5.14.0-70.13.1.el9_0.x86_64) 9.0 (Plow)"
id="4353c8e5ca804a028005a3f1f8564cfc-5.14.0-70.13.1.el9_0.x86_64"
Let’s test it by rebooting the machine with the systemctl reboot command. This is an example output:
Figure 15.1 – A quiet boot
Tips
The dmesg command is a very important command when troubleshooting a system or looking for failures. All of the hardware details detected during the boot process can be seen in the output of this command.
In a normal boot, this might not be very useful as it goes too fast. However, if there are issues, it can help debug the situation from the console. To review these messages after booting, the dmesg command can be used:
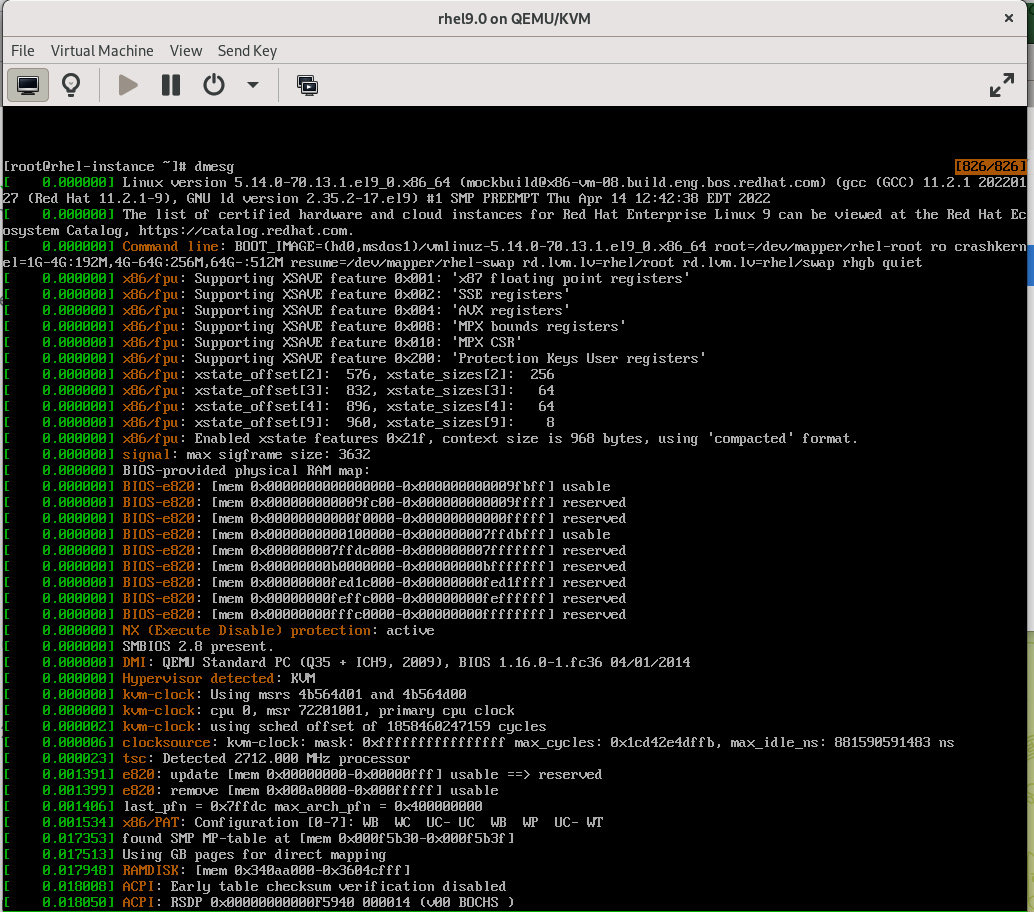
Figure 15.2 – Output of the dmesg command
We can remove an argument to the kernel by using the –-remove-args option. Let’s remove the quiet option:
[root@rhel-instance ~]# grubby --remove-args="quiet" --update-kernel=/boot/vmlinuz-5.14.0-70.13.1.el9_0.x86_64
[root@rhel-instance ~]# grubby
--info=/boot/vmlinuz-5.14.0-70.13.1.el9_0.x86_64
index=0
kernel="/boot/vmlinuz-5.14.0-70.13.1.el9_0.x86_64"
args="ro crashkernel=1G-4G:192M,4G-64G:256M,64G-:512M resume=/dev/mapper/rhel-swap rd.lvm.lv=rhel/root rd.lvm.lv=rhel/swap rhgb"
root="/dev/mapper/rhel-root"
initrd="/boot/initramfs-5.14.0-70.13.1.el9_0.x86_64.img"
title="Red Hat Enterprise Linux (5.14.0-70.13.1.el9_0.x86_64) 9.0 (Plow)"
id="4353c8e5ca804a028005a3f1f8564cfc-5.14.0-70.13.1.el9_0.x86_64"
Important note
The --info and --update-kernel options accept the ALL option to review or perform actions on all the configured kernels.
If any administration task requires us to change kernel parameters, now we know how to do it. Let’s move on to the next section of the boot process, initrd.
The initrd file, or initial RAM disk, contains a minimal system that is used to prepare the system to start. We found it in the previous configuration as /boot/initramfs-5.14.0-70.13.1.el9_0.x86_64.img. It can be regenerated using the dracut command. Let’s see an example of how to rebuild the current initrd file:
[root@rhel-instance ~]# dracut --force --verbose
dracut: Executing: /usr/bin/dracut --force --verbose
dracut: dracut module 'busybox' will not be installed, because command 'busybox' could not be found!
[omitted]
dracut: *** Including module: shutdown ***
dracut: *** Including modules done ***
dracut: *** Installing kernel module dependencies ***
dracut: *** Installing kernel module dependencies done ***
dracut: *** Resolving executable dependencies ***
dracut: *** Resolving executable dependencies done***
dracut: *** Hardlinking files ***
dracut: *** Hardlinking files done ***
dracut: *** Generating early-microcode cpio image ***
dracut: *** Constructing GenuineIntel.bin ****
dracut: *** Constructing GenuineIntel.bin ****
dracut: *** Store current command line parameters ***
dracut: *** Stripping files ***
dracut: *** Stripping files done ***
dracut: *** Creating image file '/boot/initramfs-5.14.0-70.13.1.el9_0.x86_64.img' ***
dracut: *** Creating initramfs image file '/boot/initramfs-5.14.0-70.13.1.el9_0.x86_64.img' done ***
In the preceding output, we can see what kernel modules and files, which are required for early access, are included in the initrd file. This step is useful for when our initrd file becomes corrupted and also for restoring a system from a backup, if done in different hardware, to include the proper storage drivers.
Tip
Check the manual page of dracut to learn more about the options to create initrd files. There’s a Red Hat knowledge base article with instructions that be used to unpack initrd, along with an interesting exercise, at https://access.redhat.com/solutions/24029.
We have learned the very basics of the early stages of the boot process in order to be able to start troubleshooting boot issues, as required to become an RHCSA. This advanced topic could be covered in an entire book, but very little of it will be used in your daily tasks as a system administrator. That’s why we only included the required aspects of it. We will include a specific use case in the Intervening in the boot process to gain access to a system section, and fix disk issues. Let’s move on to the next topic on how services are managed in RHEL with systemd.
Managing the boot sequence with systemd
We have already learned how the firmware of the system will take care of pointing at a disk to run the operating system loader, which, in RHEL, is GRUB.
GRUB will load the kernel and initrd to prepare the system to start. Then, it’s time to start the first process of the system, also referred to as process 1 or PID 1 (PID stands for process identifier). This process has to take care of loading all the required services in the system efficiently. In RHEL 9, the PID 1 is run by systemd.
In Chapter 4, Tools for Regular Operations, we described service and target management with systemd. In this chapter, let’s review these interactions with the boot sequence.
The first two things related to the boot sequence that we can do with systemd are to reboot the system and to power it off. We will do this with the systemctl tool:
[root@rhel-instance ~]# systemctl reboot
We can see that the system will reboot. We can check how long the system has been running using the uptime command:
[root@rhel-instance ~]# uptime
21:11:39 up 0 min, 1 user, load average: 0,62, 0,13, 0,04
Now it’s time to check poweroff. Before doing so, remember that after running this command, you will need to have a way to power the machine on again. Once we are aware of the process we are going to follow, let’s run it:
[root@rhel-instance ~]# systemctl poweroff
Now I will power my machine on again.
There is a command that will stop the system without sending the signal to power the machine off, which is systemctl halt. The cases where this can be used are rare; however, it’s good to know that it exists and what it does.
Important Note
The previously shown commands can be abbreviated to reboot and poweroff. If you check the file in /usr/sbin/poweroff, you will see that it is a symbolic link pointing to systemctl.
In Chapter 4, Tools for Regular Operations, we also reviewed how to set a default systemd target with systemctl. However, we can override the default configuration during boot time by passing the systemd.unit parameter to the kernel. We can do that using grubby:
[root@rhel-instance ~]# systemctl get-default
multi-user.target
[root@rhel-instance ~]# grubby --args="systemd.unit=emergency.target" --update-kernel=/boot/vmlinuz-5.14.0-70.13.1.el9_0.x86_64
[root@rhel-instance ~]# systemctl reboot
Now the system is rebooting. The systemd.unit=emergency.target parameter has been passed by GRUB to the kernel, and from the kernel to systemd, which, in turn, will ignore the default configuration and load the services required for the emergency target.
Now the system has been started in emergency mode and is waiting for the root password to give you control:

Figure 15.3 – The RHEL system booted in emergency mode
In emergency mode, there is no network configured and no other process running. You can make changes to the system knowing that no other user is accessing it. Also, only the / filesystem is mounted in read-only mode.
If a filesystem in the system is broken, this would be a good way to check it without any service accessing it. Let’s try it with the command for checking the filesystem, which is called fsck:
[root@rhel-instance ~]# fsck /boot
fsck from util-linux 2.37.4
If you wish to check the consistency of an XFS filesystem or
repair a damaged filesystem, see xfs_repair(8).
The filesystem is OK. We could run xfs_repair on it, as it is an xfs filesystem (fsck detects the filesystem used), if it had issues that required a fix.
At this point, we might be thinking about how can we make changes to the root filesystem if it’s already mounted as read-only at /? The process starts by remounting the / filesystem as read-write:
[root@rhel-instance ~]# mount -o remount -o rw /
Remember, you can access the manual pages for the command by running man mount. Now our root filesystem is mounted into / as read-write. We also need to mount /boot, so let’s do it:
[root@rhel-instance ~]# mount /boot
With the /boot mounted, let’s do some admin tasks, such as removing the arguments we have used in GRUB:
[root@rhel-instance ~]# grubby --remove-args="systemd.unit=emergency.target" --update-kernel=/boot/vmlinuz-5.14.0-70.13.1.el9_0.x86_64
[root@rhel-instance ~]# reboot
And we are back to a regular boot in the system. This might not be a practical way to go into emergency mode in Linux, but it shows you how to pass parameters to systemd at boot.
Tip
There is rescue.target that loads more services and makes the process somewhat easier. It does so by waiting for sysinit.target to complete, something that the emergency target does not do. A good exercise would be to repeat the previous sequence with rescue.target.
In the coming section, we will see how to make this change, alongside similar ones. Also, additionally we will see how to boot in a way in which no password is required.
Intervening in the boot process to gain access to a system
Sometimes, you need to intervene in a system that was handed over in which you do not have the password for the root user. This is an exercise that, although it sounds like an emergency situation, is more frequent than you would expect.
Important Note
The boot sequence must not have any disk encrypted for it to work, or you will need the password for the encrypted volumes.
The way to perform this procedure starts by stopping the boot process during the GRUB menu. This means we need to restart the system. Once the BIOS/UEFI checks have finished, the system will load GRUB. Then, we can stop the count by pressing the down or up arrow key while it’s waiting for the selection of the kernel, as shown in the following screenshot:

Figure 15.4 – The GRUB menu to select the kernel
We move back to the first entry. Then, we read the bottom of the screen where we find the instructions to edit the boot line:

Figure 15.5 – The GRUB menu to select the kernel
If we press the E key, we will be able to edit the boot line selected in the menu. We will see the following five lines:

Figure 15.6 – The GRUB menu to select the kernel
The first three lines with load_video, set gfx_payload=keep, and insmod gzio are setting options for GRUB. The next two options are the ones that are important. Let’s review them:
- linux: This defines the kernel to be loaded and passes parameters to it.
- initrd: This defines where to load the initrd file and if there are any options for it.
Tip
Please note that the linux line is so long that it is wrapped, as we can see by the symbols, meaning that the line continues underneath.
Now we will go to the end of the linux line and add the rd.break option, as shown in the following screenshot:

Figure 15.7 – The linux kernel line edited with the rd.break option
Tip
By default, the maintenance shell provided when using rd.break will ask you for the root password. If case you don’t have the password, you can use init=/bin/bash instead of rd.break at the end of the linux line. Here, you will get a Bash shell to change the root’s password.
To boot the edited line, we only need to press Ctrl + X. The rd.break option stops the boot process before initrd is loaded. The situation is now as follows:
- The root password is requested for maintenance.
- A single shell is loaded.
- The current root filesystem mounted on / is a minimal one with basic administration commands.
- The target root filesystem is mounted in /sysroot as read-only (instead of on /).
- No other filesystems are mounted.
- SELinux is not loaded.
The first thing we can do now is switch to the real, on-disk root filesystem with chroot:
switch_root:/# chroot /sysroot
sh-5.1#
Now our root filesystem is properly mounted, but it is read-only. Let’s change that in the same way as we did in the previous section:
sh-5.1# mount –o remount –o rw /
Now we need to change the root user password with the passwd command:
sh-5.1# passwd
Changing password for user root
New password:
Retype new password:
passwd: all authentication tokens updated successfully
Now the password for the root user has been changed and the /etc/shadow file has been updated. However, it was modified without SELinux enabled; therefore, it could cause an issue in the next boot. To avoid that, there is a mechanism to fix the SELinux labels during the next boot. This mechanism consists of creating a hidden empty file, /.autorelabel, and then rebooting the system:
sh-5.1# touch /.autorelabel
Once the file has been created, it’s time to reboot it to apply the SELinux changes. In this state, the machine might require you to force the power off and then power on. During the next boot, we will see how the system is applying the SELinux auto relabeling:

Figure 15.8 – SELinux autorelabel during boot
Now we can log in with the root user and its new password.
Summary
In this chapter, we reviewed the boot sequence. As you have seen, it is not long, but it is complex. It is also very important as no system can run if it cannot boot. We learned about the main differences between a BIOS-enabled system and a UEFI one, which enables some capabilities but also has its own requirements. Additionally, we learned about GRUB and its important role in the boot sequence, how to modify entries permanently with grubby, and how to make a one-time modification. Now, we understand the main files to boot, such as the kernel, vmlinuz, and the initial RAM disk, initrd.
This chapter also showed us how to start in emergency and rescue modes, as well as how to intervene in a system to reset the root password.
With these tools and procedures, we are now more prepared to handle any difficult situations in our systems. It’s time to dive deeper and learn about kernel tuning and performance profiles in the next chapter.