Remember in the last chapter that we created a simple controller and view for the people table using the scaffold? The scaffold is a powerful tool for getting started with Rails: it creates some boilerplate code for the controller and all its view components with a single command. However, as a learning tool it is not too useful. Initially, the controller can be baffling and take some time to understand; in addition, it produces terrible HTML, which has to be manually fixed. So, instead of sticking with the scaffold for the Person model, we will build a controller and views for that model from scratch.
The first thing we need to do is clean up the files created by the scaffold, so we can start from a clean slate. We can use a script to remove the controller and associated tests (while leaving the model intact):
$ script/destroy controller people
However, this doesn't remove the views. These reside in app/views/people, so remove the files inside this directory (e.g. in Eclipse, highlight them and press the Delete key).
There are a few other places where we have some residue from the scaffold, which should be removed:
app/views/layouts/people.rhtmlpublic/stylesheets/scaffold.css
Now, we are ready to create the controller. Although it might seem crazy, we are actually going to use a generator to replace some of the files we just deleted. However, this will give us nice clean class definitions that we can modify at our leisure:
$ script/generate controller people
exists app/controllers/
exists app/helpers/
exists app/views/people
exists test/functional/
create app/controllers/people_controller.rb
create test/functional/people_controller_test.rb
create app/helpers/people_helper.rb
The most important file for us is app/controllers/people_controller.rb. We could have manually created this file for ourselves; the generator just makes it easy and means we don't have to remember the syntax for declaring the controller class.
Open the file using Eclipse and edit it to look like this:
class PeopleController < ApplicationController
def index
render :text => 'Hello world'
end
end
Next, start the server:
$ script/server
Browse to http://localhost:3000/people. You should see:
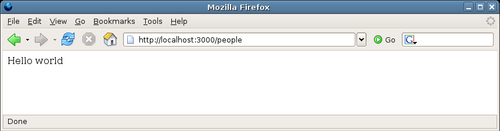
Not much to look at yet, but it demonstrates how easy it is to create a controller to serve content. Let's look at the class definition step by step:
class PeopleController < ApplicationController
...
end
The first line declares a new class called PeopleController. The less-than symbol (<) denotes inheritance in Ruby. In this case, our class is inheriting from an ApplicationController class. If you look carefully in the app/controllers directory, you should see a file called application.rb. This is the one that contains the ApplicationController class definition that our controller inherits from:
class ApplicationController < ActionController::Base
session :session_key => '_Intranet_session_id'
end
This class, in turn, inherits from the Base class inside the ActionController module, one of the core Rails libraries. The ApplicationController class sits between our controllers and the core Rails libraries. This makes it simple for us to add functionality to all of our controllers: any methods we define inside the ApplicationController class become available to any of our inheriting controllers, which turns out to be very useful.
The next part of the class definition adds an action method called index to the controller:
...
def index
render :text => 'Hello world '
end
...
All this method does is write some text into the response, using the built-in render method (available to all controller classes). The render method is the primary means of writing content to the response. It accepts a variety of arguments, as we'll see shortly; for now, we are using a :text option to send a string to be rendered. This bypasses the Rails templating system entirely, sending raw text to the response.
When we visited the URL http://localhost:3000/people, how did Rails know to call the index method? In Chapter 4 (Rails and MVC), we saw how the default routing in Rails breaks up the path in the URL into a controller name and an action to call on that controller. The controller name here is "people", so the PeopleController was invoked; as there is no action specified, Rails routes the request to the default action, index.
That's all there is to it. However, writing an application this way doesn't get us much further than PHP or similar languages. To render a whole HTML page, we would have to put the template in-line inside the method definition, which would be terrible. Fortunately, Rails has a view framework, which makes it easy to separate HTML templates from the controller actions, and tie the two together with conventions. In the next section, we'll use this to write a view, which displays a list of people in our database.
Before writing a view, we need to understand how Rails composes views into a full HTML page. The default language for writing Rails views is called ERb (Embedded Ruby). It's "embedded" because, the Ruby code is inserted among standard HTML tags; the code generates dynamic content inside the HTML page, based on the data retrieved from the model layer. You might also see the template language referred to as RHTML (Ruby HTML), as it is a particular dialect of ERb focused on web pages. Here's an ERb template, which will produce the same output as our existing index method, but nicely wrapped in valid XHTML:
<?xml version="1.0" encoding="UTF-8"?>
<!DOCTYPE html PUBLIC "-//W3C//DTD XHTML 1.0 Strict//EN" "http://www.w3.org/TR/xhtml1/DTD/xhtml1-strict.dtd">
<html xmlns="http://www.w3.org/1999/xhtml" lang="en_GB" xml:lang="en_GB">
<head>
<title>Intranet</title>
<meta http-equiv="Content-Type" content="text/html;charset=utf-8" />
</head>
<body>
<p><%= 'Hello world' %></p>
</body>
</html>
The non-HTML part of this page (the embedded Ruby bit) is the highlighted<p><%= 'Hello world' %></p> line. When Rails reads a template file like this one, it scans for any sections surrounded by the<% and %> tags. The Ruby code between the tags is then run; in this case, the code is = 'Hello world'. This prints a string into the response, replacing the tags and the code (the = character is a shortcut to print a string). The resulting HTML rendered to the response for this line is:
<p>Hello world</p>
The<% %> tags are used to inject dynamic elements into a page (like<?php ... ?> in PHP, or<% ... %> in ASP). As well as printing strings into the output, the tags may also wrap any valid piece of Ruby code: we'll see more of this later.
Associating a view with a controller action is achieved by placing the RHTML for the view into a file with the right name, in the right location inside the app directory.
The formula for the location of a view is:
<TEMPLATE_ROOT>/<controller>/<action>.rhtml
Here,<TEMPLATE_ROOT> is the root directory for views, with the default being RAILS_ROOT/app/views; <controller> is the name of the controller this view is associated with, and<action> is the action, which renders this view to the user. In our case, using the default TEMPLATE_ROOT, the file for the people controller and index action is called:
RAILS_ROOT/app/views/people/index.rhtml
Create a file with this name and add the RHTML code from the previous section to it.
Note
To modify the TEMPLATE_ROOT for your application, you can add a line to the configuration file for the appropriate environment (i.e. production.rb or development.rb inside the config directory) or for all environments (by editing environment.rb). For example, this will set the TEMPLATE_ROOT to a directory my_views inside the RAILS_ROOT directory:
config.action_controller.template_root = File.join(RAILS_ROOT, 'my_views')
For a view to be rendered by an action, the action must either explicitly or implicitly call the render method. To make our index action explicitly render our new RHTML template, the index method inside the PeopleController could look like this:
def index
render :action => 'index'
end
This is the same render method used in the previous version of the code, but with the argument :action => 'index' (instead of :text => 'Hello world'). This argument is specifying that render should use the template associated with the current controller's index action (i.e. index.rhtml). However, because this is such a common pattern, Rails allows us to simply omit the render line altogether:
def index
end
To test the template, start the server with script/server and browse to http://localhost:3000/people. You should see practically the same page in your browser as before, but now rendered from the template rather than using inline text output directly from the controller.
Note
You can use Eclipse to generate the first XHTML page for a new Rails project (File | New | Other, then select PHP > HTML file). This means you don't have to remember the DOCTYPE syntax for the XHTML file, or the elements commonly inside the<head> element.
You can use Firefox's Web Developer Toolbar (http://chrispederick.com/work/webdeveloper/) to ensure that your first template page is a valid XHTML; then periodically test other pages to make sure you are not breaking things as you add more complex markup.
If you don't already use XHTML for your web applications, there are good reasons to start doing so. XHTML enforces a clean separation between the meaning of a page (marked up using HTML tags) and how the page is presented (which is encapsulated in a separate CSS file); see http://www.w3.org/TR/xhtml1/ for more details.
How do we get data from our database into a view? To make this more concrete, let's look at displaying a list of people using our index action, rendering the records through the index.rhtml template.
The first step is to get the data from the database via the Person model in the PeopleController, by adding some code to the index method:
class PeopleController < ApplicationController
def index
@people = Person.find_all_ordered
end
end
This method now makes use of the find_all_ordered method on the Person model class (see the section Writing a Custom Finder in Chapter 4), which returns all the records from the people table, ordered by last name, then by first name. The return value from the class method call is stored in an instance variable @people (the '@' marks it as an instance variable). Any instance variables set inside an action like this are available to the next-rendered view template (index.rhtml, in our case). In this case, the instance variable is set from the model; however, we can set any instance variable we like using whatever method we want, and it will be automatically available to the template.
As the finder in this case returns an array of model instances, we can loop over them using ERb (put this code inside the<body> tag):
<h1>People list</h1>
<table>
<tr>
<th>Name</th>
</tr>
<% @people.each do |person| -%>
<tr><td><%= person.last_name + ', ' + person.first_name %></td></tr>
<% end -%>

</table>
Here, we are using a block (highlighted) to iterate over the @people array, and creating an HTML table row for each person. Used in this way, the block acts like a foreach in PHP: it enables processing each element of the array in turn, assigning one to a temporary variable (here called person) on each iteration. (Note that the person variable doesn't need to be an instance variable, as it is only used within the scope of the block.)
The -%> at the end of the first line is a new piece of syntax we haven't used before (notice the extra minus sign). This removes any newline characters from the end of a line of ERb code when that line of code is run. Where a template contains lines of ERb that don't produce any output, the - ensures that each such line produces no newline characters in the source. Without the -, ERb that produces no HTML will still add a newline character to the HTML source.
Inside the block, we have access to all of the standard methods on the model instances; here, the methods correspond to the field names in the people table. In this case, we are just showing each person's last and first names.
Test the new view at http://localhost:3000/people (you don't need to restart the server if it is already running, as the views will be refreshed automatically):
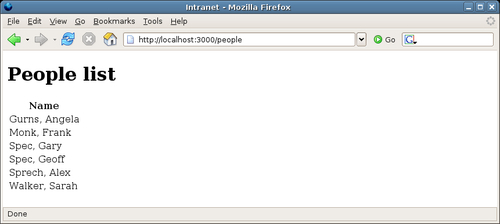
This view is very basic, and can get very long as the database fills up. The solution to this is to add some pagination to the results so that we can display just a few records at a time.
Pagination in other languages can be a real pain. But Rails provides a variety of wrapper classes that make pagination simple.
We are going to add a paginator to the index action for our application. The first step is to replace our current method definition with one that uses the paginator classes:
def index
@paginator, @people = paginate :person, :per_page => 2,
:order => 'last_name, first_name'
end
The method we're calling here is paginate, available to all controllers. This takes a symbol representing the model class we want to paginate over (:person) as its first argument. Rails converts this into a reference to the correct class (Person), and calls that class's find method. The rest of the arguments specify conditions for the find:
:per_pagedefines the number of records to return on each page (we're using 2 here, as we don't have many records, but want to be able to check that pagination is working).:ordersorts the records (see the section Sorting Records in Chapter 4).
The method returns an array with two elements: an instance of the ActionController::Pagination::Paginator class (which we'll return to momentarily), and an array of model instances. We map the elements of the returned array onto two instance variables, @paginator and @people respectively.
Our index.rhtml view already uses the model instances to create the list of person names, so we can test the new index action at http://localhost:3000/people. You should see the first two records from the database displayed. Now, try accessing http://localhost:3000/people?page=2; you should see the next two records. Rails is automatically parsing the page parameter from the request URL and retrieving the appropriate records for the page (in the case of MySQL, by using a LIMIT clause in the query). We're currently supplying the page parameter manually, but what we really want is an automated set of "pager links" at the base of the page, where each link points to an individual page of results.
We could manually code the pager links in HTML, but fortunately Rails provides some useful HTML-generation methods we can use instead, called helpers.
Note
Helpers
A Rails helper is a Ruby method used within ERb, which generates some HTML or JavaScript output. These methods can be called from any view template and are available automatically to all templates. It is also possible to create your own helpers, either for use with any controller or on a per-controller basis (see the section Custom Helpers later in this chapter).
The helper we're interested in here is pagination_links, which will create a series of page links. The helper can be invoked in the app/views/people/index.rhtml view template with:
<p><%= pagination_links(@paginator) %></p>
Place this at the bottom of the page, just before the</body> tag. Browse to http://localhost:3000/people and you should see:
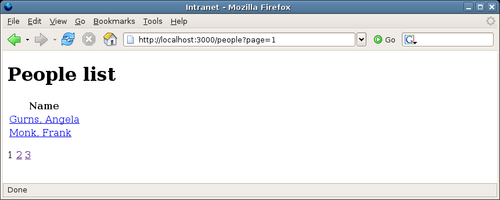
Note the links to the results pages at the base of the page. The pagination_links helper can also be supplied with other options to customize its behavior:
# show links to the 3 pages before and the 3 pages
# after the current page (default is 2 either side);
# any pages not linked to are represented by '...'
pagination_links(@paginator, :window_size => 3)
# include a link to the current page (default is false)
pagination_links(@paginator, :link_to_current_page => true)
# add some extra querystring parameters to each link URL
pagination_links(@paginator, :params => { :day => 'today' })
It's also relatively simple to interrogate the paginator to find the current page number and the total number of pages, making it possible to do Previous and Next links:
<p> <% page_num = @paginator.current.number -%> <% last_page_num = @paginator.last.number -%> <%= link_to('Previous', :page => page_num - 1) + " " unless 1 == page_num -%> , <%= pagination_links(@paginator) %> <%= link_to('Next', :page => page_num + 1) unless last_page_num == page_num -%> </p>
The highlighted sections of the code demonstrate how to query the paginator to find the current page and its number (@paginator.current.number), and how to work out the last page number (@paginator.last.number—there is also @paginator.first for the first page). Next, two links are added using the link_to helper, which creates an HTML<a> element (more on this helper in the next section). However, here the helper is called conditionally by appending an unless clause. This compares the current page number (page_num) with 1 to decide whether to display the Previous link; and with the total number of pages (last_page_num) to decide whether to generate the Next link.
The people list view doesn't tell us much about a person (just their name). The next logical view for us to build is a detailed view for a single person; this will be accessible from the list view by a hyperlink on a person's name, creating a so-called drill-down.
The first step is to put a link onto each name when it is displayed. There is another Rails helper (see the previous section), which can help here, called link_to. This will turn any string into an HTML link (<a>) element, enabling you to either specify an absolute URL or a URL for a controller, and/or action inside the application. Edit the app/views/people/index.rhtml template and change the code that lists people so it looks like this:
<% @people.each do |person| -%>
<tr><td>
<%= link_to person.full_name, :action => 'show', :id => person.id %>

</td></tr>
<% end -%>
Recall that we defined the full_name method in Chapter 4 (see the section Virtual Attributes), to show a person's title, first name, and last name. Visit http://localhost:3000/people and you should see a list of links, rather than plain text names. If you view the HTML source, there is a line like this for each person:
<a href="/people/show/3">Mr. Frank Monk</a>
This is what link_to produces. Dissecting the code above, line by line, explains what's going on:
- First, we call the
link_tomethod, passing three arguments:- The text for the link (person.full_name).
- The action the link should point to, used to construct the
hrefattribute for the<a>element. Note that we don't have to specify the controller: unless we specify to the contrary, Rails assumes the current controller (people) as the destination. - An
idto add into the URL. This is a special argument, which tells Rails to set the ID part of the URL, in this case from the person's ID.
- The destination for the link is built from the controller, the action, and the ID parts. These are joined together according to the routing configuration (see Chapter 7 Improving the User Experience for more information on routing).
- The
link_tomethod returns an HTML<a>element with the generatedhrefattribute and link text. This is printed to the output using the standard<%= ... %>syntax.
link_to can also take optional arguments to insert extra attributes into the<a> element. For example, we can append arbitrary parameters to the URL produced by passing them as extra options:
<%= link_to 'Bill', :action => 'show', :id => person.id,
:random => 'true' %>
which produces the following:
<a href="/people/show/1?random=true">Bill</a>
(We used this approach in the previous section to add a page parameter to the query string.)
As another example, if we wanted to set the HTML class and title attributes, we could do the following:
<%= link_to full_name, { :action => 'show', :id => person.id },
{ :title => "Show details", :class => "person_link" } %>
Note
{Why all the extra braces}?
In the first version of the link_to method call, we passed a few arguments without needing to use any braces; in the second version, we separated the arguments into two groups, each delimited by braces: the first set for building the href attribute of the<a> element, and the second specifying extra HTML attributes. This is because, if you pass a range of arguments to a Ruby method using key => value syntax, but without braces, Ruby will gather all of those: key => value pairs into a hash. In the case of link_to, if we leave the braces off, all of the arguments after the first are gathered into a hash of URL options. This isn't what we want—only some of them are used to generate the URL, and the rest are to add attributes to the HTML elements.
The method signature for link_to actually has four parameters:
link_to(link_text, url_options, html_options, more_options)
By adding the braces when we call the method with multiple key => value pairs as arguments, we are explicitly dividing those pairs into two separate hashes, one for url_options and the second for html_options. (more_options is yet another hash, which is passed through to the main URL-generation function on the controller, which we don't need to worry about.) This is what we want.
Many Rails methods have similar signatures and will try to do smart things with hashes. Sometimes they fail, and you get odd error messages. If in doubt, you can always put braces around the arguments passed to a method to explicitly group them.
Once we have the link, we need to hook it up to the controller. Note that our links point to an action called show in the PeopleController class, so we add this next:
def show
@person = Person.find(params[:id])
end
We are again using the find method of the Person class within this action. But rather than retrieving all the people in the database, we are using the id parameter from the request to determine the ID of the person to retrieve. The params method, available to every controller, returns a hash containing all the GET and POST parameters from the request. In this case, params contains an :id key, which holds the ID passed in the request; the value of the :id key, in turn, is derived from the request URL, using routing to decompose the URL into its component parts (the inverse of how routing composes URLs from component parts, e.g. when used internally by link_to).
The final step is to add a view to show the person's details. This goes in app/views/people/show.rhtml (so that it is automatically associated with the show action):
<!DOCTYPE html PUBLIC "-//W3C//DTD XHTML 1.0 Strict//EN" "http://www.w3.org/TR/xhtml1/DTD/xhtml1-strict.dtd">
<html xmlns="http://www.w3.org/1999/xhtml" lang="en_GB" xml:lang="en_GB">
<head>
<title>Intranet</title>
<meta http-equiv="Content-Type" content="text/html;charset=utf-8" />
</head>
<body>
<h1><%= @person.full_name %></h1>
<p><strong>Job title:</strong> <%= @person.job_title %></p>
<p><strong>Email address:</strong> <%= mail_to @person.email %></p>
<p><strong>Telephone:</strong> <%= @person.telephone %></p>
<p><strong>Mobile phone:</strong> <%= @person.mobile_phone %></p>
<p><strong>Date of birth:</strong> <%= @person.date_of_birth %></p>
<p><strong>Gender:</strong> <%= @person.gender %></p>
<p><strong>Keywords:</strong> <%= @person.keywords %></p>
<p><strong>Notes:</strong><br/><%= @person.notes %></p>

</body>
</html>
The important part of the code is highlighted, which displays the fields from the retrieved Person instance. In all cases, except for email, the attribute is displayed as it is; in the case of the email attribute, another built-in helper called mail_to is used to convert the email address into a "mail to" link.
However, the eagle-eyed among you will have noticed that we have a big chunk of repeated HTML in the show.rhtml view template (the header for the HTML file, above the<body> tag, and from</body> down), which is the same as the HTML in the index.rhtml view template. In the next section, we'll see how to fix this so the "wrapper" HTML only occurs in one place. You may also have noticed that we have blanks in the display where attributes have not been set: we will fix this later in the chapter (see the section Custom Helpers), where we'll look at writing some custom helpers to manage this, displaying a "not defined" message instead.
Rails provides a way of abstracting out the "wrapper" portions of an RHTML page (the bits above and below the content of a view) into a separate layout template (layout for short). A layout typically contains the boiler-plate HTML, which occurs on every page: for example, the DOCTYPE declaration,<head> element, links to stylesheets or JavaScripts common across the application, etc. In most cases, it makes sense to use one layout for the whole application (which makes the views for every controller look the same); however, Rails does provide the facility to set a different layout for each controller, or for a group of controllers, covered briefly below.
All layouts are stored in the app/views/layouts directory. Within this directory, convention is used to associate a layout with one or more controllers, or with the application as a whole. To associate a layout with every controller in an application, it should be named application.rhtml; to associate a layout with a particular controller, it should be named after the controller: for example, a layout specific to PeopleController would be called people.rhtml. Rails will use the most-specific layout available when rendering an individual view template.
For the Intranet application, copy one of the existing view templates from app/views/people (index.rhtml will do) to app/views/layouts. Rename the file to application.rhtml and modify its content to the following:
<!DOCTYPE html PUBLIC "-//W3C//DTD XHTML 1.0 Strict//EN" "http://www.w3.org/TR/xhtml1/DTD/xhtml1-strict.dtd">
<html xmlns="http://www.w3.org/1999/xhtml" lang="en_GB" xml:lang="en_GB">
<head>
<title>Intranet</title>
<meta http-equiv="Content-Type" content="text/html;charset=utf-8" />
</head>
<body>
<%= yield %>

</body>
</html>
The highlighted section of the above code outputs the content generated by the view template for the action; this is then wrapped inside the layout template to produce the final page rendering.
In the view templates, instead of outputting the whole of the wrapper HTML (DOCTYPE,<head>, etc.), now, we just need to generate the HTML that goes inside the<body> element. The code for app/views/people/show.rhtml looks like this as a result:
<h1><%= @person.full_name %></h1>
<p><strong>Job title:</strong> <%= @person.job_title %></p>
<p><strong>Email address:</strong> <%= mail_to @person.email %></p>
<p><strong>Telephone:</strong> <%= @person.telephone %></p>
<p><strong>Mobile phone:</strong> <%= @person.mobile_phone %></p>
<p><strong>Date of birth:</strong> <%= @person.date_of_birth %></p>
<p><strong>Gender:</strong> <%= @person.gender %></p>
<p><strong>Keywords:</strong> <%= @person.keywords %></p>
<p><strong>Notes:</strong><br/><%= @person.notes %></p>
We also need to edit app/views/people/index.rhtml, removing everything from (and including)<body> up, and everything from (and including)</body> down, leaving just the content specific to that view. If you now visit http://localhost:3000/people, the page should remain unchanged, even though, behind the scenes, it is being rendered via a layout.
Using an application.rhtml layout is fine for cases where you want every controller to have the same layout; and we have already seen that per-controller layouts are also possible by naming the layout after the controller. However, it is also possible to bend the conventions further. You can force a layout for a controller using the layout method inside the controller class definition, e.g.
class PeopleController < ApplicationController
layout 'pretty'
...
end
This would force the PeopleController to use the layout in app/views/layouts/pretty.rhtml. Using this technique makes it possible to arbitrarily associate controllers with layouts, entirely overriding the conventions.
Having a single layout for the whole application makes it significantly simpler to write views, as we don't have to worry about duplicating HTML in multiple places. However, our current setup doesn't support different titles for each page, as the content of the<title> element is set once in the layout. This makes the browser history completely meaningless, and removes a potential navigation element.
Rails comes to the rescue once more. Any instance variables initialized in a controller action are available to the layout, as well as to the view. So we can set a title for each action and then output this inside the<title> element in the layout.
First, for each action in PeopleController, set a variable called @page_title:
def index
@paginator, @people = paginate :person, :per_page => 2,
:select => 'id, last_name, first_name',
:order => 'last_name, first_name'
@page_title = "People (page #{@paginator.current.number})"

end
def show
@person = Person.find params[:id]
@page_title = "Profile for " + @person.full_name

end
The @page_title variable can contain information about the context of the action—in our case, the number of the results page we are on for the index action, and the person's full name for the show action. We can now make use of this variable in the app/views/layouts/application.rhtml layout, inside the<title> element:
<title><%= @page_title || 'Intranet' %></title>
The || syntax means that the content of the @page_title variable is used for the page title if it has been set; if it is nil, the string'Intranet' is used as a default instead. We can also access this variable inside view templates, to make the page<title> element have the same content as the page<title> element. For example, in app/views/people/show.rhtml we can do the following:
Styling the simple views created in the previous sections can be done through a standard CSS stylesheet. For example, we could put borders and padding on tables, and change the font in the following manner:
{
font-family: verdana, arial, helvetica, sans-serif;
}
table, tr, td, th {
border: solid #777 thin;
padding: 5px;
border-collapse: collapse;
text-align: left;
vertical-align: top;
}
The Rails convention is to put stylesheet files into the public/stylesheets directory. The name of the stylesheet isn't too important, and you can use core.css, base.css, or similar; for Intranet, we'll use base.css.
If you place your stylesheets in public/stylesheets, you can use the stylesheet_link_tag helper to pull your stylesheets into a page. In our case, as we want the stylesheet to be used for every page, and every page uses the same layout (app/views/layouts/application.rhtml), it makes sense to call the helper from that layout:
<head>
<title><%= @page_title || 'Intranet' %></title>
<meta http-equiv="Content-Type" content="text/html;charset=utf-8" />
<%= stylesheet_link_tag 'base' %>

</head>
which produces the following:
<link href="/stylesheets/base.css?1165272734" media="screen" rel="Stylesheet" type="text/css" />
Note
You may be wondering why a seemingly random number has been appended to the generated URL (in this case, 1165272734). This number is called the Rails asset ID, and represents the last time the referenced file was modified. Browsers cache assets they fetch, using the URL (including the querystring) as the key for the cached asset. As Rails includes the file modification time in the URL for an asset (stylesheets, JavaScripts, images), the browser cache is forced to store different versions of the asset under different keys. This ensures that the browser always fetches new versions of assets when the asset file has been modified.
Note that this only happens in the development environment; in production, the URLs just reference the asset, without a querystring, so they are cached just once by the browser, using its standard caching settings.
The stylesheet_link_tag takes one or more stylesheet file names, minus the .css suffix, and with no path information (providing the stylesheet is in public/stylesheets). If your stylesheets are in unconventional locations, you can pass a path to the stylesheet, e.g.
# link to '/styles/core.css'
stylesheet_link_tag '/styles/core'
# link to '/stylesheets/mystyles/fancy.css'
# (relative paths are append to '/stylesheets')
stylesheet_link_tag 'mystyles/fancy'
You can also pass an options hash to set attributes on the<link> element produced, e.g.
stylesheet_link_tag 'print', :media => 'print'