One simple truth of software is that users are not developers. However, most discussion on documentation for Rails applications revolves around the developer and ignores the needs of the user. There is a system to automatically generate documentation that can greatly help a developer. I will discuss this system here, but I will also discuss help for users. The two are not the same and the latter is often neglected when discussing application development.
The system for automatically generating system documentation is called RDoc. This is part of Ruby gems and therefore installed when we install Rails. RDoc extracts the definitions of classes, methods and attributes from a Rails application and presents them within a structured collection of HTML documents. Perhaps the most widely used example is http://api.rubyonrails.com, which is itself created with RDoc.
To create a similar set of documents within the application doc folder, run this command at the application root:
rake doc:app
A doc/app folder is then created with a fresh set of RDoc documents within it. Access the documentation via doc/app/index.html.
The default format of the documents is the same as that used by the Ruby core documentation as the following screenshot shows.
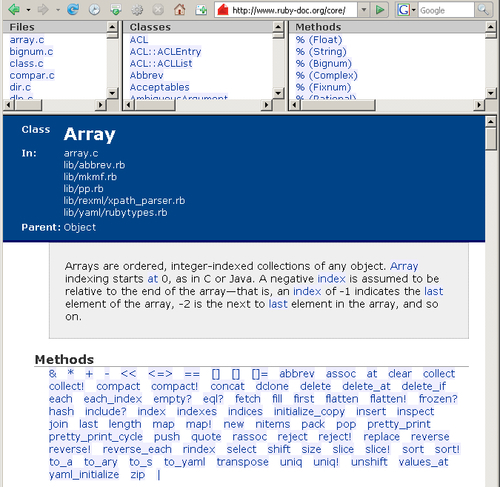
The upper three panes allow a user to browse and select particular source Files (left pane), Classes (center pane) and Methods (right pane).
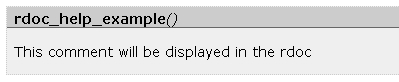
RDoc pulls out each method from its def declaration. It populates the output with any comments we add immediately before the method. For example, this method:
#This comment will be displayed in the rdoc
def rdoc_help_example
render :text => "Help!"
end
...will create this entry within the RDoc documentation, as shown below:
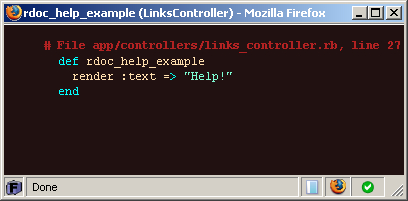
Clicking on the method name opens a new window, as shown below, containing the method's source code:
This system makes it very easy to document our application for our own records and to help colleagues and others who develop or debug our application at a later date.
RDoc is a good tool for developers, but users need something different. They will not want to know how all the underlying components work, nor need to be able to see source code. What they need to know is what to click on or select to achieve the task at hand. RDoc does not provide that. What is needed is a different system for end-user help.
The solution I use and recommend is a wiki. We can use an off-the-shelf wiki application such as DokuWiki (http://wiki.splitbrain.org/wiki:dokuwiki), or build one ourselves in Rails.
The one prerequisite is that an individual wiki page should be directly accessed via a URL. This means that some wikis, are not suited to application help documentation. (For example, TiddlyWiki is an excellent personal wiki that I used a lot to keep notes when I started Rails development. However, it relies on client side JavaScript links to access individual wiki entries, and the URL remains constant as simply that of the TidlyWiki document. Therefore it is not suitable for a Rails help system.)
A wiki provides the following advantages:
- Built-in tools to help us create attractive documents with text formatting and image insertion.
- The writing tools are available within the browser. We do not need another application to write entries.
- Built-in search tools to assist users to find the help entry they need.
- User control to allow a team of people to help you maintain and develop the help system.
The most important advantage is the last one. In my opinion, the best help systems are those that actively encourage user input. With a wiki, we can allow our users to correct, update and improve on our help entries. Users are the best people to know what they need with a help system, so why not provide them with the tool for them to update as they require.
Rory decides to use Instiki, a wiki based on Rails, for his user help system. Rory installs Instiki by downloading the files from the project's rubyforge page (http://rubyforge.org/projects/instiki/) and unziping them to their own directory. He then uses Mongrel to host a new instance of the Instiki application.
Instiki is built using Rails and therefore can be hosted in the same way as Rory's Intranet application. On Linux, the application can be started simply by running "instiki". To host the system via Mongrel on a Windows system, we would have to carry out a couple of tweaks.
- Then add a new Mongrel service instance:
mongrel_rails service::install -N instiki -c <path to instiki> -p 2500 -e production
As Instiki is a Rails application, we can modify it in the same way as any other Rails application. For example, in version 0.11.0, if we create new content via a Firefox browser, the main text area is too large and becomes displaced down the page. An examination of the code shows that the text area is defined in line 17 of app/views/wiki/new.rhtml:
<textarea name="content" id="content" style="width: 450px; height: 500px">
A similar text area in app/views/wiki/edit.rhtml which is displayed correctly in Firefox is defined via:
<textarea name="content" id="content" style="width: 70%; height: 500px">
By changing the width configuration to 70% in new.rhtml, the form is displayed correctly in Firefox. We could even extract the form code as a partial and then use the same code in both views as both forms have a lot of similarity. The advantage of using a Rails wiki is that we can easily develop it to suit our needs.
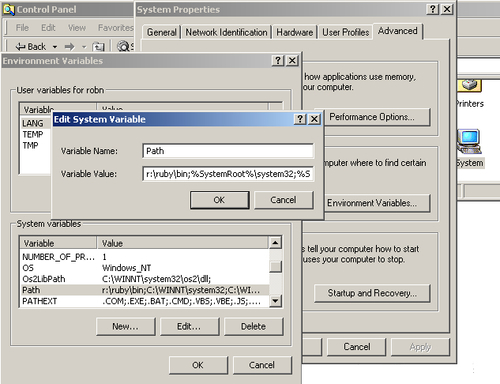
Rory decides to provide a new virtual server at wiki.company.local in the same way that he created intranet.company.local (see Chapter 6: Into Production) and adds a virtual host to his Apache configuration. To do this, he creates a new DNS A Host called "wiki" using his server's IP address, and adds the code below to httpd.conf:
</VirtualHost>
<VirtualHost wiki.company.local:80>
ServerName wiki.company.local
ServerAlias wiki.company.local
ProxyPass / http://wiki.company.local:2500/
ProxyPassReverse / http://wiki.company.local:2500
ProxyPreserveHost on
</VirtualHost>
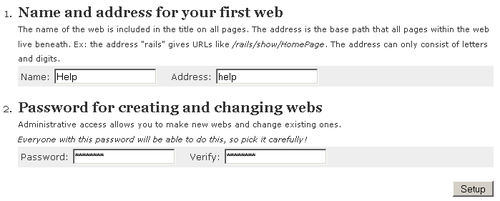
On first entry, he sets up the Instiki application to use a base path of "help".
Rory then creates a helper method to create links to the wiki, so that he has one place to update the URL for the wiki, should he need to move it. Therefore in app/helpers/application_helper.rb, he adds:
#Generates a link to the wiki page holding relevant help information.
def help_link(wiki_entry_name=nil)
wiki_url = "http://wiki.robhome.local/help/show"
if wiki_entry_name
wiki_url += "/#{wiki_entry_name}"
link_text = "Help for #{wiki_entry_name.underscore.humanize}"
else
wiki_url += "/HomePage"
link_text = "Help"
end
link_to link_text, wiki_url, {:target => '_blank'}
end
For his first wiki he creates a new entry called CompanyList and in this he writes a guide as to the use of the company listing in the application index view. He then goes to app/views/companies/index.rhtml and adds a new help_link to the bottom of the page:
<%= help_link 'CompanyList' %>
If you look at a help page you have written, and find that it can be summed up as a list of features available in the application, I would be safe to bet that you have not written the best help system you could. How many help systems have you used where the entry for "the X feature button" reads "this button activates the X feature". Yet most systems I have used have plenty of entries just like that.
So how do we avoid just listing the features? The best way I have found is not to treat the help system as the place to describe all the features available. Instead, use the help system to describe the processes a user goes through to carry out the tasks they achieve via the application.
For example, look at two help system entries for using the facility to edit telephone numbers within the company list created earlier in this chapter:
- The plus sign at the start of a telephone number allows you to edit that number.
- To edit a telephone number, click on the plus sign at the start of telephone number. The number will then appear in an input box in which you can edit the number. Change the number to the correct entry and then click on the Update button. The new number will then be saved to the server. You must be logged on to access this feature.
The first entry simply tells the user what the plus sign is. The second tells the user how to use the feature, when accessed via the plus sign. The first describes the feature, the second the process to go through to achieve the task of changing a telephone number. The second entry is better in that it tells a user how to use the feature, and in doing so, it also describes what the feature does.
When writing user help information, I recommend the following:
- Look at each user interface and list the tasks that users are likely to carry out using that interface.
- For each task, note down the steps a user will need to go through to use that user interface to achieve the task. Use this list as the core of the help document.
- If there are a number of similar tasks, describe the simplest first, and then describe how to alter the steps to achieve the different similar tasks.
- When you have finished, go back over the user interface and make sure that all the features have been used somewhere within the tasks steps, If you find a feature that is not described with a task step, then simply describe what that feature does. Even then think of an example of how a user may use that feature, and describe that if you can. (However, if you are unable to think of an example task for the feature, I would question why that feature is included within the interface. A better option may be to remove the feature!)