The coded web test generates the code for the sequence of web-test requests. The main advantage is to add more complex features such as looping, adding more requests, or adding any additional logic to the test using the .NET programming languages C# and Visual Basic. The recorded web test is simple, but the coded web test gives more flexibility.
It is suggested practice that the web test should be recorded and then converted to coded web test by defining the data sources, extraction rules, validation rules, and binding the form post fields to the data source. This can let the tool generate the basic code and concentrate on customizing it with additional features.
The other advantage of coded tests is full control of the test execution. It's just a class file, which is created with the language of our choice (either C# or Visual Basic). Once the class file is created, custom code can be included for the required functionality.
The web performance test editor provides the option to generate the code out of a recorded web test and create the coded test. Select the recorded web test that needs to be converted to code and then pick Generate Code from the editor toolbar. This opens a dialog asking for a name for the test, as shown here:
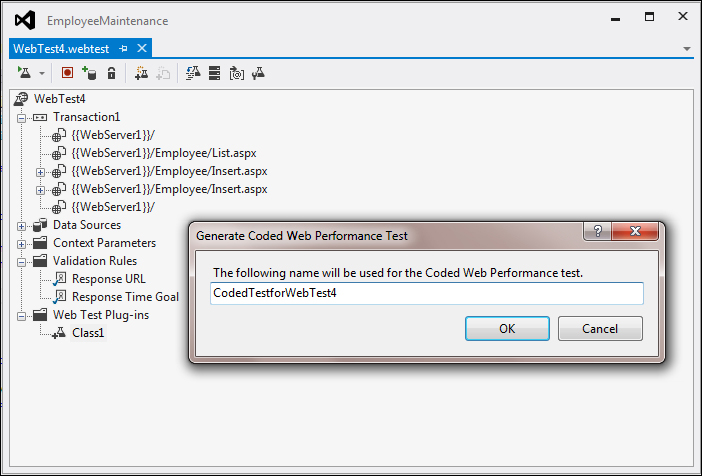
Provide the name for the coded web test and click on OK to generate the file. The file gets generated with the provided name and contains the code for the whole of web performance test. The following screenshot shows part of the code from the generated file:
The code in the previous screenshot uses the following additional namespaces, which contain the classes required for web testing:
usingMicrosoft.VisualStudio.TestTools.WebTesting;
  usingMicrosoft.VisualStudio.TestTools.WebTesting.Rules;
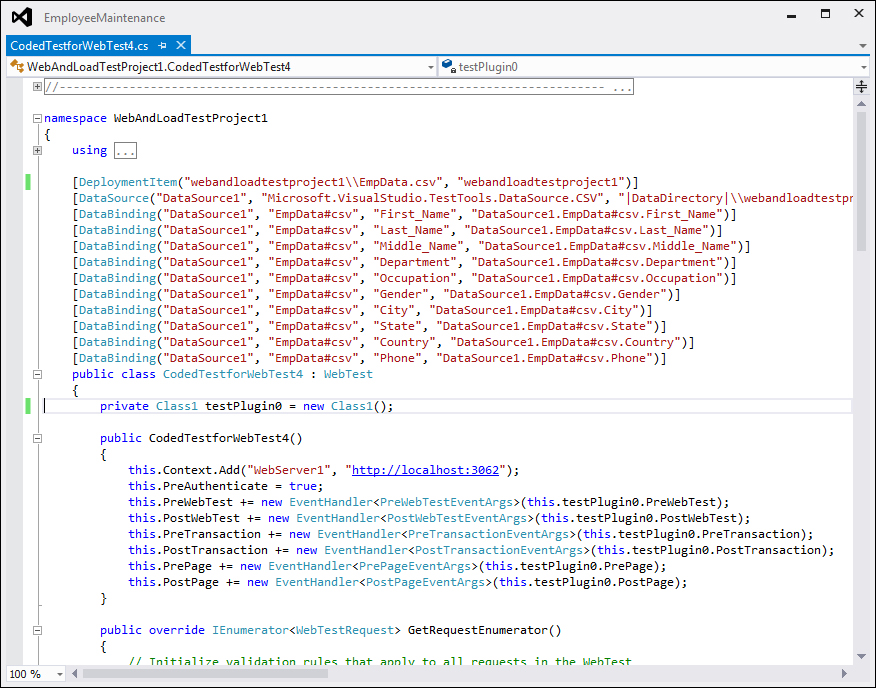
You can see that the first section of the code contains all deployment and data-source information. This is the same information that is configured to the web test using the WebTest editor. It defines the parameters for each field in the data source and binds each field to the data-source column. Following are some of the attributes and classes used in the generated code:
DeploymentItem: This specifies whether the additional files should be deployed as part of the deployment. In the previous example, the data source file is added as a deployment item:[DeploymentItem('webandloadtestproject1\EmpData.csv', 'webandloadtestproject1')]DataSource: This attribute specifies any datafile or database that is added as the source of information for the fields. The source can be a CSV, XML, or any other database. The attribute contains the name of the data source, the connection string to access the data source, location, the mode of accessing the data (such asSequential,Random, orUnique), and the table name to access. In the case of Microsoft Excel, each spreadsheet can represent a table. For example, the following code block shows the data source attribute for a CSV file:[DataSource('DataSource1', 'Microsoft.VisualStudio.TestTools.DataSource.CSV', '|DataDirectory|\webandloadtestproject1\EmpData.csv', Microsoft.VisualStudio.TestTools.WebTesting.DataBindingAccessMethod.Sequential, Microsoft.VisualStudio.TestTools.WebTesting.DataBindingSelectColumns.SelectOnlyBoundColumns, 'EmpData#csv')]DataBinding: This attribute denotes the field or fields bound to the data-source column in the data-source table. For example, the following code block denotes three fields:First_Name,Last_Name, andMiddle_Name. The attribute contains the name of the data source, the table name to refer within the source, the name for the field within the table, and the actual field name in the data source table.[DataBinding('DataSource1', 'EmpData#csv', 'First_Name', 'DataSource1.EmpData#csv.First_Name')] [DataBinding('DataSource1', 'EmpData#csv', 'Last_Name', 'DataSource1.EmpData#csv.Last_Name')] [DataBinding('DataSource1', 'EmpData#csv', 'Middle_Name', 'DataSource1.EmpData#csv.Middle_Name')]WebTest: This is the base class for all web tests. Coded web tests are directly derived from this base class. In the example, the classWebTest4Codedis derived from thisWebTestclass.WebTest(constructor): This constructor is for initializing a new instance of the class. It includes the context variables for the test, for example theWebServerName. This is the main context variable which is used by all the requests within the test and is replaced by the actual value during the Test Run. The next thing is to set the credentials for the web test to run. It can be set with credentials or pre-authenticated to run the test. All global declarations with respect to the web test are done at the constructor level.PreWebTestandPostWebTest(for web tests and requests): These events occur before and after the test. These events are mainly used for setting the environment for the test before the Test Run and for cleaning the environment after the test is completed.this.PreWebTest += newEventHandler<PreWebTestEventArgs>(this.testPlugin0.PreWebTest); this.PostWebTest += newEventHandler<PostWebTestEventArgs>(this.testPlugin0.PostWebTest);
PreTransactionandPostTransaction: These events are for web transactions. TheseWebTestPluginmethods handle events before and after the transaction, associated with the web performance test. ThePreTransactioncallback is called just before starting the transaction in the web performance test and thePostTransactioncallback is called just after the transaction is complete in the test.this.PreTransaction += newEventHandler<PreTransactionEventArgs>(this.testPlugin0.PreTransaction); this.PostTransaction += newEventHandler<PostTransactionEventArgs>(this.testPlugin0.PostTransaction);
PrePageandPostPage: These are theWebtestPluginmethods that handle events before starting and just after completing the web page.this.PrePage += newEventHandler<PrePageEventArgs>(this.testPlugin0.PrePage); this.PostPage += newEventHandler<PostPageEventArgs>(this.testPlugin0.PostPage);
PreRequestandPostRequest: These are theWebtestPluginmethods that handle events before starting after completing the HTTP request. Because these events have to fire for every request in the web test, these methods are called from theGetRequestEnumeratormethod.this.PreRequest += newEventHandler<PreRequestEventArgs>(this.testPlugin0.PreRequest) this.PostRequest += newEventHandler<PostRequestEventArgs>(this.testPlugin0.PostRequest);
PreRequestDataBinding: This is theWebtestPluginmethod that is called just before the data binding call.
PreWebTest, PostWebTest, PreTransaction, PostTransaction, PrePage, PostPage, PreRequest, PostRequest, and PreRequestDataBinding are just virtual methods. If not implemented, the base class method is called.
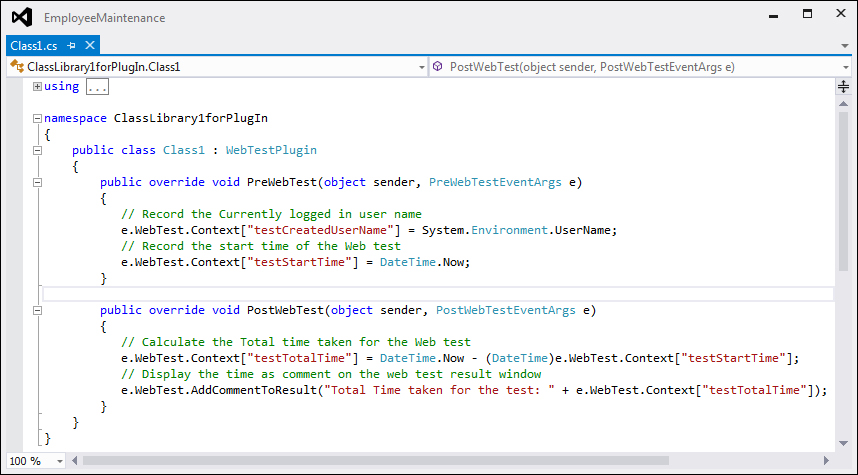
The following code screenshot shows the class derived from the WebTestPlugin class and a couple of methods overridden:
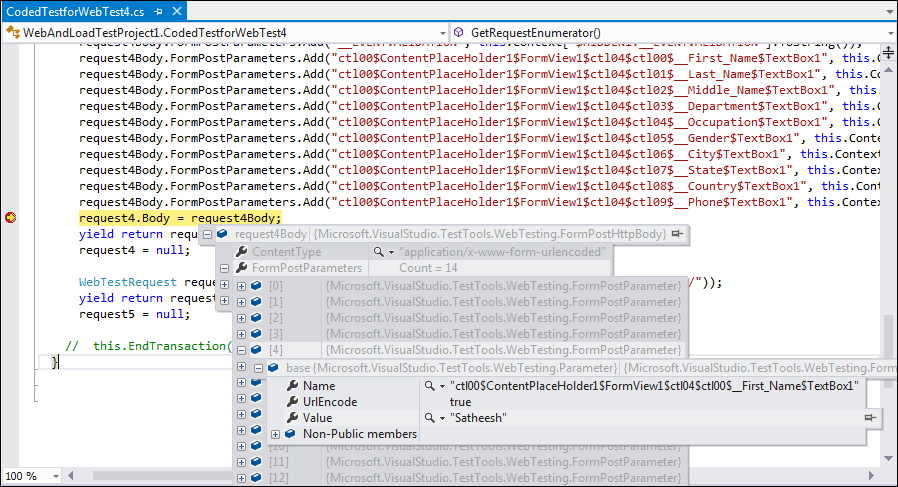
The next part of the code defines the request, extraction rules, validation rules, and the form post or the query string parameters. These parameter values are set with values retrieved from the parameters bonded with the data-source fields. Part of the code looks like this:
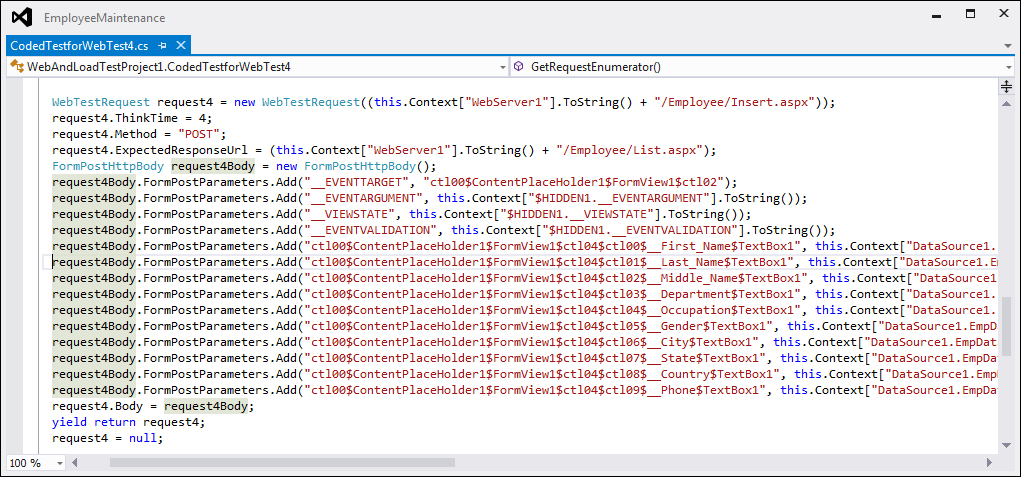
The first line defines the request and the rest of the code assigns the values to the form post parameters.
The coded web test provides all the properties and requests of the web test, and can be used to customize and add more functionality to it.
A transaction is a logical grouping of multiple requests in a web test. In web performance test recording, we have seen the insertion of transactions into the request set to collect the total time taken by all requests. The same thing can be done here. Comments, conditions, further requests, branching and looping can all be added at the transaction level. Following is some code, that begins the transaction, requests two web pages, and then ends the transaction:
this.BeginTransaction('Transaction1'),

WebTestRequest request1 = newWebTestRequest((this.Context['WebServer1'].ToString() + '/'));
            request1.ThinkTime = 3;
yieldreturn request1;
            request1 = null;

WebTestRequest request2 = newWebTestRequest((this.Context['WebServer1'].ToString() + '/Employee/List.aspx'));
            request2.ThinkTime = 2;
yieldreturn request2;
            request2 = null;

this.EndTransaction('Transaction1'),The main advantage of coded web tests is customizing the code generated from a web performance test recording. For example, the following code adds a new web test request with think time and request method to the web test, if the value of the context parameter AddTestRequest is yes.
if (this.Context['AddAbsenceforEmployee'].ToString() == 'Yes')
            {
WebTestRequest request6 = newWebTestRequest((this.Context['WebServerName'].ToString() + '/Absence/Insert.aspx'));
                request6.ThinkTime = 4;
yieldreturn request6;
                request6 = null;
}The AddCommentToResult method is used for adding comments to the web test. The code given here is an example for adding a comment to the Test Result from the web test code:
this.AddCommentToResult('Test custom comment added to the Web Test through code'),Running or executing the coded web test is very simple and is very similar to running other tests. Using the solution explorer, open the coded web performance test and then from the code area, open the shortcut menu. Then, choose the option to run the coded web performance test, as shown in the following screenshot:
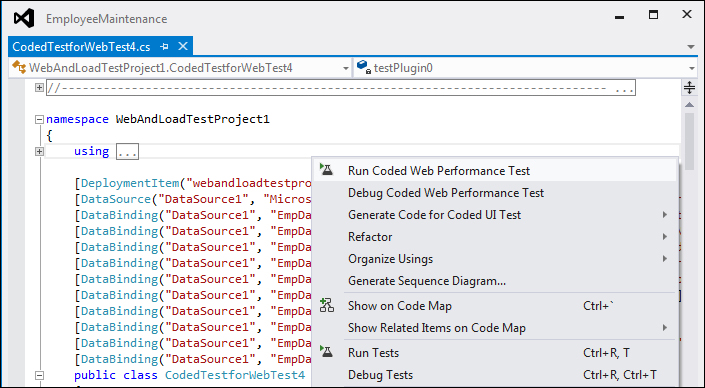
The test can be re-run from the Test Results window as well, but will only appear there after the first run of the test.
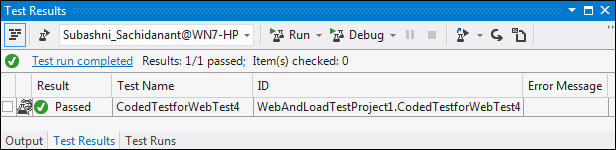
The result of the web test is shown in the Test Results window, similar to that shown by the recorded web test. It shows the status of the test, and whether it has successfully passed or failed, or has some errors:
To see the details of a Test Result, select the result from the Test Results window, right-click and choose View Test Result Details, which opens a window depicting the details about the coded web Test Run. This is the same result details window that is shown for other types of tests:
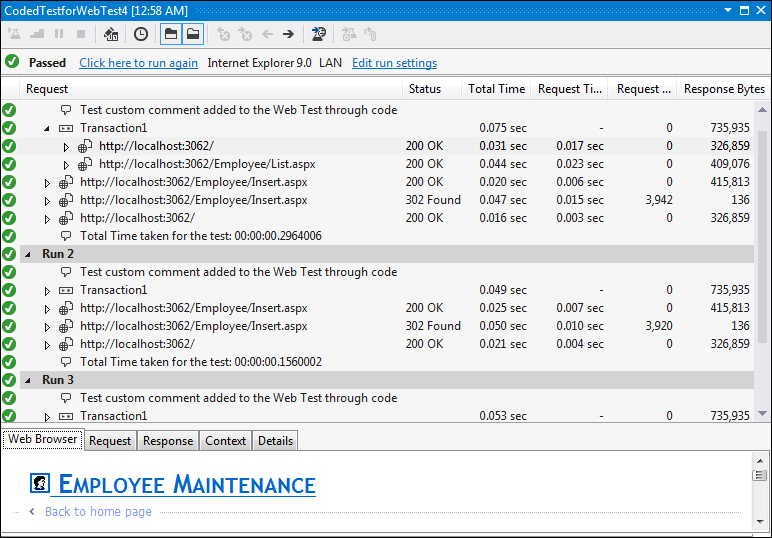
The result details window shows the result of each request in the web test. It also shows information about the request, response, context parameters, and the rule execution details for each request. You will notice that the additional comment added to the web test is shown on top of each Test Run, and the comment added in the PostWebTest event in the web test plug-in class is added after each web Test Run.
Since the code is normal C# code and the entire web test is a class file, debugging is possible as is done for normal assemblies created in Visual Studio. This is very helpful in getting the runtime information of the web test, requests, and the context information from the web test, as shown: