After selecting the Team Project, next comes the selection of a Test Plan from the Team Project, or alternatively creating a new Test Plan. The following image has a previously-created Test Plan ready for selection and to create all test cases. The window also has an option to copy the URL for opening the Test Plan option in the Testing Center window, by passing the selection processes. For example, the URL for the first Test Plan in the list would look like mtm://my-pc:8080/tfs/defaultcollection/p:TeamProject1/Testing/testplan/connect?id=1 that would directly open the Test Plan when you browse it.
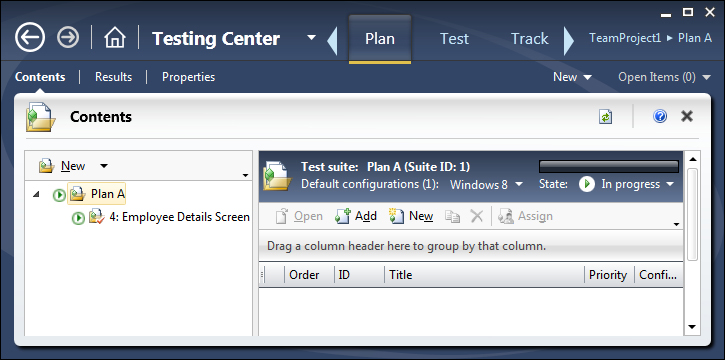
After selecting the Test Plan, the Testing Center opens with existing Test Suites and test cases. It will be blank if nothing is created yet. The Test Center has multiple tabs such as Plan, Test, Track, and Organize. The Testing Center tool also contains shortcuts to create new work items such as Bug, Impediment, Product Backlog Item, Shared Steps, Task, and Test Case. Other shortcuts such as choosing another Test Plan or going back to the home page is also available.
- Plan: This tab contains all the features needed to create Test Suites and test cases. Adding new plans or associating existing requirements to the Test Plan tab is possible from this tab.
- Test: This tab contains features to select a particular test case and then running the test.
- Track: This tab used for building queries to know the status of the Tests. The Testing Center provides multiple queries by default which can be used directly or can be customized it to create your own.
- Organize: This tab is used to organize or manage Test Plans, Configurations, Test Cases and Shared Steps for test cases.
This tab contains three subtabs such as Contents, Results, and Properties. The Contents tab lists all available Test Suites and test cases associated to the Test Suite. The left pane shows the list of all Test Suites and on the right the corresponding test cases for the selected suite are shown. Each Test Plan can have any number of Test Suites and each Test Suite can have any number of test cases. The right-hand side pane shows the current configuration selected for the Test Plan and the requirement associated to this Test Suite.
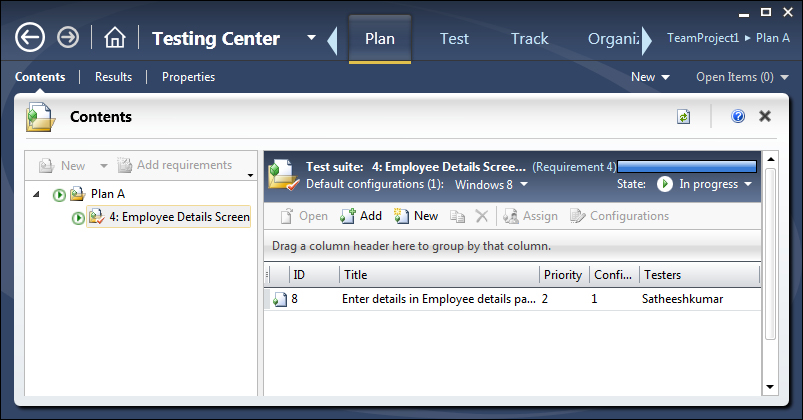
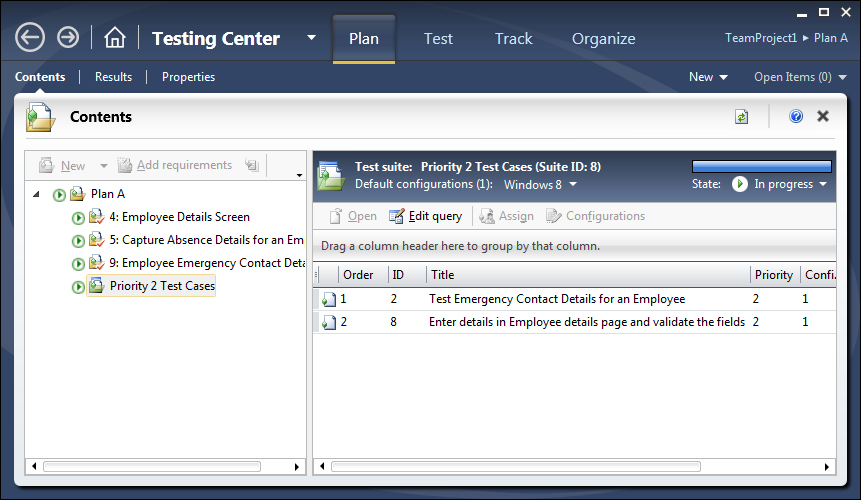
There is also a progress bar which shows the current stage and progress of the Test Suite. There are different types of Test Suites. One is to create a Test Suite and then add test cases to it, and the other is to create Test Suite based on the query to filter the test cases and add to the Test Suite. For example, the preceding screenshot contains the test cases which are created new or manually added to the suite. Test cases can be added or removed from the Test Suite any time. The following screenshot contains the Test Suite which is created based on a query to select Priority 2 Test Cases from all available test cases in the Test Plan.
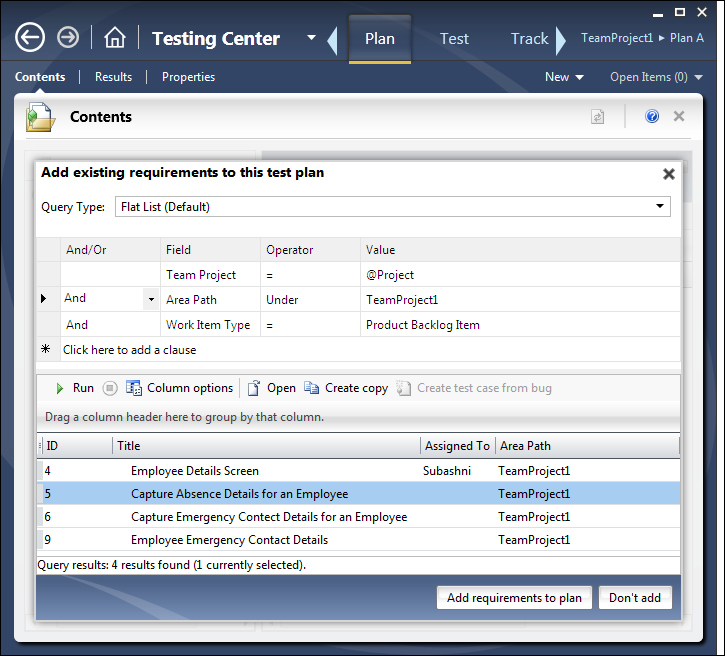
The other option is to add requirements to the Test Plan. Adding or linking requirements to the test case would help us know the test cases which would get affected in case of any requirement change. Also it becomes easy to find the related test cases and testing scenarios for that requirement. The following screenshot shows the selection of a requirement from the existing requirements list and adding it to the Test Plan.
The second option under the Testing Center tool is to view the Test Results of the test cases associated to the suites and plan. The result contains the Test Results Summary and a horizontal graph which shows the number of test cases within each Test Suite. This section also shows the number and percentage of failed tests.
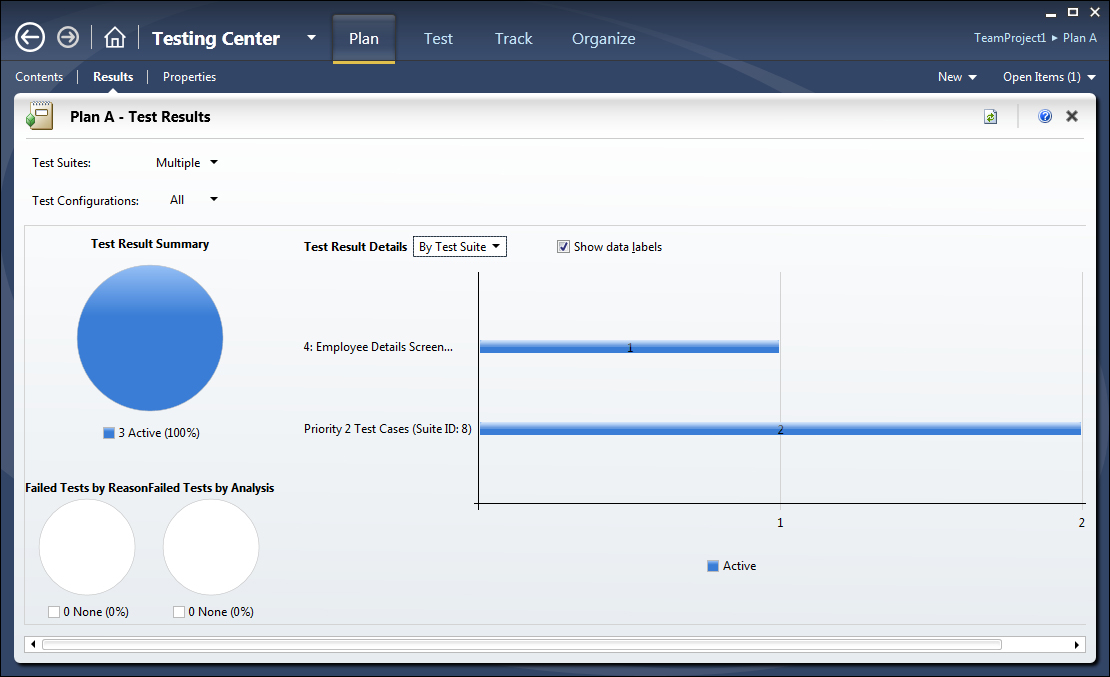
There is an option to filter the Test Suites within the Test Plan to list only the results for selected Test Suites. The above screenshot shows the value as Multiple which means that multiple suites within the Test Plan are selected to show the summary. There is another option to show the result details either by Suite Name or by Tester.
The third option is to set the properties for Test Plan. The Properties section provides a few configuration options to use for Manual and Automated Test Runs. The Test Plan can be associated with a build as well. The other common properties such as Area, Iteration, Start, and End Date for the plan can be set. The Run Settings section is used to choose the required settings file and the environment from the available list for the manual and automated tests.
Additional sections such as Links are also available to add any external URLs and comments to the Test Plan.
This Test tab contains five different subtabs such as Run Tests, Analyze Test Runs, Do Exploratory Tests, View Exploratory Test Sessions, and Verify Bugs.
The first tab, Run Tests is used for running the test cases and capturing the Test Results. Whichever test cases added to the plan are listed in the left pane. The right pane lists the options to view Test Result and the status of each run for the test case. Select the test case and start running the test with different run options such as choosing a different build configuration, test settings, and environment. After the Test Run, the Test Result details can be viewed from here.
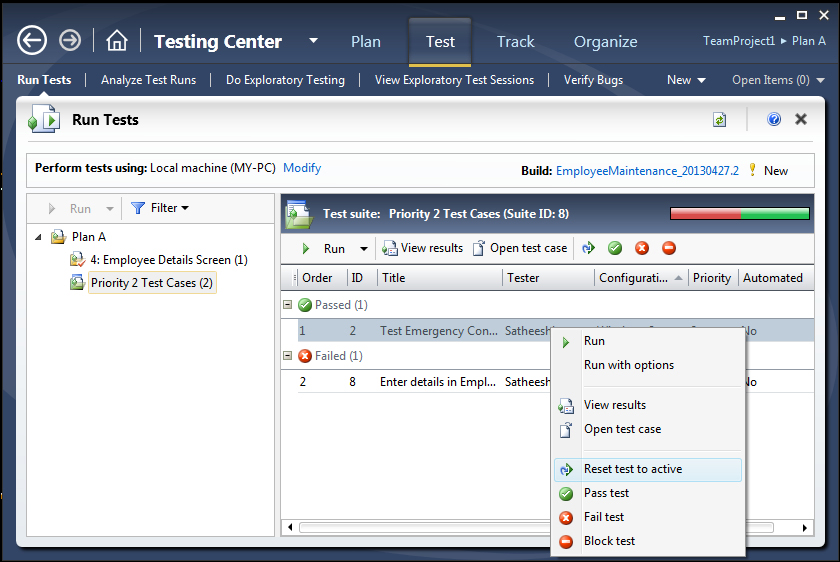
Selecting the test case and running the test will open the window for recording the test actions and result for each step in the test case. Recording the test actions is optional but can be very useful for automating the test. With the use of the recording window we can play, pause, and stop the test any time. Each step will show the actual test step and the expected result for the test step. There is a context menu option to set the test manually as pass or fail based on the Test Result.
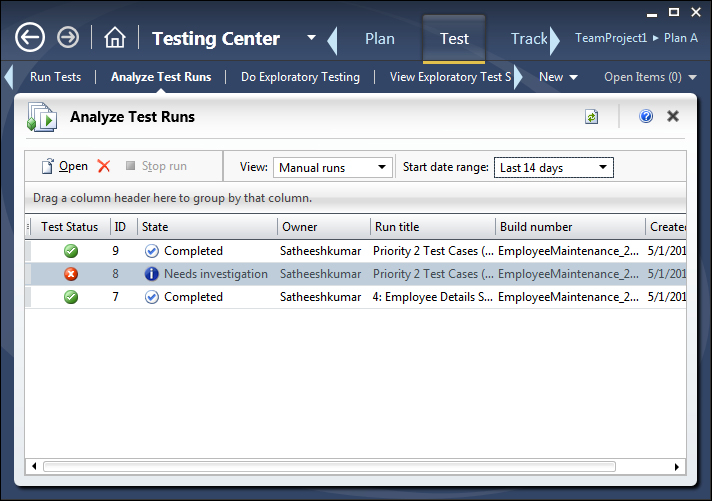
The second tab Analyze Test Runs is very useful for comparing and analyzing multiple Test Runs. The list contains the history of Test Runs and there is a filter to limit the number of runs listed. Open any Test Run to get more details on individual results for further analysis.
The third and fourth tab are to do with exploratory testing and viewing the exploratory test session details. This was explained in detail in the previous chapter with examples. This is one of the new features added to Test Manager 2012 to perform testing without prior details on any test cases defined.
The last tab Verify Bugs under the Test tab is used to verify bugs created as part of the Test Runs. Use the Open option to open the defect and get more details on defect. The verify option provides the opportunity to re-run the test case and test steps to verify the defect. The corresponding test case for the defect can be looked at from this window.
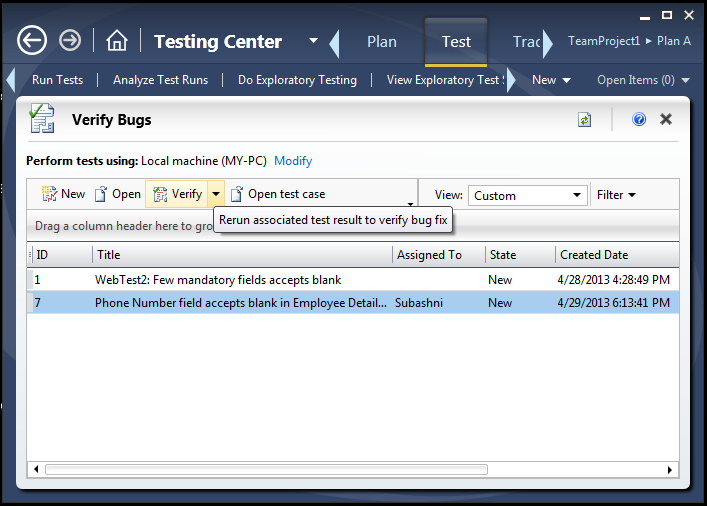
New test cases can be created and there is an option to change the machine or environment for the Test Run, to verify the defect in multiple other environments.
The Track tab in Testing Center is used for keeping track of the activities and getting the current status of Test Runs, work on items using queries, assign builds with plans, and getting the test recommendation based on build comparison.
The first subtab Queries provides multiple built-in queries which are ready to execute. Custom queries can be built based on a few parameters in order to get the status of defects and Test Runs. For example, the Product Backlog query is an inbuilt query which fetches the list of all active backlog items within the Team Project. The queries can be customized and refined with required parameters as per the needs. New queries can also be built and saved under the My Queries folder which is only meant for the current user who is creating it. The following image shows the result set for the query to return the product backlog items.
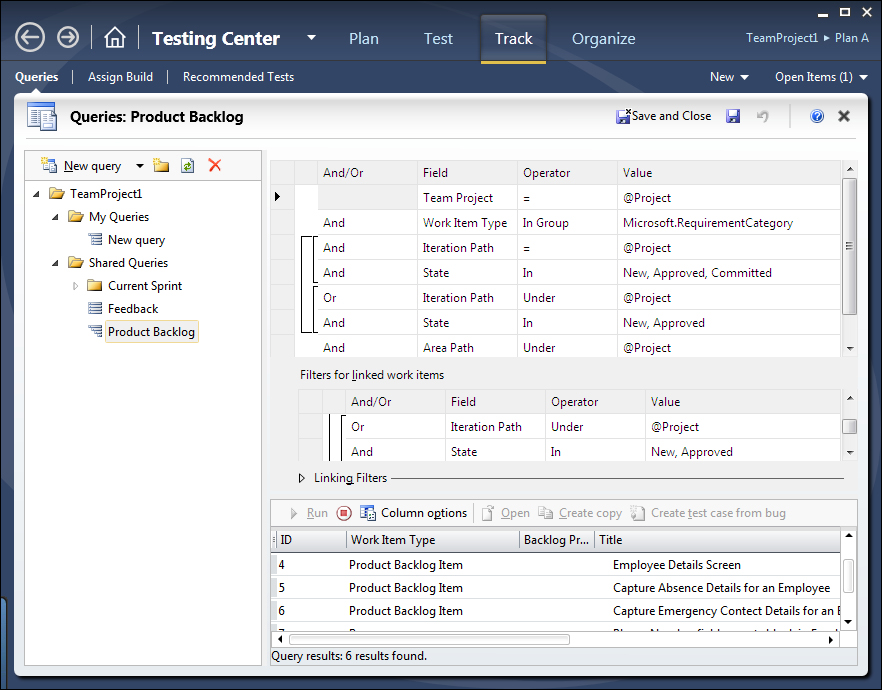
Three different queries can be created using the following options:
- New query: This query is used to create a simple query that returns a list of items.
- New direct links query: This query is used to return work items, and the items linked to each of those work items.
- New tree query: This query is used to return the set of work items which are multi-tiered.
These are the same types of queries which can also be created using Visual Studio.
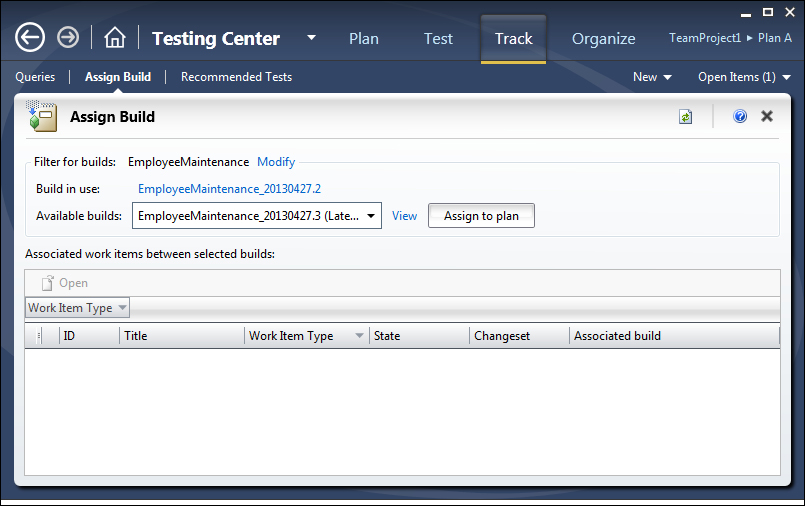
The next tab is the Assign Build tab which is used for assigning a new builds to the plan. If the development team has done some defect fixes and this is reflected in the new build then the testing should happen against the new build instead of old build. To make this change, assign the new build to the Test Plan so that the tests are carried over and new defects are logged against the new build. The associated work items list shows the updated work items between the builds. Based on the changes, the team can decide on which build to take for testing.
The next tab Recommended Tests provides an interesting feature which recommends what are all the tests that needs to be re-run based on the changes that has gone in as part of the new build. Because of some requirement change, or design change, or code change, some of the tests need to be re-run to make sure the functionality is not broken. Choose the build from the available builds list to compare and get the differences of the work that went in. This helps the tool to identify the changes and corresponding tests for the change and then provide the recommendations for re-runs.
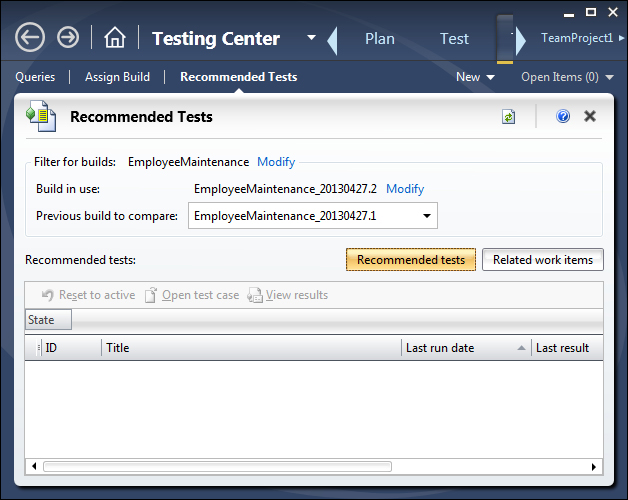
There is an option to get the related work items as well. Again, this is to get the modified work items between the builds.
The Organize tab in Test Center is used for maintaining and managing the Test Plans, Test Configurations, test cases, and shared steps for test cases. This tab contains four different subtabs to manage all of these.
The first subtab Test Plan Manager is used for setting or modifying different properties of the Test Plans.
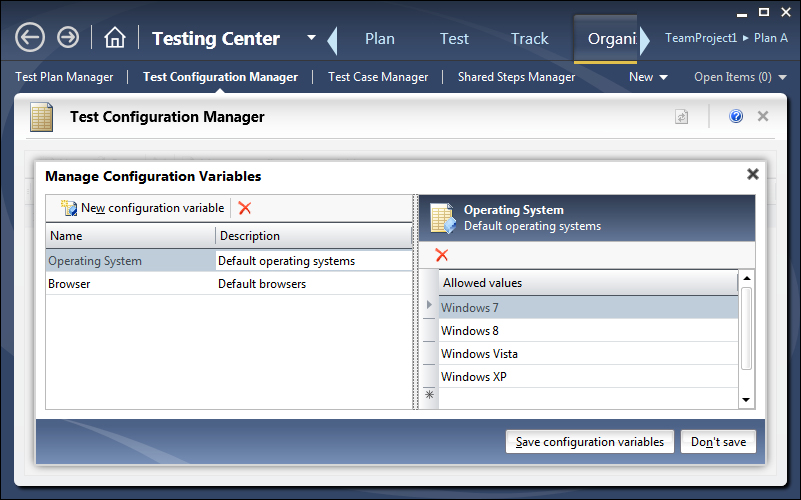
The second tab is for managing and modifying the configurations. Multiple configurations can be created based on different parameters such as Operating System, Browser version, and other system variables.
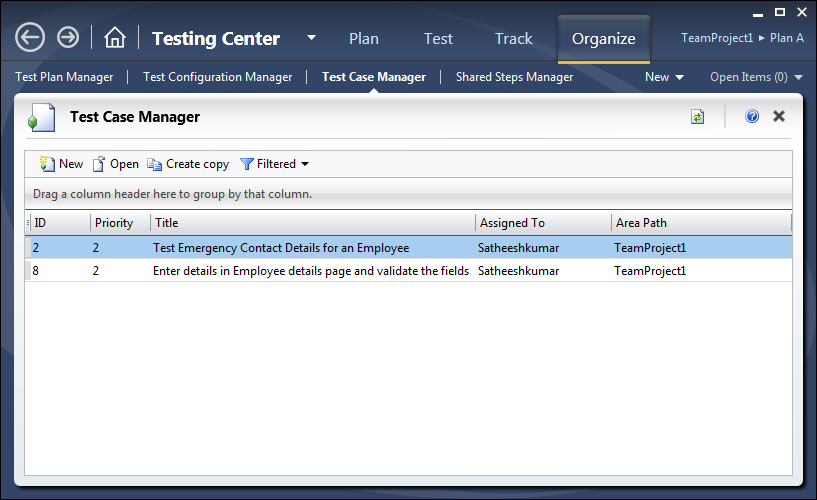
The next tab is the Test Case Manager where all the test cases in the Test Plan are displayed. Select any of the test cases from the list and modify it, or create a copy of the selected test case using the options in the toolbar. Instead of getting the list of all test cases, filter can be set to limit the test cases in the list. The following screenshot shows filtered test cases list from the available work items.
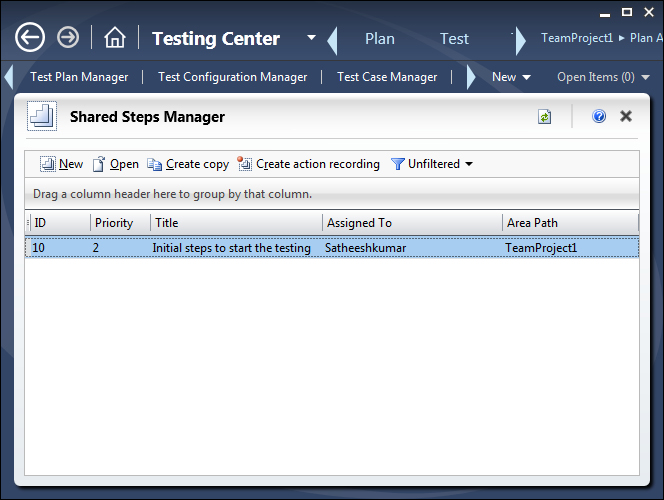
The next tab is Shared Steps Manager, which is for creating and maintaining the test cases which is shared across many test cases. These are called shared steps because of the nature of providing common steps which can be re-used across multiple test cases. For example, opening the web browser and navigating to the main page is the common activity to start the test. This can be created as one shared step and re-used across multiple test cases.
All of these activities performed in Testing Center are saved to the Team Foundation Server store and associated to the selected Team Project. All of these tabs in Testing Center are not dependent on Visual Studio or any other tool except TFS for data storage. As long as the Team Project is available in TFS, it is enough to capture the test steps and test cases for the Team Project.
