
After completing the web performance test recording, verify the test by running it with the required parameters and inputs to make sure it is working fine without any errors. There is a configuration file called .testsettings that supports running and debugging the web test with different configurations. This file is created automatically along with web performance and load tests.
Most of the assemblies built in .NET are associated with a common configuration file to hold the general settings required for the application. Similarly the web performance Test Project creates a test settings file by default with the extension .testsettings.
Local.testsettings is the default file name given to the test settings file as there is no change to the configurations and there is no data diagnostics yet.
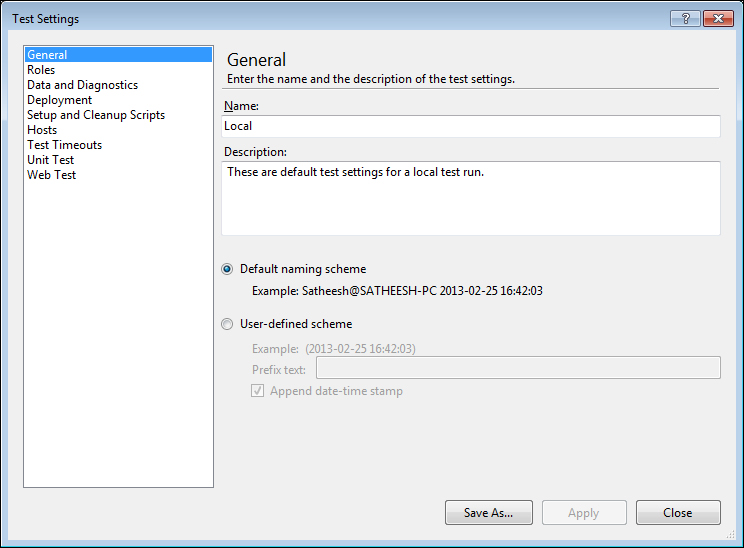
The General section in the settings file is used to rename the default file name and to set the user defined scheme for the output file, instead of using the default scheme. Additional details, such as a description about the test settings file can also be set in this section:
- Name: Specifies the name for the settings file.
- Description: Provides a short description of the test configuration. In case of maintaining multiple configuration files, we can use this field to briefly describe the changes from the previous settings.
- Test Run naming scheme: When the test is run, the results are created and stored under a specific name in the application results folder. By default, the name is the current windows user name followed by the @ symbol, the machine name, and the current date and time. The next option is to specify the user defined scheme to use a prefix text and append with date/time stamp. One of these options can be chosen to set the output file name format.
The following screenshot shows the first option selected, which is to keep the default naming scheme:
This page helps to configure the test execution and data collection location for the tests. There are three different methods of test execution as follows:
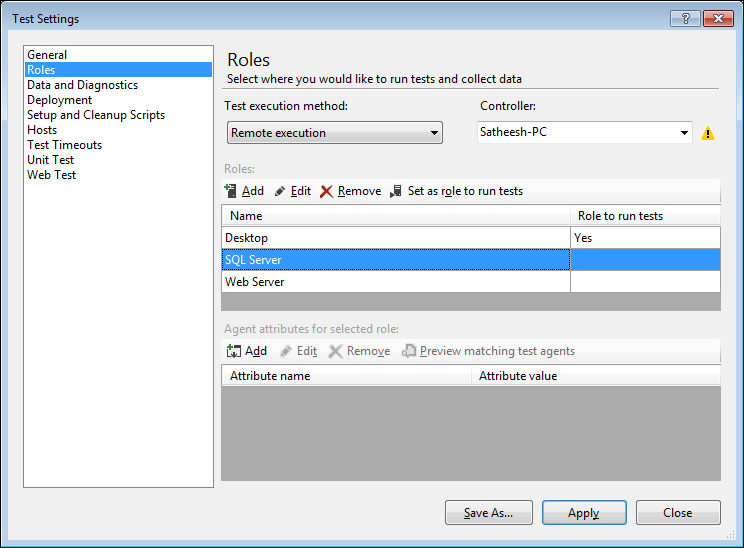
- Local execution: Run the test locally and collect the test execution data locally
- Local execution with remote collection: Run the test locally and collect the data remotely
- Remote execution: Run the test remotely and collect the data remotely
For remote execution of the test, select a controller for the Test Agents which will be used for testing the application remotely.
To add roles to run the test and collect the data, click on Add under the Roles toolbar and provide a name for the role, for example, Web Server, Sql Server, or Desktop Client. Select the role that you want to run the test and then click on the option Set as role to run the test. The other roles in the list will not run the test but will only be used for collecting the data.
To limit the agents that can be used for testing a role, add attributes to filter the agents. Click on Add from the Agent attributes for the selected role toolbar and then enter the attribute name and attribute value in the dialog box. Keep adding any number of attributes.
This setting is for collecting the diagnostics information based on the roles that are set for the tests. The data and diagnostics information should be selected based on the needs whether it is a local system or a remote machine. Select the role and then select the corresponding diagnostics adapter for the role to collect the information. Click on the Configure option above the diagnostics list to configure the selected diagnostic adapter.
If one or more data and diagnostics adapters are enabled for a role, then the Test Controller will decide on which Test Agent to use for collecting the diagnostic information. The following image shows the diagnostics selected for the local machine:
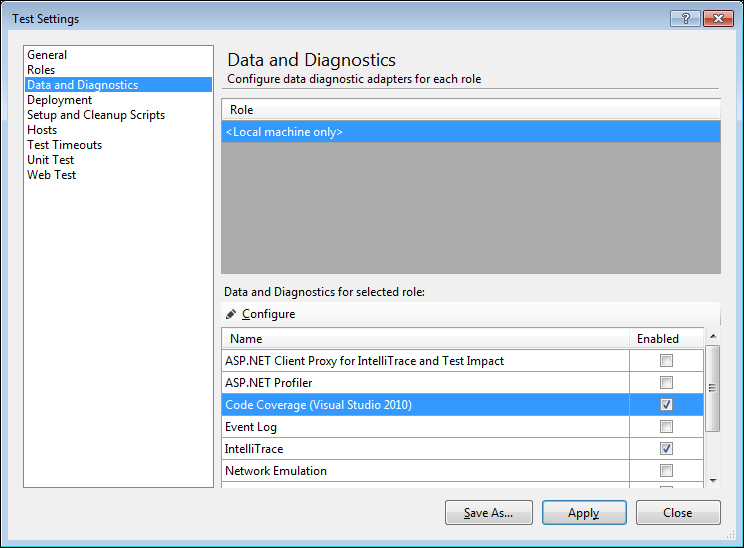
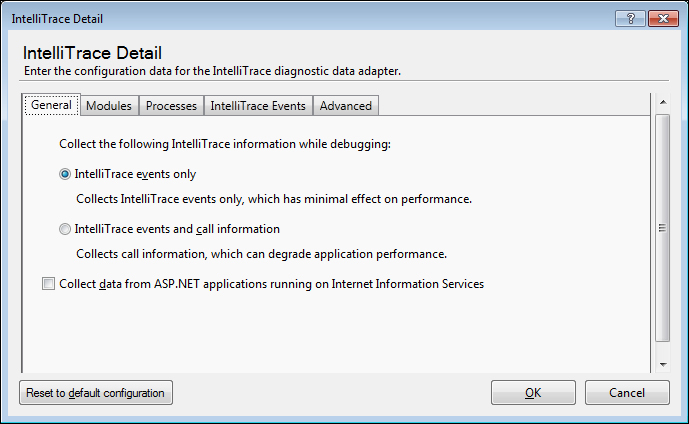
IntelliTrace is one of the diagnostics selected for the role. Select IntelliTrace from the Data and Diagnostics section and click on the Configure option to open the configuration page. Modify the configuration data here for the IntelliTrace diagnostic data adapter:
There are many other data adapters which can be used and configured. The following table shows the different data adapters.
Deployment settings are useful for specifying additional files or assemblies that go along with the test deployment. This is a part of the configuration information for the Test Project. Select additional files or folders using the Add File or Add Directory option in the dialog box, as shown in the following screenshot:
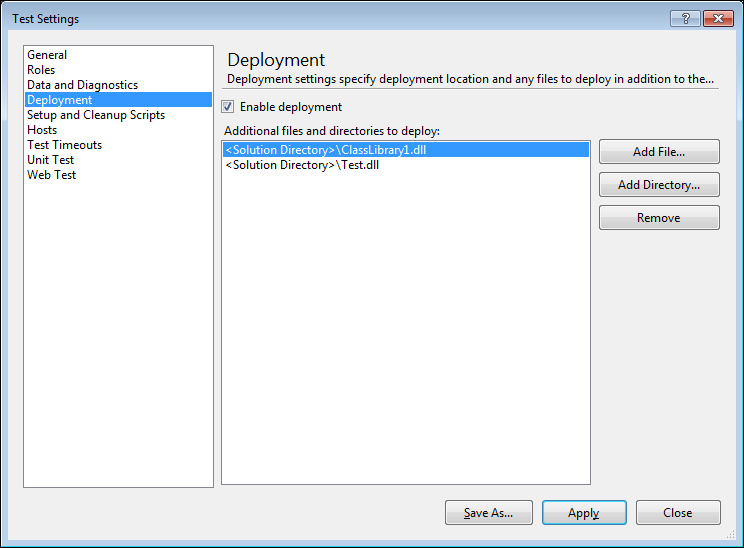
In case of coded web tests, the additional deployment items can be added using the DeploymentItem attribute. For example, the following code shows the deployment of the library files as a part of deploying the test application:
    [DeploymentItem("Test.dll")]
    [DeploymentItem("Common.dll")]
    public class WebTest11Coded : WebTest
    {

}This property is to specify the script files that can be used before and after the test. Some test scenarios require initial environment setup for the test and cleaning the environment after the test to enable the other tests to run. These environment setups are created using some special scripts and attaching that to the configuration file. The following screenshot shows the script files that run before and after the Test Run. The SetEnvironment.bat file contains the script that takes care of setting the environment for the test. The CleanTestFolder.bat is the file that contains the script which executes after the test completion to clean up the environment.
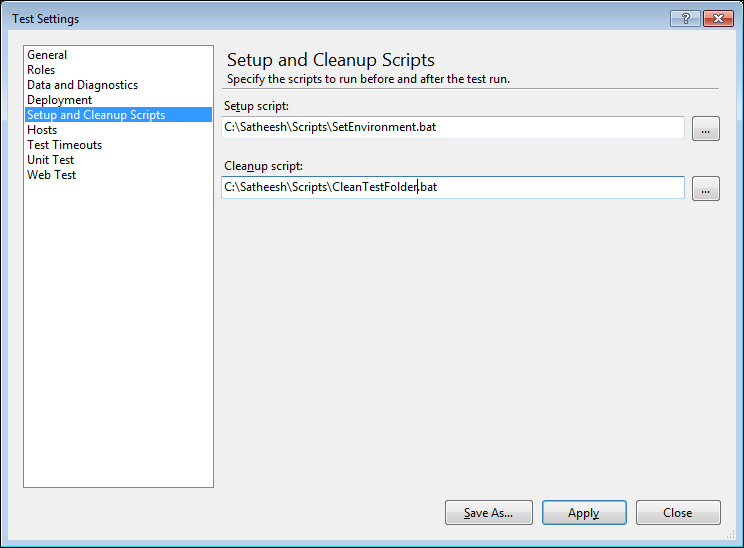
The selected script should be supported to execute in the system that is selected for the role.
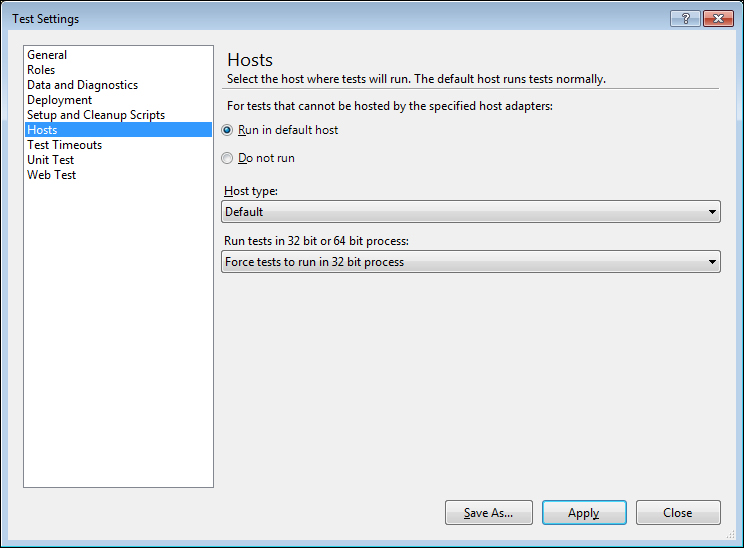
This specifies the host type for the test. For tests that cannot be hosted by the specified host adapters, select either to run in the default host or not to run the test.
Sometimes, the response for a request might take a very long time. The test application or the user in real time cannot wait that long to get the response. By giving a timeout period, the test would be aborted or marked as failed after waiting for the specified duration. The duration can be specified in seconds, minutes, or hours. If the execution of the test is not completed within the specified time, then the execution will be stopped and marked as aborted or failed or both based on the chosen option.
This option is used for configuring the dependent assemblies that are required for the test.
The root folder is the location from where the assemblies are loaded. This location would normally be the folder where the assemblies are installed, or it could be the location where the assemblies are built in a development environment. If the location is not set then the default would be the directory that contains the tests.
The following screenshot shows an example of choosing options for unit testing:
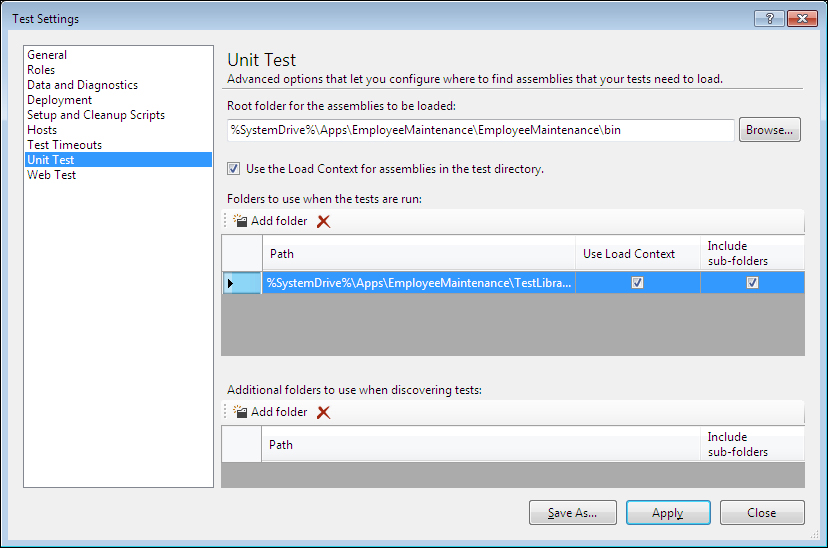
The checkbox Use the Load Context for assemblies in the test directory is selected by default, which loads the assemblies into the correct context. It may be required to uncheck this option in case of pointing to a root folder where a large number of assemblies are present and the tests are not dependent on the load context. This will help in improving the performance.
Folders to use when the tests are run would be the most frequently used option to specify the location of the assemblies used from multiple places. Each path has a couple of options as well. One is to specify that the directory should use load context and the other option is to include the sub folders for discovery of assemblies.
Additional folders to use when discovering tests option is also for discovering the assemblies but very useful when the tests are run remotely, such as from Test Manager or any other build-drop location.
This section describes all the settings required for web testing. These settings are applied only for web testing. Some of the properties will be overridden in case of load testing.
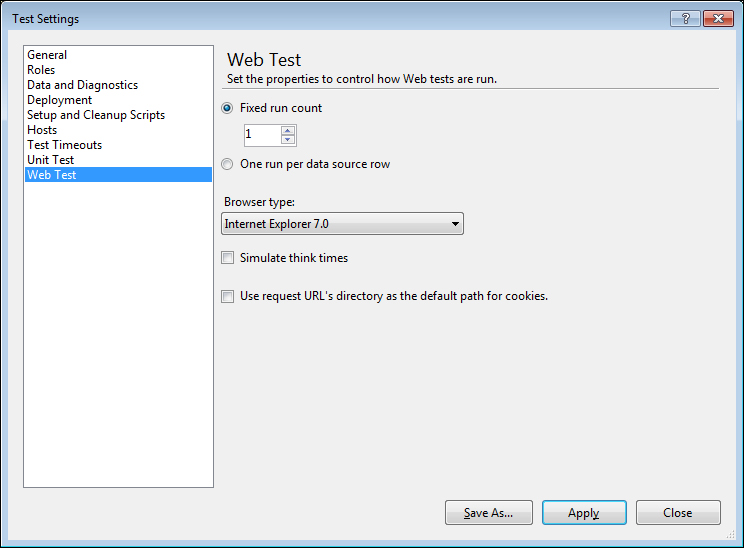
- Number of Run Iterations: This is to set the number of times the test has to run. There are two options for this: one is to set it to a specific number of times, which can be greater than 1. The second option is to set it to take the number of rows available in the data source associated to the web test and run once per row. This property does not apply to load test as load test is for the number of users and scenarios, not for iterations.
- Browser Type: This property is to set the type of browser to use for the requests. The drop-down menu contains the list of different browser types to choose from.
There are a couple of other options to choose the simulation of the think times and to use the request URL directory as the default path for cookies.
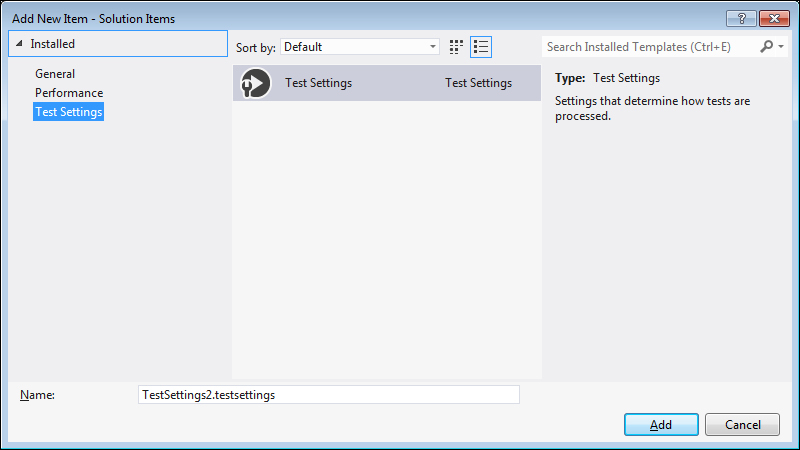
New test settings can be created instead of the default settings and can be made active for automated tests. To create new test settings, select the solution from the solution explorer, right-click and select Add New Item to choose an item from the installed templates. There are three different categories of templates, such as General, Performance, and Test Settings. Choose Test Settings from the category and select the test settings from the available templates as follows:
After adding the new test settings, edit the configurations required for testing. There may be multiple test settings created in the solution but at any point, only one test setting can be active. To pick the active setting, choose the settings file and then right-click and choose Active Load and Web Test Settings.
When all the required settings are done and you have finished recording the required requests, running the test is very simple. Before the test execution, define the required context parameters, extraction, and validation rules and add the data sources and bind the Form POST or QueryString parameters. Use the Run Test option in the WebTest editor toolbar to start running the test.
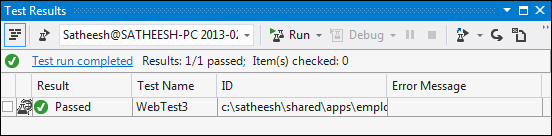
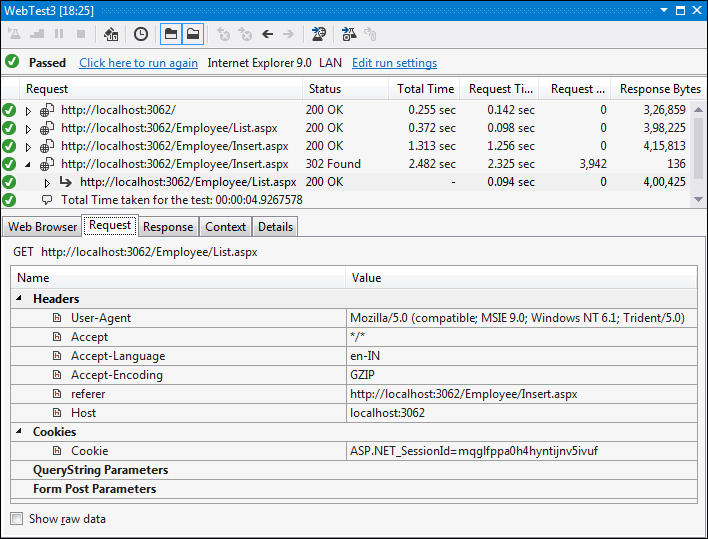
Now you can see the test execution and the progress of each request in the web test window. After completing the execution, the result window displays the success and failure marks against each request. If any of the requests in the test fails, the entire test is marked as failed. Here, the Test Result window shows the end result of one of the tests.
If there are multiple requests in the test, the Test Result details window shows the result for each request. It shows the status of the request as well as the details of the request, response, context, and the details of information gathered during the testing. These details are shown as a tabbed page with details as shown here:
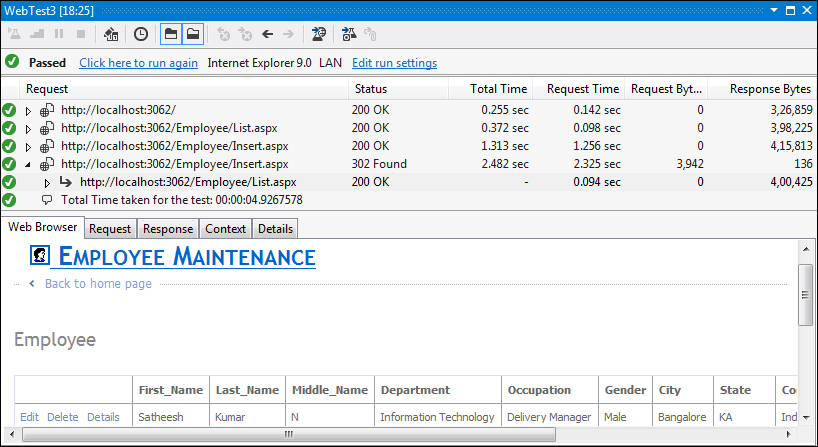
This is the same web page used by the request. This tab displays the entire web page used just to get the view of the request.
The Request tab contains all the information about the request, such as Headers, Cookies, QueryString parameters, and Form POST parameters as follows:
This tab section shows the response for the requested web page. The result is shown as a plain HTML text with headers and the body of the web response. There is also an option to view the response in an HTML editor.
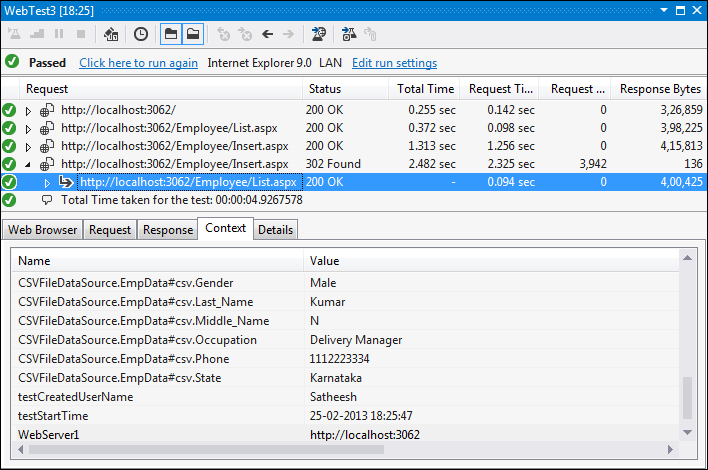
This section is very important to note as all the runtime details assigned to the test are being captured and shown here. From the following image, you can notice the values picked from the data source are assigned to the parameters values. Also, the context parameters that were created just before Test Run and the values assigned to the parameters during runtime are also shown here. This is the place to visually verify all the values that are assigned to the context parameters and form fields.
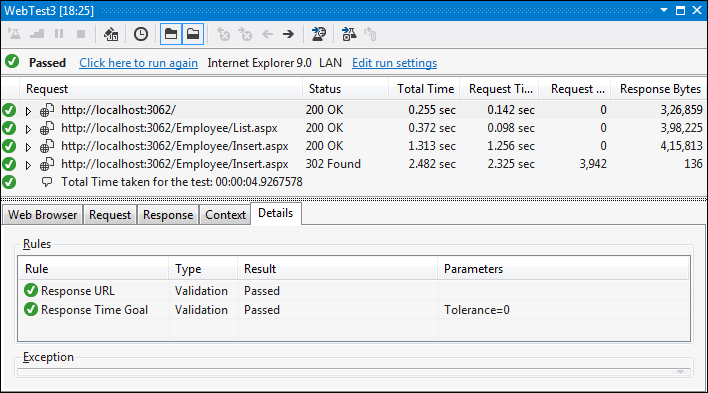
The Details tab shows the status of the rules that are executed during the test. The following image shows that all the rules created as explained in the rules section has executed successfully. The Details section also shows the type of the rule and the parameter values fetched during test execution.
The toolbar in the web test window provides an option to re-run the test again. This is useful to re-run the same test and find if there are any changes to the source data or the configurations. There is another option to edit the run settings. This option opens the same Web Test Run settings window used by the test settings. This is another shortcut to change the web test settings for the current test.