
16
MS-WORD 2007
Contents
- Introduction
- Starting MS-Word
- MS-Word screen and its components—Office logo button, quick access toolbar, ribbon, tabs, groups, icons, ruler bar, status bar, scroll bar, work area
- Office button—New, open, save, save as, print, prepare, send, publish, close
- Ribbon—Home, insert, page layout, references, mailings, review, view, add-ins
- Home tab—Clipboard, font, paragraph, styles and editing
- Insert tab—Pages, tables, illustrations, links, header & footer, text, symbols
- Page layout tab—Themes, page setup, page background, paragraph, arrange
- References tab—Table of contents, footnotes, citation and bibliography, captions, index, table of authorities
- Mailings tab—Create, start mail merge, write and insert fields, preview results, finish
- Review tab—Proofing, comments, tracking, changes, compare, protect
- The view tab—Document views, show/ hide, zoom, window, macros
- The help
- Solved examples—Magazine cover, resume, article with three columns, mail-merge, macro, project report
Why this chapter
One of the applications for which the computer is quite often used is to create documents, like, an article, letter, brochure, web page, newsletter, project report and thesis. The documents may include images, graphics, sound elements and animation, in addition to the text. You use word processing software for creating the different kind of documents. MS-Word is commonly used word processing software. The purpose of this chapter is to introduce you to MS-Word.
16.1 INTRODUCTION
Word processing software is used for the creation of text-based documents. The word processing software provides tools for composing, editing, formatting, and printing of documents. In addition to text, documents can also contain images, pictures, graphics elements, sound clips and animations. The document can be a poster, report, letter, brochure, web page, newsletter, or, long document consisting of an index and links to various chapters.
There are many software packages available, to do the job of word processing. Some of the word processing software that works in DOS environment are WordStar, Easy Word, and Word Perfect. Examples of some more word processing software are-AppleWorks Word Processing for Windows and Mac, Applix Word for Linux, Microsoft Write for Mac, Notepad for Windows, and Star Office Writer. Some examples of online word processors are Google Docs, PDSText (a free online Unicode text editor for Indian Languages), Sun OpenOffice, and ZohoWriter.
MS-Word is a word processing software used in the Windows environment. It is one of the most popular word-processing software these days. MS-Word is a part of a bigger software package called MS-Office. In addition to MS-Word, MS-Office includes other software like MS-Excel (for spreadsheet), MS-PowerPoint (for presentations), and MS-Access (for database management).
MS-Word is a Graphical User Interface (GUI) based software, which makes it easy to use and understand. It has a wide range of tools and commands that are used for formatting the documents. Some of the important features of MS-Word are as follows:
- A document can be created and later edited, whenever required. Editing includes addition of text, modifying the existing text, or deleting a part of text. Editing can be done on a word, sentence, paragraph, page, or the complete document.
- The complete document or a part of the document can be reformatted.
- Some of the options available for the formatting of a document are—changing the font size, font color and font style, addition of page numbers, page header and footer, and headings.
- Various tools like spell check for checking spellings, mail merge for generating multiple copies of letters with different addresses, macros, and track changes for making corrections are available.
- MS-Word allows tables to be created and included in the text.
Graphical pictures can be included in a document using pictures from the Clip Art and the pictures imported from other files.
This chapter discusses the usage of MS-Word software in detail. There are many versions of the MS-Word software. Here, we will discuss MS-Word 2007.
In this chapter, the following terminologies are used, while working with the mouse:
- Pointer—a mouse pointer
- Click—press left button of mouse once
- Double-Click—press left button of mouse twice
- Select—move the pointer of mouse and keep the left button of the mouse pressed over the area that you want to select. The selected area will appear in a dark background.
- Quick Menu—Right click (press right button of mouse once) to get a quick menu
We enclose the command in braces <Command> to represent the command to be clicked.
16.2 STARTING MS-WORD
As already stated, MS-Word software is installed on the Windows operating system. MS-Word is menu-driven, GUI-based software. While working with MS-Word, using a mouse makes working on the MS-Word simpler although you can work to some extent using the keyboard also.
To start using the MS-Word software, any one of the following steps needs to be performed—
- If a shortcut key to MS-Word is available as an icon (a small picture that represents an object or program) on the Desktop, as shown in Figure 16.1, then double-click the icon, OR,

Figure 6.1 MS-WORD 2007 icon
- <Start> <Programs> <Microsoft Office> <Microsoft Office Word 2007>. (Figure 16.2)
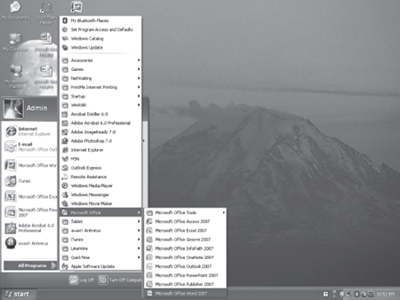
Figure 16.2 Start MS-Word 2007
16.3 MS-WORD SCREEN AND ITS COMPONENTS
The user interface of MS-Word 2007 is quite different from the previous versions of MS-Word. It has an improved navigation system which is easier to use. The main screen, as shown in Figure 16.3, consists of different components like the Ribbon, Ruler bar, Status bar, Scroll bar, and Work Area. The orientation of the Word 2007 layout and its general features are described as follows:
- The Office Logo Button
 at the top left corner contains many task buttons for the document such as, New, Open, Save, Save As, Print, and Close. This button also has a list of the recent documents. Some of these commands include an expandable menu to provide additional options. (The Office Button replaces the File menu in earlier versions of Word).
 - The Quick Access Toolbar
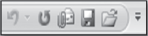 to the right of the Office Logo button. It contains shortcuts for the commonly used tools, like, Save
  , Undo
  (reverses the last change), and Repeat
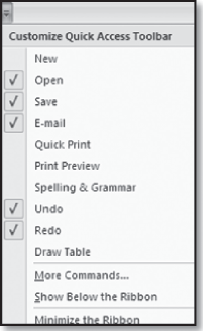
  (repeats the last action). The buttons that you wish to be displayed can be selected from the
  Customize Quick Access Toolbar.
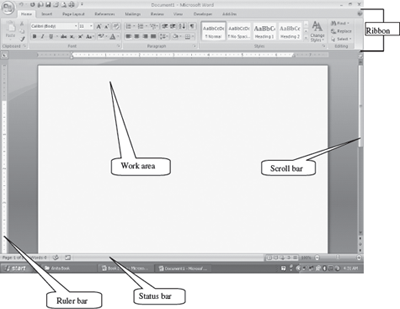
Figure 16.3 MS-Word 2007 screen
- The Ribbon is a set of tools and commands across the top of the screen (Figure 16.4). It consists of a panel of commands which are organized into a set of tabs (also known as the Tab Bar). Within Tabs, Groups are available, which are designated by the names located on the bottom of the Ribbon. Each group has icons for the associated command. The Ribbon (Tabs, Groups, and Icons) replaces traditional toolbars and menus of earlier versions of the MS-Word.
- The Tabs (Home, Insert, Page Layout, etc.) on the Ribbon contain the buttons needed to edit characters, text, and layout, as well as the additional tools that you may need.

- Each Tab consists of different Groups, like the Home tab has five groups namely, Clipboard, Font, Paragraph, Styles and Editing.


Figure 16.4 The ribbon
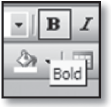
- Each group has Icons for the commands, which will actually format the document or bring up a menu. To know the function of an icon button (or command), leave the pointer on a button for a few seconds, the function of that button will appear in a small box below the pointer. For example, leaving the icon on
 displays “Bold (Ctrl+B)”.
 - Ruler Bar—MS-Word has two rulers—Horizontal and Vertical. The Ruler Bar allows formatting of horizontal and vertical alignment of text in a document, by adjusting the tabs, indents and margins.

- Status Bar—It displays information about the currently active document. The information includes the current page number, total number of pages and the number of words in the document, zoom slider
 etc. Right-click on the status bar will show you the Customize Status Bar (Figure 16.5) pop-up menu. You can select the options you want to view on the status bar.
 - Scroll Bar—There are two scroll bars—horizontal and vertical. They help to scroll the content or the body of document. Scrolling is done by moving the elevator button along the scroll bar, or by clicking on the buttons with the arrow marked on them to move up and down, and left and right of a page.
- Work Area—It is the working area in the document window where the text of the document is typed.
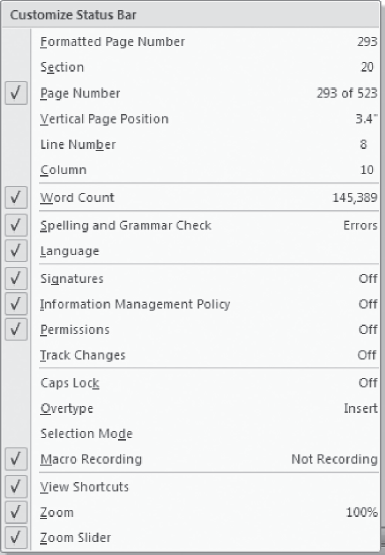
Figure 16.5 Customize status bar
16.4 THE OFFICE BUTTON
The Office Button is used to perform file management operations on the file (i.e. the document). It contains commands that allow the user to create a new document, open an existing document, save a document, print a document etc. The Office button contains nine commands, namely, New, Open, Save, Save As, Print, Prepare, Send, Publish, and Close. The Office button commands are shown in Figure 16.6.
Table 16.1 briefly describes the different commands available in the Office Button.
Some of the common operations that are performed using the commands of the Office Button are described as follows:
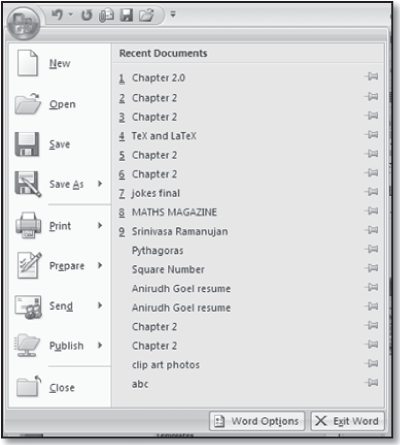
Figure 16.6 The Office button commands
| Office Button Commands | Description |
|---|---|
| New | Creates a new blank document, a blog post, class report etc. |
| Open | Opens an already existing document |
| Save | Save a document for which a file name and location has already been specified |
| Save As | Use when you save a document for the first time or, to a different location, or at the same location with different name or with a new type of document. Here, you specify the filename for the document, the location where the document is to be stored, and the save type of the document. You can save the document as a Word document, Word 97-2003 document, Word Template etc. |
| Print, Quick Print, or Print Preview the document. You can set properties like print quality, paper type, number of copies, color or grayscale, etc. Preview to see how the printed document will look after printing. | |
| Prepare | Prepare the document for distribution. View document properties, encrypt document, grant permissions etc. |
| Send | Send a copy of the document to e-mail or to Internet Fax |
| Publish | Publish the document as a blog, create a new site for the document etc. |
| Close | Close an open document |
Table 16.1 Home tab commands description
- Saving a Document for the First Time: <
 > <Save As>. You can save the document as a Word document, Word 97-2003 document, Word Template etc. (Figure 16.7). On selecting one of the Save As options, Word will display a dialog box. In the field next to File name, type a name with which you want to save the document. Navigate in the top portion of the dialog box to the folder where you want to save the document (choose the right directory where you want to save the file. You can use
  to go up in the directory Use
  to create a new folder). You can also specify the save type of the document (Figure 16.8). Once you have saved your document for the first time, you can save further revisions by selecting the <> <Save>, or by clicking on the Save button in the Quick Access Toolbar.
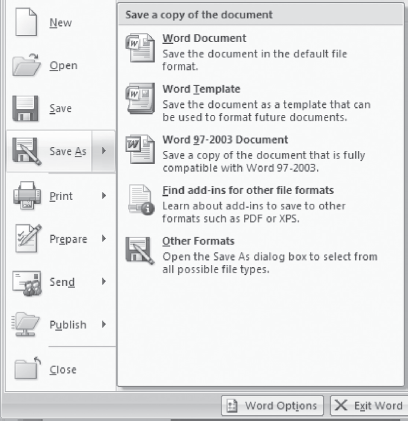
Figure 16.7 Save as option
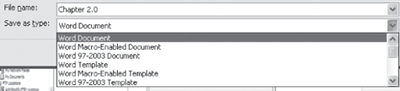
Figure 16.8 File save types
- Saving a Document Under a Different Name: Open the document by selecting the <> <Open> Next, <> <Save As> A dialog box will appear. Navigate to the folder where you want to save the document and type in a new name for the document. Select the Save button. You now have two copies of the document, one with the original name, another with a new name.
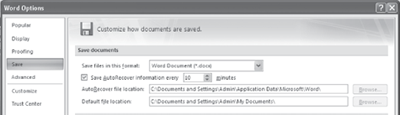
- Crash Protection: <> <Save As> <Tools><Save Options>. Select the boxes for Save Auto Recover Information every <enter the minutes>. Reset the Minutes from 10 to 1. MS-Word would be able to recover a file one minute old.
- To Preview your Document before Printing: <> <Print> Select Print Preview. You can switch between viewing one page and multiple pages, zoom in (it will turn into a magnifying glass with a + symbol inside) and zoom back out, place your cursor on the document and this time your cursor will turn into a magnifying glass with a-symbol inside.
- To Print: <File> <Print> Make settings like number of copies and pages you want to print. (Figure 16.9). From the Print dialog box you can make further settings like:
- Print What: If the document you want to print has lot of track changes and inserted comments, you can choose the document to be printed from “Print What” i.e. the final draft of the document, the Document Showing Markup that prints the original document with all of the visible edits and comments.
- Zoom: If the document is formatted in a different size than your paper, use Zoom of the Print dialog box. Use the Scale to Paper Size drop-down menu to select the paper size. Zoom feature is also used to print multiple pages on a single sheet. Use the Pages per Sheet drop-down menu to print two, four, six, eight, or even sixteen pages onto one sheet of paper.
16.5 THE RIBBON
The Ribbon of MS-Word has the Office button, and eight tabs, namely, Home, Insert, Page Layout, References, Mailings, Review, View and Add-Ins. Each tab further consists of the groups, and the groups contain icons. Icons are a pictorial representation for a command. Each tab is self-explanatory; for example, if you want to insert any item into the document, click on the Insert tab. The groups and icons related to Insert are displayed. Select the icon for the command which you want to use. The different tabs in MS-Word and the groups within them are as follows:
- Home: Clipboard, Font, Paragraph, Styles, and Editing
- Insert: Pages, Tables, Illustrations, Links, Header & Footer, and Text
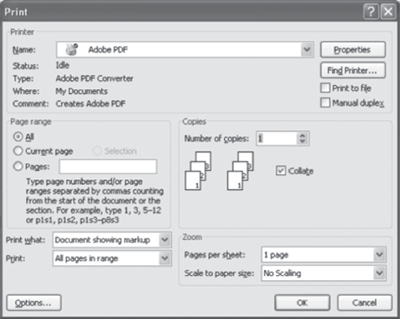
Figure 16.9 Print dialog box
- Page Layout: Themes, Page Setup, Page Background, Paragraph, and Arrange
- References: Table of Contents, Footnotes, Citations & Bibliography, Captions, Index, and Table of Authorities
- Mailings: Create, Start Mail Merge, Write & Insert Fields, Preview Results, and Finish
- Review: Proofing, Comments, Tracking, Changes, Compare, and Protect
- View: Document Views, Show/Hide, Zoom, Window, and Macros
The Add-Ins Tab can contain supplemental functionality that adds custom commands and specialized features to MS-Office products like MS-Word, MS-Excel, MS-PowerPoint. Automation add-ins, application add-ins, smart tags, and COM add-ins are some examples of add-ins. MindManager Pro 6, VisionArchive 2.0, and KwikTag 3.4 are some of the Microsoft approved add-ins for the Microsoft Office.
The commands in the Ribbon have various symbols associated with them, as shown in Figure 16.10. These symbols are interpreted as follows:
- Simple Command—The command starts executing when it is clicked.
- Command Followed by Arrow—Clicking on the arrow
 displays more options for the command.
| Selecting a command | |
|---|---|
| Ways to select a command | Using a command |
| Click on a Tab + Click on a Icon | Click on any of the Tabs like Home, Insert etc. From the displayed icons, click on the icon you want to use. |
| Shortcut key Ctrl + letter | Some commands have shortcuts where you can press the Ctrl key and a certain letter. Some commonly used shortcuts are — |
| • Paste: CTRL + V • Copy: CTRL + C • Undo: CTRL + Z • New document: CTRL + N • Open document: CTRL + O • print document: CTRL + P |
|
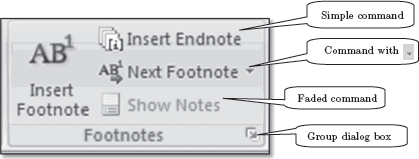
Figure 16.10 Command symbols
- Faded Command—A faded command means that it is not available currently.
- Group Dialog Box—Clicking on this
 symbol displays the dialog box for the group.
The following sub-sections describe the different tabs in detail:
Working with MS-2007
- Live Preview applies temporary formatting on the selected text or object when the mouse moves over any of the formatting buttons. This allows you to preview how the text will appear with this formatting. The temporary formatting is removed if the mouse pointer is moved away from the button.
- Mini Toolbar pops up whenever text is selected. It provides easy access to the most commonly used formatting commands in Word. The Mini Toolbar also appears when you right-click on a selection of text.
- File Format for the documents created in Word 2007 is .docx (compared to .doc in previous versions). This format is based on XML. It uses the ZIP file container, which compresses the document up to 75% smaller than previous Office file formats. All previous versions of Word documents can be open in Word 2007.
16.5.1 The Home Tab
The Home Tab contains commands for the formatting of text. The Home Tab is also used for the editing of the document like find and replace, and to perform clipboard operations such as cut, copy and paste on the document. Figure 16.11 shows the Home Tab.

Figure 16.11 The home tab
There are five groups within this tab, namely, Clipboard, Font, Paragraph, Styles and Editing.
- The Clipboard group contains commands to cut, copy and paste text. The Format Painter is also present here.
- Font group commands allow change of the font - font face, style, size, effects (Superscript, Subscript, and Shadow etc.), color and character spacing. You can change these options before or after you type your text. If case of after, you need to select the text first.
- Paragraph group is used to change paragraph settings — alignment, indents, spacing, and pagination like spacing 1.5 lines, double spacing, indentation, and, spacing before and after a heading. Move your cursor to the line or paragraph you want to change.
- The Styles group allows quickly choosing a style and applying the style.
- Editing group contains commands to select, find and replace text.
Table 16.2 gives the commands in the different groups (in left to right order) of Home Tab along with a brief explanation.
To apply formatting to an already written text, first select the text and then apply the formatting
Here, we describe briefly some of the operations that are performed using the commands of the Home Tab.
- Move Text: Select and highlight the section you want to move <Home><Clipboard>< <
 >. Move the cursor to the place you would like the text to be inserted <Home><Clipboard><
 >
> - Copy Text: Select and highlight the section you want to copy <Home><Clipboard> <
 > Move the cursor to the place you want the copied text to be inserted <Home><Clipboard> <
 >
> - Find and Replace: This is used to find a text, style or paragraph and then replace it with the new one. This option is useful if you want to find text strings at multiple places in the document, and replace all of them with the new one.
| Home Tab Groups | Description |
|---|---|
| Clipboard | 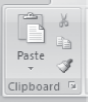 • Cut the selected text from the document and put into clipboard for later retrieval. • Copy the selected item or text to the clipboard. • Format painter copies formatting from one place and applies it to another (To apply same formatting to many places, double-click the format painter button) |
| Font | 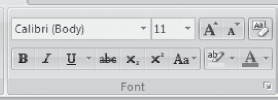 • Grow Font, Shrink Font • Clear Formatting (Clear all formatting from selection, leave only plain text) • Bold, Italics, Underline • Strikethrough (draw a line through middle of selected text), Subscript, Superscript • Change case. You can change the case — sentence, lower, upper, title, or toggle. Select the text and click on an option • Text highlight color, Font color |
| Paragraph | 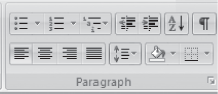 • Numbered list (choose different formats) • Multilevel list (Choose from different styles) • Increase or decrease indent of the paragraph • Sort alphabetically or numerically • Show paragraph markups • Align text left, right, centre, and justify • Change spacing between lines • Color background behind selected text • Customize the borders of selected text. Add borders and shading. There are options to select for setting, style, color, width, fill color, and pattern. You will see a preview at the right. To remove a border or shading, select None. |
| Styles | 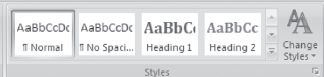 • Change style, color and font used in the document |
| Editing |  • Replace text in the document (The user can go to a page, section etc. when using find and replace) • Select text or objects in the document |
Table 16.2 Home tab commands description
To Select Multiple Text Entries that are scattered words, phrases, or paragraphs for the same action, select the first item with your mouse as you normally would. For subsequent items, press the CTRL key before you select them. Now you can perform any operation like italicize, boldface, or highlight on all the selected items.
16.5.2 The Insert Tab
The Insert Tab contains commands for inserting objects of many kinds in a document. The commands in this tab are used to add pages, tables, and images. It also includes commands to build an equation in the document, add symbols, special text, links, and, headers and footers. Figure 16.12 shows the Insert Tab.

Figure 16.12 The insert tab
There are seven groups within this tab, namely, Pages, Tables, Illustrations, Links, Header and Footer, and, Text and Symbols.
- The Pages group contains commands to insert a cover page, blank page or a page break.
- Tables are used to draw and insert tables.
- Illustrations group allows insertion of pictures, clip art, shapes, smart art, and charts.
- The Links group is used to insert a hyperlink, bookmark, and cross reference.
- The Header and Footer group allows insertion of a header, footer, and page numbers.
- The Text group contains commands to insert a text box, word Art, date, and time.
- The Symbols group is used to insert symbols, and build mathematical equations.
Some of the Tabs appear only when you use them; like Picture Tools tab, Drawing Tools Tab, Table Tab and Chart Tools Tab
Table 16.3 gives the commands in the different groups of the Insert Tab along with a brief explanation.
The Insert tab is used to insert a page break, a diagram etc. When a command of the Insert tab is used, insertion takes place at the location where the cursor is present right now. So, before inserting the item, place the cursor at the location where the item is to be inserted. When you use the commands of the insert tab for insertion, you will see that most of the times, a dialog box will open which allows you to make specific settings, as per your requirement. Here, we will not discuss using the dialog boxes as they are self-explanatory, and are easy to use. Some of the operations using the Insert Tab commands are described below—
- To Create Headers and Footers—<Insert> <Header & Footer>. You will see a Header and Footer command. A Header and Footer tab is opened which allows creation of a Header and Footer, enter text or graphics into the Header or Footer area, insert page numbers, time or date, file name, author name, etc.
Insert Tab Groups Description Pages • Insert a fully formatted cover page are available).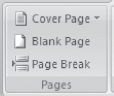
• Insert a blank page at the current cursor position
• Insert a page break. Start the content located at the current cursor position on the next page.Tables • Insert or draw table in the document (convert text to table, insert an Excel spreadsheet, insert from one of the built-in tables). When a table is drawn, a Table Tool Design Tab (Figure 16.13) and Table Tools Layout Tab opens, which allows you to select Table Style options, Table Styles, and Table Borders.
Illustrations • Insert picture from a file. When a picture is inserted, a Picture Tool Format Tab opens (Figure 16.14) which contains commands to format the picture.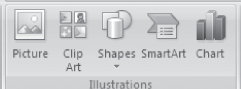
• Insert clip art into the document (sounds, movies, and drawings) readymade shapes (lines, arrows, flowchart symbols etc.)
• Insert a smart art graphics
• Insert a chart (bar graph, pie chart, line area, surface etc.)Links • Insert a hyperlink. Hyperlink to an existing file or web page, any place in the same document, to a new document, or to an email address. Target frame specifies the frame in which you want the hyper linked document to appear. To hyperlink to the same document, first create a bookmark at the location where you want to hyperlink, and select the bookmark to create hyperlink. A hyperlink is displayed in a blue color.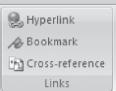
• Insert a bookmark. Identifies a location or selection of text that you name and identify for future reference. For example, you might use a bookmark to identify text where you want a hyperlink to reach.
• Insert cross referenceHeader and Footer • To edit the contents of the header. The header will appear at the top of each page. You can choose the format of the header from the built-in ones.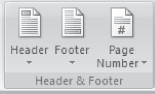
• To edit the contents of the footer. The contents of footer will appear at the bottom of each page. You can choose the format of the footer from the built-in ones.
• Insert page number into the document at the top, bottom, or at the margins etc. You can select the position, alignment and format of the page numbers.Text • Insert pre-formatted built-in text box or draw a text box is inserted, a Text Box Tools Format Tab contains commands to format the text box.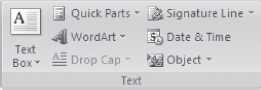
• Insert useful parts of content like fields
• Insert a signature line that specifies the person’s name who will sign it
• Insert decorative text in the document, and, date and time into the document
• A Drop Cap is an oversized capital at the beginning of a document or section. To make the first letter of a document large, select the letter and then use Drop Cap.
• Insert an embedded objectSymbols • Insert common mathematical equations or build your own equations (a new toolbar appears to insert an equation)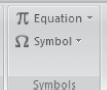
• Insert symbolsTable 16.3 Insert tab commands description

Figure 16.13 Table tools design tab

Figure 16.14 Picture tools format tab

Figure 16.15 Text box tools format tab
- Insert Bookmarks—Position your cursor where you want to insert the bookmark in the document. <Insert> <Links> <Bookmark>. In the dialog box, give the bookmark a name, descriptive of the text or location. Click Add. To return to a bookmark, open the Bookmark dialog box, select one from the list, and click Go To.
- Insert Hyperlink—<Insert> <Links> <Hyperlink>. To link to another location in the same document, click Place in This Document option under Link to; In the dialog box’s inner window, select a heading or existing bookmark from the document diagram. To link to another document, click the Existing File or Web Page option. Navigate to the proper folder and select the file’s name.
- To Insert Page Numbers—<Insert> <Header & Footer><Page Number>. For more page number options, click on the Format button. To suppress page number on first page, uncheck the Show Number on First Page checkbox.
- Insert File—Insert the contents of file B into file A. Open file A and place your cursor at the location where you want to insert the contents of file B. Select <Insert> <Text> <Object> and use the dialog box to navigate to file B. Select it, and click on Insert button. The contents of file B will be included in file A at the position of the cursor in file A.
To see a command in action; let’s say you want to insert a picture in your document,
- <Insert> <Picture>
- Choose between stock pictures or navigate to your own folder of images.
Click Insert, the selected image appears in your document
16.5.3 The Page Layout Tab
The Page Layout Tab contains commands to apply themes, change page layout, adjust line spacing, and also to adjust background by creating borders or changing page color. The Page Layout Tab is shown in Figure 16.16.

Figure 16.16 The page layout tab
There are five groups within this tab, namely, Themes, Page Setup, Page Background, Paragraph, and Arrange.
- The Themes group contains commands to change the overall design of the document including fonts and colors.
- Page Setup is used to set the margins, breaks, number of columns in a page, line numbers etc.
- Page Background group allows choosing a page background color, and page borders.
- The Paragraph group is used to make settings for the paragraph like indentation, and line spacing.
- The Arrange group is used to arrange the wrapping of text around the selected object, to position text in context of the selected object, and much more.
Table 16.4 gives the commands in the different groups of Page Layout Tab along with a brief explanation.
| Page Layout Tab Group | Description |
|---|---|
| Themes |  |
| Page Setup | 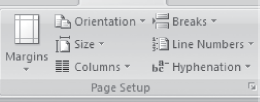 • Select orientation between • Select a paper size like A3, A4, letter etc. • Add line numbers on the margin alongside each line • Split text into two, three, left or right columns. You can specify the number of columns, column width and spacing, equal column width, line between columns, and apply to whole document or this point forward. • Turn on hyphenation, which allows the word to break line between the word syllables |
| Page Background | 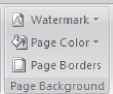 • Choose a color for the background of the page. You can choose from fill effects like gradient, texture, pattern, and picture • Add or change the border around the page |
| Paragraph |  • Change spacing between paragraphs by inserting space above and below the selected paragraph |
| Arrange |  • Bring the selected object in front of all other objects, or at the back of all other objects. • Change the way the text wraps around the object • Align the edges of multiple selected objects • Group objects together so that they can be treated like a single group • Rotate or flip the selected object horizontally, vertically, by 90° etc. |
Table 16.4 Page layout commands description
Some of the operations that are performed using the commands of the Page Layout tab are briefly described here.
- To Change Page Margins: For left or right page margins, point to a margin boundary on the horizontal ruler until it changes to a double arrow, and drag the margin boundary to the right or left. For top or bottom page margins, point to a margin boundary on the vertical ruler until it changes to a double arrow, and drag the margin boundary to the top or bottom.
- To Specify Exact Page Margins: <Page Layout> <Page Setup><Margins>. You can change either top, bottom, left, or right margins by clicking in the appropriate text boxes or on the arrows next to the numbers in Custom margins.
16.5.4 The References Tab
The References Tab contains commands for adding references of all kinds to a document. The commands in this tab are used to add Table of Contents, Bibliography, Index etc. The References Tab is shown in Figure 16.17.

Figure 16.17 The References tab
There are six groups within this tab, namely, Table of Contents, Footnotes, Citation & Bibliography, Captions, Index, and Table of Authorities.
- The Table of Contents group contains commands to create and update table of contents, and add text to it.
- Footnotes are used to insert or navigate footnotes and endnotes.
- Citations & Bibliography group allows insertion of citations and bibliography.
- The Captions group is used to insert captions in a Figure or Table, and to refer to them.
- The Index group is used to insert or update an index. An index is a list of keywords that are present in the document and also the page numbers on which they appear.
- The Table of Authorities group contains command to insert a table of authorities. A Table of Authorities lists the cases, statues, and other authorities cited in the document.
Table 16.5 gives the commands in the different groups of the References Tab along with a brief explanation.
16.5.5 The Mailings Tab
The Mailings Tab contains commands that are required to create envelopes and labels, do a mail merge or formatting of business letters. The Mailings Tab is shown in Figure 16.18.
| References Tab Group | Description |
|---|---|
| Table of Contents | 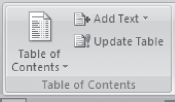 • Add the current paragraph as an entry in the Table • Update the Table of Contents so that the entry refers to the correct page number |
| Footnotes | 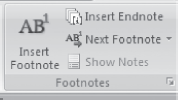 • Add an endnote to the document. Endnotes are inserted at the end of the whole document. • Next Footnote is used to navigate between the footnotes • Scroll the document to show where the footnotes and endnotes are located |
| Citations & Bibliography |  • Manage sources — to list all the citations cited in the document • Select the style of citation to use in the document • Add a bibliography which lists all the sources cited in the document |
| Captions | 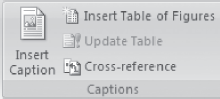 • Insert Table of Figures into the document • Update the Table of Figures • I nsert a cross-reference to a heading, figure or table |
| Index | 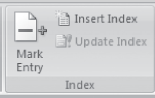 • Insert an index into the document and the page numbers on which they appear • Update the index |
| Table of Authorities |  • 1 nsert a Table of Authorities into the document • Update the Table of Authorities |
Table 16.5 References tab commands description

Figure 16.18 The mailings tab
There are five groups within this tab, namely Create, Start Mail Merge, Write & Insert Fields, Preview Results, and Finish.
- The Create group has commands to create envelopes and labels.
- The Start Mail Merge group contains commands to start the mail merge and select or edit the recipient list.
- Write & Insert Fields is used to write and insert the fields that are to be merged.
- Preview Result group shows how the merged documents will look like.
- The Finish group is used when you are satisfied with the preview and want to complete the mail merge.
The commands in the different groups of Mailings Tab along with a brief explanation are shown in Table 16.6.
Some of the operations using the Mailings Tab commands are described below:
| Mailings Tab Group | Description |
|---|---|
| Create | 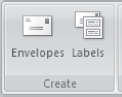 • Create and print labels |
| Start Mail Merge | 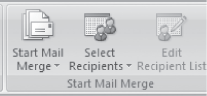 • Select the recipients of your letter • Make changes to the list of recipients |
| Write &Insert Fields | 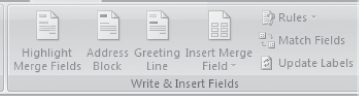 • Add an address to the letter • Add a greeting line to your letter (Dear Sir) • Add fields from the recipient list of your document (name, address etc.) • Specify rules to make decision-making ability in mail merge • Tells the meaning of different fields in the recipient list • Update information in the labels from the recipient list |
| Preview Results | 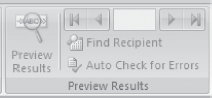 • To preview a specific record in the recipient list • Find by searching the text, and preview the specific record in the recipient list • Specify handling of errors when doing mail merge |
| Finish |  |
Table 16.6 Mailings tab commands description
- Make Envelopes: If you’ve included the recipient’s address at the top of a letter, you can prepare an envelope directly from the letter. <Mailings> <Create> <Envelopes>. MS-Word would have recognized the address and included it. If needed, input your Return Address. Click Add to Document, and the envelope will print as the first page of your letter.
- Make Labels. <Mailings> <Create> <Labels>. Type the text in this dialog box. Click Options to set the manufacturer and product code number of the label sheets you’ll be printing on; this will format your Word document with the sheet’s dimensions and layout. You can print a full page, or a single label, by targeting a row and column position on the sheet.
16.5.6 The Review Tab
The Review Tab contains commands for reviewing the document. The commands in this tab are used when there is a need to correct the contents of the document like tracking changes, checking spellings and grammar etc. The Review Tab is shown in Figure 16.19.

Figure 16.19 The Review tab
There are six groups within this tab, namely Proofing, Comments, Tracking, Changes, Compare, and Protect.
- The Proofing group has commands required for the proofing of document like the spelling and grammar checker, research etc.
- The Comments group contains commands to insert comments, and move back and forth among the comments.
- Tracking is used to track the changes made to the document. It contains commands to turn on the track changes, and to make settings for viewing the changes.
- Changes group contains commands to view the changes and accept or reject the changes.
- The Compare group is used to compare or combine different versions of the document.
- The Protect group contains command to protect the document by restricting its access.
The commands in the different groups of the Review Tab along with a brief explanation are shown in Table 16.7.
| Review Tab Group | Description |
|---|---|
| Proofing | 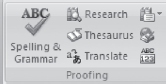 • Open Research Task Pane and search through research material • Thesaurus suggests word similar in meaning to the selected word • Translate the selected text into a different language • Enable screen tip that translates the word you pause at, into another language • Set the language used to check the spelling and grammar of the selected text • Find the number of words, characters, paragraphs and lines in your document |
| Comments | 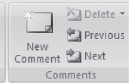 • Delete the selected comment • Navigate to the previous or the next comment |
| Tracking | 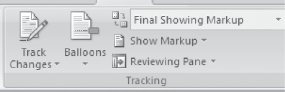 • Choose how to show the revision of the document • Choose how to show the proposed changes to the document • Choose the kind of markup to show in the document • Show revisions in a separate window |
| Changes | 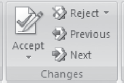 • Navigate to the previous and next revision in the document so that you can accept or reject it |
| Compare | 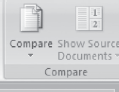 • Choose which source documents to show — the original document, the revised document or both |
| Protect |  |
Table 16.7 Review tab commands description
16.5.7 The View Tab
The View tab has commands that facilitate in viewing of document. The View Tab is shown in Figure 16.20.

Figure 16.20 The View tab
There are five groups within this tab, namely Document Views, Show/Hide, Zoom, Window and Macros.
- The DocumentViews group has commands to view the document in different modes like the print layout, full screen reading etc.
- The Show/Hide group contains commands to show or hide the ruler, gridlines etc.
- Zoom is used to view the document in smaller or larger sizes. You can zoom with two pages on a single screen, increase the view to 200%, and so on.
- Window group contains commands to view the windows like, splitting the window, arranging all open windows etc.
- The Macros group is used to create or view a macro.
The commands in the different groups of View Tab along with a brief explanation are shown in Table 16.8.
| View Tab Group | Description |
|---|---|
| Document Views | 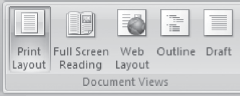 • View the document in a full screen reading view. It maximizes the space available for reading and comments • View the document as it would look as a web page • View the document as an outline and show the outlining tools. Outline symbols and indentations show how the document is organized • View the document as a draft to quickly edit the text. Certain elements of the document like the header and footer will not be visible in this view. |
| Show/Hide | 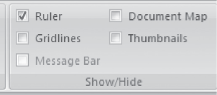 • Document map allows you to navigate the structural view of the document. It lists the headings of the current document. • Opens a Thumbnail pane which allows you to navigate a long document through small pictures of each page |
| Zoom | 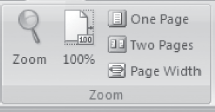 • Zoom the document to 100% of normal size • Zoom the document so that one page or two pages fit into a single window • Zoom the document so that the width of the page matches the width of the window |
| Window | 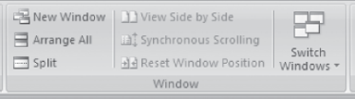 • Split the current window two parts to see the different sections of the document at the same time • View two documents side-by-side, synchronize their scrolling so that they scroll together • Reset the window position so that the two documents can be viewed side-by-side and share the screen equally • Switch to a different currently open window |
| Macros |  |
Table 16.8 View tab commands description
16.5.8 The Help
The Help button is located on the right most side of the Tabs in the Ribbon. Click on this button to get help for using any command of the MS-Word. On clicking on the help button, a screen as shown in Figure 16.21 appears. You can browse the Help for the command you want. You can also perform operations such as, search for a command and view Table of Contents.
16.6 SOLVED EXAMPLES
Here some examples are given, which show the generated output document.
Example 1: Design a Magazine Cover. You must include the features mentioned below:
(1) Page Border, (2) Select a background effect for the page, (3) Create a watermark, (4) Insert either a picture or clipart, and (5) Use WordArt.
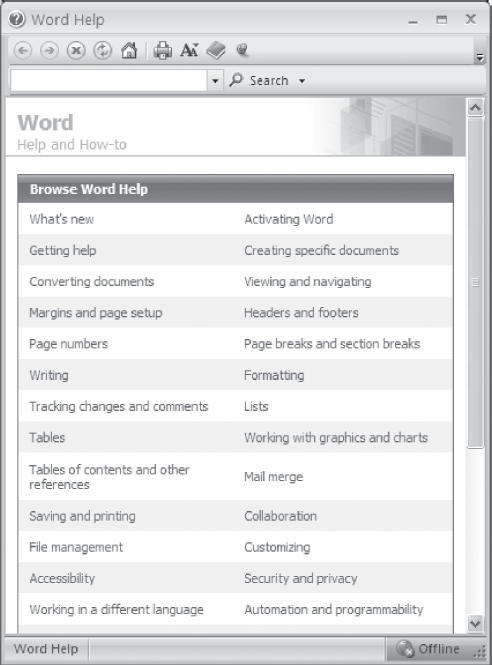
Figure 16.21 Word help
Solution 1:
- Open blank document. <><New>
- Page Border. <Page Layout> <Page Background> <Page Borders> <Art>
- Background effect. <Page Layout> <Page Background> <Page Color> <Fill Effects> <Texture>
- Watermark. <Page Layout> <Page Background> <Watermark>
- Insert Picture. <Insert> <Illustrations> <ClipArt>
- Use WordArt. <Insert> <Text> <WordArt>
- You can also use more options like Font Styles etc.
A sample is shown in Figure 16.22.
Example 2: Write your Resume. You must include the features mentioned below—
(1) Tables, (2) Alignment, (3) Bullets, and (4) At least 3 Font Styles and 3 Font Sizes.
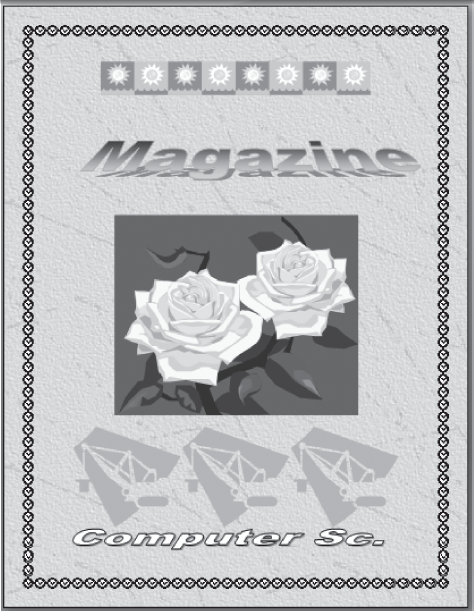
Figure 16.22 A magazine cover
Solution 2:
- Open blank document <><New>
- To Print Title. Select a Font. <Home> <Font> <Theme Font> (You can select the Font Style, size, effects etc.).
- To align title at the centre. Select the title. <Home> <Paragraph><
 >
> - To insert Bullets. <Home> <Paragraph><
 >
> - To insert Table. <Insert> <Tables>. Select the number of columns and rows for the table. <Insert Table>
A sample is shown in Figure 16.23.
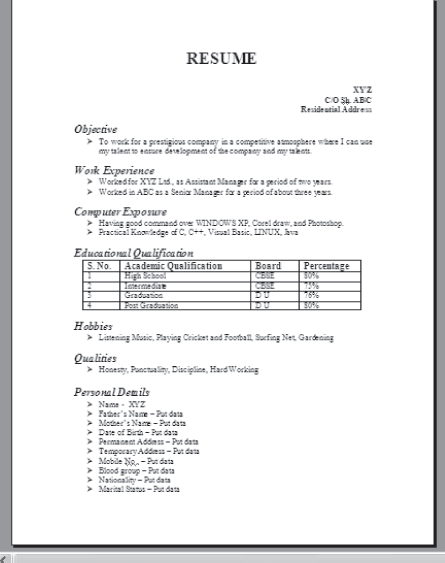
Figure 16.23 A resume
Example 3: Design an article of two pages for a magazine with three columns
- Use at least 3 different Font styles, 3 Font sizes, 3 Font colors, 3 Font effects
- Use Hyperlink, Pictures, WordArt
Solution 3:
- Open blank document. <><New>
- If you want the title to be in a single column, then first write the title. Select the font size, font style etc for the title. Press <Enter> key two times. Now select rest of the page and click <Page Setup> <Columns>. Select 3 columns.
- To get the first letter of the document big <Insert> <Text> <Drop Cap> <Drop Cap Options> <Dropped> <Lines to Drop> select 2.
- Insert Picture. <Insert> <Illustrations> <ClipArt>
- Create Hyperlink. To create a hyperlink, first create a bookmark, and then create a hyperlink to the bookmark.
- To Create Bookmark. Click at the location in the document where you want the hyperlink to reach when you click on the hyperlink. <Insert> <Links> <Bookmark> <Bookmark name> <Add>.
- To Create Hyperlink. Now click at the location in the document where you want to insert the hyperlink. <Insert> <Links> <Hyperlink> <Bookmark> Select the Bookmark name you inserted in the above step. <OK>
- Use WordArt. <Insert> <Text> <WordArt>
A sample is shown in Figure 16.24.
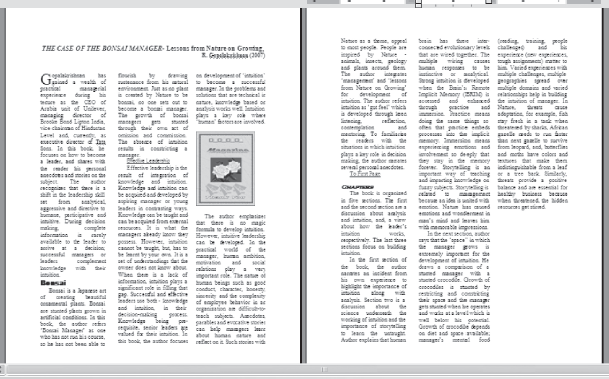
Figure 16.24 A magazine article
Example 4: Use mail-merge to submit your resume to three companies
Solution 4:
- Open blank document. <><New>
- <Mailings> <Start Mail Merge> <Step by Step Mail Merge Wizard>. A window opens on the right side of the screen. Now follow the six steps given below—
- Select Document Type—Select Letters (Figure 16.25)
- Starting Document—Select use the current document.
- Select Recipients—Select Type a new list. Create. (A window appears as in Figure 16.26. Enter the data).
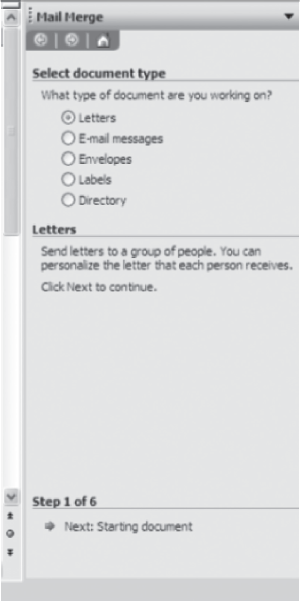
Figure 16.25 Starting mail merge
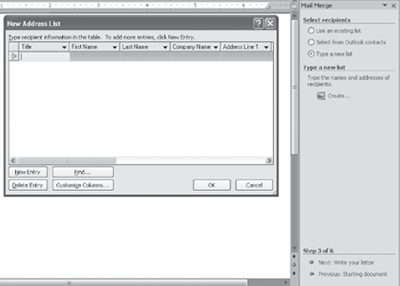
Figure 16.26 Creating new address list
- Write Your letter—Write your letter with address block, greetings etc, as shown in Figure 16.27.
- Preview your letter—Shows the letters merged with the mail addresses, as shown in Figure 16.28.
- Complete the merge.Will complete the merge.
Example 5: Use macro to design letter head of your college
Solution 5:
- Open blank document. <><New>
- <><Word Options> <Popular> Check
 on the Show Developer tab in the Ribbon. A Developer tab is displayed on the Ribbon
Show Developer tab in the Ribbon
on the Show Developer tab in the Ribbon. A Developer tab is displayed on the Ribbon
Show Developer tab in the Ribbon
- Start recording. <Developer> <Record Macro> Enter a name in <Macro Name>. Select the location to store in <Store macro in> <OK>. This will start the recording for the macro.
- Type the name of the college and insert the logo.
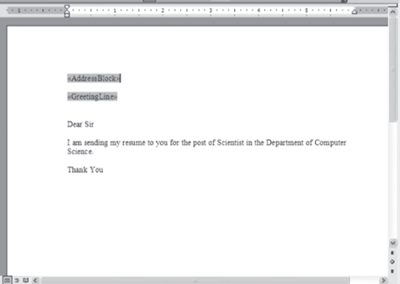
Figure 16.27 A mail letter
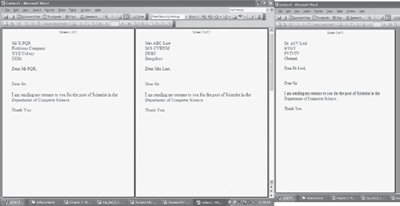
Figure 16.28 The merged mail
- Stop recording. <Developer> <Stop Recording>
- To run the macro. <Developer> <Macros>. Select your <Macro name> <Run>
A sample is shown in Figure 16.29.
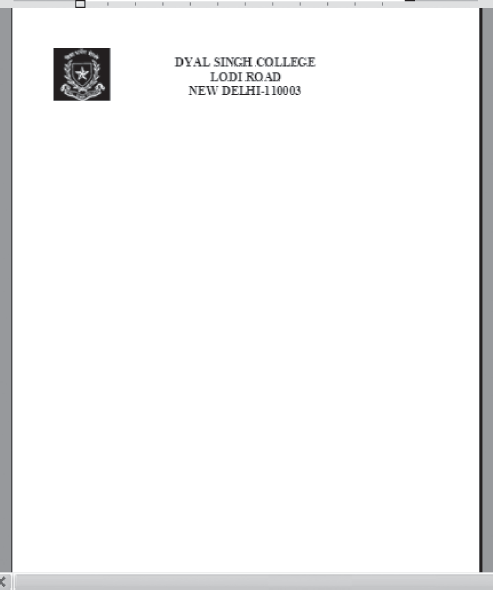
Figure 16.29 A sample macro
PS: You can also create macros from the View tab <View> <Macro>
Example 6: Use MS-Word to create Project Reports or Thesis
Solution 6: A project Report or thesis has the following specific documentation requirements:
- Page settings (Size, No. of columns, Page numbers, header or footer etc.)
- Different styles for headings and sub-headings
- Table of Contents
- Figures and Tables
- Bibliography
While writing the report, care has to be taken about the following points:
- All figure headings are written using the same format.
- All table headings are written using the same format.
- The font style of the different headings and sub-headings should be consistent in the entire document.
- The table of contents should get updated with the update of the contents of the document
- References to the bibliography should get updated with the change in the bibliography.
The steps that must be followed while writing a project report or thesis are as follows:
- Open a blank document <File> <New>
- First create a template for the document; i.e. select the bullets and numbering and customize the various headings in terms of size, color, font style etc., the style to number the figures and tables etc. Then <Save As> <Word Template> to save the template.
- Use <References> <Insert Caption> to insert a bibliography. Use <References> <Cross-reference> to refer to the bibliography in the text. Updating the bibliography will automatically update the cross reference made to the bibliography. Similarly, to refer to a figure or table, use the cross-reference.
- After you have created the template, use the template and type-in your report or thesis.
EXERCISES
- Design a “Thank You” card.
- Design a “Seasons Greetings” card.
- Design a “Birthday Invitation” card.
- Design a “Get Well Soon” card.
- Design a “Happy Birthday” card.
- Design a poster inviting all students of your college to the Computer Festival.
- Design a notice cum poster inviting all fresher for the fresher’s party.
- Design a notice cum poster inviting seniors for the farewell party.
- Design a certificate that you receive at the end of the Semester for holding a position in the Computer Society.
- Design your mark sheet.
- Design the Time Table given to you at the start of the Semester without grid lines.
- Prepare the list of practicals you shall do during the semester in an Index form.
- Create a 5-page document. Use hyperlinks. Insert Bookmarks.
- Prepare a notice giving you the schedule of your exams.
- Use mail merge to print envelopes.
- Convert Text to Table.
- Create an organization chart of your Computer Society.
- Create a web page having your own details using MS Word.
- Open two documents in MS-Word and view them together.
- Compare two documents using MS-Word.
- Create thumbnails for your project.
- Write 10 mathematics equations.
- Use the Letter Wizard to write a letter to the principal asking for a two day leave.
- Add addresses for five recipient of your letter in Q 23.
- Use Macro to design the Computer Society Certificate.
- Create a table to show the rate list of the Mother Diary Fruit and Vegetable Vendor. After you have created the table use the following — (1) Split the table to show the Vegetables and Fruits separately, (2) Split a Cell, and (3) Merge two cells.
- Sort the Table created in Q 26 in decreasing order of rate list.
- Insert a row in Table of Q 26, to write the Total of the “Rate” column. Find the total of all the rates.
- Insert a column in the leftmost side of the table in Q 26 to include the S.No.
- While printing the table in Q 26, hide the gridlines.
- Convert the Table into a Text separating the Item name from the rate list by a hyphen “ ‐ ” in Q 26.
- Type name and addresses of 10 students separated by a comma. Now convert this text into a table. For example,
Ashima, AkashDarshan Society
Anirudh, Supreme Society
Ajay, Ashiana Apartments
Some Extra Questions
- Enter a list of 5 things you have to do this week. Number the list. Select the list again and turn on the bullet. Change the bullet symbol to any other character. Insert Date and time.
- Check the spelling and grammar in an existing document. Use the “Replace All” option in Find and Replace to replace each instance of some word.
- Create and print an envelope that includes your return address. Create a full page of return labels for yourself.
- First type a one page document in double spacing. Apply the following to it:
- Select the text and convert it into two columns. Make second column wider than the first and add a line between the columns.
- Change the Page Orientation to Landscape.
- Using Draw Table feature, insert a 7-column, 6-row table to create a calendar for the current month.
- Enter the names of the days of the week in the first row of the table.
- Centre the day names horizontally and vertically.
- Change the font and font size as desired.
- Insert a row at the top of the table.
- Merge the cells in the row and enter the current month and year using a large font size.
- Shade the row.
- Enter and right-align the dates for the month in the appropriate cells of the table.
- Change the outside border to a more decorative border. Identify two important dates in the calendar and shade them.
- Create mailing labels to a select group of people from an existing data source file.
- Create a form letter with fields to represent data in an existing data source file. Preview the merge to see that everything is correct. Merge to a new document. Save the data source file and your main document but discard the merge document.
The above questions can be made specific by including one or more of the following options:
- Font effects (Superscript, Subscript, Shadow etc.)
- Paragraph effects (Spacing 1.5 lines, Double Spacing, Indentation, Spacing Before and After a Heading)
- Enclose the Text in a Border
- Enclose the Page in a Border
- Select a Theme for a page
- Insert Bullets, Numbering, Outline numbering
- Display a page with two or three columns
- Add page Background effects (Color, Fill effects, Printed Watermark)
- Use built-in Styl es and Formatting and show the formatting that has been applied
- Write the first letter of the document as big First letter. (Hint: Use Drop Cap)
- Insert Page Break, Date and Time, Symbols like £ Ω ½ © ™
- Include Salutation — Dear Madam: a comment
- Insert a Table of Content, Insert Cross‐Reference (Used for creating referring to a location, Bibliography)
- Insert Caption (For Example “Table 1” on top side of a table
- Insert a Picture from File, ClipArt, and WordArt etc.
- Insert a diagram, a Text Box, a Bookmark, a comment, a hyperlink, a file
- Use Spelling and Grammar to check your document for spellings
- Convert your document into Arabic
- Find the number of pages, words, characters (with and without spaces), paragraphs and lines in your document (Hint: Use Word Count)
- Before typing your document, create a Template for your document headings and then start typing
Project: Create a document as follows:
- Open a New Blank document.
- Type the text of the document.
- Save the document in “Original.docx”
- The title should have the following Style
- Font size—22
- Font style—Arial Bold
- Alignment—center
- Font color—Dark Brown
- The text body should have the following Style
- Font size—12
- Font style—Times New Roman
- Alignment—Justify
- Font color—Black
- Insert an image from Clip Art. Wrap the text around the clip art as square tight
- Use bullets in the document with spacing 1.5 lines
- Set paper as size A4, Portrait. Set paper margin as Top — 1”, Bottom — 1”, Left — 1.5”, Right — 1.05”
- Write the title of your document on the header of page. Write the page number and your name on the footer of page.
- Spell check the document.
- Save the document under a different filename — “revised.docx”
- Close the document
Exercise: First type the following lines. Then follow the instructions in each line and make changes to the text accordingly. For example,
Format this line as Bold, Italic, Underline, Times New Roman font face and 14pt font size.
Format this line as Bold, Italic, Underline, Times New Roman font face and 14pt font size.
Change the word 3rd so that it looks like 3rd.
Format this sentence so that the words, and not the spaces between the words, are underlined.
Change all of the text in this line to tOGGLE case.
Change the word C2H2SO4 so that it looks like C2H2SO4.
Format this sentence to grow the font size and reduce the space between each letter by 1 point.
Format this line so that it is Bold, font size 28.
Enter this line of text. This wrd is miss spelt. Use spell check to correct spelling error.
Format this line to change it to a 24-point font of your choice. Copy this line three times. Underline two of the copies, using a different underline style for each.
Exercise: Follow the instructions in the following text to format the paragraphs. It also shows how the paragraphs will look after the formatting.
This is the start of a new paragraph.
Format this paragraph so that it is centre aligned. Change the line spacing to 1.5. Now add 12 points of blank space before the paragraph and 6 points of blank space after this paragraph. Adjust the paragraph so that the right side is indented by 0.3” and the left side is indented by 0.6”. The first line should be indented by 0.5”. This is the end of this paragraph.
It looks like the following example.