
18
MS-POWERPOINT 2007
Contents
- Introduction
- Basics of PowerPoint—PowerPoint basics, PowerPoint terminology
- Start MS-PowerPoint
- MS-PowerPoint screen and its components —Office logo button, quick access toolbar, ribbon, tabs, groups, icons, notes pane, view buttons outline/slides tab, slide pane, ruler bar, status bar, scroll bar
- The office button—New, open, save, save as, print, prepare, send, publish, close
- The ribbon—Home, insert, design, animations, slide show, review, view, add-ins
- Home tab—Clipboard, slides, font, paragraph, drawing, editing
- Insert tab—Tables, illustrations, links, text, media clip
- Design tab—Page setup, themes, background
- Animations tab—Preview, animations, transition to this slide
- Slide show tab—Start slide show, set up, monitors
- Review tab—Proofing, comments, protect
- View tab—Presentation views, show/ hide, zoom, color/grayscale, window, macros
- The help
- An example—Create a PowerPoint presentation
Why this chapter
An application of the computer is to use it for presenting our work to a large audience— as a speaker in a conference, as a manager in an organization, as an instructor in a class etc., using a presentation software. A presentation software facilitates creation of slides for presentation—inclusive of text, graphics, animation, movie clips, sound clips etc. MS-PowerPoint is commonly used presentation software. The purpose of this chapter is to introduce you to MS-PowerPoint.
18.1 INTRODUCTION
The Presentation software is used for creation of the slides, and to display the information in the form of presentation of slides. Presentation software are easy to use and provide an alternative to other older types of visual aids like hand-drawn slides, blackboards, whiteboards, posters, pamphlets, handouts, or overhead transparencies. A presentation software provide tools like editor that allow insertion and formatting of text, and, methods for inserting and manipulating graphic images along with sound and visual effects. The presenter and the participants, both benefit from the Presentation software. It provides an easier access to presenter’s ideas and provides the participants with visual information in addition to the talk.
The presentations can be printed on paper or transparencies, displayed on a computer, or, projected using a video projector for large audiences. The presentations are of many different types like professional (work-related) presentations used by business people and corporate; education presentation used by educators, students, and trainers; entertainment presentation used for advertising; and presentations for general communication.
The presentation software from different vendors are available for the creation of presentation. Apple Keynote, Microsoft PowerPoint (MS-PowerPoint), Corel Presentations, and IBM Lotus Freelance Graphics are some of the presentation software available in the market. Several open-source presentation software, like, Sun OpenOffice, Impress, MagicPoint, and KPresenter are also available.
MS-PowerPoint is the most commonly known presentation software. It is a part of the MS-Office suite, and runs on Microsoft Windows and Mac OS X operating systems. MS-PowerPoint is a GUI-based software. MS-PowerPoint includes tools for word processing, outlining, drawing, graphing, and presentation management, which are all easy to use and learn. The slides in a MS-PowerPoint presentation may contain text, graphics, movies, and other objects, which may be arranged freely on the slide. Some of the important features of MS-PowerPoint are as follows:
- A consistent style in a presentation can be adopted by using a template or Slide Master.
- Interactive presentations can be made with a system of links and buttons to move to the next slide; and a full set of hyperlinks that function like a nested website, where the user chooses options.
- Background effects can be included in the slides.
- The entrance, emphasis, and exit of elements on a slide itself are controlled using Custom Animations.
- Transitions, or movements between slides can be animated in a variety of ways.
Figure 18.1 Shows a presenter making a presentation using PowerPoint

Figure 18.1 A presentation being made using PowerPoint
This chapter discusses the using of the MS-PowerPoint software in detail. There are many versions of the MS-PowerPoint software. This chapter discusses the MS-PowerPoint 2007.
In this chapter, we will use the following terminology while working with the mouse—
- Pointer—a mouse pointer
- Click—press left button of mouse once
- Double Click—press left button of mouse twice
- Select—move the pointer of mouse and keep the left button of the mouse pressed over the area that you want to select. The selected area will appear in a dark background.
- Quick Menu—Right click (press right button of mouse once) to get a quick menu
The commands used in this chapter are enclosed in braces <Command> to represent the command to be clicked.
18.2 BASICS OF POWERPOINT
MS-PowerPoint 2007 allows the creation of dynamic and high-impact presentations. In this section, we will discuss the basics of PowerPoint and introduce some PowerPoint terminology.
- PowerPoint Basics
- A PowerPoint (PPT) presentation consists of a collection of slides.
- A slide is a single screen that contains information that the presenter wants to show.
- A presentation generally has a Title slide, a Presentation outline slide, several slides discussing the outlined topics, and the conclusion or summary slide.
- The information can be in the form of text as bullet points, images or animation.
- Bullet points are not complete explanations; rather they convey a basic thought that is expanded upon by the presenter, during the presentation.
- The presenter can control the movement across the slides or the presentation can be preprogrammed to perform the navigation automatically.
- PowerPoint Terminology
- Master contains formatting and design elements common to every slide in the presentation.
- Template contains slide default settings for colors, fonts, bullet types, and graphics.
- Slide Show is the PowerPoint Presentation given, using a projection device such as a video-data projector or an LCD overhead projector. Slideshows can be enhanced with clip art, Smart Art diagrams, tables, and charts. Custom animations can be used to enliven presentations. Themes and Quick styles allow you to apply styling quickly to a whole presentation of individual elements. In addition to the pre-prepared slide layouts, presenter can also create a customized slide layout, complete with placeholder text, using the Custom Slide Layouts. Smart Art graphics allows insertion of designer quality graphics into the presentations.
- Wizard is a step-by-step guide for completing a task.
- Transitions are the effect that takes place when you advance from one slide to the next. Transitions are available only with Slide Shows.
- Animations are the sound and the movements that appear when a slide comes on the screen. For example, it can be used to have one line of text appear on the screen at a time.
- Objects can be the items that can be created with the drawing tools or the pictures that are imported from other sources (such as scanned images).
- Clip Art is the collection of pictures available in the PowerPoint Clip Art gallery.
18.3 START MS-POWERPOINT
The MS-PowerPoint software for the Windows operating system is installed on the computer. MS-PowerPoint is fully menu-driven software, and the commands are available in the form of Tabs, Groups and Icons. While working in MS-PowerPoint, using a mouse makes working on MS-PowerPoint simpler although one can work to some extent through the keyboard also.
To start using the MS-PowerPoint software, any one of the following steps needs to be performed—
Figure 18.2 MS-PowerPoint icon
- If a shortcut key to MS-PowerPoint is available as an icon on the Desktop, as shown in Figure 18.2, then double-click the icon.
- <Start> <All Programs> <Microsoft Office> <Microsoft Office PowerPoint 2007>. (Figure 18.3)
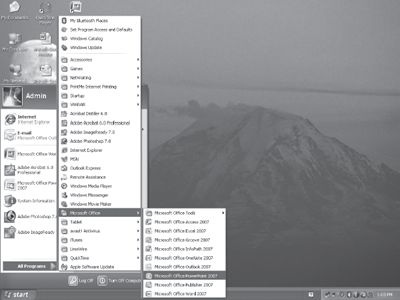
Figure 18.3 Start MS-PowerPoint
18.4 MS-POWERPOINT SCREEN AND ITS COMPONENTS
The main screen of the MS-PowerPoint that appears when the software gets started is shown in Figure 18.4. At the top side of the screen is the Ribbon. There is a ruler bar and a scroll bar, and at the lower side of the screen there is the Status Bar. The screen also consists of the view buttons, and the different panes like slide pane, notes pane, outline/slide pane. A brief description of the different components of the screen is given below:
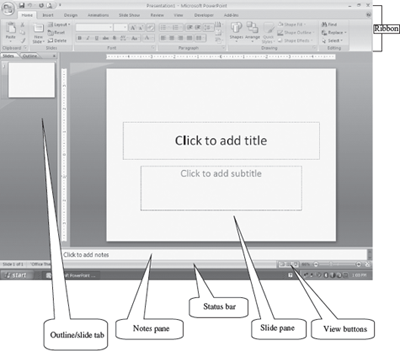
Figure 18.4 MS-PowerPoint Screen
- The Office Logo Button
 at the top left corner contains many task buttons for the document such as, New, Open, Save, Save As, Print and Close. This button also has a list of the recent documents. Some of these commands include an expandable menu to provide additional options.
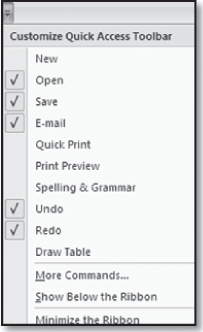
- The Quick Access Toolbar
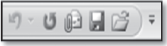 is to the right of the Office Logo button. It contains shortcuts for the commonly used tools, like, Save
  , Undo
  (reverses the last change), and Repeat
  (repeats the last action). The buttons that the user wishes to be displayed can be selected from the
  Customize Quick Access Toolbar.
 - The Ribbon is a set of tools and commands across the top of the screen (Figure 18.5). The layout of the Ribbon in MS-PowerPoint is same as that of the Ribbon in MS-Word and MS-Excel. It consists of a panel of commands which are organized into a set of tabs (also known as the Tab Bar). Within Tabs are Groups, which are designated by the names located on the bottom of the Ribbon. Each group has icons for the associated command. The Ribbon (Tabs, Groups and Icons) replaces the traditional toolbars and menus of earlier versions of MS-PowerPoint.
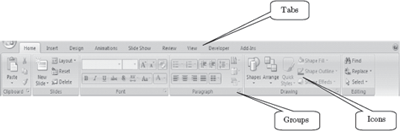
Figure 18.5 The ribbon
- The Tabs (Home, Insert etc.) on the Ribbon contain the buttons needed to edit characters, text, and layout, as well as the additional tools that you may need.

- Each Tab consists of different Groups, like the Home tab has six groups namely, Clipboard, Slides, Font, Paragraph, Drawing, and Editing.

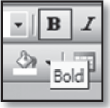
- Each group has Icons for the commands, which will actually format the document or bring up a menu. To know the function of an icon button (or command), leave the pointer on a button for a few seconds, the function of that button will appear in a small box below the pointer. For example, leaving the icon on
 displays “Bold (CtrlB)”.
- Notes Pane—It is used by the presenter to makes the notes that are to be used while presenting.
- View Buttons—They enable user to look at the slides of PPT file on their computer in different ways. By default, PowerPoint opens the presentation in Normal View
 , which is the main view used to design and edit presentations. Slide Sorter
  presents slide miniatures, allowing the reorder of the slides, and pre-set the transitions between them. Slide Show
  shows the slides as if the presenter is actually presenting. The final presentation is presented in the Slide Show mode to the audience. Slides cannot be edited in this view.
 - Outline/Slides Tab—It contains two views—outline view and slide view. The outline view shows the text of the slides in a larger format than the Normal view. The slide view displays the slides as thumbnails, where user can view all the slides in the presentation, rearrange them and hide the slides, as per requirements.
- Slide Pane—This is the work area where most of the editing is done. It shows the slide selected in the Outline/Slides tab as it will appear in the presentation.
- Ruler Bar—There are two rulers—Horizontal and Vertical. The Ruler Bar allows formatting of the horizontal and the vertical alignment of text in a presentation, by adjusting the tabs, indents and margins.

- Status Bar—It displays information about the currently active presentation. The information includes the current slide number, Theme, zoom slider
 etc. Right-click on the status bar will show the Customize Status Bar (Figure 18.6) pop-up menu. The appropriate option can be selected on the status bar.
 - Scroll Bar—The vertical scroll bar helps to scroll the slides of the presentation. Scrolling is done by moving the elevator button along the scroll bar, or by clicking on the buttons with the arrow marked on them to move up and down the slides.
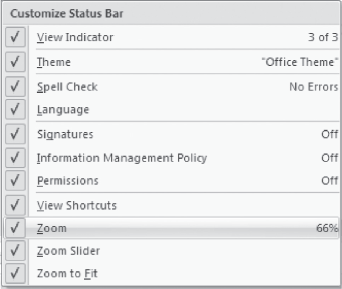
Figure 18.6 Customize status bar
18.5 THE OFFICE BUTTON
The functionality of the Office button in PowerPoint is almost similar to the functionality provided in the MS-Word or MS-Excel software. For example, New will open a blank document in MS-Word, a blank Workbook in MS-Excel, and a blank Presentation in MS-PowerPoint.
The Office Button is used to perform file management operations on the file (i.e. the presentation). It contains commands that allow the user to create a new presentation, open an existing presentation, save a presentation, print a presentation etc. The Office button contains nine commands (Figure 18.7), namely, New, Open, Save, Save As, Print, Prepare, Send, Publish, and Close. The working of these commands is almost similar to their working in MS-Word and MS-Excel, and are briefly discussed here.
Table 18.1 briefly describes the different commands available in the Office Button.
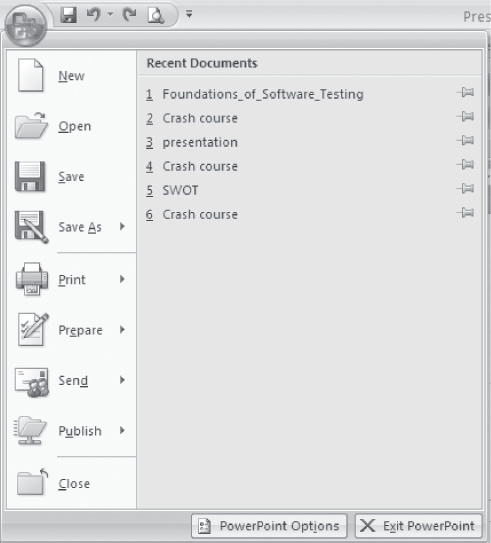
Figure 18.7 The office button commands
| Office Button Commands | Description |
|---|---|
| New | Create a new blank presentation. |
| Open | Open an already existing presentation. |
| Save | Save a presentation for which a file name and location has already been specified. |
| Save As | Used when presentation is saved for the first time or to a different location, or at same location with different name or with a new type presentation. Specify the filename for the presentation, the location where the presentation is to be stored and the save type of the presentation. Presentation can also be saved as a PowerPoint presentation, PowerPoint show, PowerPoint 97-2003 presentation etc. (Figure 18.8). |
| Print, Quick Print, Print Preview the presentation. Properties like print quality, paper type, number of slides per page, color or grayscale, etc. can be set. Preview to see how the presentation will look after printing. | |
| Prepare | Prepare the presentation for distribution. View presentation properties, encrypt document, restrict permissions etc. |
| Send | Send a copy of the presentation to e-mail or to Internet Fax |
| Publish | Publish the presentation as handouts, to a CD, save slides to a slide library etc (Figure 18.9). |
| Close | Close an open presentation. |
Table 18.1 Office button commands description
The following describes briefly some of the common operations that are performed using the commands of the Office Button:
- Create a New Presentation: <> <New>. A new window opens up. <Blank Presentation ><Create>. There are templates available on the left panel for creating a presentation of a specific type (e.g. quiz show, photo album).
- Saving a Presentation for the First Time: <> <Save As>. PowerPoint will display a dialog box. In the field next to File name, type a name with which you want to save the presentation. Navigate in the top portion of the dialog box to the folder where the user wants to save the presentation (choose the right directory where you want to save the file. You can use
 to go up in the directory, Use
  to create a new folder). Once you have saved your presentation for the first time you can save further revisions by selecting the <> <Save>, or by clicking on the Save button in the Quick Access Toolbar.
 - Saving a Presentation Under a Different Name: Open the presentation by selecting the <> <Open>. Next, <> <Save As> A dialog box will appear. Navigate to the folder where you want to save the presentation and type in a new name for the presentation. Select the Save button. One now has two copies of the presentation, one with the original name, another with a new name.
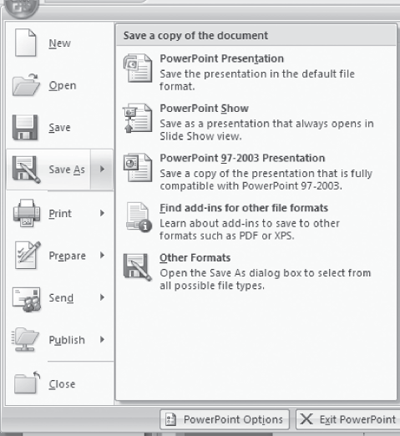
Figure 18.8 Save as option
- Crash Protection: <Save As> <Tools><Save Options>. Select the boxes for Save Auto Recover Information every <enter the number of minutes>. Reset the Minutes from 10 to 1. MS-PowerPoint would be able to recover a file one minute old.
- To Preview your Presentation Before Printing: <Print> Select Print Preview. User can switch between viewing one slide and multiple slides, zoom in, (it will turn into a magnifying glass with a symbol inside) and zoom back out, place the cursor on the presentation and this time the cursor will turn into a magnifying glass with a — symbol inside.
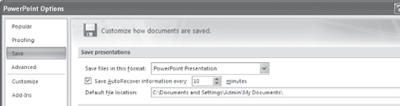
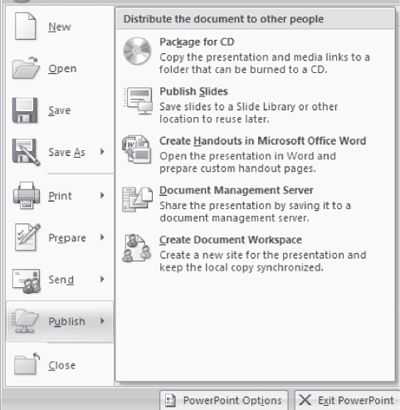
Figure 18.9 Publish option
- To Print: <File> <Print>. Make settings like number of copies and pages to be printed. (Figure 18.10). From the Print dialog box one can make further settings like—Print What, where one can select one of the following options:
- A slide—Prints one slide per page in landscape orientation.
- Handouts—it will ask the number of slides to be printed on one page. It prints two, three or six slides per page in portrait orientation. Handouts are useful to give to the audience so that they understand the presentation better, and they can handwrite notes during the presentation.
- Notes pages—Prints a slide in the top half of the page and the speaker’s notes in the bottom half of the page. They are useful for the presenter as it contains notes and reminders.
- Outline views—Prints the presentation in an outline view
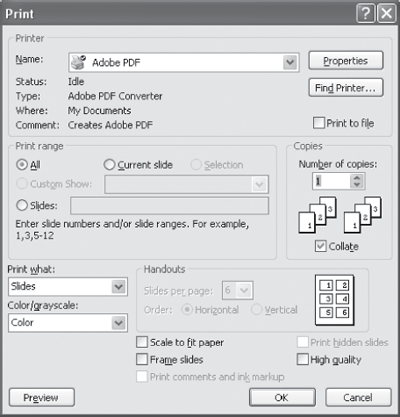
Figure 18.10 Print dialog box
Quick Tips—How to Learn MS-PowerPoint
When working with MS-PowerPoint, all one needs to know is the following:
- What a command does?
- When you want to perform a particular action, which command to use?
- How to use a command?
Here’s a brief description for further enabling you to learn MS-PowerPoint:
What a command does—When your keep your mouse pointer over a command or icon, the function of command or icon is gets displayed in a text box. So you can know what a command does by moving the mouse over the command.
Which command to use—
- To search for a command, first see which tab might have the command. For example, if you want to do any formatting, click the Home Tab; to insert anything click the Insert tab; to design your slides click the Design tab.
- You will be able to find the group and command you want, most of the time. The commands that have similar uses are grouped together in the same group in PowerPoint 2007.
Once you are able to find the command, then you should know how to use the command.
- For most of the commands, first place the cursor in the presentation at the position where the action is to happen, or, select the object on which you want the action to happen (for example formatting commands). Next, click on the command. The command gets executed.
- In some commands, there is a set of steps to use the command. Simply follow the steps.
18.6 THE RIBBON
Like the other programs in the Office 2007 suite, PowerPoint 2007 has a ribbon. The Ribbon of MS-PowerPoint has the Office button and eight Tabs, namely, Home, Insert, Design, Animations, Slide Show, Review, View, and Add-Ins. Each tab further consists of the groups, and the groups contain icons. Icons are a pictorial representation for a command. Each Tab is self-explanatory; for example, for a page setup for the slide, click on the Design tab. The groups and icons related to Design are displayed. Select the Page Setup command. The different tabs in MS-PowerPoint and the groups within them are as follows:
- Home: Clipboard, Slides, Font, Paragraph, Drawing, Editing
- Insert: Tables, Illustrations, Links, Text, Media Clips
- Design: Page Setup, Themes, Background
- Animations: Preview, Animations, Transition to This Slide
- Slide Show: Start Slide Show, Set Up, Monitors
- Review: Proofing, Comments, Protect
- View: Presentation Views, Show/Hide, Zoom, Color/Grayscale, Window, Macros
The Add-Ins tab contains supplemental functionality that adds custom commands and specialized features to MS-PowerPoint.
The commands in the Ribbon have various symbols associated with them, as shown in Figure 18.11. These symbols are interpreted as follows:
| Selecting a command | |
|---|---|
| Ways to select a command | Using a command |
| Click on a Tab + Click on a Icon |
Click on any of the Tabs like Home, Insert etc. From the displayed icons, click on the icon you want to use. |
| Shortcut key Ctrl + letter |
Some commands have shortcuts where you can press the Ctrl key and a certain letter. Some commonly used shortcuts are — |
| • Paste: CTRL + V • Copy: CTRL + C • Undo: CTRL + Z • New document: CTRL + N • Open document: CTRL + O • print document: CTRL + P |
|
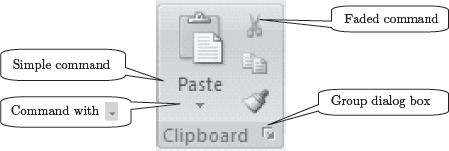
Figure 18.11 Command symbols
- Simple Command—The command start executing when it is clicked.
- Command Followed by Arrow—Clicking on the arrow
 displays more options for the command.
 - Faded Command—A faded command means that it is not available currently.
- Group Dialog Box—Clicking on this
 symbol displays the dialog box for the group.
The following sub-sections describe the different tabs in detail.
Working with MS-PowerPoint 2007
- Live Preview applies temporary formatting on the selected text or object when the mouse moves over any of the formatting buttons. This allows the preview of, how the text will appear with this formatting. The temporary formatting is removed if the mouse pointer is moved away from the button.
- Mini Toolbar pops up whenever text is selected. It provides easy access to the most commonly used formatting commands in Word. The Mini Toolbar also appears when you right-click on a selection of text.
- File Format for the documents created in PowerPoint 2007 version is .pptx. (For earlier versions it is. ppt)
18.6.1 The Home Tab
The Home Tab contains commands for formatting of text, selecting a new slide and for drawing of objects. The Home Tab is also used for editing the content of presentation like find and replace, and to perform clipboard operations such as cut, copy, and paste on the presentation. Figure 18.12 shows the Home Tab.

Figure 18.12 The home tab
There are six groups within this tab, namely, Clipboard, Slides, Font, Paragraph, Drawing, and Editing.
- The Clipboard group contains commands to cut, copy, and paste text. The Format Painter is also present here. The Clipboard commands are used in the same manner as one uses the MS-Word Clipboard commands.
- Slides group allows to select a theme and layout for a slide, reset a slide or delete a slide.
- Font group commands allows change of the Font—font face, style, size, effects (Strikethrough, Shadow etc.), color, and character spacing. These options can be changed, before or after typing the text. If case of after, select the text first.
- Paragraph group is used to change paragraph setting—alignment, indents, spacing, and pagination like Spacing 1.5, Double Spacing, Indentation, and, Spacing Before and After a Heading. Move the cursor to a line which needs to be changed.
- The Drawing group allows the quick selection from the in-built shapes, arranging the order and grouping the objects, filling, outlining, and adding effects to the shape.
- Editing group contains commands to select, and, find and replace text.
Table 18.2 gives the commands in the different groups (in left to right order) of the Home Tab along with a brief explanation.
To apply formatting to an already written text, first select the text and then apply the formatting.
| Home Tab Groups | Description |
|---|---|
| Clipboard | 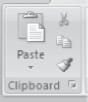 • Cut removes the selected text from the presentation and puts into Clipboard for later retrieval. • Copy copies the selected item or text and puts it on the Clipboard. • Format painter copies formatting from one place and apply to another (To apply same formatting to many places, double-click the format painter button) |
| Slides | 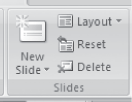 • Change the layout of the selected slide. • Reset the position, size and setting of the slide to default values. • Delete the selected slide from the presentation. |
| Font | 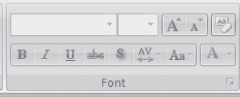 • Increase Font size, Decrease Font size. • Clear formatting (Clear all formatting from selection, leave only plain text). • Bold, Italics, Underline. • Strikethrough (draw a line through middle of selected text). • Shadow adds a shadow behind the selected text. • Adjust the spacing between characters. • Change case. Changes the case — sentence, lower, upper, title, or toggle. • Select the text and click on an option. • Change the Font color. |
| Paragraph | 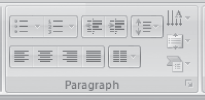 • Numbered list (choose different formats). • Increase or decrease indent of the paragraph. • Change spacing between lines. • Change the direction of text to vertical, stacked or rotate the text. • Align the text—change how the text is aligned within the text box. • Align text left, right, centre, margins. • Split text into two or more columns. • Convert text into Smart Art graphics. |
| Drawing | 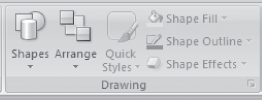 • Arrange objects on the slide by changing their order, position, and rotation. • Quick styles allows for choosing a visual style for the shape or line. • Fill the selected shape with a solid color, gradient, picture or texture. • Specify the color, width, and line style for the outline of the selected shape. • Apply a visual effect to the selected shape like glow, shadow, reflection, and 3-D rotation. |
| Editing | 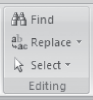 • Replace text or objects in the presentation. •Select text or objects in the presentation. |
Table 18.2 Home tab commands description
Some of the operations that are performed using the commands of the Home Tab are briefly described here.
- Move Text: Select and highlight the section which needs to be moved <Home><Clipboard><
 >. Move the cursor to the place where the text is to be inserted <Home><Clipboard><
 >.
>. - Copy Text: Select and highlight the section to be copied <Home><Clipboard><
 > Move the cursor to the place where the copied text is to be inserted <Home><Clipboard><>
 - Find and Replace: This is used to find a text and then replace it with the new one. This option is useful for finding a text at multiple places in the presentation and replacing all of them with the new one.
To Select Multiple Text Entries that are scattered words, phrases, or paragraphs for the same action, select the first item with your mouse in a normal manner. For subsequent items, press the CTRL key before selecting them. Now perform any operation like italicize, boldface, or highlight on all the selected items
18.6.2 The Insert Tab
The Insert Tab contains commands for inserting objects of all kinds in a presentation. The commands in this tab are used to add illustrations, tables, links, text, and media clips. It also includes commands to add symbols, slide number, a picture, clip art, shapes, and, headers and footers. Figure 18.13 shows the Insert Tab.

Figure 18.13 The insert tab
There are five groups within this tab, namely, Tables, Illustrations, Links, Text, and Media Clips.
- Tables are used to draw and insert tables.
- Illustrations group allows insertion of pictures, clip art, pictures from photo album, shapes, smart art, and charts.
- The Links group is used to insert a hyperlink, and to add action to an object.
- The Text group contains commands to insert a text box, word Art, date and time, slide number, and, header and footer.
- The Media Clips group is used to insert movie from a file, and sound from a CD or clipboard.
Some of the Tabs appear only when you use them; like Picture Tools tab, Drawing Tools Tab, and Table Tools Tab
Table 18.3 gives the commands in the different groups of the Insert Tab along with a brief explanation.
| Insert Tab Groups | Description |
|---|---|
| Tables |  |
| illustrations | 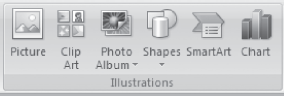 • Insert clipart into the document (sounds, movies, drawings). • Insert a photo album. Create a new presentation based on the set of pictures. Each picture is placed on a new slide. • Insert readymade shapes (lines, arrows, flowchart symbols etc.) into the document. • Insert a smart art graphics. • Insert a chart (bar graph, pie chart, line Area, surface etc.). |
| Links | 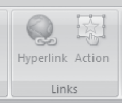 • Add an action to the selected object to specify the action to be taken when the mouse hovers over it or when it is clicked. |
| Text | 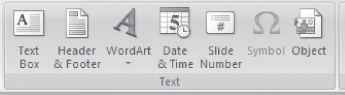 • Insert header and footer to the slide. Insert the slide number, date and time, both for the slides and the notes. • Insert decorative text in the document. • Insert date and time into the document. • Insert slide number into the document. • I nsert symbols that are part of the keyboard into the document. When Symbol is clicked, a symbol table pops up. Select the symbol to be inserted. • Insert an embedded object. |
| Media Clips |  • Insert sound from a file, clip organizer, a CD track or record the sound. |
Table 18.3 Insert tab commands description

Figure 18.14 Table tools design tab

Figure 18.15 Picture tools format tab
When a command of the Insert tab is used, insertion takes place at the location where the cursor is present right now. So, before inserting the item, place the cursor at the location where the item is to be inserted. While using the commands of the insert tab for insertion, most of the times, a dialog box will open which allows making changes to specific settings, as per requirements. The dialog boxes are not discussed here, as they are self-explanatory and easy to use. Some of the operations performed using the Insert Tab commands are described below:
- To create headers and footers—<Insert> <Text><Header & Footer>. A Header and Footer command is seen. A Header and Footer tab is opened which allows to the addition of date and time, slide number etc.
- Insert Hyperlink—<Insert> <Links> <Hyperlink.> To link to another location in the same document, click Place in This Document option under Link to; In the dialog box’s inner window, select a heading from the document diagram. To link to another document, click the Existing File or Web Page option. Navigate to the proper folder and select the file’s name. It is also possible to add a link to a newly created presentation or an e-mail address.
- Insert Text: <Insert> <Text> <Text Box>. In PowerPoint, all text is contained in Text Boxes. Click anywhere on the slide and drag corner points of the text box to change its size. Click within the box to type text. To format the text box, select the text box. <Drawing Tools> <Format>. Format the selected text box. To format the text in the text box; select the text. <Home> <Font> <Paragraph>. Format the Font, Size, color, and style of the selected text.
18.6.3 The Design Tab
The Design Tab contains commands to apply themes, change page set up, and to adjust the background style. The Design Tab is shown in Figure 18.16.

Figure 18.16 The design tab
There are three groups within this tab, namely, Page Setup, Themes, and Background.
- Page Setup opens a dialog box that sets up orientation of the slide, size of the slides and screen size on which the slide is to be shown.
- The Themes group contains commands to select a theme, font, color and effect, for the slides.
- Background group allows choosing a background style for the slide.
Table 18.4 gives the commands in the different groups of the Design Tab along with a brief explanation.
| Design Tab Group | Description |
|---|---|
| Page Setup | 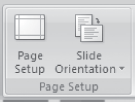 • Select orientation between portrait and landscape of the slide and also of the notes and handouts. • Select a size for which the slide show is meant like A3, A4, banner, overhead etc. • Select the height and width of the slides. |
| Themes |  |
| Background | 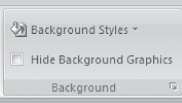 • Hide the background graphics of the theme. |
Table 18.4 Design commands description
Some of the operations that are performed using the commands of the Design tab are briefly described below.
- To Change the Background: <Design> <Background><Background styles> <Format Background> Format Background window appears. Set the color, solid or gradient, transparency, picture/texture fill etc.
- <Close> to apply changes only to the current slide.
- <Apply to All> to apply changes to all the slides.
- To Change the Theme: <Design> <Themes>. To preview the different themes for the slide, move the cursor over the theme buttons. Select a theme; the theme will apply to all the slides in the presentation.
- <Colors> changes the color scheme of the current theme.
- <Fonts> changes the font of the current theme.
- <Effects> changes the effects of the current theme.
18.6.4 The Animations Tab
The Animations Tab contains commands for adding animations and transitions to the slide. Animation is the movement and sound that accompanies text or slides as they are introduced on the screen. Using animation in the slides by displaying text at crucial moments makes good impact on the audience. Transitions are the effects that a presenter can add to PPT and these effects get displayed during the Slide Show, as the presenter moves from one slide to the next. The Animations Tab is shown in Figure 18.17.

Figure 18.17 The animations tab
There are three groups within this tab, namely, Preview, Animations, and Transition to This Slide.
- The Preview group contains a preview button that displays a preview of the animation effects you selected for the slide.
- Animations allow creation of animation effects. To select a predefined effect, click on the Animate drop-down list, or click the Custom Animation button to specify a custom animation.
- Transition to This slide group allows setting the transition effect that is used when the slide is displayed in Slide Show mode.
Table 18.5 gives the commands in the different groups of Animations Tab along with a brief explanation.
Some of the operations that are performed using the commands of Animations tab are briefly described below:
- To Create Custom Animation Effects: <Animations> <Animations> <Custom Animation>. Custom Animation pane appears on the right side of the current slide. Select the object on the slide to which you wish to apply animation.
- <Add Effect>. Select the animation style. “Entrance” styles have commonly used effects.
- <Play>. Preview the animation.
- <Modify Effect>. To modify the animation effects and order of the animated object. How to Start the animation, Direction of animation, Speed of animation. To change the orders of animated objects — Select the object in the list under Modify. Hold on the mouse and bring up or down to change the order of object.
- To Create Slide Transition: <Animations> <Animations> <Transition to This Slide>. Select a transition effect which is needed. As the cursor moves over the transition buttons, the effects get previewed. Click on the transition effect to apply it.
- <Transition Sound>. Apply sound effect for transition.
- <Transition Speed>. Adjust the speed.
- <Apply to All>. Apply the same transition effect to all the slides.
- To Create Automatic Presentation: <Animations> <Transition to this Slide> <Advance Slide> <Automatically After>. Set the time to automatically change to the next slide after certain time duration. While making the PowerPoint presentation, the presenter need not forward to the next slide each time; it will automatically forward to the next slide after the specified time.
Animations Tab Group Description Preview • Click on preview to see the animation effect of the selected slide.
Animations • Animate — Choose an animation effect to apply to objects in the slide.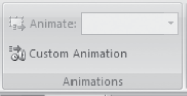
• Custom animation opens the custom animation task pane which lets the animation of the individual objects on the slide. Add effects like Entrance, Emphasis, Exit, Motion Paths etc, when to start the animated effect (on click etc.), and the speed of animation.Transition to This Slide • Select the special effects that will apply during the transition between the previous slide and the current slide.
• Choose the transition sound, transition speed and apply it to the current slide or to all the slides.
• Select On mouse click if the slide is to be advanced on a mouse click during slide show. Select Automatically after and specify the time after which the slide should advance automatically during slide show.Table 18.5 Animations tab commands description
18.6.5 The Slide Show Tab
The Slide Show Tab contains commands that are required to setup and start the slide show. The Slide Show Tab is shown in Figure 18.18.

Figure 18.18 The slide show tab
There are three groups within this tab, namely Start Slide Show, Set Up, and Monitors.
- The Start Slide Show group contains commands to start the slide show from the start slide, current slide or to create custom shows. Custom shows allow the selection of slides from the current presentation and presents only the selected slides.
- Set Up is used to set up the slide show, record narration, rehearse timings etc.
- The Monitors group contains commands to make the monitor settings. The monitor can be chosen or its screen resolution can be set.
The commands in the different groups of Slide Show Tab along with a brief explanation are shown in Table 18.6.
An operation performed using the Slide Show Tab commands is described below:
| Slide Show Tab Group | Description |
|---|---|
| Start Slide Show | 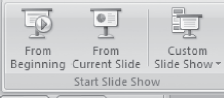 • Create custom shows. A Define Custom Show window appears. Select the slides to be added to the custom show. |
| Set Up |  • It is possible to record the narration, rehearse the timing of presentation, hide a slide etc. |
| Monitors | 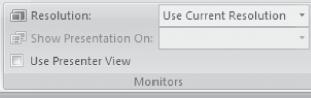 • Use presenter view to present the slide show and the speaker's view on two different monitors. |
Table 18.6 Slide show tab commands description
- Create Custom Show: <Slide Show> <Start Slide Show> <Custom Slide Show> <Custom Shows>. A custom show window appears. To create a new custom show, click on New. A Define custom show window appears (Figure 18.20). Select the slide which you want to add to custom show. Click Add button (To select multiple slides, press the ctrl key on the keyboard and click on the slides you want to select. Click Add button).

Figure 18.19 Set up show window
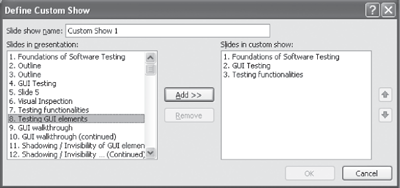
Figure 18.20 Define custom show window
18.6.6 The Review Tab
The Review Tab contains commands for the reviewing of the presentation. The commands in this tab are used when there is a need to correct the presentation like checking spellings and grammar, adding or viewing comments etc. The Review Tab is shown in Figure 18.21.

Figure 18.21 The review tab
There are three groups within this tab, namely Proofing, Comments, and Protect.
- The Proofing group has commands required for the proofing of presentation like the spelling and grammar checker, research etc.
- Comments group contains commands to insert comments and move back and forth among the comments.
- The Protect group contains command to protect the presentation by restricting its access.
The commands in the different groups of Review Tab along with a brief explanation are shown in Table 18.7.
| Review Tab Group | Description |
|---|---|
| Proofing | 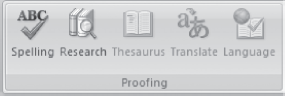 • Open Research Task Pane and search through research material. • Thesaurus suggests word similar in meaning to the selected word. • Translate the selected text into a different language. • Set the language used to check the spelling and grammar of the selected text. |
| Comments | 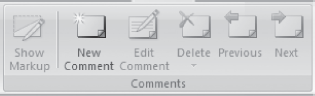 • Add a new comment about the selection. • Edit or Delete the selected comment. |
| Protect |  • Restrict how people can access the presentation. You can allow restricted access, unrestricted access or manage the credentials of those who access your presentation. |
Table 18.7 Review tab commands description
18.6.7 The View Tab
The View tab has the commands that facilitate viewing the presentation. While working with the presentation, it is helpful to work with different views. For example, to edit the content of a slide, use the Normal view. The Outline and Slides view on the left side of the screen are not available in the View menu, but they are two additional significant view options. The Outline view displays a written outline of each slide of your presentation. The Slides tab displays the slides as thumbnails. The View Tab is shown in Figure 18.22.

Figure 18.22 The view tab
There are six groups within this tab, namely Presentation Views, Show/Hide, Zoom, Color/Grayscale, Window, and Macros.
- The Presentation Views group has commands to view the presentation in different modes like normal, slide sorter, notes page, and slide show. It is also possible to view master slide, handout master, and notes master.
- The Show/Hide group contains commands to show or hide the ruler, gridlines etc.
- Zoom is used to view the presentation in smaller or larger sizes. Zoom to increase the view to 200% etc or decrease it below 100%.
- Color/Grayscale allows viewing the presentation in color, grayscale, and, black and white color.
- Window group contains commands to view the windows like, arranging all open windows side-by-side or in cascading style etc.
- The Macros group is used to create or view a macro.
The commands in the different groups of View Tab along with a brief explanation are shown in Table 18.8.
Some of the operations performed using the View Tab commands are described below:
- Change the Order of the Slides: Order of the slides can be changed in two ways:
- <View> <Presentation Views> <Slide Sorter>. Simply drag the slide to the location where it is to be placed, or,
- <View> <Presentation Views> <Normal>. Select Slides tab in the left frame. Thumbnails of the slides in the presentation can be seen. Click on a slide thumbnail and drag up and down to change the order.
- Formatting Presentation in Slide Master: The Slide Master acts as a template for the entire presentation. Altering anything on the Slide Master will change it for all the slides in the presentation. <View> <Presentation Views> <Slide Master>. Slide Master Tab appears on the left-hand side of Home Tab, which provides a set of Slide Master formatting groups — Edit Master, Master Layout, Edit Theme, Background, Page Setup, and Close to go back to Normal View.
| View Tab Group | Description |
|---|---|
| Presentation Views | 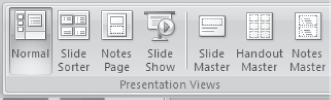 • Slide Sorter presents miniatures of each slide. It lets the wholesome picture of the presentation to be seen. Allows to easily sort, move, add, delete slides, reorder the slides and, add transitions between them. • Notes Page displays a page layout of the notes and the slide. It allows rearranging the notes and comparing them to the content of your slide. Notes are not visible during the slide show. • Slide show shows the slides as if they were actually being presented. Slides cannot be edited in this view. • Slide Master opens a Slide Master tab (Figure 18.23), from where the layout and the design of the master slide, can be changed (Figure 18.26). It allows changing the properties of any text, bullet points, backgrounds, colors, etc. Changes on the Slide Master will be reflected on all the slides in the PPT file. • Handout Master opens a Handout Master tab (Figure 18.24), from where the layout and the design of the handout slide can be changed (Figure 18.27). Edit the theme, page setup, background slides per page etc. Changes on the Handout Master will be reflected on the hand outs printed for the audience. • Notes Master opens a notes master tab (Figure 18.25). It is possible to edit the theme, page setup, background slides per page etc. for the notes (Figure 18.28). |
| Show/Hide | 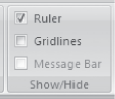 |
| Zoom | 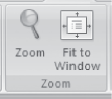 • Zoom the presentation so that the slide fits the window. |
| Color/Grayscale | 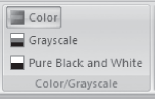 |
| Window | 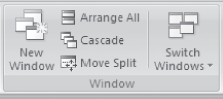 • Arrange all open presentations side-by-side on the screen. • View all the open presentations in a cascading style. • Move the splitters which separate the different sections of the windows. • Switch to a different currently open window. |
| Macros |  |
Table 18.8 View tab commands description

Figure 18.23 Slide master tab

Figure 18.24 Handout master tab

Figure 18.25 Notes master tab
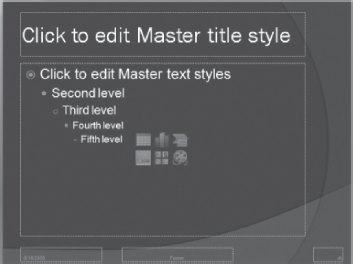
Figure 18.26 The master title style
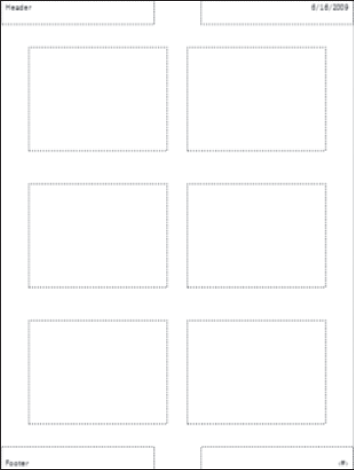
Figure 18.27 The handout master style

Figure 18.28 The notes master style
- Present the Slide Show: <View> <Presentation Views> <Slide Show>. You can move to the next slide, manually, using any of the following ways:
- Click the left mouse button.
- Hit the spacebar.
- Use the arrow keys on the keyboard. Up and left to go back, right and down to go forward.
- Click on the Esc key on keyboard to exit the Slide Show and go back to Normal view.
18.6.8 The Help
The Help button ![]() is located on the right most side of the Tabs in the Ribbon. Click on this button to get help for using any command of the MS-PowerPoint. On clicking on the help button, a screen as shown in Figure 18.29 appears, and the Help for any command can be browsed. Operations such as, search for a command, and view Table of Contents, can also be performed.
is located on the right most side of the Tabs in the Ribbon. Click on this button to get help for using any command of the MS-PowerPoint. On clicking on the help button, a screen as shown in Figure 18.29 appears, and the Help for any command can be browsed. Operations such as, search for a command, and view Table of Contents, can also be performed.
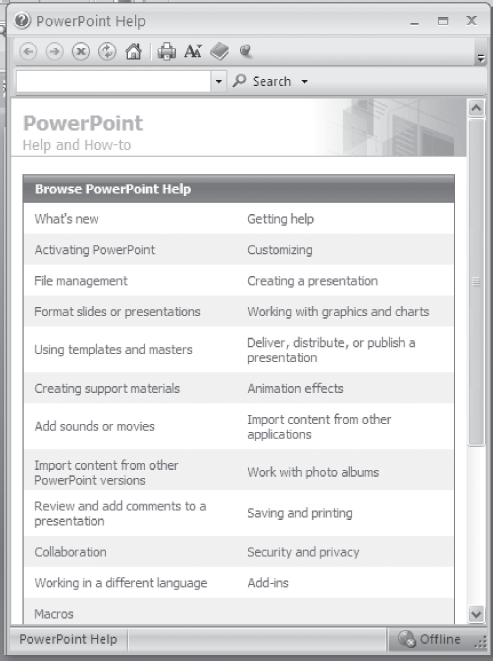
Figure 18.29 PowerPoint help
Many of the concepts that are used while working with MS-Office suite are common for MS-Word, MS-PowerPoint, and MS-Excel. For example, open, close, save, cutting and pasting are performed the same way in MS Word as they are in PowerPoint. The menus are also arranged in a similar layout. If you are not sure how to do something in PowerPoint, then try it as you would do in MS-Word, and it is likely to work.
18.7 AN EXAMPLE
Here we give an example to create a PowerPoint presentation.
Example 1: Create a PowerPoint Presentation.
Solution 1:
- Open blank presentation. <New> <Create>
- Create a Master slide. <View> <Presentation Views> <Slide Master>. Select the theme, color, fonts, effects, background styles for your slide (Figure 18.30). Insert the title and footer in the slide (if required). A set of master slides (Figure 18.31) is created (Title slide, Title and layout slide, Blank slide etc.). It is also possible to create placeholders. Insert placeholder in the slide (Figure 18.32).
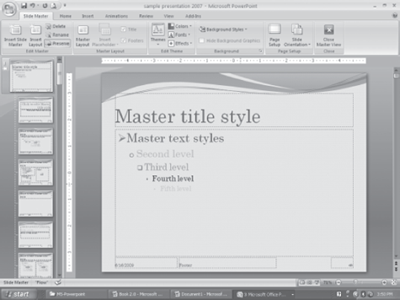
Figure 18.30 Master title slide
Figure 18.31 The set of master slides
Figure 18.32 A master slide with your custom layout
- Now use the Master slides to create the presentation. <Home> <Slides> <New Slide>. Select the title slide. Write the content to it. The content can be text as bullet points, pictures, graphs, clip art etc. Then again add a new slide and write the content, and so on Figure 18.33, Figure 18.34 and Figure 18.35).
Figure 18.33 An example of slide using the master slide
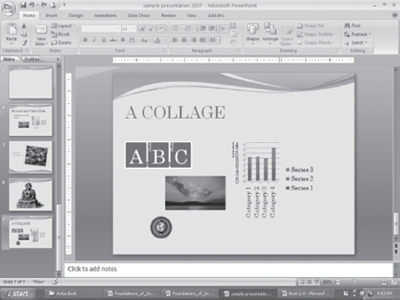
Figure 18.34 A slide made using the custom layout slide
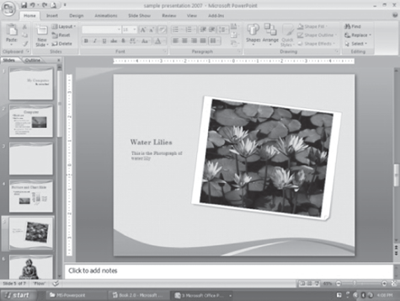
Figure 18.35 An example of slide using master picture caption slide
EXERCISES
- Design a birthday invitation card.
- Design a “Thank You” card.
- Design a “Seasons Greetings” card.
- Design a “Birthday Invitation” card.
- Design a “Get Well Soon” card.
- Design a “Happy Birthday” card.
- Design a Magazine cover. Use the following: (1) Select a theme for the page, (2) Insert either a picture or clipart, and (3) Use WordArt.
- Design a poster inviting all students of your college to the Computer Festival.
- Design a certificate that you receive at the end of the Semester for holding a position in the Computer Society.
- Create a 5-slide presentation on any topic. Use Images, Graphs, Chart, Tables, Animation, Time, Bullets, Transition, Sound, Hyperlink, Background template, Header and Footer.
- View multiple presentations.
The above questions can be made specific by including one or more of the following options from the Home Tab
- Text Font, Style (Bold, Italic), Size, Color
- Font effects (Superscript, Subscript, Shadow etc.)
- Alignment of text — left, right, center, justify
- Bullets, Numbering
- Paragraph effects — line spacing, spaces before and after a paragraph.
- Change case — sentence, upper case, lower case, title case, toggle case.
- Change slide design
- Background effects — Fill gradient, texture, pattern, picture in the background of slides, or color of the background
- Rotate the slide content. Change height and width.
- Fill color and set transparency margin.
- Change the design of arrows.
The above questions can be made specific by including one or more of the following options from the Insert Tab:
- Insert Date and Time in slide.
- Insert Slide number in slide.
- Insert Footer in slide.
- Insert Date and Time, Slide number and Footer on Notes and Handouts.
- Insert a new slide.
- Insert a Duplicate slide.
- Insert Symbols like £ Ω ⅔ © ™.
- Insert a Picture from File, ClipArt, WordArt, scanner or camera, auto shapes, organization chart etc.
- Insert a diagram, a chart and an object.
- Insert movies and sounds, sound from clip organizer file, play Audio CD track, record sound, movie from clip organizer, movie from file.
- Insert a Table. w. Insert a hyperlink.
- Insert Lines, Curves, and Shapes — draw and format lines, draw a rectangle, ellipse, freeform lines.
The above questions can be made specific by including one or more of the following options from the Review Tab:
- Use Spelling and Grammar to check the presentation for spellings.
- Convert the slide into Arabic.
The above questions can be made specific by including one or more of the following options from the Slide Show Tab:
- View Show.
- Set up slide show — advance slide timings, show a few slides only, show without animation etc.
- Rehearse the timing of slide show.
- Record your narration.
- Insert Action buttons in slide show — buttons for home, help, information, backward, forward, beginning, end, return, document, sound, movie.
- Make action settings for the action buttons you have inserted. Action settings for mouse click and mouse over that button.
- Add Custom Animation.
- Add Slide Transition.
- Hide a Slide.
- Make Custom shows.
- Insert Sound, Transition Effects, Embed Video.