
You can add controls to a worksheet to make it easier to enter data into a cell. Form controls can aid users who are not familiar with Excel and can increase the accuracy of data entry by limiting the options a user has. For example, you can add check boxes to your worksheet so your worksheet looks like a paper form. You can also add a combo box from which users can select an entry.
Excel provides nine controls you can add to a worksheet. You add controls by selecting the control you want from the Form Controls menu. After you add a control, you can adjust its size by dragging the side or corner handles. When you add a control or when you right-click a control twice and then click the control, you are in design mode. In design mode, you can modify the properties and size of the control, but you cannot test its functionality.
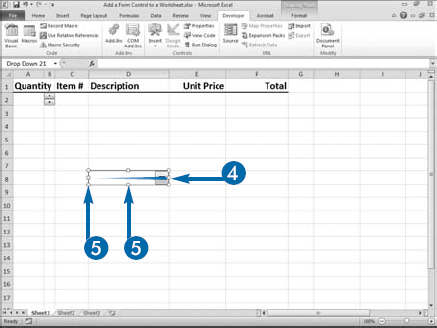
When you place a control on a worksheet, it sits on top of the worksheet. You can size it so it appears to be located in a cell, but controls are separate from cells. You can place controls anywhere on the worksheet. A control can cover any portion of a cell or range of cells.
After you add a control to a worksheet, you can assign it values. See the next section, "Assign Values to a Form Control," to learn how. Form control options are located on the Developer tab. See Chapter 14 to learn how to display the Developer tab.
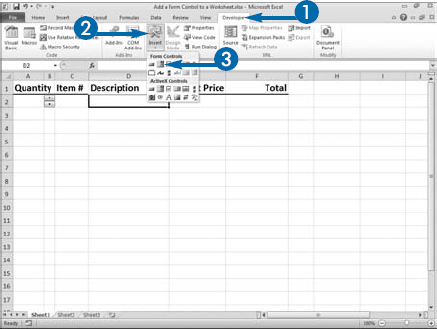
Add a Form Control to a Worksheet

Note: See Chapter 14 to learn how to display the Developer tab.

The Form Controls menu appears.


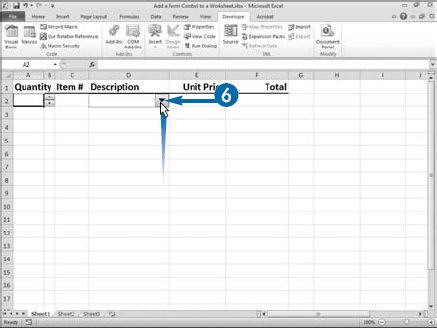

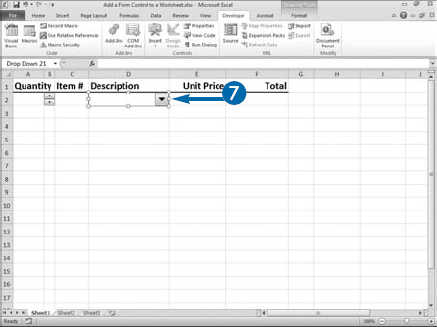
To cancel design mode, click any cell in the worksheet.
To remove a control, place it in design mode and then press the Delete key.
Extra
You can add the controls listed in the following table to your worksheets.
CONTROL | CONTROL NAME | DESCRIPTION |
|---|---|---|
Button | Runs an associated macro when clicked. | |
Displays a list of items for selection. | ||
Check box | Selects or deselects an option. | |
Scrolls up and down through a list of numeric values. | ||
Combo box | A menu that displays a list of items. | |
Selects one of a group of items. | ||
Places related controls together. | ||
Provides information about an associated control. | ||
Increases or decrease a value when the user clicks the arrows or drags the bar. |
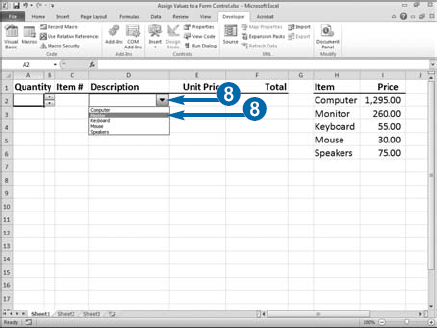
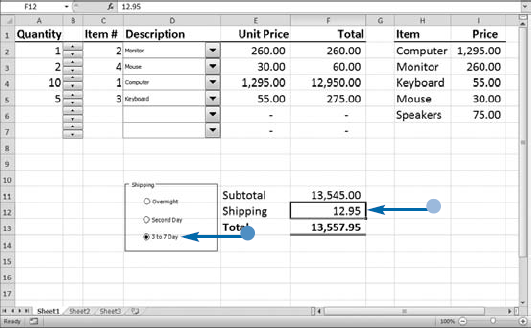
After you add a control to a form, you can assign values to it. For example, if your worksheet contains a list box, you can assign the list of values that will appear when users access the list box. Some controls enable you to define a range of valid numeric values for the control. For example, if you use a spinner, you define the starting value and the maximum value for the control. For combo boxes and list boxes, you can place the options associated with the control in a range of cells. For example, if you use a combo box, you tell Excel the list of values used by the control by entering the range of cells containing the values. The values can be located on another worksheet, or even in another workbook as long as Excel can access the workbook when users view the worksheet that contains the control.
You can link a cell to a control. If you link a cell to a control, whatever value users select when using the control becomes the value in the linked cell. If you use a combo box control or list box control, the value in the linked cell is a number that represents the user's selection. Excel assigns the number based on the position of the selected value in your list. If the list is Computer, Monitor, Keyboard, and the user selects Monitor, the linked cell receives the value 2, because Monitor is second in the list.
With a control, such as a check box, you can tell Excel whether you want the option initially selected or unselected. Both options — selected and unselected — have an associated value.
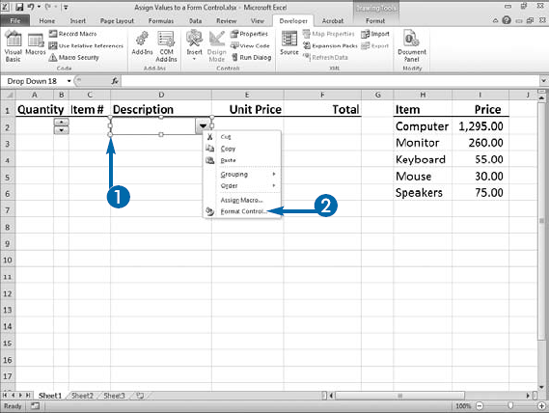
Assign Values to a Form Control
A menu appears.
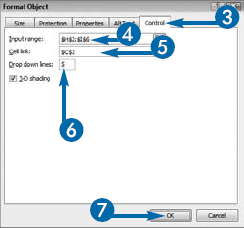
The Format Object dialog box appears.
The available fields depend on the control type. This example uses a combo box.
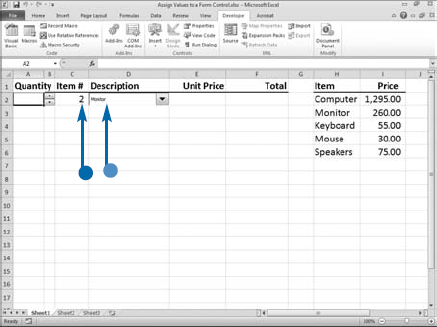
The value associated with your selection appears in the linked cell.

Excel places a numeric value representing the control selection in the linked cell.
Excel displays the value in the control.
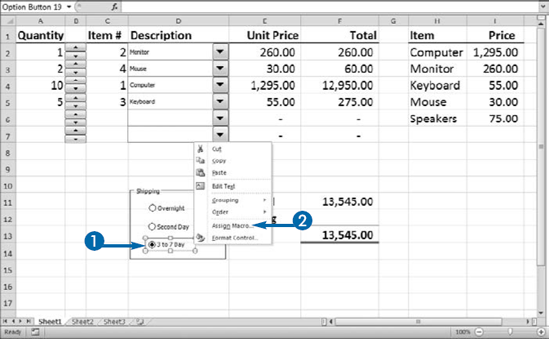
You can use macros to automate the tasks you perform in Excel. See Chapter 14 to learn more about macros. You can assign a macro to any form control on a worksheet. For example, if a user clicks a radio button control, you can have Excel add a postage amount to an invoice.
You can create one macro for each control on a worksheet. You create a macro either by recording a series of keystrokes or by writing a Visual Basic for Applications (VBA) procedure. This book does not cover writing procedures. When you select the Assign Macro menu option, Excel automatically creates a new macro name by using the name of the control followed by an underscore and an event name, such as _Click. Excel assigns the control name to the control when you add it to a worksheet. For example, the first OptionButton control that you add to a worksheet is named OptionButton1. If you create a macro for the option button, Excel gives the macro the name OptionButton1_Click. Every time you add a new control, Excel gives the control a unique name by adding a sequential number to OptionButton; for example, OptionButton2_Click, Option Button3_Click, and so on.
The portion of the macro name following the underscore character corresponds to an action, commonly referred to as an event. For example, with an OptionButton control, the user clicks the radio button to select the option, so the event is Click. If you create a macro for a combo box control, Excel assigns Change as the name of the event because you want to execute the macro when the value of the control changes.
Add a Macro to a Form Control
A menu appears.
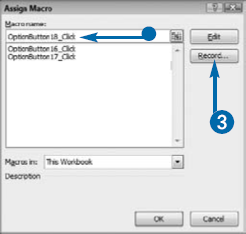
The Assign Macro dialog box appears.
Excel assigns a default macro name for the selected control.
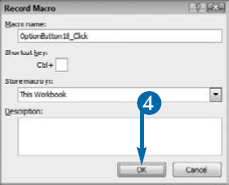
The Record Macro dialog box appears.
Note: See Chapter 14 to learn how to record a macro.
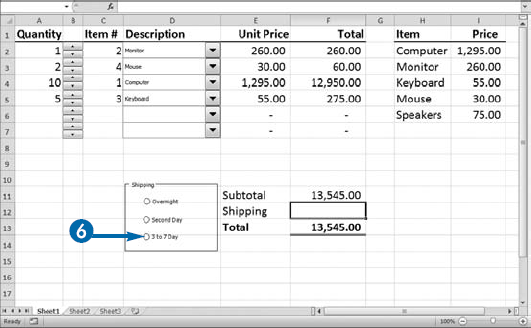
Excel executes the associated macro.
In the example, Excel assigns postage to the invoice.
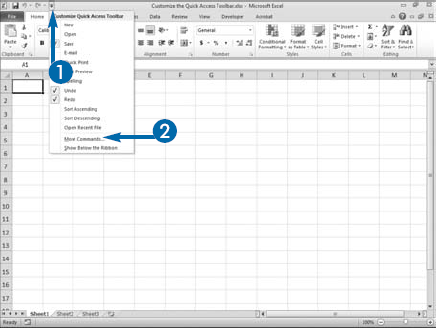
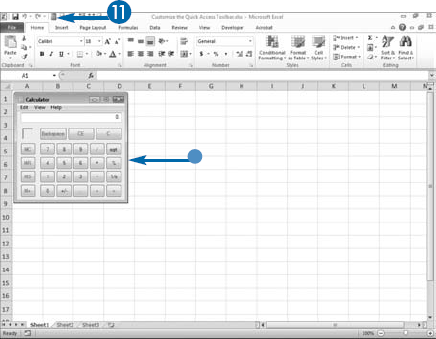
The Quick Access Toolbar enables you to access commands with a single click. By default, Save, Undo, and Redo appear on the toolbar. You can use the Customize the Quick Access Toolbar pane to add more commands.
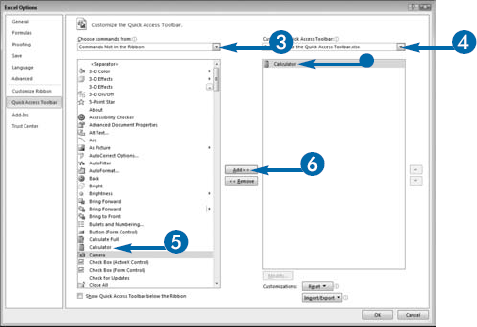
In the Customize the Quick Access Toolbar pane, you use the Choose commands from drop-down list to select the category from which you want to choose commands. Excel divides commands into the following categories to make it easier for you to find the commands you want: Popular Commands, Commands Not in the Ribbon, All Commands, and Macros. You should review the commands listed under Commands Not in the Ribbon. This is particularly true if you find that you have to perform a large number of steps to get to the command you want. A number of commands that are found on panes or listed in menus can be found under Commands Not in the Ribbon. Select the macros option to add macros to the toolbar. See Chapter 14 for detailed instructions on how to add a macro to the Quick Access Toolbar.
You can use the Customize Quick Access Toolbar drop-down list to specify whether the command should appear on the toolbar of all Excel workbooks or only on the toolbar in the Workbook you specify. By default, the buttons will appear in all workbooks.
Some sections in Chapter 11 and Chapter 12 require that you add commands either to the Quick Access Toolbar or to the Ribbon.
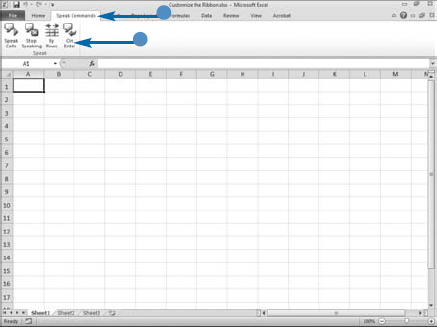
To make the commands that you use most frequently readily available to you, you can place them in the Ribbon on a custom tab and the tab can be divided into groups. You can add a new tab and name it Speak, and then put all the commands in a group called Speak Commands.
You can also add command groups and commands to existing tabs. For example, if you frequently use the Format Cells dialog box, you can add it to the Home tab next to the Styles group. You can rename tabs and groups. For example, if you do not like the name Home tab, you can change the name to Basic Commands or some other name. You can also choose which tabs display and the order in which they display. For example, if you never use the Review tab, you can remove it from view. If you frequently use the Formulas tab, you can have it display first.
You can select a command category from the Choose command from drop-down list. Excel divides commands into the following categories to make it easier for you to find the commands you want: Popular Commands, Commands Not in the Ribbon, All Commands, Macros, Office Menu, All Tabs, Main Tabs, Tool Tabs, and Custom Tabs and Groups. Main Tabs are the tabs that you see when you use Excel without any customizations. Tool tabs are the context-sensitive tabs that appear when you work on objects such as charts or PivotTables.
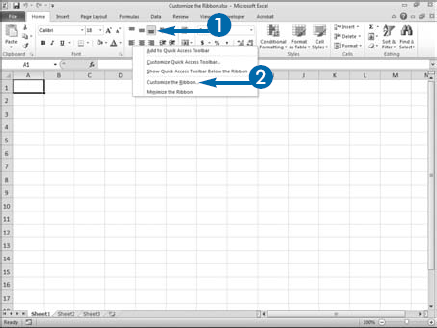
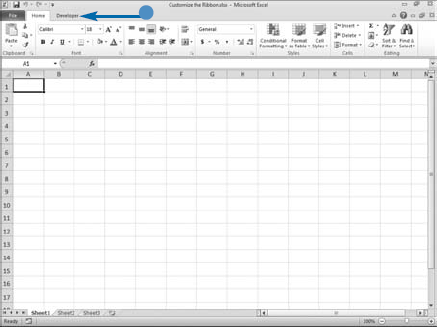
Customize the Ribbon
Open the Customize the Ribbon Pane
A menu appears.
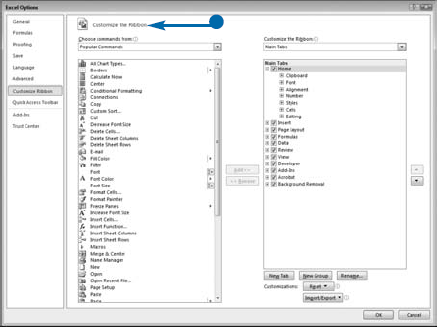
The Customize the Ribbon pane appears.
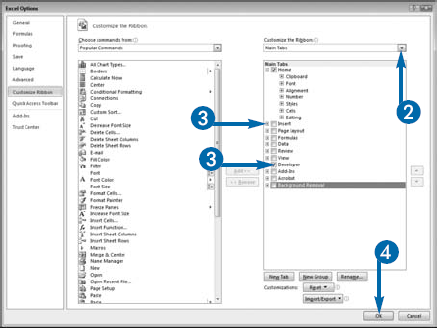
Only the selected tabs appear.
Apply It
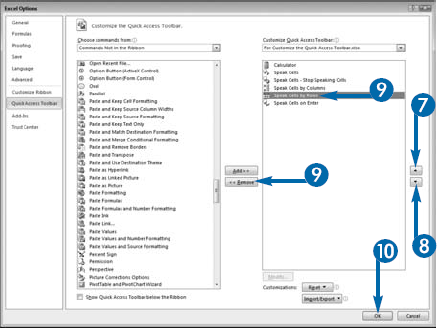
Tabs, groups, and commands display in the order they appear in the Customize the Ribbon pane. To change the order, open the Customize the Ribbon pane. Click a tab, group, or command and then use the Move Up (
If you no longer want a tab, group, or command, you can remove it. Open the Customize the Ribbon pane. Click the tab, group, or command you want to remove and then click the Remove button. Excel removes the tab, group, or command.
You can restore the Excel Ribbon back to the way it was before you made any customizations. To remove all customizations, click the Reset button. A menu appears. Click Reset all customizations. A prompt appears. Click Yes. Note the Quick Access Toolbar customizations are also removed. To restore a specific tab, click"the tab. Click the Reset button. A menu appears. Click Reset only selected Ribbon tab. Excel restores the tab.
It is a good idea to review the commands listed in the Choose commands from drop-list under Commands Not in the Ribbon. This is particularly true if you find that you have to perform a large number of steps to get to the command you want. A number of the commands that are found on panes or listed in menus can be found under Commands Not in the Ribbon. You can use the Macros option in the Choose commands from drop-list to add Macros to the Ribbon. Once you select a category, the options in that category appear in the box below the Choose commands from field.
You can use the Customize the Ribbon drop-down list to tell Excel the type of tab you want to modify. Choose from All Tabs, Main Tabs, or Tool Tabs. Once you choose a tab type, the options appear in the box below the Customize the Ribbon field. A check box appears next to each tab listed. Only the selected tabs appear in the Ribbon. For a number of tasks in this book, you need to display the Developer tab, which is unselected by default and does not display. The Developer tab can be found under Main Tabs. To display the Developer tab, make sure the Developer tab check box is selected.
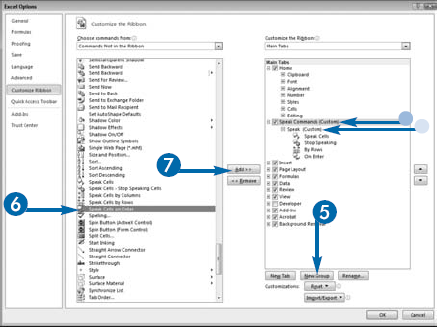
You can click the New Tab button to add a new tab. You can click the New Group button to add a new group. When you click the New Tab button or the New Group button, Excel usually places the new tab or group under the highlighted tab or group. Tabs and groups appear in the order listed on the Customize the Ribbon pane. You can use the Rename button to rename any tab or group.
Add a Custom Tab
A new tab appears.

A new group appears.
Repeat Steps 6 and 7 for every command you want to add.

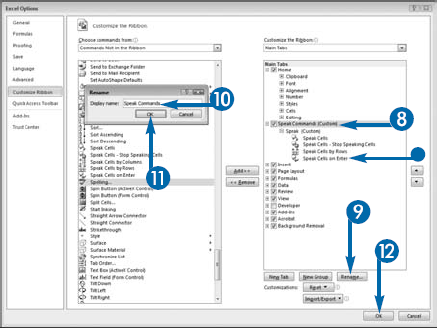
The Rename dialog box appears.


Excel renames the tab or group.
You can repeat Steps 7 to 9 for every tab and group you want to rename.

Excel adds the Custom tab and Commands to the Ribbon.
Apply It
To add a new group to a standard Excel tab, follow these steps: Open the Customize the Ribbon pane. Click the down arrow next to the Choose commands from field and then choose the category from which you want to choose commands. Click the down arrow next to the Customize the Ribbon field and then choose the type of Ribbon you want to customize. Click the tab to which you want to add the new group. Click New Group. Excel adds the new group. Click Rename. The Rename Dialog box appears. Type the name you want to give the new group and then click OK. Excel renames the group.
Click the command you want to add. Click the Add button. Excel adds the command. Repeat the process to add additional commands. Groups display in the order they appear in the Customize the Ribbon pane. Click the new group's name. Click the Move Up button (