
The trouble with programmers is that you can never tell what a programmer is doing until it’s too late. | ||
| --Seymour Cray | ||
People write bad code. It is a common reality, and poorly written code can lead to many maintenance and design issues. Microsoft realizes this and has presented a couple of well thought out solutions, such as the Design Guidelines for Class Library Developers, which helps promulgate best practices and coding standards to maintain consistency among .NET assemblies. Having a set of guidelines can do wonders if developers follow them in an almost religious fashion. However, this is not always the case, and many times source code deviates from the proposed norm. This prompted Microsoft to create the FxCop utility, which tests .NET code to confirm that it follows the best practices and design guidelines.
The developers of FxCop could have designed the tool to perform conformance analysis at a source code level like most tools of a similar nature, but instead chose to use the powerful features of the .NET platform to make a tool that performed analysis on a much grander scale. Rich and extensible meta-data concepts alongside powerful reflection support, MSIL parsing, and call-graph analysis allow for the inspection of many different areas of your software instead of just analyzing source code. FxCop looks for over 200 different defects and issues in regards to library design, naming conventions, localization, security, and performance. There is also an SDK that allows you to write custom rules to enforce conventions specific to your needs.
On top of Reflection, the latest version of FxCop has exposed another method of analyzing your assemblies using an introspection engine. This engine provides a rich set of analysis functionality and can analyze large applications much more quickly than the regular reflection-based engine. On top of speed, the introspection engine also supports multithreaded application analysis. Lastly, the introspection engine is different from the reflection engine in that it does not lock assemblies when it performs analysis, allowing you to fix and recompile assemblies while FxCop remains open instead of shutting down FxCop to release locked assemblies.
The purpose of this chapter is to introduce you to the wonderful world of enforced coding policies, and the tool that makes it all possible. After reading this chapter, you should be able to analyze your code for convention violations, design custom violation rules, and know how to configure FxCop to suit your development preferences.
Caution
The engine and SDK specification for FxCop have not yet been finalized, so the common pattern is that each release breaks backward compatibility with existing plug-ins, forcing the developer to update the custom rules to reflect API changes. This chapter was written using FxCop 1.32 for Whidbey Beta 2 (.NET 2.0 Beta 2). I still felt that the information presented in this chapter is important, so I decided to keep this chapter in the book and present this little warning about the changing API. Hopefully the next release version of FxCop supports an easy migration path from the 1.32 API.
This is just a warning that you may not be able to compile the examples in this chapter straight out of the book; you may need to update the examples to reflect the latest API specification. With this in mind, let’s continue on to discovering what FxCop is, and how you and your code can benefit from its use.
Note
The first thing you need to do is install the FxCop tool; you can get the installer at the companion Web site for this book, or from http://www.gotdotnet.com/team/fxcop/.
There are no custom configuration options, so the installation itself is very simple. FxCop can be accessed from either a WinForms applications or the command line using the FxCopCMD application. You can actually integrate FxCop analysis into your build process, which is a great idea because you can fix conformance violations as they occur, instead of letting them build up into a huge list that you have to cull through at a later time. If you want to get as much speed as possible during the build process, you can also stick to running FxCop on a daily basis instead. This is the approach that Microsoft is pushing to its developers. The longer you wait between each running of FxCop, the more possible violations will have been amassed, resulting in more time spent fixing these issues. Making FxCop an integral part of your work schedule ensures increased familiarity with the guidelines and eases the design work. For example, imagine that you create a property which is named in such a way that it does not follow design guidelines. With FxCop integrated with your build process, you would notice this violation immediately the next time your post-build process executes. If instead, you run FxCop on a weekly basis, you would have to go back and modify a week’s worth of work in all places where that property was accessed. There are increased productivity benefits when running FxCop analysis as often as possible.
The first thing to do is create an FxCop project where you can select the assemblies to target for analysis, and specify the rules to enforce. Launch the FxCop tool and start adding assemblies through the Project>Add Targets menu, or by using the Ctrl+Shift+A hotkey. Once you have selected the assemblies you want to analyze, you should end up with a window similar to Figure 13.1.
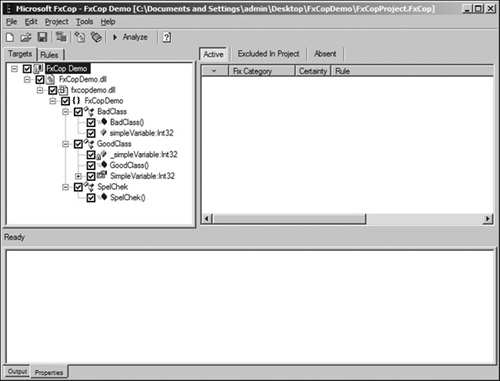
The left tree view shows the hierarchy of the loaded assemblies and the components available for analysis. You can uncheck code that you do not want analyzed, though it is recommended that you only do so if absolutely necessary.
The right view pane has a list view that will populate with rule violations once analysis has been completed. The bottom view pane will display detailed information about a rule violation when one has been selected in the violations list view.
Once the target assemblies have been added to the project, you are now at the point where you can configure the rules engine for the project.
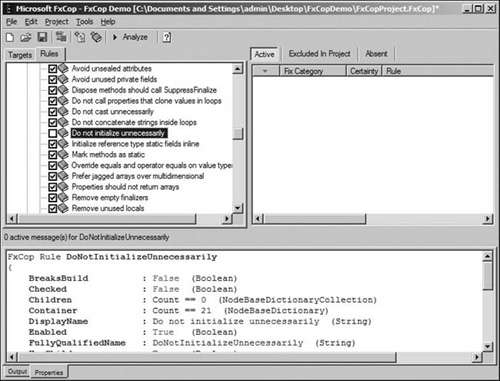
Now that the FxCop project has been created and assemblies have been targeted for analysis, it is time to move on to the configuration of the rules engine. Some people stick to the default configuration, but many developers customize the configuration to suit their own preferences where applicable.
The left view pane contains a tab control with a Rules tab. Selecting that tab will present a listing of the available rules that can be enforced upon the targeted assemblies, and each rule can be enabled or disabled using the checkbox to the left of the rule.
Some rules may not be applicable or favorable to a developer, which warrants the disabling of the rule. For example, even though the .NET runtime implicitly initializes all managed memory to a default value, many developers feel that all variables should be explicitly initialized even when the initialized value and the default value for that data type are the same. Yes, doing so can be viewed as a redundant step as there is a performance rule that prohibits unnecessary initialization, yet other developers feel that explicit initialization is necessary in the spirit of maintainability. Figure 13.2 shows a screen capture of the rules configuration tab.
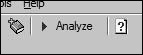
Once your FxCop project has been created and the target assemblies have been specified, it is time to perform analysis. You do so by clicking the Analyze button shown in Figure 13.3.
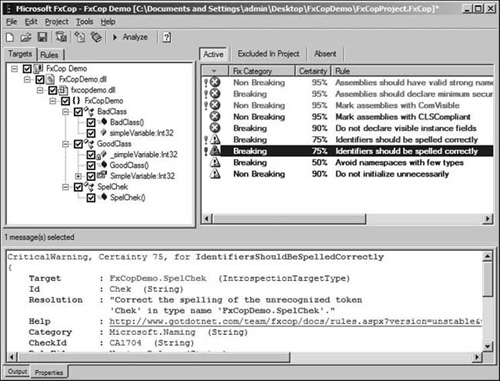
The most advisable approach for fixing guideline violations is to sort the violations by message level with the errors at the top of the list, and to fix each violation one by one. It should be noted that there are two types of errors: regular and critical.
Both types are fairly subjective in nature, and many rule developers feel that it would have made their lives a lot easier if Microsoft had just simplified the message levels to errors, warnings, and informational messages.
Aside from the message level, you will notice that there are a few other statistics for each violation. The fix category indicates whether or not your code will break if the violation is resolved by itself. Breaking indicates that fixing the violation without modifying the rest of your code will cause compilation errors, such as changing a property name referenced elsewhere. Nonbreaking indicates that fixing the violation without modifying the rest of your code should still result in a successful compilation, such as adding an attribute to a class definition. Figure 13.4 shows the FxCop project window after an analysis has been performed.
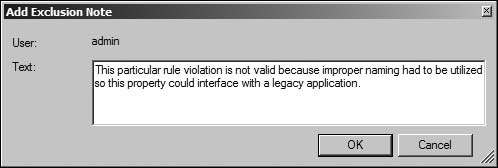
It may be acceptable to exclude certain rule violations from the analysis, and you can accomplish this by right-clicking on the rule in question and selecting Exclude. Exclusion should be done rarely and only with a solid reason. It is now mandatory to give a reason why a particular rule violation was excluded. Figure 13.5 shows this.
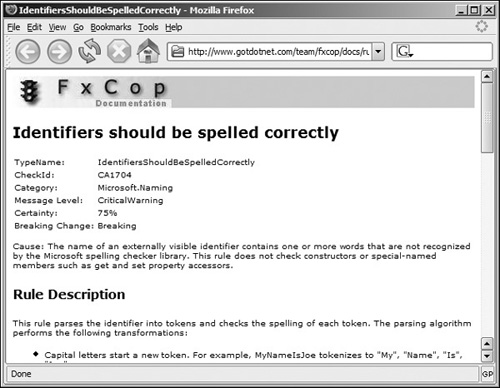
Certain rules that FxCop throws an exception for can be somewhat vague, but thankfully each rule has a referenced documentation page located on the FxCop web site that discusses the rule in greater detail, including possible causes for why a certain exception was thrown. Figure 13.6 shows the web page detailing a spell check exception.
It is also important to keep in mind that not all errors are your fault, as even the pre-2005 Visual Studio generation wizards have code that does not conform to the design guideline standards. If you notice any errors resulting within the InitializeComponent method, or any other auto-generated regions for that matter, it is safe to exclude them.
Another point to note is that FxCop has a fairly rigid spell checker integrated right into the tool, and will generally complain about any product or company names that are not a composition of dictionary words. Additionally, there may be some acronyms you wish to keep in full uppercase, yet FxCop will complain that they break design guidelines. It is quite easy to configure FxCop to ignore certain cases of a rule exception, and this can be done by modifying the CustomDictionary.xml file that resides in the installation folder of FxCop. If you’re working in a multi-developer environment, be sure to add this file to source control so that all developers have access to the custom configuration you specify.
You may be reading all the built-in rules available for FxCop and thinking that they enforce all the policies you have. If this is the case, you do not need to extend the rules engine. However, some projects require the enforcement of custom rules, in which case you will need to extend the rules engine in FxCop. The latter half of this chapter covers building custom FxCop rules and enabling them for enforcement in your projects.
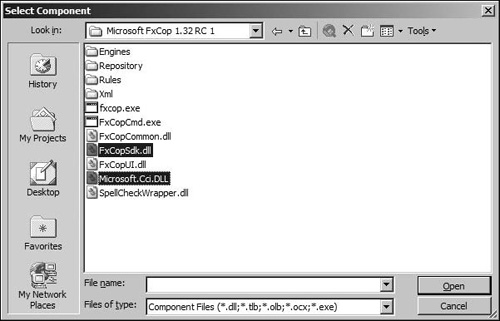
The first thing to do is to create a new C#.NET class library project and reference the FxCop SDK. Navigate to the installation folder of the FxCop tool, and reference the FxCopSdk and Microsoft.Cci assemblies. Figure 13.7 shows the assembly reference screen that should resemble what you see.
For an extremely simple yet practical example, we will make a custom FxCop rule that requires all namespaces to be prefixed with Nexus.WorldBuilder.
We need to start by creating an XML file in the project that will eventually be compiled as an embedded resource during the build process. This file defines all the rules that FxCop will load, including configuration and resolution information. It is here that you can set the warning level, description, and resolution for each rule. The name of the file at this point is fairly flexible.
<?xml version="1.0" encoding="utf-8" ?>
<Rules>
  <Rule TypeName="NamespacePrefix" Category="Nexus.Naming" CheckId="NX0001">
   <Owner>Graham Wihlidal</Owner>
   <Email>[email protected]</Email>
   <Name>Namespaces must be prefixed with Nexus.WorldBuilder</Name>
   <MessageLevel Certainty="95">Error</MessageLevel>
   <Description>All namespaces should be prefixed with Nexus.WorldBuilder
   for consistency</Description>
   <LongDescription>All namespaces should be prefixed with Nexus.WorldBuilder
   for consistency</LongDescription>
   <Url>http://Url-To-A-Help-Page</Url>
   <Resolution Name="Default">The namespace '{0}' is not prefixed with
   Nexus.WorldBuilder</Resolution>
   <FixCategories>Breaking</FixCategories>
  </Rule>
</Rules>
You must set the Build Action property to Embedded Resource so that this XML file will be embedded in the rule assembly file; otherwise FxCop will not be able to find it and will report that there are no rules to load.
The best approach to structuring the code for a rules assembly is creating a base rule from which other rules can inherit. This is because there are a few arguments that must be repeated for each rule, and proper class design urges the normalization of repeating data.
Here is the code for the base rule class:
using System;
using Microsoft.Cci;
using Microsoft.Tools.FxCop.Sdk;
using Microsoft.Tools.FxCop.Sdk.Introspection;
namespace NexusRules.Naming
{
    [CLSCompliant(false)]
    abstract public class BaseNexusNamingRule : BaseIntrospectionRule
    {
        protected BaseNexusNamingRule(string name)
              : base(name, "NexusRules.Naming.NamingRules",
                            typeof(BaseNexusNamingRule).Assembly)
        {
        }
    }
}
You will notice the arguments being passed into the base constructor. The first argument is the name of the rule, and it is passed in through the constructor of each custom rule inheriting from BaseNexusNamingRule. The last two arguments require more explanation. The second argument is the fully qualified name of the embedded configuration XML file without the extension. In this example, the assembly is NexusRules.Naming.dll and the XML configuration file is NamingRules.xml, resulting in NexusRules.Naming.NamingRules. The third argument is a reference to the assembly containing the rules.
It is also important to note the need for [CLSCompliant(false)]; the FxCop SDK is not CLS-compliant, so it is required that this attribute be placed so that the code compiles correctly.
With the base rule class defined, we can create our first FxCop rule. The magic behind the FxCop SDK is the Check method. There are many different overloaded versions, all of which get run when an assembly is analyzed; it becomes a matter of picking the right overloaded method for the job.
Here is the code for the example FxCop rule:
using System;

using Microsoft.Cci;
using Microsoft.Tools.FxCop.Sdk;
using Microsoft.Tools.FxCop.Sdk.Introspection;

namespace NexusRules.Naming
{
    [CLSCompliant(false)]
    public class NamespacePrefix : BaseNexusNamingRule
    {
       public NamespacePrefix() : base("NamespacePrefix")
       {
       }

       public override ProblemCollection Check(string namespaceName,
                                                   TypeNodeList types)
       {
           if (!namespaceName.StartsWith("Nexus.WorldBuilder"))
           {
               string[] arguments = new string[1] { namespaceName };
               Resolution resolution = GetNamedResolution("Default", arguments);
               Problems.Add(new Problem(resolution));
           }

           return Problems;
       }
   }
}
You should notice that there is a collection called Problems with no apparent declaration. This property is declared in the BaseIntrospectionRule class, and is the collection you must add Problem objects to and return from the Check method. Do not create a new ProblemCollection as it will not work. Be sure to return null if no errors occurred. Lastly, you need to modify AssemblyInfo.cs in a couple of places and also give the assembly a strong name key.
Add the following lines near the other assembly attributes:
[assembly:CLSCompliant(true)]
[assembly:ComVisible(false)]
If everything compiles correctly, you are halfway there! The real parlor trick is getting FxCop to recognize the rules in your assembly. The custom rules importer is very strict, and quite often it forces you to pull your hair out just to get custom rules to import. Thankfully, the latest version of FxCop outputs XML configuration errors, whereas the older versions did not and required some clever debugging to fix. You can import custom rule assemblies by selecting Add Rules from the Project menu.
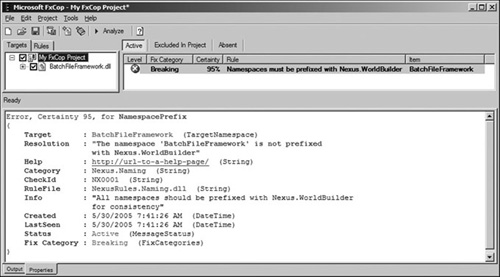
If FxCop fails to load your rules, be sure to read the messages left in the output window of FxCop. If the custom rules loaded correctly, you can try them out. You should have output similar to Figure 13.8 after analyzing an assembly that violates the namespace prefix rule defined in this example.
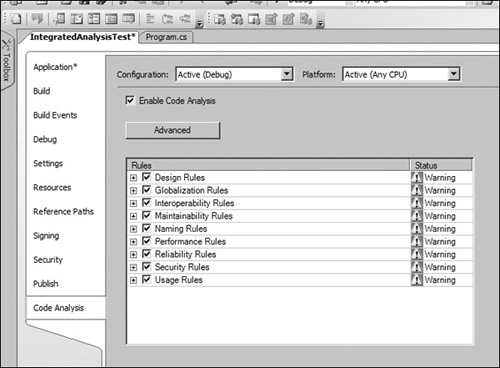
Lastly, it is important to mention that Microsoft has integrated FxCop analysis into Visual Studio 2005. To enable integrated analysis, just go to the properties page of the project, and then select the Code Analysis tab. Check the Enable Code Analysis checkbox and configure the rules that you want to conform to.
You should end up with a dialog like the one shown in Figure 13.9.
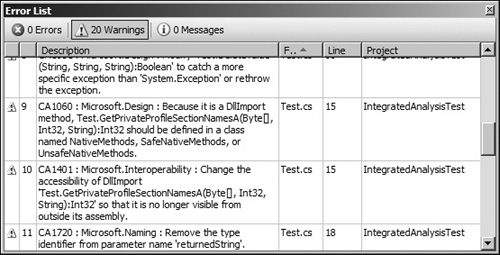
The previous step has now configured your project to perform integrated code analysis during the build process. By default, analysis issues and rule violations will appear as warnings in the error list window, as shown in Figure 13.10.
This chapter discussed the importance of coding guidelines and using FxCop to enforce them. Also surfacing was the apparent need to deviate from the proposed norm, and ways to configure FxCop to perform customized analysis and enforcement of both Microsoft- and project-specific policies.
Lastly, there are a number of online resources that cover how to build more complex custom rules, one of which is the June 04 Bugslayer column from MSDN magazine: http://msdn.microsoft.com/msdnmag/issues/04/06/Bugslayer/default.aspx.
Perhaps the best place to learn the art of building FxCop rules is by disassembling the built-in rules provided by Microsoft. You can do this by downloading Reflector for .NET, an extremely useful tool written by Lutz Roeder, which allows you to browse classes and disassemble non-obfuscated code into a humanly readable format. You can download Reflector for .NET at http://www.aisto.com/roeder/dotnet/.