As mentioned in Chapter 2, The Paint.NET Workspace, there is a difference between resizing your canvas and resizing your image. Your canvas size refers to the size of the document you are working on or the size of your finished document.
If you have imported a photo from a camera with a large sensor, for instance, an SLR camera, your image size will be very large because it will hold a lot of information. Most likely, you are not going to print an image of this size, so we will have to make it a little more manageable. First, we will want to resize the image to make it a little smaller:
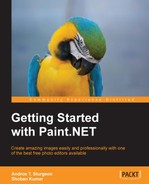
Because we opened the image first, Paint.NET sets the size of the canvas to the size of the image. As you can see, the image has a width of 72 inches and a height of 48 inches. An image of this size would be impractical if you were to print something like a flier on a standard sheet of paper.
So it is here that you can resize your image to something a bit more manageable. You can do this in the following two ways:
- In the menu, select Image/Resize or use the Ctrl + R keyboard shortcut. This will bring up the Resize dialog box. Then perform the following steps:
- First, select how you want Paint.NET to resample the image or rearrange information in the image when you change the size. Usually, you will want to leave it on the default setting Best Quality. It will take more memory, but most modern systems can handle this.
- Under this option, you will notice two radio buttons: By Percentage and By Absolute Size. The By Percentage option will allow you to change your image by a percentage of what the original size is. By default, it is set to 100%. If we select this option, we can put in a larger value to make the image larger (for instance, 125%) or smaller (say 35%).
- You can also change the size of an image by selecting By Absolute Size and entering custom pixel values for Width and Height. Perform the following steps to do so:
- Clicking on Maintain Aspect Ratio will automatically change your width if you enter a height value so the image won't become squished or distorted. Your height will automatically change if you enter in the width value.
- By deselecting Maintain Aspect Ratio, you will be able to change the image dimension as you wish; however, your image will most likely become distorted.
- If you prefer to work in centimeters, simply use the drop-down menu in this selection and change it from inches to centimeters.
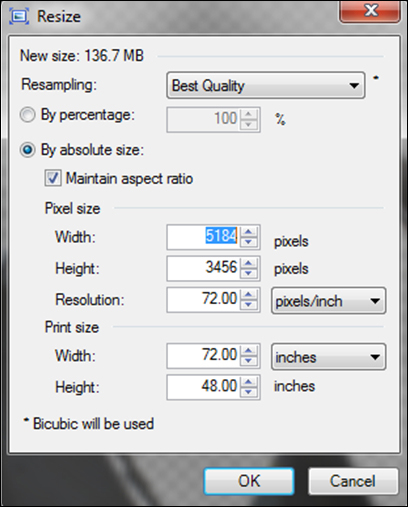
The image size and canvas size can be confusing for beginners. To make it easier for beginners to understand, consider the following image:
Imagine that you are painting on a white sheet of paper. This sheet is the canvas size and your painting is the image. If you want more space to paint more, you will add another sheet of paper to make it bigger. This will only increase the white space but not the size of the painting. Similarly, increasing the canvas size will give you more space but will not increase the image size.
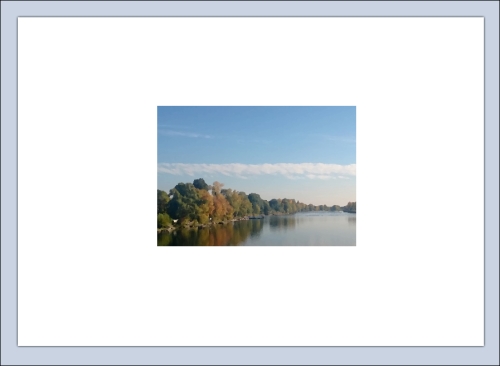
Reducing the canvas size may affect the size of the image based on the change you make. For example, in the preceding image, if we were to reduce the canvas size to a value smaller than the image size, the following will be the result:
If you want your final document to be the size of, let's say, a standard sheet of letter paper, you will have to first adjust your image and then adjust your canvas size. Otherwise, your image will become larger than your canvas and the entire canvas will be filled with a closeup of one part of your image. The following screenshot shows you the options to adjust your image:
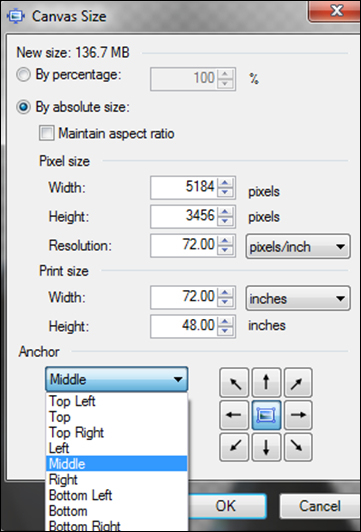
Navigating to Image | Canvas Size or using the Ctrl + Shift + R keyboard shortcut will bring up the Canvas Size dialog box. This is where you will change the absolute value of your document. As with the Image-Resize dialog box, you can scale your canvas by a percentage or by the absolute values you select. You can also maintain your aspect ratio. You do this in the Pixel size option. However, you can select your print size, or what your final output will be with Print size. This means that you can work with a large version of your image, but when it is time to print, it will scale down your image to something more manageable.
An anchor point is the spot on your image from where the change should take place. To understand this better, consider the following image:
Imagine that the length of line AC is 10 centimeters. Point B is at 5 cm. If you want to increase the length of the line to 15 centimeters, there are a few options:
- You can draw a 5-cm line from point C. In this case, point C is the anchor point.
- You can also draw a 10-cm line from point B, and in this case, the anchor point is B.
- You can draw a 15-cm line from point A, and in this case, point A is the anchor point.
The same concept is used in canvas resizing.