
Custom dialogs can be used for all kinds of user input. We can ask the user to fill a form (for example, a login form can be displayed as a dialog). We can also use them to ask the user to accept or decline some action that requires immediate attention (for example, a dialog asking the user "Are you sure you want to delete the selected items?").
As we can theoretically display any other page segment in a dialog, it would be great if we had a single flexible method to do it. The easiest way to attain flexibility is to split the dialog into three parts: view, model, and controller.
In this recipe, we're going to create a general dialog. It will consist of a view (HTML that supports JavaScript templating), a model (available from the template), and a list of event bindings that make the controller.
This is an advanced recipe. If you're not familiar with Embedded JavaScript Templates (EJS), we recommend reading the EJS recipes in Chapter 9, Client-side Templates, before reading this recipe.
We're going to use John Resig's simple implementation of EJS-like templates. It's a compiler that converts EJS templates to JavaScript functions. We're not going to explain the compiler—it's sufficient to know that it takes the ID of the element containing the template content and returns a template function. This function gives an HTML output when applied to an object.
The following is the template compiler function:
// Simple JavaScript Templating
// John Resig - http://ejohn.org/ - MIT Licensed
(function(){
  var cache = {};

  this.tmpl = function tmpl(str, data){
    // Figure out if we're getting a template, or if we need to
    // load the template - and be sure to cache the result.
    var fn = !/W/.test(str) ?
      cache[str] = cache[str] ||
        tmpl(document.getElementById(str).innerHTML) :

      // Generate a reusable function that will serve as a template
      // generator (and which will be cached).
      new Function("obj",
        "var p=[],print=function(){p.push.apply(p,arguments);};" +

        // Introduce the data as local variables using with(){}
        "with(obj){p.push('" +

        // Convert the template into pure JavaScript
        str
          .replace(/[

]/g, " ")
          .split("<%").join("	")
          .replace(/((^|%>)[^	]*)'/g, "$1
")
          .replace(/	=(.*?)%>/g, "',$1,'")
          .split("	").join("'),")
          .split("%>").join("p.push('")
          .split("
").join("'")
      + "'),}return p.join(''),");

    // Provide some basic currying to the user
    return data ? fn( data ) : fn;
  };
})();
Note
The original article explaining JavaScript Micro-Templating can be found at http://ejohn.org/blog/javascript-micro-templating/.
We're going to write the page code and the dialog library.
- Let's create a file named
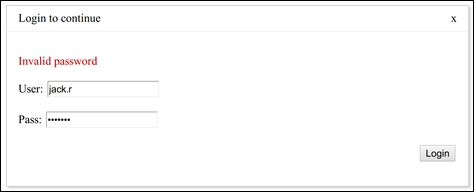
index.html. It will contain a secretdivarea and a template for a login dialog with the ability to pre-fillusernameand the ability to show an error message:<!DOCTYPE HTML> <html> <head> <title>Simple rich text editor</title> <link rel="stylesheet" type="text/css" href="dialog.css"> <style type="text/css"> .dialog.tmplExample .button-area { margin-top: 20px; text-align:right; } .dialog.tmplExample p.error.hidden { display:none; } .dialog.tmplExample p.error { color:#c00; } div.secret { display:none; } </style> </head> <body> <div> <div class="secret"> Welcome to the secret place, where only authenticated users may roam. </div> </div> <script id="tmplExample" type="text/html"> <p class="error hidden"></p> <p><label for="user">User:</label> <input name="user" type="text" value="<%= user %>" ></p> <p><label for="pass">Pass:</label> <input name="pass" type="password" value="<%= pass %>" ></p> <p class="button-area"> <button class="login" type="button">Login</button> </p> </script> <script src="http://ajax.googleapis.com/ajax/libs/jquery/1.8.2/jquery.min.js"></script> <script type="text/javascript" src="tmpl.js"></script> <!--<script type="text/javascript" src="dialog.js"></script>--> <script type="text/javascript" src="example.js"></script> </body> </html> - To see how we would like the dialog API to work, we're going to create
example.jsnext. It will immediately show a login dialog that will close once a correct password is input, then the secret content will be shown. Otherwise, an error message will be displayed inside the dialog:$(function() { dialog("tmplExample", {title: 'Login to continue', user: 'jack.r', pass: ''}, { 'button.login => click': function(dialog, ev) { var data = dialog.data(); if (data.pass == 'secret') { dialog.close(); $('.secret').show(); } else { dialog.find('p.error').text('Invalid password').show(); } } }); }); - Next let's create
dialog.js. It should export a function calleddialogthat takes three arguments: the ID of the dialog template, the data to fill into the template, and an object containing event bindings:(function() { window.dialog = function(template, data, bindings) {- First, build the
dialogchrome:var holder = $("<div />").addClass('dialog') .addClass(template); var titlebar = $("<div />").addClass('title') .appendTo(holder); var titletext = $("<span />").addClass('titletext') .appendTo(titlebar); var close = $("<span />").addClass('close') .html('x').appendTo(titlebar); var form = $("<form />").addClass('dialog') .appendTo(holder); - Fill it with the templated HTML, set the title, and display it:
form.html(tmpl(template, data)); $(titletext).text(data.title || "Dialog"); holder.appendTo('body'), - Apply the bindings that are in the
selector => eventformat:for (var key in bindings) if (bindings.hasOwnProperty(key)) (function(key) { var selectorEvent = key.split(/s+=>s+/); form.find(selectorEvent[0]).on(selectorEvent[1], function() { var args = [].slice.call(arguments); args.unshift(self); bindings[key].apply(this, args); }); }(key)); - Build the
dialogobject to return. Provide thefind()function for fields, thedata()function to extract all form data as a JSON object, as well as event binding and close functions:var self = {}; self.find = form.find.bind(form); self.data = function() { var obj = {}; form.serializeArray().forEach(function(item) { if (obj[item.name]) { if (!(obj[item.name] instanceof 'array')) obj[item.name] = [ obj[item.name] ]; obj[item.name].push(item.value); } else obj[item.name] = item.value; }); return obj; } self.close = function() { holder.trigger('dialog:close'), holder.remove(); }; self.on = holder.on.bind(holder); close.on('click', self.close); return self; }; }()); - Finally, we will customize the positioning and style of the dialog in
dialog.css:div.dialog { position:fixed; top:10%; left: 50%; margin-left: -320px; width:640px; height:auto; border: solid 1px #ccc; background-color:#fff; box-shadow: 2px 2px 5px #ccc; } div.dialog div.title { border-bottom: solid 1px #eee; } div.dialog div.title span { padding: 0.5em 1em; display:inline-block; } div.dialog div.title span.close { float: right; cursor: pointer; } div.dialog form.dialog { padding: 1em; }
- First, build the
To make a flexible dialog library, we split the data needed to show the dialog into view, model, and controller.
The tmpl.js library provides a function that processes an EJS template using the provided model object. The innards of this function are out of the scope of this recipe.
Our dialog function constructs a chrome containing a title bar, a Close button, and a form. Afterwards, it fills out the form with the template and data. Finally, it applies our bindings to the content of this form. The bindings are in the jQuery selector => event format and can be used to respond to any kind of user input.
This function returns a dialog object (constructed in the variable self). The object provides the following convenience functions:
find: This allows the user to find elements within the form using selectorsdata: This extracts all data inputs into the form as an easy-to-use JSON objectclose: This closes the dialogon: This allows the user to add extra bindings (for example, thedialog:closeevent)
The object also provides a convenience event named dialog:close that gets triggered when the dialog is closed.
We style this dialog using dialog.css. The dialog is positioned with a pure CSS-based positioning method: using fixed-width and negative margins, we avoid the need to read the width of the window, and hence manage to fully avoid using JS.
The flexible templating language allows us to create dialog content of any complexity, while the bindings syntax allows full control over of all user input. We can simplify the creation of some common dialogs by providing the template and some, or all, of the bindings.
With this generic method, creating simple message boxes, generic text prompts, or complex dialog forms with a variable number of fields are all equally easy.