Portraits, whether of people or of pets, pose a special challenge. No one is going to notice if you draw a raccoon and its eyes are a bit closer together than the original’s, but if you change the shape of Sparky’s nose . . . The grid method is a useful technique for drawing exactly what you see, getting all the proportions and details precisely correct. With this approach, you simply draw a grid on your photo and the same size grid (or a proportionately larger or smaller one) on your drawing paper. The grid breaks up your subject into smaller, more manageable parts while providing a guide for placement and sizing. I’ll show you how it works using a friendly Labrador Retriever.

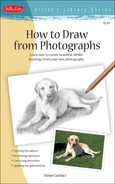
Photographing a Pet I like to take pet photos outdoors in the sun. I set my camera to three-exposure bracketing and follow the animal, coming down to eye level and taking shots from different angles. I usually take 200 to 300 shots, as pets don’t understand posing! Then I choose an image that showcases the animal’s personality, form-defining shadows, and a nice design. In this case, I liked the angle of her face, the position of her body, and the angle of her tail.

Establishing the Grid You can draw a grid directly on your photo (using a ruler to make even squares), or you can digitally superimpose one. I like to keep my photo clean for reference, so I simply print a grid out on acetate and attach it above my photo with drafting tape. I print the same grid on a regular piece of paper for my sketch (as I’ll be refining the drawing on a separate piece of art paper, anyway).

Transferring by Grid With my grids in place, I can switch my focus to the main outline. Instead of sketching in the general outlines of the shapes as I usually do, I now look at each square individually, drawing the outline of the shape within the corresponding square on the copy paper. It doesn’t matter where you start on the page with this method! Once I have drawn each square, I go back and check for accuracy, square by square.

Step One The grid method is ideal for accurate line drawings; when my base outline is complete, though, I tape a piece of heavyweight tracing paper over the line drawing to create a carefully refined sketch. I touch in additional lines to indicate fur at this stage, particularly where it indicates underlying muscle. I also draw in lines of grass. When I finish, I transfer the drawing to smooth Bristol paper, cleaning up the with a sharp HB and a kneaded eraser.
Step Two I study the direction of hair growth in the photo before applying a graphite wash base. Using a large stump covered with graphite powder, I stroke in the direction of the hair growth to establish shadows and the dog’s darker coloration. For the head and ears, as well as for the body, legs, and tail, I apply short strokes with the stump tip. I also use the tip to add a dark base value to the eyes and nose. For the head’s cast shadow, I apply long strokes with the stump’s side. I then make irregular strokes for a deep tone on the shadowed grass.

Step Three I pick up a 2B to draw over the base wash, making quick, short strokes that are a bit varied around the head and ears as well as the body and legs, and curving them where the hair curves around the body. I add some hair to the tail before applying short strokes around the eyes, establishing texture. Then I use the pencil point to better define the eye, also indicating the pupil. Using the side of the pencil, I darken the nose with small circular strokes. Finally, I add texture to the grass, alternating between curved and straight strokes.
Remember those 200 photos I took before beginning this drawing? Well, I didn’t just discard the ones that weren’t perfectly suited for portraiture. Those additional photos come in handy as references. Before I start drawing, I like to have a clear understanding of the animal’s form, and viewing the pet from different angles helps me do so. Varied viewpoints also assist me in making determinations about patterns of hair growth—you might see something from one angle that you missed from another. Going through my photos—and even making some rough sketches of what I see, as in the cat example below—helps ensure that I’m correctly interpreting the animal’s shape and form in the final drawing.

Front View

3/4 View

Profile View

Step Four I continue building up hair texture using the tip of a 2B and heavier pressure, reminding myself to vary the strokes so they don’t become too mechanical and regular. I use the side of the pencil to add shading, following the direction of the form. I further define both the nose and the eye before using my kneaded eraser to pick out highlights. I then use the side of a 4B to deepen tones in the grass, applying very heavy pressure in the shadow areas. I use the points of the 2B and 4B to add more grass texture, again with varying strokes.

Step Five Now using the sharp point of an HB, I better define the eye, nose, and mouth; create more texture on the head; and develop the ears’ cast shadows. For the ears themselves, I use both a 2B and a 4B. I also deepen values below the nose with the 4B. With the point of an HB, I develop detail on the paws and create texture in the lightest areas of hair. For the grass, I use my kneaded eraser to pick out lighter blades and patches, switching to a stump to smudge in darker areas, and then alternating between pencil and eraser again to build up texture. As the grass recedes, I use the side of the pencil to create softer texture instead of drawing blades. Then I use the eraser to pick out a few more highlights on the dog to finish.
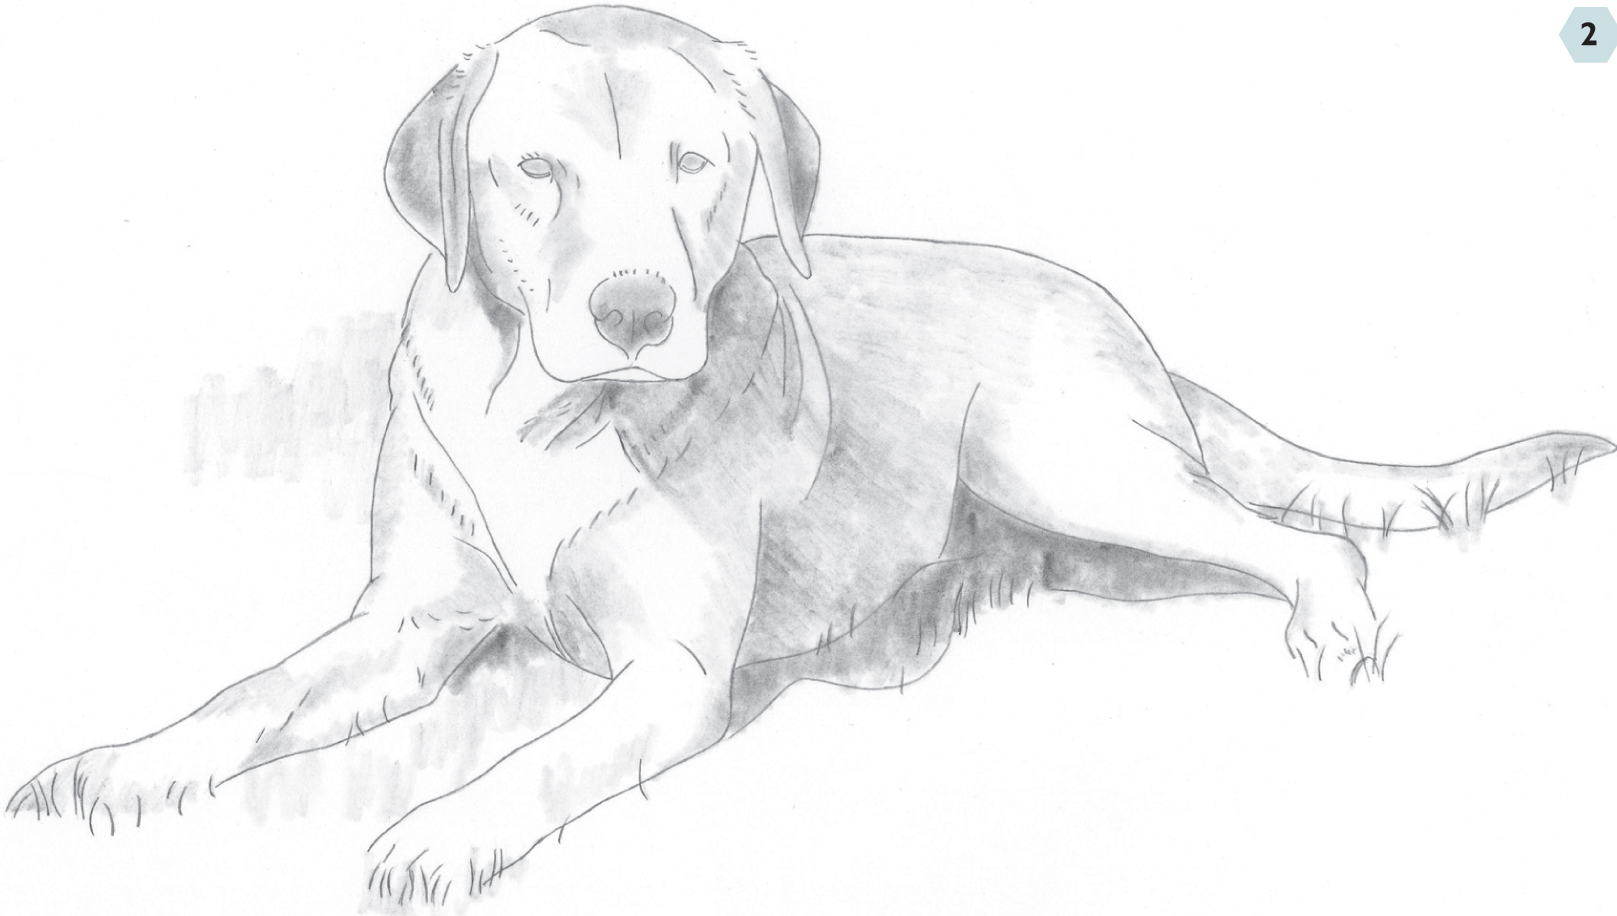
Highlights on the iris and pupil are essential to creating a realistic eye, adding both life and sparkle. Sometimes it’s simply a matter of replicating the highlights you see in your photo reference—but even if your photo does not include this element, your drawing should! You may need to search for other photos (of the same animal or another animal of the same species) so you can accurately depict the eye’s reflective quality. No matter the animal, the process is the same for developing the highlights, as I’ll demonstrate with a cat’s eye here.
Step 1 After carefully drawing the outline of the eye shape, I block in the pupil—and the highlights, as well. Then I apply graphite with the side of a stump, smudging in a base layer of tone.

Step 2 I switch to a 2B for shading, applying radiating strokes around the pupil, working around the highlight, and making circular strokes along the iris’ edge and around the eye. I apply very heavy pressure to darken the pupil.

Step 3 For the deepest shading, I use a 4B, layering small circular strokes to create the illusion of flecks of color in the iris. I use an HB to define the eye’s outer edges. I use my eraser to lift out more flecks and clean up the highlights.