
Many beginning artists shy away from architectural subjects because they worry about depicting the buildings accurately with all their angles and dimension. But once you understand a few simple rules of linear perspective, it’s easy to approach subjects like this historic piazza in the historic Italian town of Assissi. It’s just a matter of breaking the subject down into simple shapes and understanding how those individual shapes relate to the horizon and vanishing point in the distance.


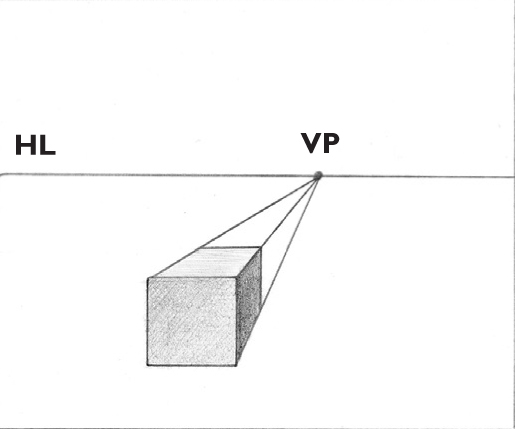
When the viewer faces the front plane of an object, the perspective is one-point perspective. There is one vanishing point on the horizon line, where all lines converge. For example, if you were viewing a set of railroad tracks, the rails would converge in the distance at the vanishing point. To draw an object in one-point perspective, first I draw the horizon line and vanishing point. Then, I draw the front of the object, followed by a line from each corner of the object to the vanishing point. Finally I draw lines for depth.

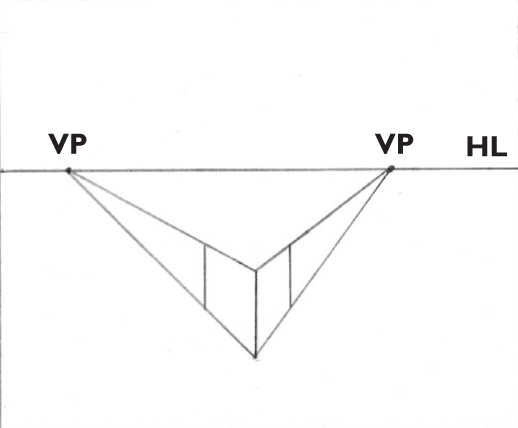

When an object is not viewed head on, two-point perspective is employed. Here, two vanishing points are located on the horizon line. First I draw the horizon line with two vanishing points. Then I draw a vertical to represent the location and height of the item. After creating converging lines that travel from the top and bottom of the object to each vanishing point, I establish the depth with vertical lines. Finally, I draw lines from each corner to the opposite vanishing point.

Removing Perspective Distortion I try to stand as far back as possible when photographing a building, so that the photo’s perspective isn’t distorted in my image. But inevitably, you’ll need to make some adjustments and corrections if you’re going to be working from a photo. Rather than drawing these buildings exactly as I see them, I’ll use a right-angle tool and a ruler to establish a more accurate portrayal than my camera captured.
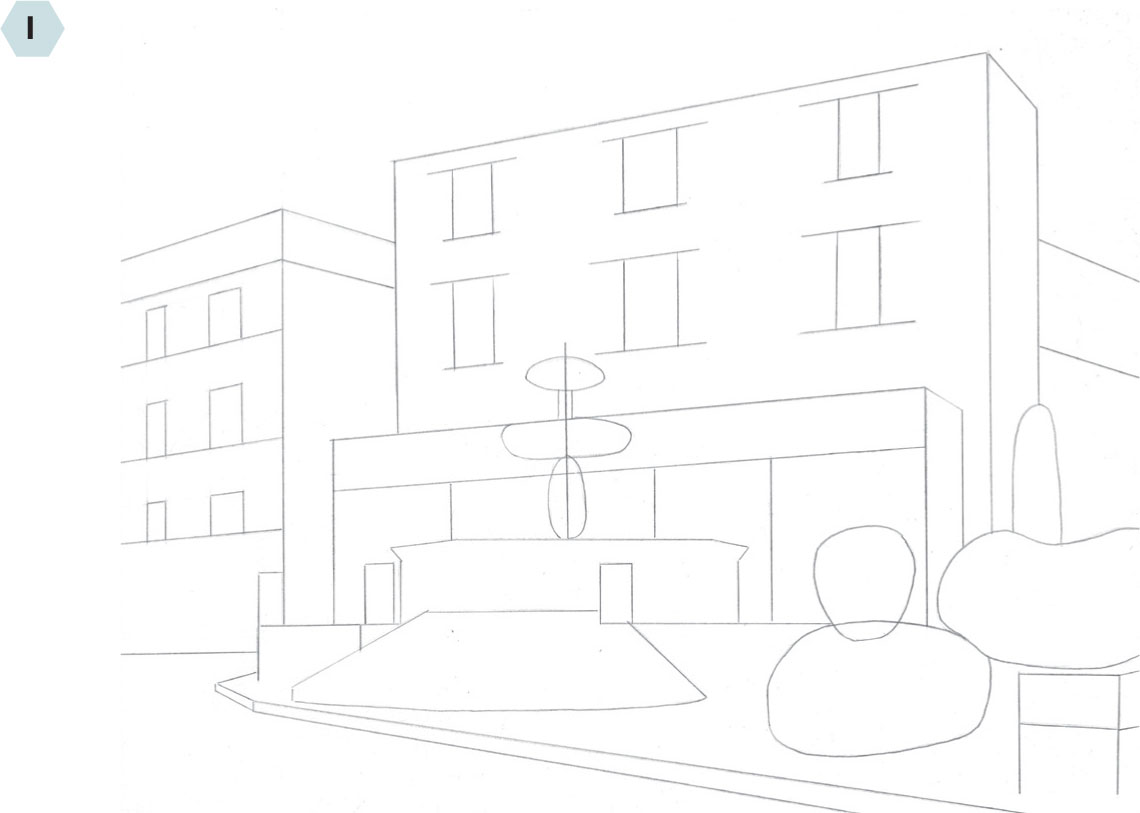
Step One I start my sketch with the main building, thinking of it as a large box. I use a right angle tool and a ruler to establish the lines in perspective. Then I do the same for the building on the left. With the buildings in place, I draw the windows. Next I block in the shape of the terrace, using verticals to indicate supporting arches and columns. To draw the fountain, I sketch simple lines and ovals to suggest the basic shape. And I represent the plants on the right with large organic shapes.

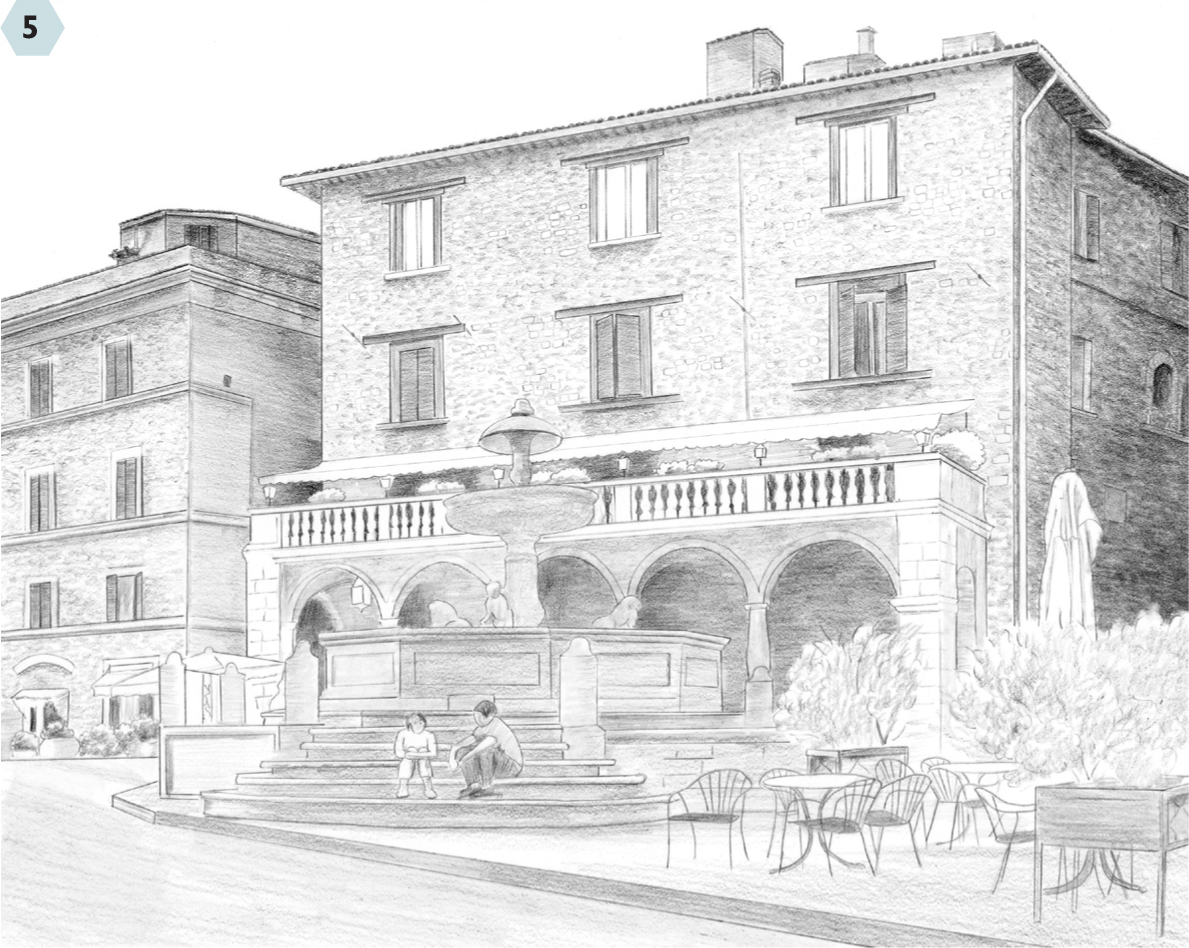
Step Two Now I add a little detail and refine some of the shapes. I add the roof to the building, along with windows detail with the help of my ruler. Then I create the arches and columns, along with the awning for the terrace. I represent the plants on the terrace and down the street with simple ovals. I create additional detail on the fountain, checking all verticals with my right angle tool. I also add stairs to the fountain, and I block in the couple sitting on the steps. Finally I draw the two tables at the right of the composition.

Step Three This is a more complex subject, but it becomes approachable if you take it in stages. We’ll use this base sketch as a guide for the more detailed drawing. On a sheet of tracing vellum, I copy over the base structures, adding more detail to the roof, windows, and terrace. I refine the drawing of the plants and draw in the lanterns. I make some indications of stonework, and I roughly draw the two figures that are seated at the fountain. I also draw the umbrella, chairs, and plants before transferring to Bristol board.
Step Four Now, using the side of a 4B, I tone the sides of the buildings, stroking along the angle of the perspective. With the pencil tip, I dot the roof to indicate tiles. I stroke horizontally to shade under the roofline, terrace awning, and arches. With the side of a 2B, I shade the windows and shutters. I also tone the fountain, following the form. I shade the distant doorway and plants, plus add texture to the plants using a 2B. I lightly shade the umbrella. Then I tone the planter and street curb with heavier pressure.
Step Five To develop building texture, I make short, wide strokes with the 4B, varying pressure. I apply heavier pressure on the sides. I also deepen tone under the roof and add window shading. Switching to a sharp HB, I define edges. With the HB’s side, I shade the top windows, tone the supports, and deepen under the arches. Then I make curved strokes with the side of the 2B to shade the upper fountain. For the base and steps, I use long horizontal strokes. I apply dark tone to the chairs and use the 2B for plant texture. I also tone the ground with the side of a 4B.

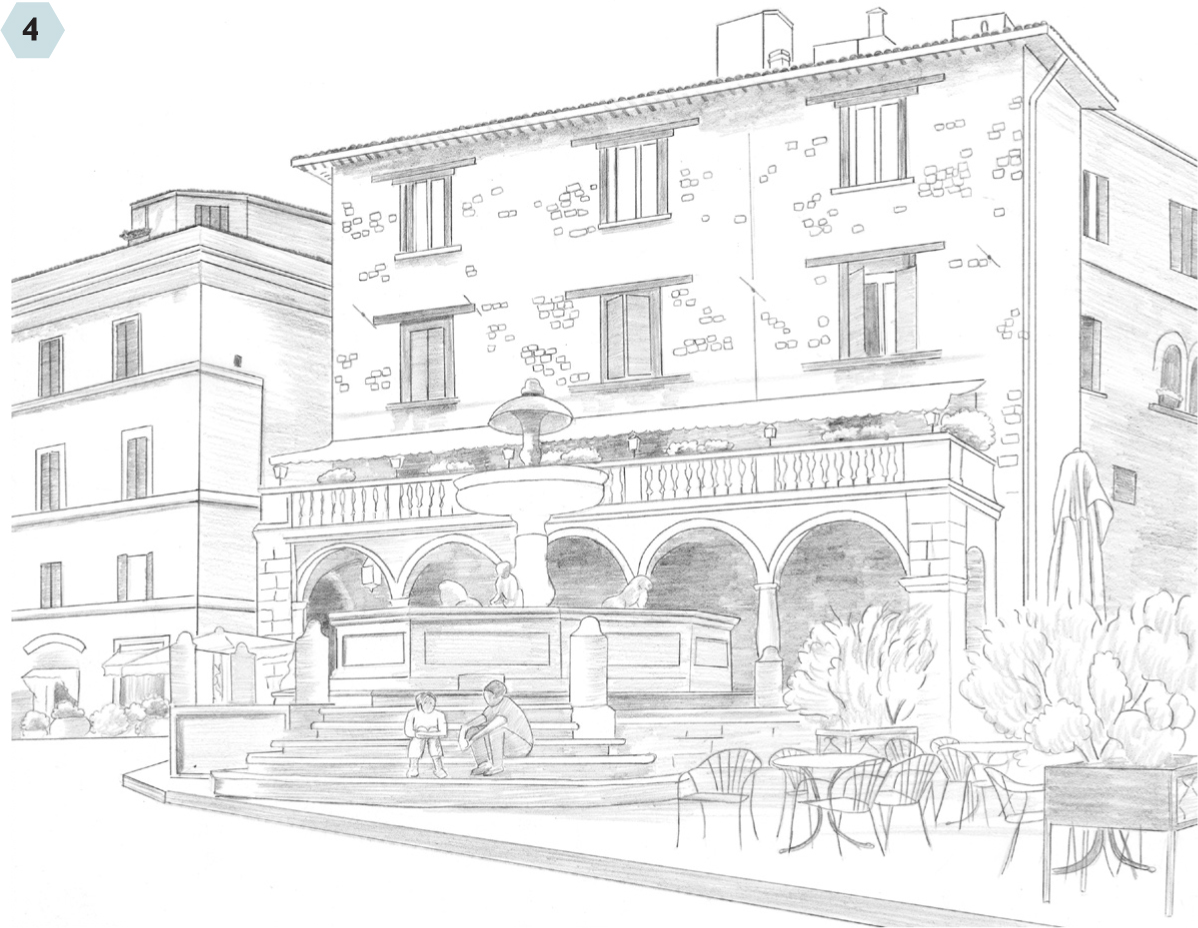
Step Six For the buildings, arches, and columns, I add the darkest shadows with a 6B, refining the edges with a sharp HB. Under the arches, I lift out light areas. I shade the balusters, tone the awning, add plant texture, and shade the lights on the terrace. Next I shade the upper fountain using the 4B’s side. To create water, I lift out tone. For the base and steps, I use both the 2B and 4B, refining edges with an HB. I shade the planters, also deepening shadows under doors and on the umbrella. I tone the ground. And then I finish with a sharp 2B, deepening the planter bases and refining edges.