A robot can be controlled remotely through radio communication. We can use an RF module, Wi-Fi, or Bluetooth to communicate between robot and another system.
In this section, we'll try to control a robot from a computer using Bluetooth. In general, a communication model between a robot and a computer can be described as follows:
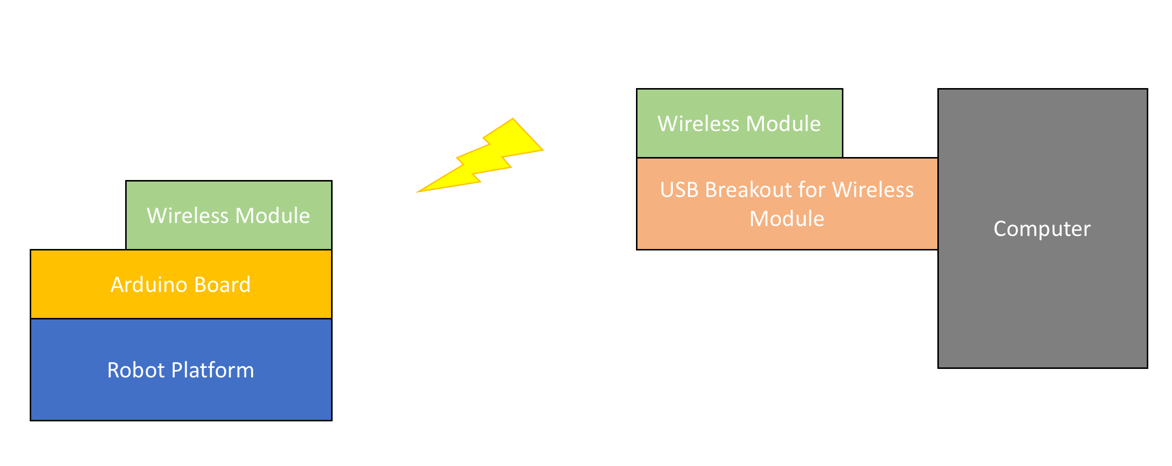
There are some radio and wireless modules that you can use to integrate with your robot to communicate with a computer.
For testing, I use the MiniQ Discover Arduino for robot platform from DFRobot: https://www.dfrobot.com/product-1144.html. Since this robot platform uses the Romeo board (Arduino compatible) as the core robot board, it supports an RF/wireless module-based XBee shield. You can check it out at https://www.dfrobot.com/product-844.html. This is what it looks like:

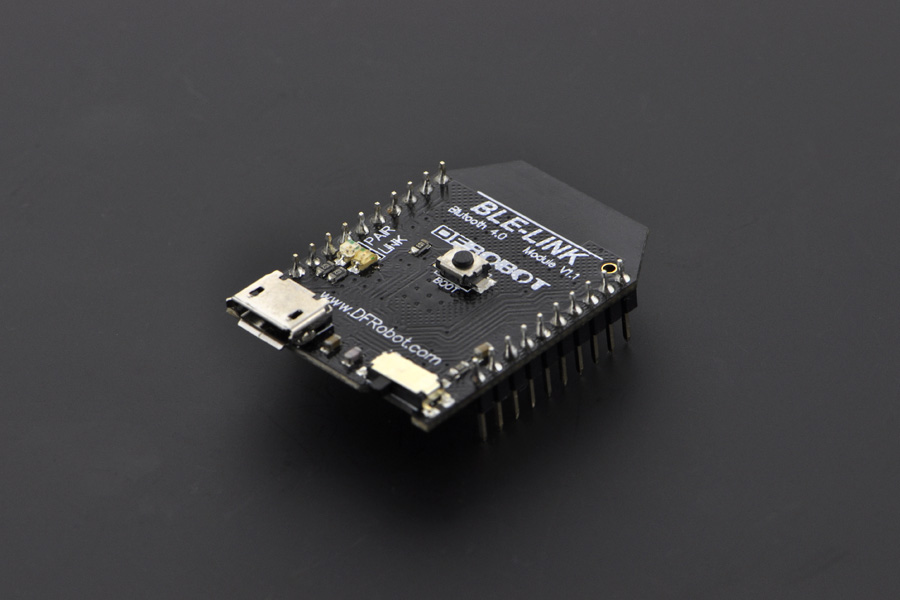
I use Bluno Bee (https://www.dfrobot.com/product-1073.html) from DFRobot for the RF module on the Romeo board. This module has a serial BLE network stack. You can attach it to the board and listen for incoming messages from serial pins. Bluno Bee has the same pin model as the XBee module. You can see it here:
Put the Bluno Bee module into the MiniQ Discover Arduino robot on the Romeo board. You also need another Bluno Bee that is attached to your computer through a micro-USB cable. You can see my implementation of the robot kit here:

Now we'll continue to develop a program to enable our robot to be controlled from a computer. Make sure you've turned off the robot. Using a micro-USB cable attached to the Romeo board, you can write a sketch program.
Open the Arduino software and write the following complete program:
//Standard PWM DC control
int E1 = 5;     //M1 Speed Control
int E2 = 6;     //M2 Speed Control
int M1 = 4;    //M1 Direction Control
int M2 = 7;    //M1 Direction Control

void stop(void)                    //Stop
{
  Serial.println("stop");
  digitalWrite(E1,LOW);
  digitalWrite(E2,LOW);
}
void advance(char a,char b)          //Move forward
{
  Serial.println("advance");
  analogWrite (E1,a);      //PWM Speed Control
  digitalWrite(M1,HIGH);
  analogWrite (E2,b);
  digitalWrite(M2,HIGH);
}
void back_off (char a,char b)          //Move backward
{
  Serial.println("back_off");
  analogWrite (E1,a);
  digitalWrite(M1,LOW);
  analogWrite (E2,b);
  digitalWrite(M2,LOW);
}
void turn_L (char a,char b)             //Turn Left
{
  Serial.println("turn_L");
  analogWrite (E1,a);
  digitalWrite(M1,LOW);
  analogWrite (E2,b);
  digitalWrite(M2,HIGH);
}
void turn_R (char a,char b)             //Turn Right
{
  Serial.println("turn_R");
  analogWrite (E1,a);
  digitalWrite(M1,HIGH);
  analogWrite (E2,b);
  digitalWrite(M2,LOW);
}
void setup(void)
{
  int i;
  for(i=4;i<=7;i++)
    pinMode(i, OUTPUT);
  Serial.begin(115200);      //Set Baud Rate
  Serial.println("Run keyboard control");

  Serial1.begin(115200);      //Set Baud Rate
}
void loop(void)
{

  if(Serial1.available()){
    char val = Serial1.read();
    if(val != -1)
    {
      switch(val)
      {
      case 'w'://Move Forward
        Serial.println("Move Forward");
        advance (100,100);   //move forward
        break;
      case 's'://Move Backward
        Serial.println("Move Backward");
        back_off (100,100);   //move back
        break;
      case 'a'://Turn Left
        Serial.println("Turn Left");
        turn_L (100,100);
        break;
      case 'd'://Turn Right
        Serial.println("Turn Right");
        turn_R (100,100);
        break;
      case 'z':
        Serial.println("Hello");
        break;
      case 'x':
        stop();
        break;
      }
    }
    else stop();
  }
}
Save this sketch as ArduinoRobotDemo. Now you can build and upload it to the Romeo board.
Now your robot should switch to battery power. Your robot should be ready to receive a command from the computer.
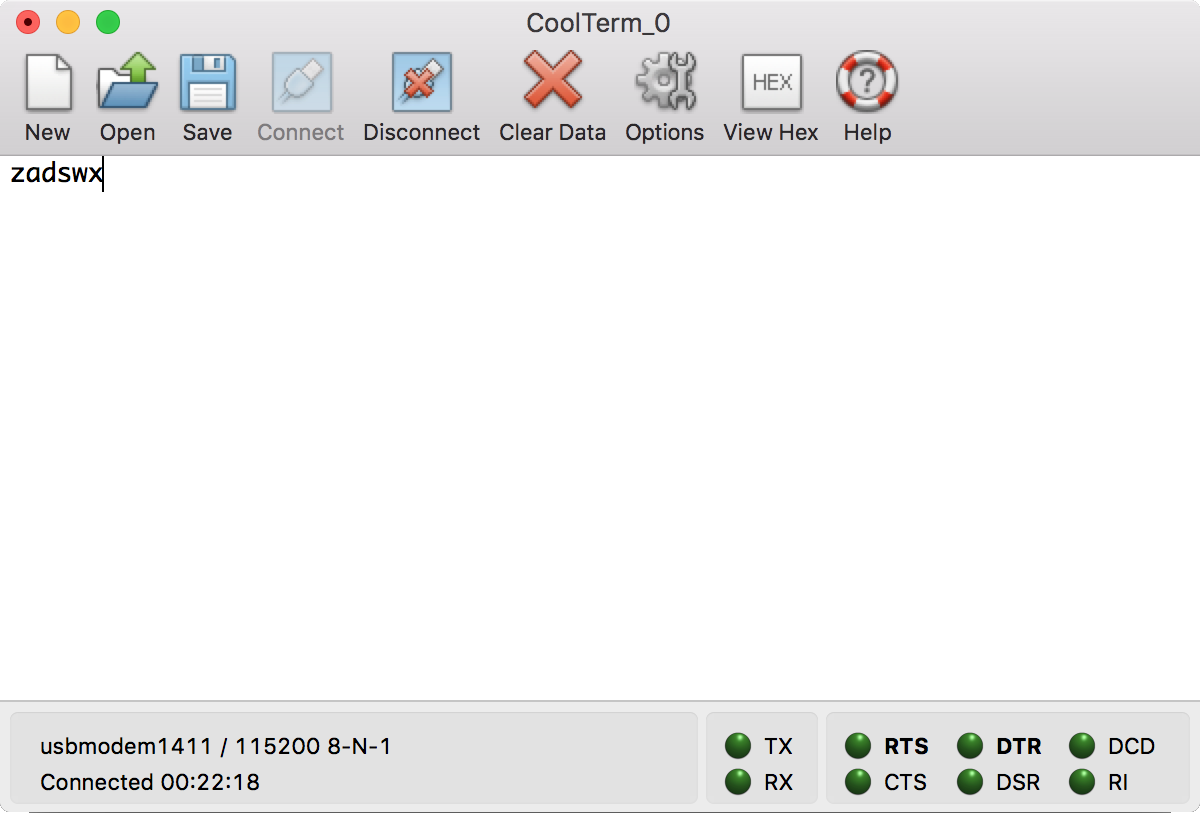
Since one Bluno Bee module is connected to a computer, you can use any serial tool to send messages to Bluno Bee. I use CoolTerm (http://freeware.the-meiers.org) for testing.
Connect the CoolTerm application to the serial port of Bluno Bee. By default, it uses a baud rate of 115200. Based on our sketch program, you can use these keys to move the robot:
- W to move forward
- S to move backward
- A to move left
- D to move right
- Z to print hello to the serial port
- X to stop
You can see my CoolTerm application output here: