
Before we wind up the various useful methods using remote APIs, we can have a look at the administration methods. In this recipe, we will just concentrate on some methods revolving around the creation of projects and permissions. The remaining methods are an easy read once you have a fair idea of the ones we are discussing in this recipe.
Since JRJC doesn't support all the administration methods, let us look at the required REST method details, along with sample request and response data, as we did in the Remote user and group management recipe.
Let us consider a simple scenario to explain some of the administrative REST APIs:
- Create a simple permission scheme. The permission scheme will grant Project Admin permissions to the jira-administrators group and will ignore the rest of the permissions.
- Create a project.
- Update the project with the new permission scheme, created in step 1.
- Retrieve the project roles.
- Add a user to the Administrators project role.
The following are the REST API method details for creating a permission scheme in JIRA:
|
Method URL |
/rest/api/2/permissionscheme |
|
Method type |
POST |
|
Parameters |
|
|
Request data |
|
|
Response codes |
|
The following is a sample input for creating a permission scheme:
{
     "name": "JTricks permission scheme",
     "description": "Demo Permission scheme",
     "permissions": [{
         "holder": {
             "type": "group",
             "parameter": "jira-administrators"
         },
         "permission": "ADMINISTER_PROJECTS"
     }]
}
After successful creation, you will get a response similar to the following:
{
     "expand":"permissions,user,group,projectRole,field,all",
     "id":10000,

     "self":"http://localhost:8080/jira/rest/api/2
      /permissionscheme/10000",

     "name":"JTricks permission scheme",
     "description":"Demo Permission scheme"
}
The following are the REST API method details for creating a JIRA project:
|
Method URL |
/rest/api/2/project |
|
Method type |
POST |
|
Parameters |
none |
|
Request data |
|
|
Response codes |
|
The following is a sample input for creating a permission scheme:
{
     "key": "JTRICKS",
     "name": "JTricks Project",
     "projectTypeKey": "business",
     "description": "Example Project description",
     "lead": "jobinkk",
     "url": "http://www.j-tricks.com",
     "assigneeType": "PROJECT_LEAD"
}
After successful creation, you will get a response similar to the following:
{
     "self":"http://localhost:8080/jira/rest/api/2/project/10200",
     "id":10200,
     "key":"JTRICKS"
}
Updating a Project
Updating a project is very similar to creating one. The only difference is that the method type is PUT and we need to pass only the data that we need to update:
|
Method URL |
/rest/api/2/project/${projectIdOrKey} |
|
Method type |
PUT |
|
Parameters |
|
|
Request data |
Same as Create |
|
Response codes |
|
For example, if we want to update the permission scheme of the project we created above with the permission scheme we created before that, we can send a PUT request to the below URL:
http://localhost:8080/jira/rest/api/2/project/JTRICKS
And the input will be:
{
        "permissionScheme": 10000
    }
Here, 1000 is the id of the permission scheme we created earlier.
The following are the REST API method details for retrieving all the project roles:
|
Method URL |
/rest/api/2/project//${projectIdOrKey}/role |
|
Method type |
GET |
|
Parameters |
none |
|
Request data |
none |
|
Response codes |
|
The following is a sample url to retrieve the project roles from the project we created earlier:
http://localhost:8080/jira/rest/api/2/project/JTRICKS/role
And a sample output would be:
{
         "Developers":"http://localhost:8080/jira/rest/api/2
         /project/10202/role/10001",

        "Administrators":"http://localhost:8080/jira/rest/api/2
        /project/10202/role/10002",

        "Users":"http://localhost:8080/jira/rest/api/2
        /project/10202/role/10000"
    }
The following are the REST API method details for adding a user or group (called "role actors") to a project role retrieved in the previous method:
|
Method URL |
/rest/api/2/project/{$projectIdOrKey}/role/${roleId} |
|
Method type |
POST |
|
Parameters |
none |
|
Request data |
Object with the actor type (user or group) and an array of actors (usernames or group names, as appropriate)
For example: { "user" : ["jobinkk"] } { "group" : ["jira-developers"] } |
|
Response codes |
|
The following is a sample url to add a user to the "Administrators" role, in the project we created earlier:
http://localhost:8080/jira/rest/api/2/project/JTRICKS/role/10002
And the input would be:
{
        "user" : ["jobinkk"]
    }
Once the permission scheme is created, it appears in JIRA as follows:
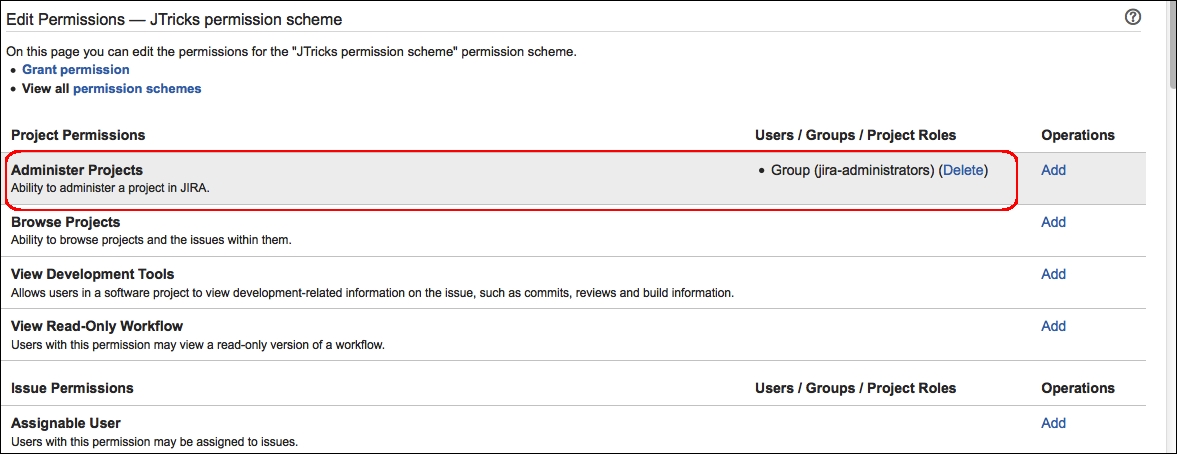
Here, a single permission is added, that is, to administer the project. We can add the rest in a similar fashion.
And the project, after creation, will be shown as follows:

The project is populated with the default JIRA schemes, as we didn't pass any of them during the creation.
After the project is updated using the new permission scheme, it appears as follows:
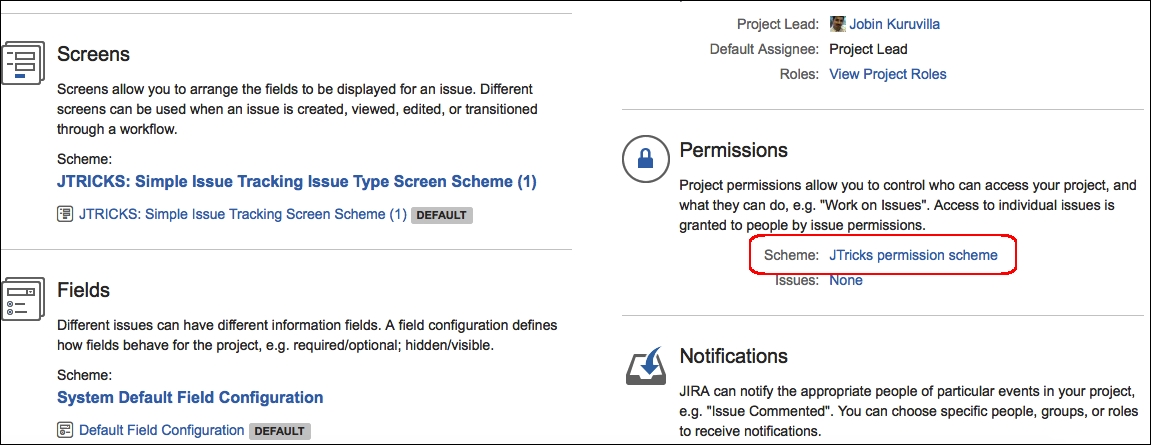
As you can see, the permission scheme is changed while the other schemes are the default ones.
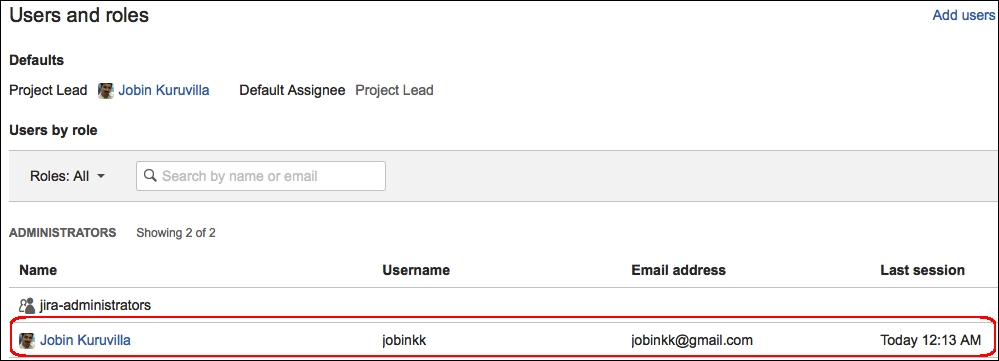
After adding the actors, the project role screen is reflected with the change, as shown below:
Similarly, we can use the other REST methods to perform different administrative operations.