
The Read, Eval, Print Loop, or REPL, is a concept relative to many scripting languages, but it is new to libraries, and definitely new to robotics. Think about how you alter the state in a typical Arduino program: you modify the source code, re-load it onto the board, and wait for it to run.
However, due to the way Johnny-Five works, we can modify the state of our robot code while the code is running. This is because we use Firmata—the board is just a thin client that reacts to instructions from our node program, so if we let our Node programs send different instructions, we can change how our robot works in real time.
The way to do this in a Johnny-Five program is by injecting components into the REPL, which allows us to use them.
We're going to modify our script from the previous section in order to manipulate our LED. To do this, we're going to use the this.repl.inject()
function. The this keyword, when used within our board.on('ready') handler, is a reference to the global context, so we can access the REPL for the program we are working on with this.repl. The inject method accepts an object; the keys of this object will represent the names you can access from the REPL, and the values will be the components you wish to access.
So, we're going to pass the following object to the inject method. It will allow us to access our LED component by the myLed name:
{
  myLed: led
}
Our new program looks like this:
var five = require("johnny-five");

var board = new five.Board();

board.on("ready", function() {
  var led = new five.Led(11);

  this.repl.inject({
    myLed: led
  });

  led.blink(500);
});
Go ahead and save this in LED-repl.js. Now we have the code that we had before—the LED at pin 11 will blink—but we have programmatic access to this LED via the REPL. Now, let's run it and have some fun.
First, with the LED still wired to pin 11, attach your board to your computer. Then, in your command line, in the same folder as your .js file, run the following:
> node LED-repl.js
You should see a boot-up sequence, followed by a prompt—it'll look like the following screenshot. Your LED wired to pin 11 should also start blinking.

The terminal setup for the Johnny-Five REPL prompt
This (as well as the Repl Initialized line) means that you can start working with the REPL. Try typing myLed and hit Enter. What you'll see is an object representing your LED:

The output of your myLed object in the REPL
You can see the names of several functions and attributes of the LED object. Next, we'll use the REPL to stop the blinking of the LED. Type myLed.stop() into the REPL and hit Enter. As the .stop() function returns the LED object, the output will look like the following screenshot:

The output from myLed.stop();
This function should return quickly, and the LED will stop blinking.
One of the cool things about Johnny-Five's object functions is that they are chainable—if you want the LED to remain off once you stop its blinking, you can use myLed.stop().off():
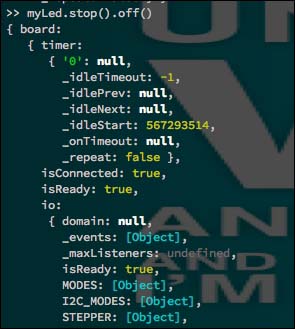
Using chainable function calls in the REPL
There are a bunch of LED functions available to you in the REPL:
.on()and.off().blink().pulse().toggle().strobe().fadeIn()and.fadeOut()
Try them all to see what happens with your myLed object!