
You should always try to store data and relate it to other data in the best possible way, as it will reduce the time spent on coding. It will also make sure that the solution you are building will be more stable and perform better.
This chapter will show you how to create tables where you can store data, how one can create relations between tables, and how to enforce referential integrity by creating unique indexes and delete actions.
You will learn about the following topics in this chapter:
- Tables
- Extended datatypes
- Relations
In order to understand how data is stored in Dynamics AX 2012, you need to get an understanding of the extended datatypes.
As you have read in the previous chapter, there are certain primitive datatypes you can use when programming in AX. Primitive datatypes can be extended and with more information to help you when you program in AX. A real datatype can be extended to create a quantity or an amount field, and each extended version can have its own set of properties, for example, four decimal places might be allowed for the amount field, but quantity might be restricted to zero decimal places. If one does not use an extended datatype for quantity, one would have to set the label, help text, number of decimals, and other relevant information on all the tables where the field is used.
Extended datatypes can be extended any number of times, for example, the type quantity can be created from Real and quantity can be further extended to create PurchQuantity and SalesQuantity.
To create an extended datatype (EDT), open the AOT and expand the node Data Dictionary | Extended Data Types. Then right-click Extended Data Types and select New. You will then get a submenu as shown in the following screenshot:
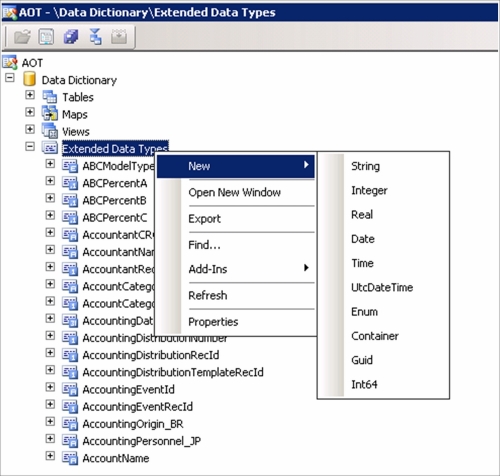
The following are the different types of which you can use one as the base for your extended datatype:
In this example, we will use a string. To open the property window, right-click on String and select Properties.
The property window will appear as follows:

As you can see, some of the properties have a yellow background. This means that it is a best practice to have these properties filled out.
Also notice that if you change any of the properties that have a default value, the value entered will be bold. This is only done to make changes more visible. If you see properties with a red background, they are mandatory.
You can also see a categorized list of properties, in all property windows, by pressing the Categories tab. The categories will vary depending on what kind of element is active. The following screenshot shows the categories for the extended datatype we have created:

The first thing you would want to change is the name of the EDT. In our example we will call it CarId. You should also give the EDT a label that users see throughout the solution. So open the label editor by clicking on the square to the right in the Label field. Create a label with text Car Id. Do the same in the HelpText field and create a label with text Unique identifier for a record in the CarTable. The last thing you want to check now is the length of the field. By default, a string is set to 10 characters, which is fine for our example.
There will be times where you will want to check more properties as well, and if you are creating an EDT of type integer, it obviously has a different set of properties than a string, but these are just the basics.
Here is a list of some of the most used properties for all kinds of extended datatypes. Not all of the properties are explained here as that is beyond the scope of this book, so if there are properties you want to know more about that haven't been explained in this book, take a look in the developers' help file.