In AX, views are objects that are used to retrieve data from the database and stored in the memory on the layer in which the view is instantiated. The views are actually stored as database views on the SQL server. This means that there are potentially great performance benefits of using views compared to using an equivalent query. This depends on the complexity of the query but, in general, the performance benefits of using a view compared to a query will increase and the complexity of the query will increase.
Views can be used throughout AX in all places where tables can be used; this includes forms, queries, and reports in the X++ code.
We will now create a view that consists of car ID, car brand, car model, customer's name, from date, and to date.
- First, we locate the Views node under the Data Dictionary node in AOT.
- Right-click on the Views node and select New View. A new view will be created and you can see its properties by right-clicking on it and selecting Properties.
- Change the name of the view to
CarCustRentaland give it a label that describes the contents of the view. - The views can actually use already created queries as a base for the data selection. This is done in the Properties tab of the view by choosing the query from the Query property. However, in our example, we will create the view from scratch.
- Under the Metadata node under the view, select the Data Sources node, right-click on it, and select New Data Source.
- Select the newly created data source and enter
CarTablein the Table property. The name of the data source will automatically change to CarTable_1 and this is OK. - Under the CarTable data source, find the Data Sources node, right-click on it, and select New Data Source. This time, we want to use the
RentalTable, so change the table property toRentalTable. Also, change the Relations property to Yes in order to get the link between the two tables active in the view. - Do the same to add the CustTable as a child data source to the RentalTable.
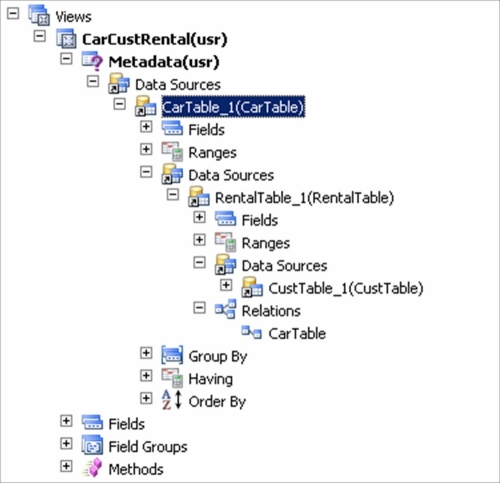
- The next step now is to define the fields that should be made available when this query is executed. Simply drag the fields you need to use in the view from CarTable_1, RentalTable_1, and CustTable_1 data sources and drop them onto the Fields node.
You should now have a view that looks like this:
After saving the view, you can browse the contents of the view in the same way as you can with a table by using the table browser. Just open the view and the table browser will display the view with its contents.
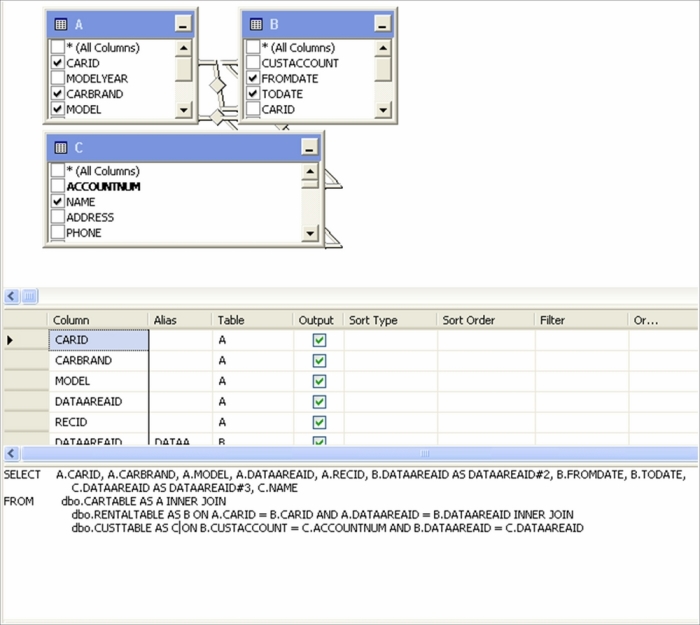
You can also take a look at the view in the SQL Management Studio by opening the AX database node, selecting the Views node, and looking for the view you just created. Right-click on the view and select Design to open it in Design view. It should then look something like this: