
Although the previous example had no practical applications, it introduced most of the concepts needed to make something useful. To put the skills together in a more interesting way, the next example will show you how to create your own Internet radio station. A screenshot of the piMusic interface is shown here:
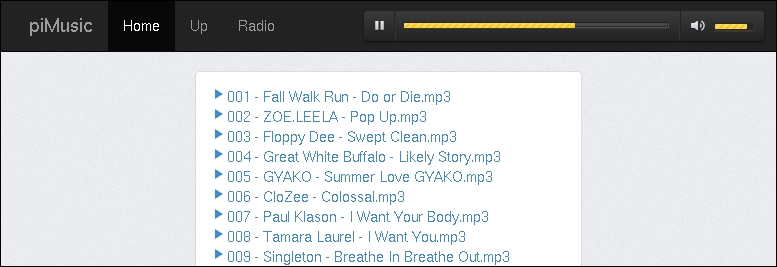
The piMusic interface
The aim is to develop a site to play music stored on your Raspberry Pi from anywhere. This will integrate a small file browser that will allow you to browse your music collection and click a file to play it. Clicking Home will return to the top of the music folder, whereas Up will go up one directory level. Instead of playing individual files, clicking Radio will allow you to play a radio station, which you can manage from your Raspberry Pi.
First, create and enter a directory for the new Flask application as follows:
$ mkdir -p ~/piMusic/static/music
$ mkdir ~/piMusic/templates
$ cd ~/piMusic/templates
There are two main ways to play audio from the browser. The first is using the HTML5 audio element. The downside is that very few browsers support MP3 playback. Although it is possible to keep multiple formats of all files and use JavaScript to determine which file should be played, this solution is tedious to implement. The second alternative is to use Flash to play the audio. jPlayer is a media player for jQuery that supports both of these methods. You can head over to http://jplayer.org to download jPlayer 2.5.0 and extract the Jplayer.swf and jquery.jplayer.min.js files into the static folder.
This download does not include a theme, so one needs to be obtained elsewhere. A web designer by the name of Luke McDonald has ported an audio player theme by premium-pixels for use with jPlayer and it can be downloaded from http://github.com/lukemcdonald/jplayer-skins/archive/master.zip. The jplayer-skins/skins/premium-pixels directory needs to be extracted into the static directory.
To get an interface that looks relatively clean and professional, Bootstrap is used. It provides templates for common web page elements in a CSS file as well as a JavaScript file for enhanced interactivity. If you wish, you may download it from http://getbootstrap.com or use the provided CDN.
To help visually separate files and directories in the file browser, they will be prepended with a relevant icon. http://genericons.com provides great-looking icons for free. Download and extract the archive into the static folder as before.
In the template directory, create pimusic.html with the following content:
<!DOCTYPE html>
<html lang="en">
  <head>
    <meta charset="UTF-8">
    <title>piMusic</title>
    <link type="text/css" href="//netdna.bootstrapcdn.com/bootstrap/3.1.1/css/bootstrap.min.css" rel="stylesheet"/>
    <link type="text/css" href="{{url_for('static', filename='premium-pixels/premium-pixels.css') }}" rel="stylesheet"/>
    <link type="text/css" href="{{url_for('static', filename='genericons/genericons.css') }}" rel="stylesheet"/>
  </head>
  <body>
    <script src="//ajax.googleapis.com/ajax/libs/jquery/1.11.0/jquery.min.js"></script>
    <script type=text/javascript src="//netdna.bootstrapcdn.com/bootstrap /3.1.1/js/bootstrap.min.js"></script>
    <script type=text/javascriptsrc="{{ url_for('static', filename='jquery.jplayer.min.js') }}"></script>
  </body>
</html>
This template doesn't display much, but it includes the third-party tool that will be used. In order to add the navigation bar, you should insert the following code:
<div class="navbar navbar-inverse navbar-fixed-top" role="navigation">
  <div class="container">
    <div class="navbar-header">
      <div class="navbar-brand">piMusic</div>
    </div>
    <ul class="nav navbar-nav">
      <li class="active"><a href="#" id='home'>Home</a></li>
      <li><a href="#" id='updir'>Up</a></li>
      <li><a href="#" id='radio'>Radio</a></li>
    </ul>
    <div class="nav navbar-nav navbar-right">

    </div>
  </div>
</div>
This code is based on the navbar template provided in the Bootstrap documentation. The top div has three classes, which identifies it as a navigation bar with inverted colors, fixed to the top of the page. The next div serves as a container for the rest of the elements, which centers the content and assigns the correct widths. After a Pi MusicBox brand is added, the actual menu items are added as an unordered list. The highlighted element is a right-aligned navigation element that will contain jPlayer. To add it, use the following code:
<div id="jquery_jplayer_1" class="jp-jplayer"></div>
<div id="jp_container_1" class="jp-audio">
  <div class="jp-type-single">
    <div class="jp-guijp-interface">
      <ul class="jp-controls">
        <li><a href="javascript:;" class="jp-previous" tabindex="1">previous</a></li>
        <li><a href="javascript:;" class="jp-play" tabindex="1">play</a></li>
        <li><a href="javascript:;" class="jp-pause" tabindex="1">pause</a></li>
        <li><a href="javascript:;" class="jp-next" tabindex="1">next</a></li>
        <li><a href="javascript:;" class="jp-stop" tabindex="1">stop</a></li>
        <li><a href="javascript:;" class="jp-mute" tabindex="1" title="mute">mute</a></li>
        <li><a href="javascript:;" class="jp-unmute" tabindex="1" title="unmute">unmute</a></li>
        <li><a href="javascript:;" class="jp-volume-max" tabindex="1" title="max volume">max volume</a></li>
      </ul>
      <div class="jp-progress">
        <div class="jp-seek-bar">
          <div class="jp-play-bar"></div>
        </div>
      </div>
      <div class="jp-volume-bar">
        <div class="jp-volume-bar-value"></div>
      </div>
      <div class="jp-time-holder">
        <div class="jp-current-time"></div>
        <div class="jp-duration"></div>
      </div>
      <ul class="jp-toggles">
        <li><a href="javascript:;" class="jp-shuffle" tabindex="1" title="shuffle">shuffle</a></li>
        <li><a href="javascript:;" class="jp-shuffle-off" tabindex="1" title="shuffle off">shuffle off</a></li>
        <li><a href="javascript:;" class="jp-repeat" tabindex="1" title="repeat">repeat</a></li>
        <li><a href="javascript:;" class="jp-repeat-off" tabindex="1" title="repeat off">repeat off</a></li>
      </ul>
    </div>
    <div class="jp-no-solution">
      <span>Update Required</span>
      To play the media you will need to either update your browser to a recent version or update your <a href="http://get.adobe.com/flashplayer/" target="_blank">Flash plugin</a>.
    </div>
  </div>
</div>
This is a standard template provided by jPlayer, modified for the theme and to fit the navigation bar.
The last major element to add is the file browser itself, which is done by inserting the following code at the end of all the added div elements, before the script elements:
<div class="panel panel-default">
      <div class="panel-body">
        <ul id="files" class="filebrowser">
        </ul>
      </div>
    </div>
The first two div elements here are used by Bootstrap to create a panel, where an empty list will be stored. This list will be dynamically populated by a script, which will use the files ID to find the list. The filebrowser class will be used for theming.
To complete the frontend of the application, create a file named pimusic.css in the static directory with the following code:
body {
  padding-top: 70px;
}
ul.filebrowser {
  list-style-type: none;
}
a.file:before {
  content: 'f452';
  font: normal 16px/1 'Genericons';
}
a.dir:before {
  content: 'f301';
  font: normal 16px/1 'Genericons';
}
.panel {
  width: 50%;
  margin-left: auto;
  margin-right: auto;
}
Then, include it in the HTML document by adding the following line to the head element:
<link type="text/css" href="{{url_for('static', filename='pimusic.css') }}" rel="stylesheet"/>When the navigation bar is fixed to the top, it will overlap with the content of the page. The CSS file adds 70 pixels to the body element to avoid this problem.
Next, the bullets are removed from unordered lists of the filebrowser class. These are replaced with the Genericons icons by prepending links of file and dir classes with the relevant content. The content property for these icons is obtained from the Genericons website.
Finally, the panel is set to take up half of the screen's width and centered.
Before adding interactivity to the site, there needs to be a clear way for JavaScript to interact with the server.
The backend will need to handle the following actions:
- Display the page
- Check whether the current directory is valid
- List the directories and MP3 files in the current directory
- Handle clicks on directories and files
- Go up a directory as well as return to the home directory
To begin, create the piMusic.py file in the main application directory with the following content:
#! /usr/bin/python
from flask import Flask, render_template, session,
    request, url_for, safe_join
from os import listdir, path
from json import dumps

app = Flask(__name__)
app.secret_key=
'x9bTxcbx87vpx82uxd1x0eyx8axfdtdW6x12xb1xf16,xa4xb5'
startdir = app.static_folder + "/music/"
@app.route('/')
def index():
  return render_template('pimusic.html')

if __name__ == '__main__':
    app.debug=True
app.run(host='0.0.0.0')Make it executable by running the chmod command as earlier:
$ chmod +x piMusic.py
Apart from the secret key, all of the content should look familiar. The application will use cookies to store the current directory so that multiple clients can browse the files without interfering. For security reasons, Flask encrypts session information using a secret key. In order to generate the secret key, open up a Python shell and execute the following commands:
import os
os.urandom(24)
Then, replace the highlighted section of the code with the output.
Next, the function to check whether the current directory is valid needs to be added:
def checkcurrdir():
if ('currdir' not in session or
no tsafe_join(session['currdir'],"").startswith(startdir) or
not path.isdir(session['currdir'])):
      session['currdir'] = startdir
The if statement contains three conditions to determine whether a directory is valid:
- '
currdir' not in session: The session does not have the variablecurrdirset at all not safe_join(session['currdir'],"").startswith(startdir): The current directory is outside the home directorypath.isdir(session['currdir']): The current directory is not actually a directory
If any of these conditions are met, the directory is set back to the home directory.
Next, a function to list the valid files in the current directory is needed:
def listloc(loc):
  filetypes = {}
  files = listdir(loc)
  files = [elem for elem in files if (not elem.startswith('.') and
    (elem.lower().endswith(".mp3")  or
    path.isdir(safe_join(session['currdir'], elem))))]
  for index in range(len(files)):
    htclass = ("file", "dir")[
      path.isdir(safe_join(loc, files[index]))]
    filetypes[files[index]] = htclass
  return dumps(filetypes, sort_keys=True)
This function is a little complicated. First, an empty dictionary called filetypes is created. This will contain all of the valid entries of a directory and the information on whether they are directories or files.
Then, the files variable is created and is assigned a list of everything in the directory passed to the function. This list needs to only include directories and MP3 files, without any hidden files or directories. The way this is done in Python is difficult to understand at first, so a few simple examples need to be covered, as you can see here:
>>> a = [0, 1, 2, 3]
>>> [elem for elem in a]
[0, 1, 2, 3]
>>> [elem * 2 for elem in a]
[0, 2, 4, 6]
>>>[elem for elem in a if elem > 1]
[ 2, 3]
In the first case, a list containing all the elements in the list a is returned. Next, instead of simply returning the elements as they are, they are multiplied by two. In the final example, elements are returned as they are, but only if they are greater than one.
This same technique is used to filter the files. The files list is mapped back to itself, but only the elements that satisfy all of the following conditions are returned:
not elem.startswith('.'): The file is not hidden.elem.lower().endswith(".mp3"): The file is an MP3 file orpath.isdir(safe_join(session['currdir'], elem)): The file is a directory.
Once the list is filtered, it can be used to populate the dictionary. To do this, the function loops through each element in the list using the for loop. range(len(files)) returns a list of indices for the files list, so each iteration of the for loop, using files[index] will return the next file.
htclass = ("file", "dir")[path.isdir(safe_join(loc, files[index]))] is another tricky line to understand. htclass is set to either file or dir, depending on whether the current element in the file list is an actual file or a directory. This is done by indexing a tuple with a true or false value. If the index is false, the first element is returned, but if it's true, the second value is returned.
The filetypes dictionary is populated using filetypes[files[index]]=htclass. However, the purpose is to return a list of files and assign them to a relevant class using JavaScript, and to do so, the dictionary needs to be converted to a format JavaScript understands. One such format is called JSON. Python's json module contains the dumps function, which can convert Python data into the JSON format. The return dumps(filetypes, sort_keys=True) statement returns the dictionary in the JSON format sorted by filenames.
A directory click can be handled with the following function:
def dirclick(req):
  if 'id' not in req.form:
return listloc(session['currdir'])
  clickeddir = path.normpath(safe_join(session['currdir'],
    req.form['id']))
if path.isdir(clickeddir):
    session['currdir'] = clickeddir
  checkcurrdir()
return listloc(session['currdir'])
The function will be passed through the POST request containing the clicked directory name in the id variable. If the request does not contain the id variable, it will simply return the list of files in the current directory.
Otherwise, the clicked directory path is normalized. Normalizing a path means converting a path that looks like /home/pi/../pi into /home/pi. Although both are valid, if the path is not normalized, a POST request can be crafted in a way that will allow a hacker to list all the files on your Raspberry Pi.
The function then checks whether the clicked directory is a real directory, sets the currdir variable in the session to the clicked directory, checks whether it is still valid, and returns a list of files in the newly entered directory.
File clicks can be handled in a similar way:
def fileclick(req):
  if 'id' not in req.form:
return listloc(session['currdir'])
  clickedfile = safe_join(session['currdir'], req.form['id'])
if path.isfile(clickedfile):
    clickedfile = url_for('static',
    filename = clickedfile.replace(app.static_folder+'/',''))
return clickedfile
return 0
The difference is that instead of listing files in a directory, the URL for the clicked file is returned, after making sure it is a valid file. The URL is generated by stripping the static folder location from the absolute path and using the url_for function. For example, if the path is /home/pi/piMusic/static/music/file1.mp3, stripping the static folder will return music/file1.mp3 and url_for will ensure the URL for the file is valid by returning /static/music/file1.mp3.
The next function implements going up a directory:
def updir(req):
  session['currdir'] = path.split(session['currdir'])[0]
  checkcurrdir()
return listloc(session['currdir'])
The path.split statement is used to split the current directory into the path containing the directory and the directory itself. The first of these is then indexed and set as the current directory. The directory is then checked and listed.
The last function is to return to the home directory:
def rethome(req):
  session['currdir'] = startdir
return listloc(session['currdir'])
This simply sets the current directory to the home directory and returns its listing.
Finally, there needs to be a way to expose these functions fully for use with JavaScript:
@app.route('/_action', methods=['POST'])
def action():
  checkcurrdir()
  return { 'dirclick' : dirclick,
    'fileclick' : fileclick,
    'updir' : updir,
    'home' : rethome
  }[request.form['action']](request)
This function checks the current directory then calls one of the defined functions with the request object and the parameter. Which function is called is then determined by the action variable passed in the POST request. This is implemented by a dictionary where each action corresponds to a function. The dictionary is indexed by the relevant action and the request is passed as the parameter.
Now that the backend and user interface is laid out, the last thing to do is connect the two using JavaScript.
One problem with using a separate JavaScript file is that it cannot use features provided by Flask's template features. For example, url_for will not work. Therefore, all content that requires such features should be included directly in the HTML template. In this case, the path for jPlayer's Flash file and the URL for the action function are needed.
Open the HTML template pimusic.html and insert the following script element before the other scripts:
    <script type=text/javascript>
      var STATIC_LOC = "{{ url_for('static', filename='') }}";
      var ACTION_LOC = "{{ url_for('action') }}";
    </script>
This will allow the STATIC_LOC and ACTION_LOC variables to be used in external scripts.
Next, create a file named pimusic.js in the static directory and add the following line at the end of the other script elements:
<script type=text/javascript src="{{ url_for('static', filename='pimusic.js') }}"></script>Open the newly created JavaScript file and add the following function:
function showdata(data) {
  var items = [];
  $.each(data, function (key, val) {
    items.push('<li><a href="#" id ="' + key + '" class ="' + val + '">' + key + "</a></li>");
  });
  $("#files").html(items);
}
The function steps through each data element using jQuery's iterator each the syntax for which is .each( collection, callback(indexInArray, valueOfElement) ). The argument is the listing of the current directory along with the type of each element (file or dir). The items array is used to store list items that will be added to the file browser. The key, which is the filename, is used as the ID attribute value and content, while the value, which is the element type, is used as the class. Once the array is populated, its content is set as the content of the list identified by the ID of files using the following line: $("#files").html(items);.
Next, add a function to play a file:
function playfile(file) {
  $("#jquery_jplayer_1").jPlayer("setMedia", {
    mp3: file
  });
  $("#jquery_jplayer_1").jPlayer("play", 0);
}
The function takes the URL of an MP3 file or stream as a parameter, sets it as the current media for jPlayer and then plays it.
Next, the functions need to be bound to the relevant elements:
$("ul#files").on("click", "a.dir", function () {
$.post(ACTION_LOC, {
  action: "dirclick",
  id: this.id
  },
  showdata,
  "json");
});
This binds a function to the list of files and propagates to all elements identified by dirid. The fact that this function binds to the list rather than the a.dir elements is important. When this snippet of code is parsed by the browser, there are no a.dir elements and they change every time the directory is changed. Therefore, the function must be bound to an existing element and use a selector to specify which elements the function will actually apply to when the click is detected.
The function itself sends a post request to the ACTION_LOC URL, containing the action name, which is dirclick and the ID of the clicked directory, which corresponds to its name.
The same approach applies to file clicks:
$("ul#files").on("click", "a.file", function () {
$.post(ACTION_LOC, {
  action: "fileclick",
  id: this.id
  },
  playfile,
  "text");
});
However, instead of displaying a directory listing, the file is played. Next step is to bound the Up link:
$("a#updir").on("click", function () {
$.post(ACTION_LOC, {
  action: "updir",
  },
  showdata,
  "json");
});
As the Up link is not dynamically created, it is bound without specifying a selector as was done before. Next step is to bound the Home click event:
$("a#home").on("click", function () {
$.post(ACTION_LOC, {
  action: "home",
  },
  showdata,
  "json");
});
The Home click is a straightforward POST request with the home action and a showdata callback. Next step is to play an corresponding HTTP MP3-encoded file based on click event:
$("a#radio").on("click", function () {
  playfile('http://' + location.hostname + ':8000'),
});
The preceding function will play an HTTP MP3-encoded audio stream running on the server's port 8000. Music Player Daemon (MPD) will be used to provide the stream.
Next, set jPlayer's Flash file location and tell it to use Flash if available, but fallback to HTML otherwise:
$("#jquery_jplayer_1").jPlayer({
swfPath: STATIC_LOC,
solution: "flash, html"
});
You can swap html and flash if you would like to try the HTML solution first and fall back to Flash.
$.post(ACTION_LOC, {
  action: "dirclick"
},
showdata,
"json");
As you can see from the preceding code, the final POST request is used to fill the file browser's list by sending a dirclick action with no ID.
At this stage, the application is complete. You may wish to extend it by adding support to upload files, playlists, creating your own themes, or turning it into a full-featured media library and player.
The final step is to run an actual Internet radio stream on Raspberry Pi. In order to do this, install MPD and the command-line client to control it by running the following command:
# apt-get install mpdmcp
Next, edit the configuration file found in /etc/mpd.conf according to the documentation in the file. For this application, the music_directory parameter was changed to the application's music folder location, and db_file was changed to the same location with the filename tag_cache. The auto_update statement is set to yes and the following output was added:
audio_output {
        type            "httpd"
        name            "piMusic"
        encoder         "lame"
        port            "8000"
        bitrate         "128"
        format          "44100:16:1"
}
Once MPD is configured, enter the following command to restart it:
# service mpd restart
The mpc command can then be used to control MPD. Familiarize yourself with the available commands by running man mpc. As an example, the following should get all of the files playing in random order:
mpc install | mpc add
mpc play
mpc random
mpc repeat
Now, clicking the radio button in the Flask application should tune into the MPD stream.