
5
Keeping Your Network Clean
A network is the sum of all environments within an organization, even those not directly controlled by the organization. For example, an environment could consist of a database management application that resides partly on local servers and partly on hosted servers in the cloud, so part of the environment is controlled directly by the organization and another part is controlled by a third party. The same holds true for applications that rely on third-party services or access data through third-party APIs. In addition, users often rely on more than one device to perform work, and some of those devices are owned by the user, rather than the organization.
The current environment demands new ways of ensuring control of resources through a combination of traditional and other means that are more flexible and have a broader range than protections in the past. Because hackers often employ zero-day exploits nowadays (those that occur immediately after a new threat is exposed, often before an organization knows about it), real-time analysis and mitigation are critical. In fact, a modern network requires some level of predictive protection so that a hacker doesn’t find it easy to break in. These sorts of protections are impossible using just traditional techniques; you really need machine learning (ML) methods to detect, assess, and mitigate the threats.
With these issues in mind, this chapter will discuss these topics:
- Defining current network threats
- Considering traditional protections
- Adding ML to the mix
- Creating real-time defenses
- Developing predictive defenses
Technical requirements
This chapter requires that you have access to either Google Colab or Jupyter Notebook to work with the example code. The Requirements to use this book section of Chapter 1, Defining Machine Learning Security, provides additional details on how to set up and configure your programming environment. When testing the code, use a test site, test data, and test APIs to avoid damaging production setups and to improve the reliability of the testing process. Testing over a non-production network is highly recommended but not absolutely necessary. Using the downloadable source is always highly recommended. You can find the downloadable source on the Packt GitHub site at https://github.com/PacktPublishing/Machine-Learning-Security-Principles or my website at http://www.johnmuellerbooks.com/source-code/.
Defining current network threats
Network threats go well beyond the application level, and it’s unlikely that a single individual would provide support for every protective means that a network will require. For example, developers aren’t going to handle physical security – a security company will likely handle it. However, your ML application may interact with the physical security system by monitoring cameras and other sensors. If you think this is a little futuristic, companies such as Bosch (https://www.boschsecurity.com/xc/en/solutions/video-systems/video-analytics/) and Nelly’s Security (https://www.nellyssecurity.com/blog/articles/what-is-deep-learning-ai-and-why-is-it-important-for-video-surveillance) have products available today. An ML application can look for trends, such as an attacker who is casing a business before attempting to break in. The human monitoring the cameras may not see that the same person shows up on various nights, yet never enters the building. This chapter focuses more on the software end of networks, but it’s important to keep the hardware element in mind.
Developing a sense of control over chaos
It’s essential to define control in the context of security. Chaos reigns on the internet today because so many people have so many views on how to manage it. Because there is no centralized strategy for managing issues such as security, hackers are able to place data wedges (exploits such as code insertion, viruses, and trojans) in various ways that can create a security nightmare for your business’s network. However, this chaos also applies to casual use of the internet by users who do their shopping at work when the organization allows such an activity, because the user is using organizational resources to interact with the world. Many of these interactions are currently controlled through traditional means, such as honeypots, to detect hacker activities. A honeypot (essentially, a fake monitored system) can help detect intrusions that piggyback on legitimate requests.
Businesses rely on huge numbers of interconnected machines that share expensive resources to promote data sharing and keep costs low in the form of networks. These interconnected machines work both separately and together at the behest of their operators to perform tasks of all sorts. The term network applies to the entirety of connected systems, whether local or cloud-based, whether part of the organization or part of a third party, and whether directly or indirectly connected. When you consider a network in these terms, the vastness of the configuration can become overwhelming, yet you must consider the network at this level or suffer the consequences wrought by hackers, outsiders, insiders, well-meaning users, and inept managers. Keeping a network clean means constantly monitoring conditions for any form of threat that would damage infrastructure, mangle data, or prevent users from accomplishing something useful. Unfortunately, networks are inherently unsafe because someone, somewhere, is almost certainly going to leave the door open to some form of attack. Consequently, knowing these attack types is essential.
Traditional techniques are effective to an extent when managed well and updated constantly to address new threats. However, the task of managing and updating security, plus checking data and keeping logs, is daunting and impossible to perform manually. ML strategies help an administrator keep up to date by performing many tasks automatically so that they can focus on tasks that require special attention. In fact, ML-based tools can often help the administrator discover those tasks that are most important to complete.
However, it’s in the proactive nature of a real-time defense that networks can gain the biggest advantage against adversaries. Real-time defenses depend on ML applications that can detect specific patterns of attack, adjust neural networks to address new types of attack, and generally anticipate certain types of human behavior. Predictive ML methodologies take protection one step further by making it possible to create a defense before the attack comes. Of course, the efficacy of predictive measures relies on tracking trends, and these measures can’t address black swan events (see the Understanding the Black Swan theory section in Chapter 3, Mitigating Inference Risk by Avoiding Adversarial Machine Learning Attacks, for details). Now that you have a sense of what control means with regard to security, it’s time to look at the categories of network control in the ML domain.
Implementing access control
As someone who works with ML code for any reason, you likely know that it’s important to ensure that you have firm control over the data you download, create, or interact with in any other way. However, hackers don’t just work with data files. They also use any other sort of access available. For example, Microsoft used to make Telnet (a notoriously high-security risk) a default part of Windows. Telnet Server has not been available on its server products since 2016. However, you can still install Telnet Client as an optional product on Windows Server 2019 (https://www.rootusers.com/how-to-enable-telnet-client-in-windows-server-2019/), Windows 10 (https://social.technet.microsoft.com/wiki/contents/articles/38433.windows-10-enabling-telnet-client.aspx), and even the supposedly more secure Windows Server 2022 and Windows 11 (https://petri.com/enable-telnet-client-in-windows-11-and-server-2022/).
Generally speaking, a network administrator will know not to install Telnet because there are other, more secure, methods of achieving the same thing. The most common replacement is Secure Shell (SSH). You can read about the differences between Telnet and SSH at https://www.tutorialspoint.com/difference-between-ssh-and-telnet. Some Windows administrators now use a PowerShell equivalent, as explained at https://www.techtutsonline.com/powershell-alternative-telnet-command/, but this solution only works on Windows. If you don’t want to work at the command line, then you might consider using PuTTY instead (https://www.makeuseof.com/tag/windows-10-ssh-vs-putty/). The GUI interface shown in Figure 5.1 makes working with network connections a lot easier, especially if you’re not used to working with them.

Figure 5.1 – ML developers need not fight with a command line interface when testing security-related ML applications
What the network administrator won’t know about is some product vulnerabilities, such as the Remote Code Execution (RCE) problem with Python (https://www.zdnet.com/article/python-programming-language-hurries-out-update-to-tackle-remote-code-vulnerability/). If you use Python to create your ML model, then you also need to keep track of required updates or you could inadvertently create a security hole for your organization while trying to protect it. NumPy (https://numpy.org/) has a similar RCE flaw (https://www.cybersecurity-help.cz/vdb/SB2019012101). (Other Python libraries also have various vulnerabilities, including RCE issues.)
Figure 3.1 and Figure 3.2 show the use of ensembles of learners to control access to specific applications. It turns out that you can also use this tactic for controlling and monitoring access to your network, as described in AI, machine learning and your access network at https://www.networkworld.com/article/3256013/ai-machine-learning-and-your-access-network.html. What this article points out is that using ML tools can focus administrator attention on actual problems after the ML tool has already scoured the incoming data.
Ensuring authentication
Authentication must work at several levels to ensure the integrity of a network and its constituent parts. When someone is authenticated, the system has ensured that the person’s identity is known. The Developing a simple authentication example section of Chapter 4, Considering the Threat Environment, discusses the role of authentication in application security, and the same need is evident at the network level. The example code in the Accessing GitHub using OAuth-type authentication section of Chapter 4 demonstrates authentication and another requirement, authorization, which provides actual access to a resource by a known individual. Networks tend to focus on authentication, after which a user must go through an additional hurdle of authenticating to a specific application before gaining access to a resource. The problem with multiple layers of security is that the user quickly tires of it all and finds ways around it, which is where adaptive authentication comes into play, as described in Adaptive Authentication and Machine Learning at https://towardsdatascience.com/adaptive-authentication-and-machine-learning-1b460ae53d84. The short definition of adaptive authentication is the deployment and configuration of multi-factor authentication (MFA) such that it becomes possible to select the correct kind of authentication, depending on a user’s risk profile and tendencies. When writing an ML application to deal with network-level authentication, the developer can take a significant number of factors into consideration, such as the following:
- Device type and/or name
- Location
- Network type
- Operating system
- User risk profile
- User tendencies
All of this happens in the background without the user’s knowledge. What the user sees is an MFA setup that provides the access needed for both the network and common applications. Adaptive authentication is far more flexible and less likely to encounter problems than most monolithic solutions in place today.
Detecting intrusions
ML is seeing major use in Network-Based Intrusion Detection Systems (NIDSs), an automated technique to determine whether a particular access attempt is an attack or benign. The use of ML allows the NIDS to react quickly and also adapt its behavior to new threats faster than most humans can. The main point of contention is how best to implement NIDS. Articles such as Deep learning methods in network intrusion detection: A survey and an objective comparison (https://www.sciencedirect.com/science/article/abs/pii/S1084804520302411) express a preference for deep feedforward networks over autoencoders and deep belief networks (DBNs) (see https://www.analyticsvidhya.com/blog/2022/03/an-overview-of-deep-belief-network-dbn-in-deep-learning/ for details). However, not everyone agrees that using this approach will work well. In fact, there are some complex studies available to show the effectiveness of various NIDS strategies, such as Network intrusion detection system: A systematic study of machine learning and deep learning approaches at https://onlinelibrary.wiley.com/doi/full/10.1002/ett.4150.
NIDSs necessarily rely on a combination of hardware and software. Because the NIDS is detecting a particular event, rather than interacting directly with the network, it often appears in a separate server in a supervisory capacity. Figure 5.2 shows a typical NIDS setup, with a generalized ML configuration.

Figure 5.2 – Developing a generalized NIDS solution with the NIDS in a supervisory role
An essential part of this design is that you use multiple independent models (in contrast to an ensemble, where models work together), each of which is designed to detect a particular threat. Most of these models will output a classification regarding threat potential (Chapter 7, Dealing with Malware, discusses malware detection) or detect suspicious activity as represented by anomalies (Chapter 6, Detecting and Analyzing Anomalies, discusses how to detect anomalies). The reason that you need multiple models is that no one model will provide both classification and anomaly detection, and no one model will even cover a single detection method completely. The process will likely include output from other types of non-ML software and the output of all of the detection methods centralized in a threat detection model. This module provides a vote upon the various detection models and final output to the administrator in the form of an alert when enough components agree there is a threat.
Defining localized attacks
The previous sections have focused on attacks from the outside or protection from outside influences. Networks are attacked at the local level in a wide range of ways, some of which aren’t even purposeful but rather due to user error. In many cases, the use of network analytics can detect issues such as aberrant behavior or various kinds of probing. However, network analytics are ill-equipped to detect changes in user behavior. Because an administrator can’t follow every user around looking for potential problems, an ML approach is helpful. One such technique appears in Deep Learning and Machine Learning Techniques for Change Detection in Behavior Monitoring at http://ceur-ws.org/Vol-2559/paper3.pdf. In this case, the paper is talking about monitoring the elderly or those with special needs, but the same techniques can be employed in network scenarios, as described in Network Anomaly Detection and User Behavior Analysis using Machine Learning at https://www.ijcaonline.org/archives/volume175/number13/vadgaonkar-2020-ijca-920635.pdf. The former techniques detect physical behavioral changes (which can drastically affect your network), while the latter techniques detect usage behavioral changes, both of which are required for complete user coverage.
However, tracking down user issues is only part of the localized attack detection requirement. It’s also necessary to detect attacks against the ML models on your network, especially those involved in NIDS solutions (as described earlier in the chapter). Unfortunately, not a lot of research has been done in this area, so the best approach is to ensure you track any local input into the NIDS that could disrupt its functionality from hacker attacks, in which users actually facilitate hacker entry into the network.
Understanding botnets
Botnets are a kind Distributed Denial of Service (DDoS) attack, but the goal is to steal information, spread spam, infect systems, or cause damage to infrastructure in most cases, rather than simply bring a network down. The problem with botnets is that some of them simply won’t die. Law enforcement takes the botnet down, but it comes back again like an unwanted weed. You can read about some of these exploits in Botnet Detection with ML at https://medium.com/@EbubekirBbr/botnet-detection-with-ml-afd4fa563d31. What is truly terrifying is that one such botnet consisted of 2 million zombie computers.
The essential element in botnet detection is that the botnet will produce some sort of anomaly that the system can detect and monitor, using an approach similar to that shown in Figure 5.2. The anomalies are detectable by looking for techniques such as the following:
- TCP syn (synchronization) scanning: The hacker tries to create a handshake with every port on the server
- DNS monitoring: The hacker tries to modify DNS records
- Botnet attack and propagation models: The hacker relies on multiple botnet variations that replicate themselves
A legitimate user won’t engage in any of these activities, so looking for them provides you with an anomaly to verify. The Machine Learning Based Botnet Detection white paper at http://cs229.stanford.edu/proj2006/NivargiBhaowalLee-MachineLearningBasedBotnetDetection.pdf provides insights into the effectiveness of specific algorithms in detecting botnet attacks.
There are some interesting examples of detecting botnets using ML classifiers (special applications designed to categorize entries based on learned characteristics), similar to the technique shown in the Developing a simple spam filter example section of Chapter 4. One such site is Build botnet detectors using machine learning algorithms in Python at https://hub.packtpub.com/build-botnet-detectors-using-machine-learning-algorithms-in-python-tutorial/. In this case, you work with the approximately 2 GB CTU-13 dataset found at https://mcfp.felk.cvut.cz/publicDatasets/CTU-13-Dataset/ and described at https://mcfp.weebly.com/the-ctu-13-dataset-a-labeled-dataset-with-botnet-normal-and-background-traffic.html. The dataset explodes in size to around 74 GB when you extract it. It’s best to download the dataset separately and extract the data because doing so within the example code can sometimes make it appear that the example has frozen. You may also want to temporarily disable virus detection on your system (after disconnecting from the internet). Otherwise, your antivirus application will dutifully remove all of the example files before you can use them for testing. The second example also relies on a Twitter dataset that’s apparently no longer available, but it’s possible to modify the code to use the dataset found at https://www.kaggle.com/davidmartngutirrez/twitter-bots-accounts.
Now that you have some idea of what the threats are, it’s time to look at some protections. Protections currently come in four levels: traditional, ML, real-time, and predictive. This next section provides an overview of traditional protects that work well in ML application environments.
Considering traditional protections
Understanding the threats to your network is a good first step because knowing about the threat is the first step in avoiding it. However, now it’s time to do something about the threats. Anything that protects your network directly because of some type of detection practice is part of an Intrusion Detection System (IDS). It doesn’t matter whether the protection is a firewall, virus scanner, or other software that checks data in some manner, an actual security element designed to fool the attacker in some manner, or (as described later) an ML application. All of this protection reports an intrusion after detecting it, making it an IDS. Of course, you often find the term IDS cloaked in some sort of mystical way (depending on the organization/author), but really, they’re straightforward. As described in the previous section, attacks come in waves and at different levels. Consequently, you need multiple layers of security (defense in depth) to address them. Each layer is part of your IDS.
Working with honeypots
A honeypot is a security mechanism that purposely attracts hackers, as described at https://www.imperva.com/learn/application-security/honeypot-honeynet/. The idea is to create a fake network that includes security holes that a hacker can use to gain access. In order to be successful, the fake network must look real enough so that the hacker is fooled into believing it actually is real. However, the honeypot can be completely disconnected from anything else in the organization so that the hacker gains nothing of value in exchange for the effort of breaking into the system. For a security specialist, a honeypot provides an opportunity to discover how hackers perform tasks while maintaining the safety of the real network. One of the more interesting pieces on this sort of effort is Honeypots: Free psy-ops weapons that can protect your network before defences fail at https://www.theregister.com/2017/02/08/honeypots_feature_and_how_to_guide/.
From an ML perspective, the most useful honeypot is a high-interaction honeypot – one that looks completely real in every respect. In some cases, these honeypots are actually part of the functioning network and provide a means of detecting an intrusion. The most common use for AI today is in creating a honeypot that provides increased intrusion detection capability, as described in AI-powered honeypots: Machine learning may help improve intrusion detection at https://portswigger.net/daily-swig/ai-powered-honeypots-machine-learning-may-help-improve-intrusion-detection. Unfortunately, hackers have also been busy, as explained in Automatic Identification of Honeypot Server Using Machine Learning Techniques at https://www.hindawi.com/journals/scn/2019/2627608/. The consensus is that knowledgeable hackers now have tools to detect low-interaction and medium-interaction honeypots, but that high-interaction honeypots are still viable.
To create an ML-based honeypot, it’s essential to know where to place the honeypot application and how to create the required agent. An article entitled A Smart Agent Design for Cyber Security Based on Honeypot and Machine Learning, at https://www.hindawi.com/journals/scn/2020/8865474/, provides some ideas on how to perform this task. In most cases, you’re depending mostly on linear regression classification that is trained using hacker profile data to determine whether an access attempt is normal or an attack. Some sources also combine this type of agent with another agent that detects whether the actor in an interaction is a legitimate user or a hacker, based on activity – how the actor interacts with the system.
Honeypots aren’t necessarily limited to detection. You can use them in a number of other ways. For example, you could possibly use a honeypot to provide a competitor with fake data or even a tainted version of a real ML model used within your organization. Because of the nature of ML models, detecting a reasonable fake would be incredibly difficult. For that matter, you could simply let the hacker steal the model and implant some sort of phone home code so you know the hacker’s location (or, at least, the location of one of the hacker’s zombies). Oddly enough, there is currently a patent application for such technology (see https://www.freepatentsonline.com/y2020/0186567.html for details).
Using data-centric security
Data-centric security focuses on protecting data, rather than infrastructure. When a user opens an application, the application has privileges required to access precisely the data it needs and no more. The user has no rights to the data at all because the user isn’t accessing the data; the application is. Any attempt by the user to access the data directly would result in a denial by the system and requisite notification to the administrator of the attempt. Even if the user were to somehow manage to evade the security, a secondary level of data encryption would thwart any attempt to actually use the data. This method of securing a network has these advantages:
- The data remains encrypted except when the application is actually using it
- It’s easier to monitor data access because you track one application, rather than multiple users
- The actual location of the data is masked
- Creating policies governing data usage becomes more straightforward
Organizations normally combine data-centric security with other security measures for sensitive data. A number of vendors now provide support for data-centric security, as described at https://www.g2.com/categories/data-centric-security. These vendors are moving to ML strategies because using ML makes solutions more flexible and adaptive. In fact, if you read The Worldwide Data-centric Security Industry is Expected to Reach $9.8 Billion by 2026 at a CAGR of 23.1% from 2020 at https://www.globenewswire.com/en/news-release/2021/05/07/2225398/28124/en/The-Worldwide-Data-centric-Security-Industry-is-Expected-to-Reach-9-8-Billion-by-2026-at-a-CAGR-of-23-1-from-2020.html, you’ll find that data-centric security is an emerging technology that’s attracting a lot of attention. According to the Forbes article at https://www.forbes.com/sites/forbestechcouncil/2020/02/14/12-tips-to-help-shift-your-business-to-data-centric-cybersecurity/?sh=2098f174555d, the two main contributions of ML to data-centric security are as follows:
- Implementing analytics-based security controls
- Monitoring data flows
When creating an ML application to implement data-centric security, you create one model that performs anomaly detection on access logs. All access to the data should follow easily recognized patterns, and anything that falls outside those patterns is suspect. The second model would categorize data flow. If only applications are supposed to access the data, then a user accessing the data would represent a threat. However, the categorization must go further. When an application is restricted to local access only, seeing it access the data from a remote location is cause for concern.
Part of data-centric security measures is to improve the quality of the data itself. For example, if the data isn’t clean or of the right type, the outliers contained within it could be viewed as a potential security issue, rather than simply a failure to clean the data correctly. The article Big Data To Good Data: Andrew Ng Urges ML Community To Be More Data-Centric And Less Model-Centric (https://analyticsindiamag.com/big-data-to-good-data-andrew-ng-urges-ml-community-to-be-more-data-centric-and-less-model-centric/) is enlightening because it points to a need to create better results. By ensuring that data is more correct by reviewing it for missingness, consistency, and other issues, it’s easier for a model to detect a botnet or malware, as opposed to real data, because there are fewer anomalies to deal with. The article makes clear that code is important, but data quality is far more important because it takes up 80 percent of a data scientist’s time. Consequently, in addition to creating models that detect anomalies and classify access, ensuring data remains clean so that the models can do their jobs is essential.
Data-centric security also relies partly on the same techniques used for privacy programming, using products such as PyGrid (https://github.com/OpenMined/PyGrid) and PySyft (https://github.com/OpenMined/PySyft). Chapter 13 looks into the matter of ensuring that data remains private through the use of federated training techniques. As a data scientist creates data-centric security models, the need to train on sensitive or encrypted data is important. Using the same measures that developers rely on to keep data private will also ensure the efficacy of the security model.
Locating subtle intrusion indicators
If you only use NIDS to protect your network, then you’re actually leaving it wide open to attack. The Internet of Things (IoT) is quickly changing the security landscape because IoT makes subtle, backdoor attacks possible. Upon viewing Multi-level host-based intrusion detection system for Internet of things at https://link.springer.com/article/10.1186/s13677-020-00206-6, you’ll find that IoT devices are largely unsecured now and lack any sort of intrusion detection. However, a NIDS won’t work in this case. What you need instead is Host-Based Intrusion Detection Systems (HIDSs). Of course, you may wonder how the IoT can present any sort of threat. Consider this process:
- A hacker gains entry to a smart device connected to the internet for monitoring purposes.
- The hacker changes data in an unobtrusive manner on the device, such that the data will produce an unexpected result when processed by analytics software.
- The user or host service accesses the device from a desktop system, tablet, or other device attached to the network.
- The data modifications produce an unexpected result.
- The network is now potentially open to attack due to the result produced by the analytics software.
Because the smart device continues to operate as expected, no one suspects that it has become a time bomb. The hacker modified the data, not the device, so interacting with the device wouldn’t show any difference. The attack only becomes apparent when performing an analysis of the data. Besides direct data manipulation, IoT devices represent these sorts of threats to your business and network:
- An attacker monitors users of interest to see whether they will tell family members about potentially sensitive information. There is an app available to hackers to make this possible with very little effort (see https://www.siliconrepublic.com/enterprise/
- amazon-alexa-google-home-smart-speaker-research for details). IoT devices, such as smart speakers, are sensitive enough to hear a heartbeat (https://www.ncbi.nlm.nih.gov/pmc/articles/PMC7943557/), so whispering won’t prevent the divulging of sensitive information to hackers who are listening.
- The use of a group of IoT devices can create a DDOS attack, such as the Mirai attack, where the botnet turned IoT devices running on ARC processors into a group of zombies (https://www.csoonline.com/article/3258748/the-mirai-botnet-explained-how-teen-scammers-and-cctv-cameras-almost-brought-down-the-internet.html).
- The attacker gains access to a home network with access to your business network through an IoT device.
- In order to reduce employee effectiveness, the attacker bricks company-issued IoT devices using a botnet, such as the BrickerBot malware (https://www.trendmicro.com/vinfo/us/security/news/internet-of-things/brickerbot-malware-permanently-bricks-iot-devices).
One way in which to combat subtle intrusions such as IoT devices is to ensure all data sources receive proper checks. As noted in the Developing a simple spam filter example section of Chapter 4, Considering the Threat Environment, you need to parse the incoming data looking for anomalies of any sort, including data that falls out of range or simply doesn’t follow a predictable pattern. For example, a thermometer indicating 5 hours of intense furnace use on a 90-degree day signals that there is either something wrong with the thermostat and it should be replaced, or that someone is tampering with it. ML techniques can take data from multiple sources, such as outside temperature monitors and thermostats, and combine it to detect threats that would otherwise go unnoticed.
It’s also possible to mitigate potential tampering using what is known as a trace – a little piece of software in each device that produces trace data. A trace is essentially data that monitors device activity with regard to network communication. The Obtaining Data for Network Traffic Testing section talks about using Wireshark to obtain network traffic. Wireshark can also be used to create trace data, as described at https://2nwiki.2n.cz/pages/viewpage.action?pageId=52265299. When working with IoT devices, it’s necessary to create a trace point, which is a small piece of code that collects information in instrumented kernels, such as Linux or Android devices. When a tracer, such as LTTng (https://lttng.org/), hits the trace point, the trace point provides the device state in the Common Trace Format (CTF) (https://diamon.org/ctf/). When an IoT device isn’t instrumented, it’s often possible to add tracing ability through software such as barectf (https://github.com/efficios/barectf). To make binary data compatible with ML code, you can use the Babeltrace API (https://babeltrace.org/). Figure 5.3 shows what a typical trace scenario might look like.

Figure 5.3 – Using trace data to monitor IoT devices directly and look for intrusions
Note that this approach doesn’t depend on a particular kind of IoT device. It works with any IoT device that contains enough intelligence to communicate with the outside world. Interestingly enough, even newer Wi-Fi garage door openers can provide an opening for hackers (https://smarthomestarter.com/can-garage-door-openers-be-hacked-smart-garages-included/). Although this particular article is about home systems, the techniques work just fine for businesses too.
Using alternative identity strategies
People lose passwords, create passwords that are too easy to guess, and generally don’t use passwords correctly. So, your traditional protection might be easier to hack than you think because of the human factor. Biometric security has become quite common and is used in a number of ways, as discussed in the Biometrics: definition, use cases and latest news article at https://www.thalesgroup.com/en/markets/digital-identity-and-security/government/inspired/biometrics. The use of biometrics would seem to be perfect because a person can’t easily lose their fingerprint without also losing the associated finger. In addition, many biometrics, such as DNA, would seem to be hard, if not impossible, to duplicate. So, using biometrics should also reduce fraud by making it hard for one person to impersonate another.
Unfortunately, it’s easy to find articles that discuss techniques hackers use to overcome some forms of biometric security, such as fingerprints, voiceprints, iris scans, palm prints, and facial impressions. However, researchers keep working on new approaches that will be harder to overcome. Of course, you could always force everyone to provide a drop of blood for DNA testing (see https://www.ibia.org/biometrics-and-identity/biometric-technologies/dna for some current uses of DNA for biometrics). One such alternative is finger vein biometrics, as discussed in the Finger-vein biometric identification using convolutional neural network article at https://www.researchgate.net/figure/Error-rates-of-the-CNN-models-tested-in-cross-validation-process_fig4_299593157. Since finger veins are inside the body, it’s harder to overcome the biometric technology involved.
The point is that if a hacker is determined enough, not even biometrics will prevent fraud or other uses of a person’s identity without permission. Creating security measures that are harder to overcome keeps honest people honest and prevents a determined hacker from succeeding.
Obtaining data for network traffic testing
Unlike other ML tasks, finding network traffic data can prove difficult, partly because network traffic consists of so many kinds of data. It’s possible to find a few sources online, such as the network traffic datasets at https://sites.google.com/a/udayton.edu/fye001/simple-page/network-traffic-classification, which discusses two datasets. The first is the Curtin University dataset that simulates standard network traffic and includes the SYN (synchronize), RST (reset), FIN (finalize), and ACK (acknowledge) sequences. (See the TCP Flags article at https://www.geeksforgeeks.org/tcp-flags/ for more information about how these TCP flags work.) The second is the DoS dataset that simulates a DOS attack. The entirety of both datasets is 40 GB, so it’s not something you’d download. In fact, the site tells you where to send a hard drive.
Unfortunately, getting a canned dataset in this case won’t provide you with a model for your network traffic. At best, you’ll come to understand the network traffic for another organization. Some white papers, such as Evaluation of Supervised Machine Learning for Classifying Video Traffic at https://core.ac.uk/download/pdf/51093126.pdf, suggest using a product such as Wireshark to obtain data. Wireshark has an established reputation and people have used it for a great number of tasks, as illustrated in the blog post at http://blog.johnmuellerbooks.com/2011/06/07/sniffing-telnet-using-wireshark/. The best part about Wireshark is that you can choose precisely what you want to track and then save the data to a text file. The resulting data reflects your actual network traffic. You can also generate specially crafted network traffic using a data generator that you build to reflect your actual network traffic, as described in the Building a data generator section of this chapter.
When creating an ML application to perform specific regression, classification, or clustering tasks on your network, you need to consider the data used to train the model carefully. Otherwise, the model might not detect the type of traffic you want to monitor accurately. Fortunately, you can perform a great many security tasks without necessarily relying on packet-level methods. For example, as shown in the Developing a simple spam filter example section of Chapter 4, you can look for email spam without going to the packet level. So, it’s also important to consider the level at which you choose to monitor network traffic adequately.
Now that you have an idea of how traditional security techniques with augmentation can improve protections for both ML applications and associated data, it’s time to look at how you can use ML itself to make the traditional techniques more flexible. Traditional techniques can be brittle and easily broken by a hacker because they’re easily diagnosed, according to the traits that they present. ML can use algorithms to analyze and anticipate changes that hackers will make to avoid traditional protections.
Adding ML to the mix
Once you get past the traditional defenses, you can use ML to implement Network Traffic Analytics (NTA) as part of an IDS, as shown in Figure 5.2. Most ML strategies are based on some sort of anomaly detection. For example, it’s popular to use convolutional auto-encoders for network intrusion detection. A few early products still in the research stage, such as nPrintML, discussed in New Directions in Automated Traffic Analysis at https://pschmitt.net/, have also made an appearance. Here are just a few of the ways in which you can use ML to augment traditional security layers:
- Perform regression analysis to determine whether certain packets are somehow flawed compared to normal packets from a given source. In other words, you’re not dealing with absolutes but, rather, determining what is normal from a particular sender. Anything outside the normal pattern is suspect.
- Rely on classification to detect whether incoming data matches particular suspect patterns. Unlike signature matching, this form of analysis relies on training a neural network to recognize classes of data that it hasn’t seen before. Consequently, even if an attacker changes a signature, the model can still likely recognize the data class.
- Use clustering to detect attack patterns and as part of forensic analysis in real time. For example, suddenly seeing groups of requests from a particular set of IP addresses that all have the same characteristics is a type of suspect pattern.
As part of creating new layers for your IDS, you also need to consider the people who are part of that implementation strategy. For example, an updated security plan (the document that discusses how to deal with security issues so that people know what to do when a security event occurs) will describe how to look at the reports generated by the ML application and use them to determine when a potential threat is real. In addition, the people who are managing the network will need input on just what to do with the threat because it might not match threats they’ve seen in the past.
ML can be used in a variety of ways that many administrators haven’t considered possible. For example, you can add ML to applications to detect unusual usage patterns or to a cloud environment to detect unusual API call patterns. Endpoint security is an area in which ML can excel, but only when the application knows what to look at and you maintain good records of existing trends. Each endpoint type is unique, so strategies that work on a workstation may not work as well on a server, and not at all in your cloud environment. Because the incoming data for each endpoint is also different, you need some means of preparing the data for comparison purposes, which is the real benefit of using ML to protect from a coordinated attack using unusual vectors (such as gaining access to a network through an IoT device).
Developing an updated security plan
If you plan to employ ML as part of your security strategy, then you need to update the security plan. For example, users need to know that the ML application exists, how to access it, and what to do about the information it generates. This might seem like a straightforward requirement, but many security plans don’t receive updates and are therefore useless in the event of an attack. The new security plan should have an eye toward ML techniques such as the following:
- Determining what sort of data to collect before, during, and after an attack
- Tracking user activities for analysis as part of detecting attack vectors
- Creating and testing models specifically designed for security needs and then providing instructions for deploying them during an attack
Immediately after the update, you need to provide user training on it and go through various scenarios. Just having something in writing won’t prepare the people who have to react during an emergency. Remember that they’re not going to be thinking as well as they could; they’ll be excited, frantic even. Running through the security plan when everyone is calm and thinking correctly will help ensure its success.
Determining which features to track
Features are essentially specific kinds of data that you want to track to create a dataset for your ML model. For example, if you’re protecting an API, then tracking which IP addresses make specific API calls and when these calls are made are potential features. A hacker will present a different API calling pattern than a benign user because the hacker is searching for an entry point into your system. Often, that means the hacker uses less frequently accessed API calls, on the assumption that these API calls could contain bugs not found by users who rely on common API calls. Of course, the hacker will try to disguise this activity by making other calls, which adds noise to the dataset that the model must remove to see the true pattern. You have various options to format these features as data, depending on the model you want to create:
- Make each API call a separate feature in a two-dimensional table that lists the IP address making the call. Each API call could appear across the top of the table and the IP addresses could make up the rows (similar to one-hot encoding). This setup would work best with regression.
- Create a three-column, two-dimensional table that has the API call, IP address, and time the call is made as separate columns. This setup could work with either regression or classification.
- Define a three-dimensional table with one dimension being the API call, a second dimension being the IP address, and the third dimension being the times that the calls are made. This setup would work well with clustering.
- Provide a two-dimensional table, with the API calls as the rows, the IP addresses as the columns, and the number of calls made as the data. A bubble chart would work best in this case, with the ML model using size (showing the number of calls) and bubble color (perhaps based on hacker activity probability) to show patterns.
When adding ML to the security layers of your IDS, it’s essential to think outside the box and to look at endpoints as a significant place for the installation of potential protections. For example, when working with an application, users usually resort to certain usage patterns. These workflows are based on the tasks that users perform, and there isn’t a good reason for the user to deviate from them. However, there is no precise step-by-step way to define a workflow because each user will also express some level of uniqueness in their approach to a task. ML can learn a user’s methodologies using unsupervised learning techniques and then use what the model learns to predict the next step in a process. When the user begins to deviate from the normal process employed specifically by them, it’s possible that they aren’t actually controlling the application at all. These features of application usage rely on data, such as keystroke analysis, to keep a network clean.
Note that users are the most difficult source of potential network attacks for traditional security measures to detect and mitigate. The detection of user security issues is a perfect way to use ML. Even though users are unpredictable and there is no source of labeled data for a dataset, user behaviors can point to potential issues. It’s possible to detect user behavior problems in these ways:
- Track user behaviors such as login time, the time between breaks, and other factors using regression
- Employ known user factors, such as meeting times, to classify users by peer group (such as a workgroup or users who exercise during lunch)
- Use clustering techniques to detect users who have unusual habits or aren’t part of known groups (the outliers)
Analysis can go further than predictive measures. Customizing the detection of certain kinds of data input can greatly decrease your risk. Most off-the-shelf software works well in general cases. However, some attacks are specific to your organization, so you can provide added levels of security to detect them. An email server could classify certain types of messages as ransomware, malware, or spyware based on previous patterns of attack against your organization that the off-the-shelf products missed. Such an application could track features such as the message source, specific subjects, some types of content, or the types of attachments provided. Figure 5.4 shows a variety of attack vectors, implementation methods (as it concerns an ML solution), the ML model that is likely to work best, and an exploit site that demonstrates the attack.


Figure 5.4 – Common endpoint attacks and strategies
It’s also possible to use ML to detect issues with various organizational processes. Regression techniques can help track the usual pattern of processes even in a large organization and predict what should happen next, even if the next step isn’t necessarily related to the previous step. For example, if just one truck leaves with goods on a night other than the usual night, humans may not notice the change in pattern, but a regression model would. You could also use classification to detect these unusual changes in the pattern as potential fraud. When working with multiple organizational units that each perform similar processes, comparing one unit with another at a detailed level could show outliers in what would become clustered data.
Understanding the massive number of threats that your network faces and how ML methods can help reduce them are only part of the picture. The techniques described in the previous two major sections are static and reactive in nature. A hacker is already making an attack when you employ them, and now you must put your finger in the dike (so to speak) to keep the flood of hacker activity under control. What is really needed are real-time defenses that react immediately, at the same time the hacker is making an attack, as described in the next section.
Creating real-time defenses
The previous section discussed how to use ML to augment your existing security, but it didn’t mention when the solution will kick in. A problem exists for most network administrators and the developers who support them in that most strategies are either static or reactive. A real-time defense would be proactive and dynamic because hackers aren’t going to wait until a network administrator can marshal forces formidable enough to keep them at bay. Networks can become overwhelmed by a lack of adequate real-time protection. What is really needed is real-time Detection, Analysis, and Mitigation (DAM).
Mary Mapes Dodge published the novel Hans Brinker, or The Silver Skates in 1865. The novel is the story about Hans and the silver skates he wants to win, but it also contains an interesting little side story about a Dutch boy who plugs a hole in a dam with his finger and saves his people (see https://marleenswritings.wordpress.com/2015/02/16/the-story-of-hans-brinker/ for details). The problem is that this is wishful thinking of the same sort employed by network administrators because a finger simply won’t cut it. The article Why the Little Dutch Boy Never Put his Finger in the Dike at https://www.dutchgenealogy.nl/why-the-little-dutch-boy-never-put-his-finger-in-the-dike/ provides a dose of reality. So, when creating DAM for your network to keep the waters of outside influences at bay, you really must consider the reality that constant maintenance and vigilance are essential or the whole thing is bound to fall down.
One of the most exciting elements of ML is that it’s finally possible to create DAM for your network – one that is fully proactive and dynamic. The ML applications you create won’t get tired, won’t make mistakes, and will monitor the network constantly for those stresses that a finger simply can’t address. However, as presented in the previous four chapters, hackers can and do overwhelm ML applications, so constant human supervision is also needed. The ML application may help detect an intrusion pattern, but it takes a human to interpret that pattern and address it when the ML application simply can’t do the job.
Using supervised learning example
Most of the ML models you create for security needs rely on supervised learning because this approach provides a better result, with known issues that you can track in real time. This is the approach that works best for issues such as determining when a hacker wants to break into your API or evade security through trial and error. It’s also the method most commonly used to detect malware, fake data, or other types of exploits. The example in this section is somewhat generic but does demonstrate how you can collect features, such as the number of API calls made by a specific IP address, and then use this information to create a model that can then detect unwanted activity. The following sections show how to perform this task using a decision tree. You can also find this code in the MLSec; 05; Real Time Defenses.ipynb file of the downloadable source.
Getting an overview
The example is somewhat contrived in this case because a production system would use an active data stream to acquire data, and the dataset itself would be much larger. Figure 5.5 shows an example of how a production system might acquire and analyze data using the techniques found in this example. However, it’s also important that the example is understandable, so the example dataset is static and relatively small to make it easy to see how various elements work.

Figure 5.5 – Obtaining and analyzing API call data
The goal of this setup is to not only disrupt the flow of data as little as possible but also ensure that any hacker activity is detected and immediately stopped. The data logger simply creates continuous output files on disk. In the example, the output files are in .csv format, with just the time, IP address, and API call made by everyone who is using the system. It isn’t unusual to have such setups anyway, so most developers won’t have to implement anything new to obtain the data; they’ll just have to know where to find it and ensure that it contains the information needed for the next step.
The next step is to read and convert the data in the logs at specific intervals, perhaps every 2 minutes. The conversion process takes the log data and counts how many times each IP address is making each API call. The sections that follow show how this works, but the transformation process needs to be as fast and simple as possible.
Creating a model based on call patterns comes next. A human will need to go through the frequency logs and label IP addresses to decide whether they’re benign or a hacker, based on the call patterns. During real-time use, when the model detects a hacker, it sends the information to the administrator, who can then filter out the IP address and change the timespan to a shorter interval used to detect new intrusions. In the meantime, the benign data continues to flow into the network.
Building a data generator
In a perfect situation, you have access to data from your network to use in building and testing a model to detect an API attack or other security issue (because this example focuses on an API attack, this is where the discussion will focus from this point on). However, you might not always have access to the required labeled data. In this case, you can construct and rely upon a data generator to create a simulated dataset with the characteristics you want. Start by importing the packages and classes needed for this example as a whole, as shown in the following code block:
from datetime import time, date, datetime, timedelta
import csv
import random
from collections import Counter
import pandas as pd
import numpy as np
from sklearn.ensemble import RandomForestClassifier
from sklearn.metrics import accuracy_score
Note that memory usage is kept down by not importing everything from sklearn.
Creating the CreateAPITraffic() function
You need a function to actually generate the API traffic. The following steps outline what goes into this function (it appears as a single block of code in the online source:.
- Define a function that creates the actual data, based on what the logs for your network look such as. This example uses a relatively simple setup that includes the time, IP address of the caller, and the API call made, as shown here. The code starts by defining arguments you can use to modify the behavior of the data generation process. It’s a good idea to provide default values that are likely to prove useful so that you’re not dealing with missing argument problems when working with the function:
def CreateAPITraffic(    values = 5000,
    benignIP = ['172:144:0:22', '172:144:0:23',
        '172:144:0:24', '172:144:0:25',
        '172:144:0:26', '172:144:0:27'],
    hackerIP = ['175:144:22:2', '175:144:22:3',
        '175:144:22:4', '175:144:22:5',
        '175:144:22:6', '175:144:22:7'],
    apiEntries = ['Rarely', 'Sometimes', 'Regularly'],
    bias = .8,
    outlier = 50):
- Define the variables needed to perform tasks within the function. You use data to hold the actual log entries for return to the caller. The currTime and updateTime variables help create the log’s time entries. The selectedIP variable holds one of the IP addresses, provided as part of the benignIP or hackerIP argument, and this is the IP address added to the current log entry. The threshold determines the split between benign and hacker log entries. The hackerCount and benignCount variables specify how many of each entry type appears in the log:
    data = []    currTime = time(0, 0, 0)
    updateTime = timedelta(seconds = 1)
    selectedIP = ""
    threshold = (len(apiEntries) * 2) -
        (len(apiEntries) * 2 * bias)
    hackerCount = 0
    benignCount = 0
- A loop for generating entries comes next. This code begins by defining the time element of an individual log entry:
   for x in range(values):        currTime = (datetime.combine(date.today(),
            currTime) + updateTime).time()
- Selecting an API entry comes next. The code is written to accommodate any number of API entries, which is an important feature of any data generation function:
apiChoice = random.choice(apiEntries)
- The hardest part of the function is determining which IP address to use for the data entry. The CreateAPITraffic() function uses a combination of approaches to make the determination, based on the assumption that the hacker will select less commonly used API calls to attack because these calls are more likely to contain bugs, which is where threshold comes into play. However, it’s also important to include a certain amount of noise in the form of outliers as part of the dataset. This example uses hackerCount as a means of determining when to create an outlier:
        choiceIndex = apiEntries.index(apiChoice) + 1        randSelect = choiceIndex *
            random.randint(1, len(apiEntries)) * bias
        if hackerCount % outlier == 0:
            selectedIP = random.choice(hackerIP)
        else:
            if randSelect >= threshold:
                selectedIP = random.choice(benignIP)
            else:
                selectedIP = random.choice(hackerIP)
- It’s time to put everything together as a log entry. Each entry is appended to data in turn, as shown here. In addition, the code also tracks whether the entry is a hacker or benign:
data.append([currTime.strftime("%H:%M:%S"), selectedIP, apiChoice]) if selectedIP in hackerIP: hackerCount += 1 else: benignCount += 1 - The final step is to return threshold, the benign log count, the hacker log count, and the actual log to the caller.
return (threshold, benignCount, hackerCount, data)
When creating your own data generation function, you need to modify the conditions under which the log entries are created to reflect the real-world logs that your network generates automatically. The need for randomization and inclusion of noise in the form of outliers is essential. Just how much randomization and noise you include depends on the kinds of attacks that you’re trying to prepare your model to meet.
Creating the SaveDataToCSV() function
Part of developing a test log to use is to provide some method of saving the data to disk in case you want to use it again, without regenerating it each time. The SaveDataToCSV() function serves this purpose, as shown here.
def SaveDataToCSV(data = [], fields = [],
    filename = "test.csv"):
    with open(filename, 'w', newline='') as file:
        write = csv.writer(file, delimiter=',')
        write.writerow(fields)
        write.writerows(data)
This code consists of a loop that takes the log data as an input and writes one line at a time from the log to a .csv data file on disk. Note that this function makes no assumptions about the structure of the data that it writes. Again, the point is to provide significant flexibility in the use of the function.
Note that the fields input argument is used to write a heading to the .csv file so that it’s possible to know which columns the file includes. It’s likely that any real-world server logs you use will also include this information, so adding this particular data is important to ensure that any analysis code you create works properly.
Defining the particulars of the training dataset
To make the generation process as flexible as possible, it’s helpful to provide variables that you can easily modify to see their effect on the output. In this case, the example specifies API calls and IP addresses that differ from the defaults created earlier:
callNames = ['Rarely',
             'Sometimes1', 'Sometimes2',
             'Regularly1', 'Regularly2', 'Regularly3',
             'Often1', 'Often2', 'Often3', 'Often4',
             'Often5', 'Often6', 'Often7', 'Often8']
benignIPs = ['172:144:0:22', '172:144:0:23',
             '172:144:0:24', '172:144:0:25',
             '172:144:0:26', '172:144:0:27',
             '172:144:0:28', '172:144:0:29',
             '172:144:0:30', '172:144:0:31',
             '172:144:0:32', '172:144:0:33',
             '172:144:0:34', '172:144:0:35',
             '172:144:0:36', '172:144:0:37']
Note that the example is using the default hackerIP values, but you could modify the example to include more or fewer hackers, as desired.
Generating the CallData.csv file
Now that everything is in place, you need to actually generate and save the data file using the following code:
random.seed(52)
threshold, benignCount, hackerCount, data =
    CreateAPITraffic(values=10000,
        benignIP=benignIPs,
        apiEntries=callNames)
print(f"There are {benignCount} benign entries "
        f"and {hackerCount} hacker entries "
        f"with a threshold of {threshold}.")
fields = ['Time', 'IP_Address', 'API_Call']
SaveDataToCSV(data, fields, "CallData.csv")
The call to random.seed(52) ensures that you obtain the same output every time during the code testing process. When you finally start using the code to generate real data, you comment out this call so that the data can appear random (this is why they call it a pseudo-random number generator).
The call to CreateAPITraffic() comes next, with the output being unpacked into local variables. The threshold, benignCount, and hackerCount variables provide output that tells you about the functioning of the data generation process. When using the random seed of 52, you should see this output from the function:
There are 9320 benign entries and 680 hacker entries with a threshold of 5.599999999999998.
The final step is to call SaveDataToCSV() to save the data to disk. At this point, you’ve completed the data generation process.
Converting the log into a frequency data table
Log entries don’t provide information in the right form for analysis. What you really need to know is which IP addresses made what calls and how often. In other words, you need an aggregation of the log entries so that your model can use the calling pattern as a means to detect whether a caller is a hacker or a regular user. This process takes place in a number of steps that include reading the data into the application and performing any manipulations required to put the data into a form that the classifier can understand. The following sections show how to perform this task.
Creating the ReadDataFromCSV() function
The first step is to create a function that can read the .csv file from disk. More importantly, this function automates the process of labeling data as either benign or from a hacker. This particular part of the function is exclusive to this part of the example and serves to demonstrate that you can try really hard to make every function generic, but you may not always succeed. The following steps show how this function works:
- Define the function and read in the data file from disk:
def ReadDataFromCSV(filename="test.csv"): logData = pd.read_csv(filename)
- Obtain a listing of the unique API calls found in the file:
calls = np.unique(np.array(logData['API_Call']))
- Aggregate the data, using IP_Address as the means to determine how to group the entries and API_Call as the means to determine which column to use for aggregation:
aggData = logData.groupby( 'IP_Address')['API_Call'].agg(list)
- Create a DataFrame to hold the data to analyze later. Begin labeling the data based on its IP address (which is most definitely contrived, but it does add automation to the example instead of forcing you to label the entries by hand). A value of 0 denotes a benign entry, while a value of 1 denotes a hacker entry. Note the use of ipEntry.sort() to place all alike IP entries together:
analysisEntries = {} analysisData = pd.DataFrame(columns=calls) for ipIndex, ipEntry in zip(aggData.index, aggData): ipEntry.sort() if ipIndex[0:3] == '172': values = [0] else: values = [1] - Create columns for the DataFrame based on the API calls:
        keys = ['Benign']        for callType in calls:
            keys.append(callType)
            values.append(ipEntry.count(callType))
- Define each row of the DataFrame, using the number of calls from the IP address in question as the values for each column:
analysisEntries[ipIndex] = pd.Series(values, index=keys)
- Create the DataFrame and return it to the caller:
analysisData = pd.DataFrame(analysisEntries)return (analysisData, calls)
At this point, you’re ready to read the data from disk.
Reading the data from disk
Now that you have a function for reading the data, you can perform the actual act of reading it from disk. The following code shows how:
analysisData, calls = ReadDataFromCSV("CallData.csv")
print(analysisData)
It’s important to look at the data that you’ve created to ensure it contains the kinds of entries you expected with the pattern you expected. Figure 5.6 shows an example of the output of this example (the actual output is much longer).

Figure 5.6 – This figure shows the output of the data creation process
Note that each API call appears as a row, while the IP addresses appear as columns. Later, you will find that you have to manipulate this data so that it works with the classifier. The Benign column uses 0 to indicate a benign entry and 1 to indicate a hacker entry.
Manipulating the data
The classifier needs two inputs as a minimum for a supervised model. The first is the data itself. The second is the labels used to indicate whether the data is of one category (benign) or another category (hacker). This means taking what you need from the DataFrame and placing it into variables that are traditionally labeled X for the data and y for the labels. Note that the X is capitalized, which signifies a matrix, while y is lowercase, which signifies a vector. Here is the code used to manipulate the data:
X = np.array(analysisData[1:len(calls)+1]).T
print(X)
y = analysisData[0:1]
print(y)
y = y.values.ravel()
print(y)
The X variable is all of the data from the DataFrame that isn’t a label. This isn’t always the case in ML examples, but it is the case here because you need all the aggregated data shown in Figure 5.6. Note the T at the end of the np.array(analysisData[1:len(calls)+1]) call. This addition performs a transform on the data so that rows and columns are switched. Compare the output shown in Figure 5.7 with the output shown in Figure 5.6, and you can see that they are indeed switched. In addition, this is now a two-dimensional array (a matrix).

Figure 5.7 – The X data is turned into a transformed data matrix
The y variable consists of the labels in the Benign row. However, when you print y out, you can see that it retains the labeling from the DataFrame, as shown in Figure 5.8.
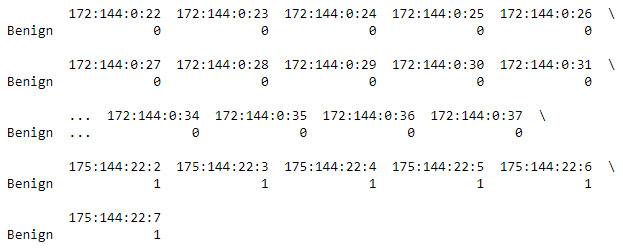
Figure 5.8 – The y variable requires additional manipulation
To change the data into the correct form, the code calls y.values.ravel(). The values property strips all of the DataFrame information, while the ravel() call flattens the resulting vector. Figure 5.9 shows the result.
Figure 5.9 – The y variable is now a vector suitable for input to the classifier
The reason that Figure 5.7 and Figure 5.9 are so important is that many input errors that occur when working with the classifier have to do with data being in the wrong format. In many cases, the error message doesn’t provide a good idea of what the problem is, and trying to figure out precisely why the classifier is complaining can be difficult. In a few cases, the classifier may only provide a warning, rather than an error, so it’s even more difficult to locate the problem.
Creating the detection model
All of the data generation and preparation took a long time in this example, but it’s an even longer process in the real world. This example hasn’t considered issues such as cleaning data, dealing with missing data, or verifying that data is in the correct range and of the correct type. This is actually the short version of the process, but now it’s time to finally build the model and see how well it does in detecting hackers.
Selecting the correct algorithm
This example relies on RandomForestClassifier. There are no perfect classifiers (or any other algorithm, for that matter). The reason for using a random forest classifier in this case is that this particular algorithm works well for security needs. You can use the random forest classifier to better understand how the ML model makes a particular decision, which is essential for tuning a model for security needs. A random forest classifier also has these advantages:
- There is less of a chance of bias providing you with incorrect output because there are multiple trees, and each tree is trained on a different subset of data. This algorithm relies on the power of the crowd to reduce the potential for a bad decision.
- This is a very stable algorithm in that new data that shows different trends from the training data may affect one or two trees but is unlikely to affect all of the trees.
- You can use this algorithm for situations where you have both categorical and numerical features. Security situations often require the use of categorical data to better define the environment, so that something such as an API call can be a hacker in one situation but not another.
- This is also the algorithm to rely on when you can’t guarantee that real-world data is scaled well. It also handles a certain amount of missingness. Security data may not always be as complete as you want it to be. In fact, it’s in the hacker’s interest to make the data incomplete.
Although the random forest algorithm may appear perfect, appearances can be deceiving. You also need to be aware of the disadvantages of using this algorithm:
- The algorithm is quite complex, so training can require more time.
- Tuning the model can prove a lot more difficult, especially with the stealthy manner in which hackers operate. You may find yourself tweaking the model for quite a while to get a good result.
- The resulting model can use a lot more computational resources than other solutions. Given that security solutions may rely on immense databases, you really do need some great computing horsepower to use this algorithm (despite the apparent alacrity of the example due to the small size of the dataset).
These advantages and disadvantages should give you a better idea of what to expect when working with the random forest algorithm in the real world. The critical point here is that you can’t skimp on hardware and expect a good result.
Performing the classification
The actual classification process is all about fitting a model to the data that you’ve created. Fitting is the process of creating a curve that differentiates between benign requests on one side and hackers on the other. When a model is overfitted, it follows the data points too closely and is unable to make good predictions on new data. On the other hand, when a model is underfitted, it means that the curve doesn’t follow the data points well enough to make an accurate prediction, even with the original data. The RandomForestClassifier used in this example is less susceptible to either overfitting or underfitting than many algorithms are. With this in mind, here are the steps needed to perform classification:
- Create the classifier and fit it to the data generated and manipulated in the previous sections. In this case, the example uses all of the classifier’s default settings except for the data. The output of this step simply says RandomForestClassifier(), which tells you that the creation process was successful:
clf=RandomForestClassifier()clf.fit(X,y)
- Generate test data to test the model’s performance. This is the same approach that was used to create the training data, except this data is generated using a different seed value and settings to ensure uniqueness:
random.seed(19)threshold, benignCount, hackerCount, data =
    CreateAPITraffic(benignIP=benignIPs,
        apiEntries=callNames, bias=.95, outlier=15)
print(f"There are {benignCount} benign entries "
    f"and {hackerCount} hacker entries "
        f"with a threshold of {threshold}.")
fields = ['Time', 'IP_Address', 'API_Call']
SaveDataToCSV(data, fields, "TestData.csv")
Something to note about this step is that the bias and outlier settings are designed to produce the effect of a more realistic attack by making the attacker stealthier. The output of this step is as follows:
There are 4975 benign entries and 25 hacker entries with a threshold of 1.4000000000000021.
- Perform the actual classification. This step includes manipulating the data using the same approach as the training data:
testData, testCalls = ReadDataFromCSV("TestData.csv")X_test = np.array(testData[1:len(calls)+1]).T
y_test = testData[0:1].values.ravel()
y_pred = clf.predict(X_test)
print('Accuracy: %.3f' % accuracy_score(y_test, y_pred))
This process ends with a measurement of the accuracy of the model, which is the most important part of the process. Data scientists often use other measures to verify the usefulness of a model and to check which factors contributed most to the model’s accuracy. You can also create graphs to show data distributions (https://machinelearningmastery.com/statistical-data-distributions/) and how the decision process is made (https://stackoverflow.com/questions/40155128/plot-trees-for-a-random-forest-in-python-with-scikit-learn and https://mljar.com/blog/visualize-tree-from-random-forest/). In this case, the output says that the model is 95.5 percent accurate (although this number can vary, depending on how the training and testing data is configured). It’s possible to improve the accuracy in a number of ways, but the best way would be to provide additional data.
Using a subprocess in Python example
Real-time defenses often depend on using the correct coding techniques in your ML code. For example, something as innocuous as a subprocess could end up torpedoing your best efforts. A subprocess is a task that you perform from the current process as a separate entity. Even though you don’t see it used often in Python ML examples, you do run across it from time to time. For example, you might use a subprocess to download a dataset or extract data from a .zip file. It’s handy to see how this kind of problem can appear totally innocent and how you might not even notice it until a hacker has exploited it. This first example, which won’t run on online environments such as Google Colab because the IDE provides protections against it, shows the wrong way to perform tasks using a subprocess. The reason that this code is included is to provide you with a sort of template to see incorrect coding practices in general. You’ll find this example in the MLSec; 05; Real Time Defenses.ipynb file for this chapter:
from subprocess import check_output
MyDir = check_output("dir", shell=True)
print(MyDir.decode('ascii'))
Even though the code executes as a script at the command line and provides a listing of the current working directory, the use of shell=True creates a potential RCE hole in your code, according to https://docs.python.org/3/library/subprocess.html#security-considerations and https://www.hacksplaining.com/prevention/command-execution. In order to avoid the RCE hole, you can use this form of the code instead (note that this code may not work on your Linux system):
from subprocess import check_output
MyDir = check_output(['cmd','/c','dir'])
print(MyDir.decode('ascii'))
In this case, you create a new command processor, execute the directory command, and then close the command processor immediately by using the /c command-line switch. Of course, this approach requires some knowledge of the underlying operating system. It’s often better to find a workaround that doesn’t include calling the command processor directly, such as the solution shown here (which will definitely run on your Linux system):
from os import listdir
from os import getcwd
MyDir = listdir(getcwd())
print(MyDir)
This version obtains the directory as an easily processed list, in addition to protecting it from an RCE attack. In many respects, it’s also a lot easier to use, albeit less flexible, because now you don’t have access to the various command-line switches that you would when using the check_output() version. For example, this form of check_output() will obtain only the filenames and not the directories as well: MyDir = check_output(['cmd','/c','dir', '/a-d']). You can also control the ordering of the directory output using the /o command-line switch with the correct sub-switch, such as /os, to sort the directory output by size.
Working with Flask example
You may want to expose your ML application to the outside world using a REST-type API. Products such as Flask (https://www.fullstackpython.com/flask.html) make this task significantly easier. However, when working with Flask, you must exercise caution because you can introduce XSS errors into your code. For example, look at the following code (also found in the MLSec; 05; Real Time Defenses.ipynb file for this chapter):
from flask import Flask, request
app = Flask(__name__)
@app.route("/")
def say_hello():
    your_name = request.args.get('name')
    return "Hello %s" % your_name
In this case, you create a Flask app and then define how that app is going to function. You start at the uppermost part of the resulting service (yes, it runs fine in Jupyter Notebook). The hello() function obtains a name as a request argument using request.args.get('name'). It then returns a string with the name of the website for display. To run this example, you place this call in a separate cell:
app.run()
When you run the second cell, it won’t exit. Instead, you’ll see a message such as this one (along with some additional lines that aren’t a concern in this example):
* Running on http://127.0.0.1:5000/ (Press CTRL+C to quit)
Note that the address the server provides may vary, so you need to use the correct URL or the application will fail. When you see the running message, you can open a new tab in your browser and type something such as this as an address: http://127.0.0.1:5000/?name=John. The browser page will display Hello and then your name. However, if you type the following address instead, http://127.0.0.1:5000/?name=<script>alert(1)</script>, you will see an alert dialog. Of course, you could have run any script, not just this one. To stop the server, click the Stop button in Jupyter Notebook. Here’s a fix for this problem:
from flask import Flask, request, escape
app = Flask(__name__)
@app.route("/")
def say_hello():
    your_name = request.args.get('name')
    return "Hello %s" % escape(your_name)
The use of escape(your_name) means that the server won’t actually execute the script. Instead, it escapes the script as text and displays the text on screen. It’s important to note that Flask creates a running log for you as you experiment with the test page. This log appears as part of the Jupyter Notebook output, such as this:
127.0.0.1 - - [20/Apr/2021 16:56:18] "GET /?name=John HTTP/1.1" 200 -
127.0.0.1 - - [20/Apr/2021 16:56:27] "GET /?name=%3Cscript%3Ealert(1)%3C/script%3E HTTP/1.1" 200 –
From an ML perspective, you could place this log in a file and then use techniques such as the one demonstrated in the Using supervised learning example section to perform analysis on it. The log provides everything you need to begin hunting the hacker down in real time, as the hacker is experimenting with the API, rather than waiting until it’s too late.
Asking for human intervention
Figure 5.2 and Figure 5.5 make it clear that a significant part of this example includes the use of human monitoring to ensure that nothing has gone awry with the supervised learning example. The setup could constantly check the accuracy of predictions that it’s making, for example, and send an alert of some type to the administrator when accuracy begins to fall below a certain point. The examples in the Using a subprocess in Python example and Working with Flask example sections also point to the need for human monitoring of the system. If you take anything at all away from this chapter, it should be that ML augments the ability of humans to detect and mitigate threats – it can’t act as a replacement for humans.
Unfortunately, humans are easily overwhelmed. ML can perform constant monitoring in a consistent way and then ask a human for intervention when the monitoring process detects anything unusual. This is the essential component that will make real-time monitoring in your organization possible – the realization that ML can direct a human’s attention to the right place at the right time.
This part of the chapter takes you beyond what most organizations do today – that is, addressing threats in real time. However, to have a real edge against hacker attacks, you really need to know what a hacker is likely to do in the future. Predicting the future always comes with certain negative connotations because it really isn’t possible to predict anything with complete accuracy. Otherwise, everyone engaged in the stock market would be a millionaire. However, when it comes to security, it’s possible for the observant administrator to use ML to predict future attacks with enough accuracy to make the process worthwhile and possibly thwart a hacker before any mischief begins.
Developing predictive defenses
Being able to predict the future is something that everyone who is involved with security would like to have. The use of ML to help predict things such as network attacks is an ongoing venture, but there aren’t any commercial examples of such technology to date, and usable examples are also hard to find. However, it’s possible to postulate what a commercial offering might look like and start doing some experimenting of your own, as described in the sections that follow.
Defining what is available today
What you see most often today are explorations into predictive software based on new Long Short-Term Memory (LSTM), Recurrent Neural Network (RNN), and Multilayer Perceptron (MLP) models, which are described in articles such as CyberSecurity Attack Prediction: A Deep Learning Approach at https://dl.acm.org/doi/fullHtml/10.1145/3433174.3433614 and A deep learning framework for predicting cyber attacks rates at https://link.springer.com/article/10.1186/s13635-019-0090-6. (You’ll have to pay for the privilege of reading the first research paper.) Still, just as ML has become popular in predicting all sorts of other events, researchers will eventually come up with methods of predicting possible attacks.
Another white paper that provides an interesting read, Conceptualisation of Cyberattack prediction with deep learning (https://cybersecurity.springeropen.com/articles/10.1186/s42400-020-00053-7), also focuses on the need for new algorithms to perform attack prediction, including the use of new ReLU algorithms to provide activation functions in deep learning models. Figure 1 of this article provides a block diagram of a potential model to use for predictive purposes. The end of the article also provides useful links to datasets you can use while experimenting.
Forensic analysis of events that have already happened using techniques such as those shown in the Using supervised learning example section, such as botnet attacks as described in Botnet Forensic Analysis Using Machine Learning at https://www.hindawi.com/journals/scn/2020/9302318/, are helping to improve the odds of creating good predictive solutions. As you read the article, however, you quickly become aware of the new skills required to actually perform such analysis. In addition, the article demonstrates that the forensic model won’t be easy to construct because it consists of ensembles of learners, much such as the ensembles discussed in the Using ensemble learning section of Chapter 3.
There are also people skills to consider. Not only will the person performing the analysis have to have a good knowledge of ML techniques but also low-level network analysis techniques, as described earlier in this chapter. If the person who is performing the analysis isn’t comfortable with using tools such as Wireshark, then the analysis is likely to fail. In addition, botnet forensics only tells you about trends –you still need to create some sort of ML tool to predict future botnet attacks based on current trends.
Even though it may not seem relevant at first, the ability to predict certain classes of worldwide events will also prove helpful in determining when network attacks could possibly peak. For example, Prediction of Future Terrorist Activities Using Deep Neural Networks at https://www.hindawi.com/journals/complexity/2020/1373087/ looks at terrorist activity. Knowing this information could provide clues as to when terrorists will use various kinds of network attacks to bring down the financial sector or simply look for easy ways to finance their various endeavors, by forcing businesses to pay a ransom to get their data back. Keeping track of world events is a viable aid to keeping your network free of various attacks as well.
Downsides of predicting the future
In many ways, trying to predict whether someone is going to attack your network is like trying to predict the weather. Yes, techniques have improved over time, but ask anyone who has had a picnic ruined by rain and you’ll quickly understand that the process is far from bulletproof. Humans have always tried to predict the future using various means, with many of the correct guesses being more a matter of random chance than any skill on the part of the predictor. When trying to predict whether a hacker will attack your network, you need to consider these issues:
- Current trends in hacker attacks
- Historical trends in attacks of the same type
- The probability of a hacker continuing to use similar (albeit updated) attacks
- The likelihood of hackers devising an entirely new attack vector
- Human intuition
The first two items on the list do have a solid mathematical basis found in real-world data, assuming you can find the right data and that it hasn’t become biased or manipulated in some way.
The second two items on the list have a statistical basis of the same sort and can predict the outcome of games of chance. Yes, you can create ML models that can provide you with statistics and even choose the options with the highest probability, but in the end, any of the options under review can occur. Winners of the lottery know that sometimes the option with the smallest chance of success actually does occur.
The fifth item on the list is the hard one, and it’s the one with a significant effect on your efforts. Interpreting data requires human intuition because a computer has no sense of one attack vector’s meaning in a specific situation over another. Human intuition also informs a hacker when it’s time to move on to another method because the old one has a dwindling chance of success, based on a new administrator technique. The hacker can simply get a feeling that something is about to happen and switch tactics. There is no way to predict such feelings.
The human element in predictions
There is a strong fear that a combination of ML applications and robotics will replace humans. It’s true that ML applications can perform a great many predictable and mundane tasks that humans once performed exclusively. Because an ML application doesn’t need to eat and doesn’t get tired, it can actually do a better job in many cases. However, computers don’t feel, don’t have intuition, can’t think creatively, and can’t do a wealth of things that humans can do. What is more likely to happen with ML is that the application will assist the human security professional, relieving the security professional of performing mundane tasks. In looking at the techniques used to mitigate network attacks, it’s important to consider the contributions that the security professional will make, rather than become blinded by the flashing lights of technology.
The problem then is one of unrealistic expectations on the part of those using the prediction techniques. When anyone makes a prediction using any model created for the purpose, even with the addition of human intuition, there is an expectation that the prediction is correct. However, there is only a probability that the prediction is correct, and hackers attacking your network may decide to do something completely different and unexpected. This is how a hacker wins the war over the defenses you build and the predictions you make – by behaving unpredictably.
Creating a realistic network model
Security requires a realistic, as opposed to a proof-of-concept, model if you truly want to detect attacks in real time and predict future trends. Of course, trying to generate a model that represents the real world is difficult at best. It’s possible to obtain perfectly reliable pre-built models for many ML needs and save yourself a lot of time, not to mention guesswork, in creating such a model. Some problem domains are common enough and predictable enough that you can use a pre-built model and feel good about it. Security is no exception to this rule. Using a pre-built model for these needs will likely provide good results:
- Various types of common fraud, such as credit card fraud
- Identity theft of various sorts, including the use of illegally obtained credentials to access your network
- Spoofing techniques, such as those used to gain unlawful access to a system
- Spam mail or malware of various kinds
- Some types of attacks on cloud-based resources that are hosted by a particular vendor
The problem arises when you try to use what someone else has put together for predicting specific types of problem domains. No one can anticipate, much less build, a model that will match the particular characteristics of your organization (even if they attempt to tell you that they can do so). Here are some examples of situations where you need to build your own model to ensure that it works as anticipated:
- Social attacks of various sorts
- Attacks that depend on your organization’s structure
- Physical attacks that depend on the layout, structure, and organization of any physical elements of your organization, such as buildings
- Infiltration based on your particular product line or methodologies
- Attacks on your APIs or databases
Building a realistic network model that you can use to predict future activity comes down to examining how the data is trending on your network, rather than on networks in general. This means using statistical analysis to track your particular network and being aware of the threats peculiar to your network. Your network may not be particularly vulnerable to an API attack. Perhaps the hackers interested in you are working in other ways, such as social engineering through various kinds of email entreaties instead.
Beware of one-size-fits-all
A common mistake that leads to security issues is to assume that every network is just like every other network out there. Networks do have similarities, but they also have unique qualities. Hackers poke and prod at a network using every means possible to locate a chink in a network’s security armor. However, once they find that chink, they don’t ignore it. Rather, they use what is known about the network to create an exploit that will work. This is the reason why you really do need to consider the uniqueness of your network as part of a solution for predicting what will happen in the future, based on what you know now.
Summary
This chapter has covered a broad range of network topics, which should tell you one thing – keeping your network secure is a team effort that requires the devoted efforts of professionals in several different areas. In order to make the topic a little easier to understand, this chapter broke the requirements down into traditional protections, ML protections, real-time detection, and predictive defenses. Hackers are constantly doing three things to thwart your efforts: finding new ways to break into your network, developing ever-faster techniques, and doing the unexpected to evade your defenses. These hacker methodologies are why you must view network security as a collaboration between humans and various kinds of automation. Without augmentation, humans are hopelessly mired in detail and won’t see an attack until it has already finished and the damage is done. Despite this, automation can’t possibly deal with a hacker’s ability to perform attacks in unexpected ways.
Part of this chapter focused on techniques that work well for security purposes, rather than ML as a whole. For example, you can use any number of algorithms to detect suspicious activity, but the best practice is to start with a random forest classifier for security needs because of the particular advantages it provides. In addition, you use supervised learning to perform detection, again because of the advantages it provides over unsupervised learning in a security context. The point is that there is a difference between ML techniques in general and those used specifically for security needs, so it’s important to consider the focus of any security applications you create.
You’ve also discovered that Python, the language most often used to create ML applications, has security holes that can affect your network as well. Consequently, you need to look out for the issues presented by programming techniques such as subprocesses and the potential for RCE. Even though these security holes always affect Python applications, they’re especially important to consider when working with network applications because a hacker can access them with greater ease.
Chapter 6 studies a topic that’s essential to creating and using ML successfully to keep hackers at bay – the detection of anomalies, which is the presence of anything unexpected in data, models, or activities, no matter where they occur in a system. An anomaly can be a black swan event, the effects of cosmic radiation, or the subtle intrusion of a hacker, but you won’t know until you investigate it.