
Chapter 19: Azure Virtual Desktop's Getting Started Feature
In this chapter, we'll look at using the Getting Started feature to deploy Azure Virtual Desktop. This feature provides an easy way to deploy and configure an Azure Virtual Desktop environment.
By the end of this chapter, you should be able to use the Azure Virtual Desktop Getting Started feature to deploy Azure Virtual Desktop environments.
In this chapter, we will cover the following topics:
- How the Getting starting feature works
- Using the Getting started feature with Azure AD DS and AD DS
- Using the Getting started feature without an identity provider
- Post-deployment cleanup
- Troubleshooting the Getting started feature
How the Getting started feature works
The purpose of the Getting started feature is to address the challenges associated with deploying Azure Virtual Desktop environments.
The Getting started feature removes the multi-step processes and makes deploying Azure Virtual Desktop simple.
Two key benefits of using the Getting started feature are as follows:
- You can remove complex multi-step processes, including FSLogix profile container setup and configuration, which includes Azure Files and permissions.
- You can create session hosts and configure Azure Virtual Desktop core components, including host pools, workspaces, application groups, and validation user accounts.
There are two options you can choose from:
- Existing Setup: This is for organizations who already have an Azure Tenant and Subscription, including Active Directory or Azure Active Directory Domain Services (Azure AD DS).
- New Subscription (Empty): This is tailored for subscriptions that have no Active Directory or Azure AD DS).
The Getting started feature is essentially a wizard that enables you to deploy an Azure Virtual Desktop environment within a matter of hours. It lets you rapidly deploy small environments that can be used in production, testing, or lab environments.
The Getting started feature uses nested templates to deploy the required Azure resources for validation and to automate the deployment of Azure Virtual Desktop. The Getting started feature creates two or three resource groups that are dependent on the identity provider option that's selected within the wizard, which we will cover shortly.
Prerequisites
Before you get started, you need to ensure that you have an Azure Active Directory tenant. You will also need to ensure that the account you are using has global admin permissions on the subscription being used within Azure Active Directory.
Important Note
At the time of writing, the Getting started feature does not support the use of accounts with multi-factor authentication (MFA). You need to make sure the account that's being used has MFA turned off. Also, managed service accounts (MSA), business-to-business (B2B), and guest accounts are not supported at the time of writing.
For those who are using an environment with Active Directory Domain Services (AD DS), take note of the following:
- You need to have the AD DS domain admin credentials to hand.
- You must configure Azure AD connect on your subscription and make sure the USERS container is syncing with Azure Active Directory. You can check this by viewing the Azure Active Directory page within the Azure portal.
- You need to ensure you have a Domain Controller deployed within the required region you plan to deploy Azure Virtual Desktop.
- The domain controller that you deploy to Azure must not have DSC extensions of the Microsoft.Powershell.DSC type.
For those who plan to deploy Azure Virtual Desktop without an identity provider, take note of the following:
- You need to ensure that the AD domain join's user principal name (UPN) does not include specific keywords such as admin, server, or support. The full list can be found here: https://docs.microsoft.com/azure/virtual-machines/windows/faq#what-are-the-username-requirements-when-creating-a-vm-.
- You must create a new host pool to add session hosts when using the Getting started feature while using the without an identity provider option; if you're trying to deploy a session host in an existing host pool, it will fail.
Now, let's look at using the Getting started feature wizard.
Using the Getting started feature with Azure AD DS and AD DS
This section details how to use the Getting started feature to deploy an Azure Virtual Desktop environment in a subscription that already has Azure Active Directory Domain Services (Azure AD DS) or Active Directory Domain Services (AD DS):
- First, you need to open the Azure portal.
- Once you have signed into Azure, open the Azure Virtual Desktop page using the search bar or navigate through the services.
- Within the Azure Virtual Desktop page, select the Getting started tab:

Figure 19.1 – The Getting Started tab within the Azure Virtual Desktop page of Azure
- Click the Start button.
- Select the required Subscription the select Existing Active Directory in the Identity provider section.
- For Identity Service type, select Active Directory or Azure Active Directory Domain Services. For this example, we will choose Active Directory.
- Enter a Resource group name:

Figure 19.2 – The Getting started wizard using an existing active directory identity provider
- For Location, select the Azure region you wish to deploy your Azure Virtual Desktop resources to. This example uses UK South.
- Select the required Virtual network and Subnet:
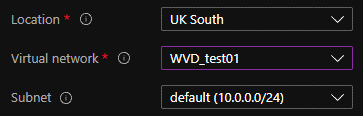
Figure 19.3 – The Location, Virtual network, and Subnet options within the Getting started wizard page
- Enter the required Azure User credentials. This is the full user principal name and ensures the account has the owner permissions on the Azure tenant.
- Enter the required Domain administrator credentials. You will need to ensure you enter the full user principal name:

Figure 19.4 – Both the Azure user credentials and Domain administrator sections within the Getting started wizard
- Click Next: Virtual Machines to continue to the Virtual Machines tab.
- Within the Virtual Machines tab, select the required option for users per virtual machine. For this example, we will choose multiple users.
- Select an Image type, and then an Image. In this example, we will use the default of Gallery for Image type and Windows 11 Enterprise multi-session + Microsoft 365 Apps for Image.
- Select the required Virtual machine size and SKU you would like to deploy:
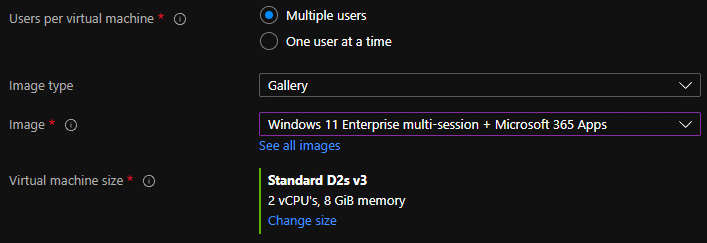
Figure 19.5 – The first four fields within the Virtual Machines tab within the Getting started wizard
- Enter a Name prefix for naming the session hosts that will be deployed.
- Under Number of virtual machines, specify the number of virtual machines you would like to deploy:

Figure 19.6 – The Name prefix and Number of virtual machines fields
- Specify domain or unit. This option enables you to specify a domain to join and the organizational unit path you wish to use. For this example, we will select No:
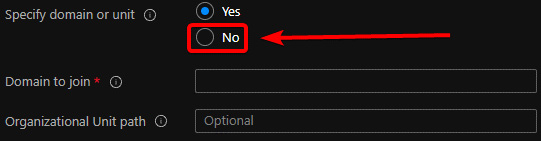
Figure 19.7 – The Specify domain or unit section
- Select a Domain controller resource group. This is the resource group where the domain controller will reside.
- Select a Domain controller virtual machine:

Figure 19.8 – The Domain controller resource group and Domain controller virtual machine fields
- You can also chain a custom Azure Resource Manager (ARM) template. This allows you to insert specific customizations into the deployment process. You can download an example template customization here: https://github.com/Azure/RDS-Templates/tree/master/wvd-sh/arm-template-customization. In this example, we will skip linking to the Azure template:

Figure 19.9 – The Link Azure template section within the Virtual Machines tab when using the Getting started wizard
- Click Next: Assignments to move on to the Assignments tab.
- Within the Assignments tab, you can create a test user account. This will be used as a validation user account to test your deployment. In this example, we will skip the Create test user account section. Uncheck the box for Create test user account:

Figure 19.10 – The Create test user account fields within the Assignments tab in the Getting started wizard
- Within the Assign existing users or groups field, add the users or groups you wish to add to this Azure Virtual Desktop deployment:
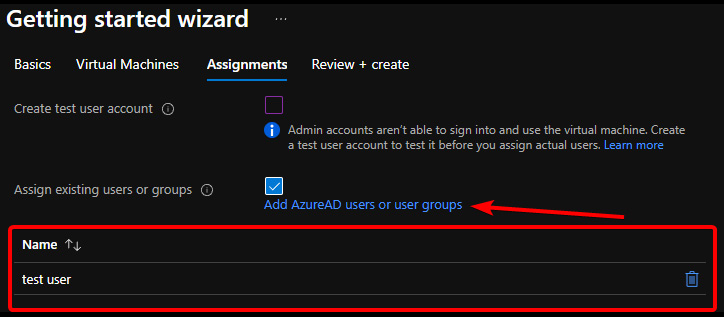
Figure 19.11 – Button to add users and groups to the Getting started wizard deployment
- Once you've finished adding users and groups, click Review + Create to progress to the Review + create tab:
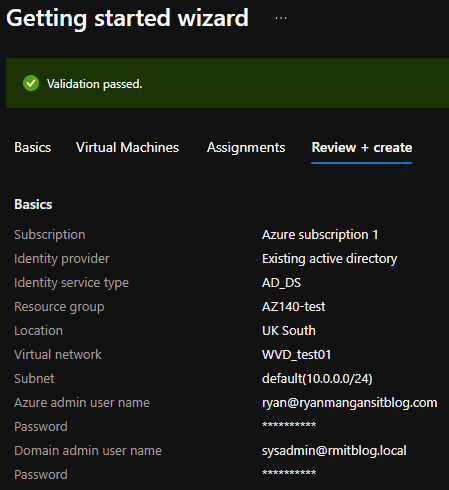
Figure 19.12 – The Getting Started wizard – validation has passed
- Once validation has passed, click Create.
Once the deployment has finished, you should see the following:
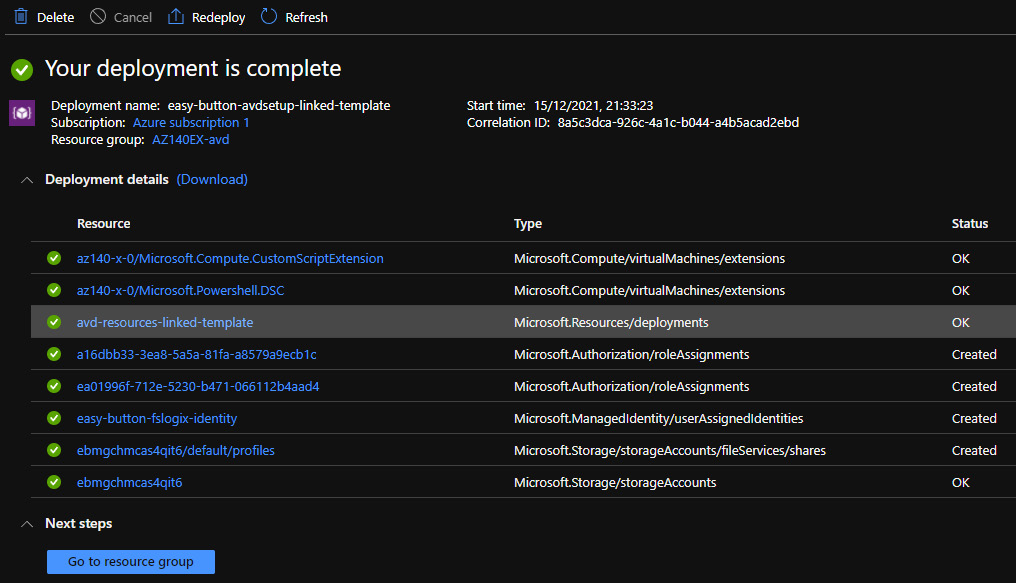
Figure 19.13 – Your deployment is complete
In the next section, we will look at using the Getting started feature without an identity provider.
Using the Getting started feature without an identity provider
Interestingly, when deploying Azure Virtual Desktop using the Getting started feature without an identity provider, the wizard has fewer options. The reason for this is that the Getting started wizard will deploy the Azure Active Directory Services infrastructure as part of the wizard and will take care of the majority of the configurations. Let's take a look at using this feature without the identity provider settings:
- Within the Getting started wizard, in the Basics tab, under Identity provider, you will need to select No identity provider.
- Under the Identity service type section, you will see that the only option you have is Azure AD Domain Services; select it:

Figure 19.14 – Setting the No identity provider option
- You need to make sure that you set a Domain admin user name and Password as these credentials will be used with the deployed Azure Active Directory Domain Services resource:
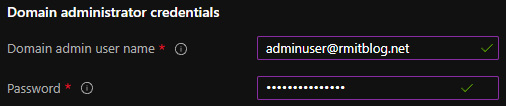
Figure 19.15 – The Domain administrator credentials section within the Getting started wizard
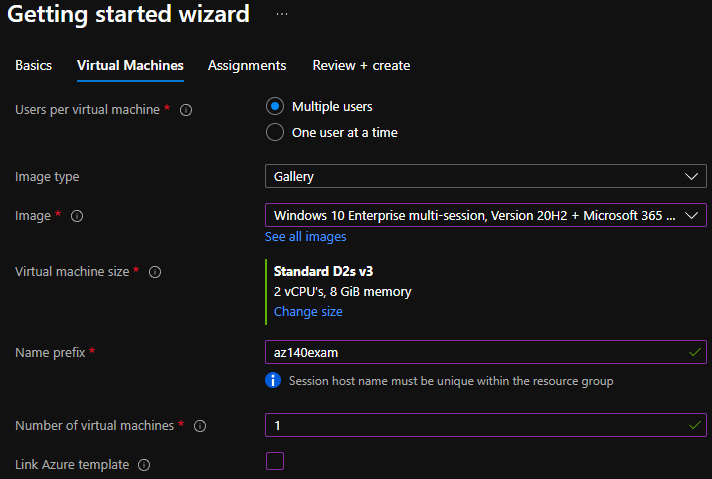
Figure 19.16 – The difference between using the No identity provider option within the Getting started wizard
Now, let's look at the post-deployment cleanup.
Post-deployment cleanup
Once you have deployed Azure Virtual Desktop, you will see that two resource groups have been created – one marked with a prefix of -avd, which specifies all the resources you require for Azure Virtual Desktop to function, and another marked with a prefix of -deployment, which specifies all the resources that will be used to automate the deployment of the Azure Virtual Desktop environment within your subscription:

Figure 19.17 – Two resource groups created by the Getting started feature
If you have used the Getting started feature to deploy an Azure Virtual Desktop environment without an identity, such as when using a new Azure AD DS, then you will see three resource groups marked with the -deployment, -avd, and -Prerequisite prefixes.
In the following screenshot, you can see the resources that have been used to deploy the Azure Virtual Desktop environment:

Figure 19.18 – The -deployment resource group's contents
The resource group marked with the prefix of prerequisite contains the virtual network, network security group, and the Azure AD DS resource. The following screenshot shows what you will find within this resource group:
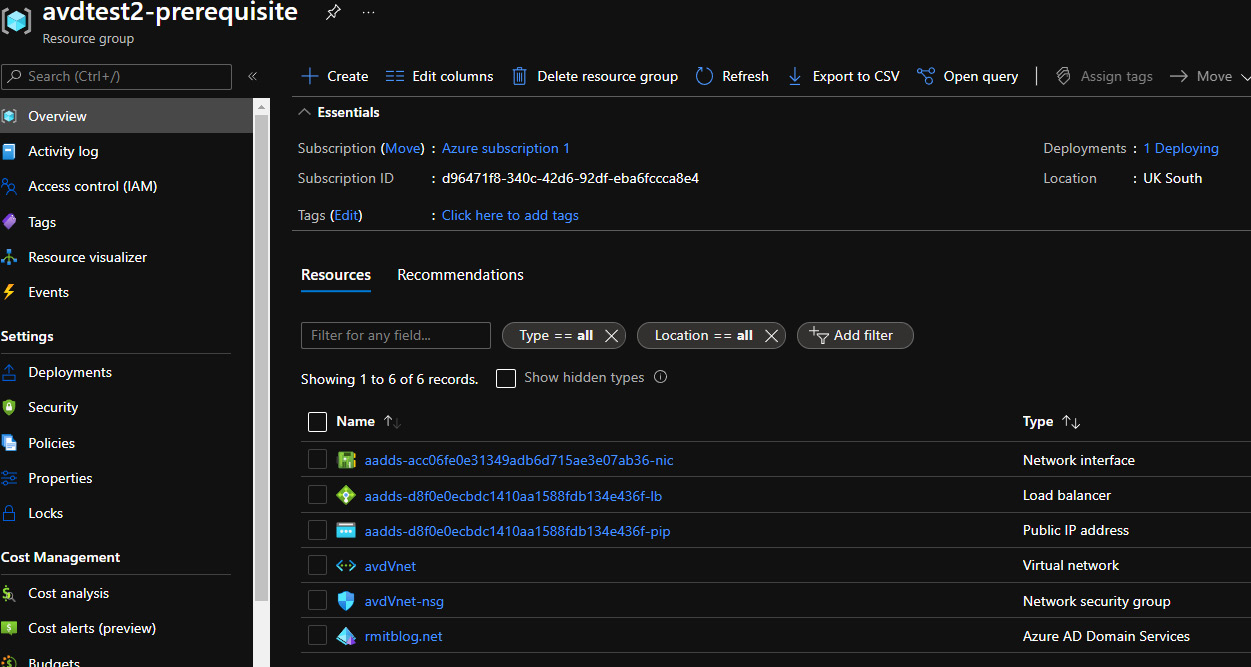
Figure 19.19 – The resource group deployed as part of the Getting started wizard when the No identity provider option is selected
You can go ahead and delete the resource group marked as -deployment as it's no longer required. If you have finished with the deployment, you can remove the two/three resource groups to safely delete the deployed Azure Virtual Desktop environment.
Now, let's look at some of the errors you may see and how to solve them while troubleshooting the Getting started feature.
Troubleshooting the Getting started feature
In this section, we'll look at some of the issues and errors you may come across when using the Getting started wizard.
The following table details some of the most common issues:

You can read more about troubleshooting the Azure Virtual Desktop Getting started feature here: https://docs.microsoft.com/azure/virtual-desktop/troubleshoot-getting-started?.
Summary
In this chapter, we looked at using the Getting started feature to simplify the deployment of Azure Virtual Desktop. We started by looking at the benefits before looking at the prerequisites. We then ran through the full Getting started wizard and looked at the subtle differences between using an existing identity provider and no identity provider. Finally, we learned how to troubleshoot deployment errors when using the Getting started wizard feature.
Questions
Answer the following questions to test your knowledge of this chapter:
- How many resource groups are created when deploying an Azure Virtual Desktop environment when creating an Azure AD DS environment as a part of the deployment?
- When you're deploying an Azure Virtual Desktop environment using the Getting started feature, what is the required RBAC role for the user account?
- Which resource group should you delete once you've deployed using the Getting started wizard?
- If the resource group with the -prerequisites prefix is present, which resources would you expect to find in there?
Answers
- -prerequisites, -deployment, and -avd
- Owner
- -deployment
- Azure Active Directory, virtual network, network security group