
Chapter 2: Designing the Azure Virtual Desktop Architecture
We will start this book by looking at the design of Azure Virtual Desktop. Design is an integral part of any suitable technology solution, and in this chapter, we will look at the areas you should consider when designing Azure Virtual Desktop.
In this chapter, we'll cover the following topics:
- Assessing existing physical and Virtual Desktop environments
- Assessing the network capacity and speed requirements for Azure Virtual Desktop
- Identifying an operating system for an Azure Virtual Desktop implementation
- Planning and configuring name resolution for Active Directory and Azure Active Directory Domain Services
- Planning a host pools architecture
- Recommended resource groups, subscriptions, and management groups
- Configuring the location for the Azure Virtual Desktop metadata
- Calculating and recommending a configuration for capacity and performance requirements
Assessing existing physical and Virtual Desktop environments
Before we can look at the components of Azure Virtual Desktop, we need to understand the current environment, the requirements, and other information that would be useful.
Assessing Azure Virtual Desktop deployments
When tackling the design of Azure Virtual Desktop, the first thing we must do is look at the current desktop estate within the organization's environment. The desktop estate could be purely physical, virtual, or a mixture of both physical and virtual. Suppose your organization is deploying a virtual desktop environment for the first time (greenfield deployment). In this case, you should still assess your physical desktop estate to understand the applications, data, and profile usage within your organization.
The desktop assessment should evaluate areas including the user's persona, consistent host pool types of virtual machines, applications, and user profiles. The data that's gathered from this assessment can be used to scope the deployment of new infrastructure and Azure Virtual Desktop migration.
When preparing your planning methodology, you can use Microsoft's best practices on cloud adoption. They will help you document your technology strategy and current desktop state:
- Inventory and rationalize your desktop estate based on assumptions that align with motivations and business outcomes with the digital estate guidance from Microsoft: https://docs.microsoft.com/en-us/azure/cloud-adoption-framework/digital-estate/rationalize.
- Establish a plan for initial organizational alignment to support the proposed adoption plan using the organizational alignment plan: https://docs.microsoft.com/en-us/azure/cloud-adoption-framework/plan/initial-org-alignment.
- Create a readiness plan for addressing any skills gaps that may be present. You can find this in the skills readiness plan: https://docs.microsoft.com/en-us/azure/cloud-adoption-framework/plan/adapt-roles-skills-processes.
- Develop a cloud adoption plan to manage change across the digital estate, operational and technical skills, and overall organization using the cloud adoption plan: https://docs.microsoft.com/en-us/azure/cloud-adoption-framework/plan/plan-intro.
Another helpful tool that can be used to plan is a digital estate assessment, which enables you to measure your desktop estate changes based on the organization's desired outcomes:
- Infrastructure: For organizations that are inward-facing and seek to optimize costs, operational processes, agility, or other aspects of their operations, the digital estate focuses on VMs, servers, and workloads.
- Applications: It is recommended that you focus on applications, APIs, and transactional data that supports the customers.
- Data: It is somewhat challenging to launch new products/services without some data. You should also focus on the silos of data across the organization.
- Operational: Businesses require stable technologies to operate efficiently and effectively. Where possible, businesses need to aim to be as close as possible to zero downtime. Service reliability is critical in today's competitive markets. When stability is a priority, the digital estate should be measured on the positive or negative impact on stable operations. The reliability of workloads, disaster recovery, and business continuity are good measures you can use for operational stability per asset.
Using the data you have collected and analyzed will help you create the migration plan. You may need to carry out workload assessments to capture specific requirements. For an Azure Virtual Desktop migration deployment plan, you will require data about the desktops, users, and workloads used by each user.
Let's look at some tools available to you.
Movere
Movere is a product designed to help you migrate resources to Microsoft cloud services. It improves business intelligence by reporting on entire IT environments within a single day. As organizations grow, change, and digitally optimize, Movere helps IT admins to see and control their IT environment.
You can access Movere through Microsoft Solution Assessment and Microsoft Cloud Economics Program. You can use these tools when you're planning and deploying an Azure Virtual Desktop environment. You can find out more about Movere at https://www.movere.io/.
Azure Migrate
Azure Migrate is used to discover, assess, and migrate on-premises servers, apps, and data to Microsoft Azure:
- Azure Migrate's appliance is used to discover installed applications (software inventory).
- Agentless VMware migration supports concurrent replication of 500 VMs per vCenter.
- Azure Migrate installs the Azure VM agent automatically on the VMware VMs while migrating them to Azure using the agentless VMware migration method.
Lakeside is also integrated with Azure Migrate within the virtual desktop infrastructure migration goals section to assess your current state. This vendor can help you map out an Azure Virtual Desktop deployment plan, including personas, host pools, applications, and user profiles specific to a Virtual Desktop environment.
User personas
User personas are the specifications for a particular group of users within a physical or virtual desktop environment with common characteristics or working methods. You may have multiple user personas in an Azure Virtual Desktop environment.
Once you have completed the required data capture, you will see the resources and workloads being used within your environment. You can then use this data to group user personas based on the following criteria:
- Personal pools: Some users may require dedicated desktops (personal pools). For example, security, compliance, high-performance, or noisy-neighbor requirements might lead to some users running on dedicated desktops that aren't part of a pooling desktop strategy. You can use one-to-one here, though one of the biggest benefits of using personal pools is the ability to give local administrator rights and solve the challenge of those apps that do not support pooled multi-session deployments. You would enter this information by specifying a personal host pool type during the Azure Virtual Desktop host pool deployment (https://docs.microsoft.com/en-us/azure/virtual-desktop/create-host-pools-azure-marketplace#begin-the-host-pool-setup-process).
- Density: Power users may benefit from fewer users per session host for the more intensive workloads. For example, heavier density (applications/users/load) may require two users per virtual central processing unit (vCPU) instead of the typical six users' light-user assumption per vCPU. You must enter the required density information in the pool settings of the Azure Virtual Desktop host pool deployment (https://docs.microsoft.com/en-us/azure/virtual-desktop/create-host-pools-azure-marketplace#begin-the-host-pool-setup-process).
- Performance: High-performance desktop requirements for workloads or specific user scenarios. Some users may need more memory per vCPU than the assumed 4 GB of RAM per vCPU. You must enter the VM sizing in the Azure Virtual Desktop host pool deployment in the virtual machine details section (https://docs.microsoft.com/en-us/azure/virtual-desktop/create-host-pools-azure-marketplace#virtual-machine-details).
- Graphical processing: Some users may require a graphic processing unit (GPU) for CAD or other graphical applications/workloads. Some users may require vGPU-based VMs in Azure, as demonstrated in this guide for configuring GPU VMs: https://docs.microsoft.com/en-us/azure/virtual-desktop/configure-vm-gpu.
- Azure region: Localized regional requirements to mitigate any latency and connectivity issues. Before configuring the host pool, it is recommended that a user from each region should test latency to Azure by using the Azure Experience estimation tool: https://azure.microsoft.com/services/virtual-desktop/assessment/#estimation-tool. The test user should provide details for the lowest-latency Azure region and the latency in milliseconds for the top three Azure regions. Additionally, if a local backend is needed for the applications that are served via AVD, the latency between the application and the backend can be more important than the latency between the user and the session.
- Business functions: Department grouping for billing or specific operational requirements. This type of grouping will help you align corporate costs in later stages of operations. You can use different subscriptions per department or use tagging to allocate costs to different business cost centers.
- User count: One question you should consider is, How many users will be in each distinct persona?
- Max session counts: Based on the geography and hours of operation, how many concurrent users are expected for each persona during maximum load? These are factors you should consider.
The following table shows responses to populating a completed assessment or design document:

Each persona/grouping, or each group of users with distinct business functions and technical requirements, would require a specific host pool configuration.
The end user assessment helps you realize the required data: pool type, density, size, CPU/GPU, Landing Zone region, and so on.
Important Note
You can read more about Azure Landing Zones here: https://docs.microsoft.com/en-us/azure/cloud-adoption-framework/ready/landing-zone/.
The host pool configuration assessment maps that data to a deployment plan. Aligning the technical requirements, business requirements, and cost will help determine the host pools' proper number and configuration.
Pricing examples are available for Microsoft Azure in the East US (https://azure.com/e/448606254c9a44f88798892bb8e0ef3c), West Europe (https://azure.com/e/61a376d5f5a641e8ac31d1884ade9e55), and Southeast Asia (https://azure.com/e/7cf555068922461587d0aa99a476f926) regions.
Application groups
Both Movere and Lakeside assess the current on-premises environment and provide data about the applications that are run on end user desktops. Using the data you have collected, you should create a list of all the applications that are required for each persona. For each required application, the answers to the following questions will help shape deployment iterations:
- Which applications need to be installed for the persona to use this desktop? (group/departmental applications)
Unless the persona uses 100 percent web-based software as a service application, you will most likely need to create and configure a custom master VHD image (https://docs.microsoft.com/en-us/azure/virtual-desktop/set-up-customize-master-image) for each persona. You will then need to work out which applications are typical applications and group/departmental applications. Common applications should be installed on the master image.
Tip
You can create custom images within the Azure portal or use Hyper-V, as suggested in the preceding paragraph.
- Is this application compatible with a Windows 10 Enterprise multi-session (W10EMU)?
If an application isn't compatible, a personal pool (https://docs.microsoft.com/en-us/azure/virtual-desktop/configure-host-pool-personal-desktop-assignment-type) may be required to run the custom VHD image.
- Will mission-critical applications suffer from latency between the Azure Virtual Desktop instance and any backend systems?
If this is the case – and it is likely to be the case – you may want to consider migrating the backend systems that support the application to Azure.
These answers may require the plan to include remediation to the desktop images or support application components before desktop migration or deployment.
In this section, we looked at application groups and some of the tools available, as well as some questions to help you gather the requirements for your future Azure Virtual Desktop solution.
Now, let's look at the network capacity and speed requirements for Azure Virtual Desktop.
Assessing the network capacity and speed requirements for Azure Virtual Desktop
In this section, we will look at assessing the network requirements for Azure Virtual Desktop and some of the considerations you should factor into your design.
A remote desktop protocol (RDP) session relies on network bandwidth. Problems with bandwidth will impact your user experience within a Windows session. Depending on the applications and display resolutions, you may require different network configurations for specific groups within your organization. Incorrectly configuring your network to meet your remote desktop needs and requirements can lead to project failure and users not being able to carry out their required tasks within Azure Virtual Desktop.
Applications
Before we understand how applications affect bandwidth, let's look at what user-specific bandwidth recommendations are available:

The preceding table provides guidance on the minimum recommended bandwidths for an acceptable user experience. The listed recommendations are based on the guidelines in Microsoft's guide to Remote Desktop workloads (https://docs.microsoft.com/en-us/windows-server/remote/remote-desktop-services/remote-desktop-workloads).
Important Note
The recommendations in the table apply to networks with less than 0.1% loss. These recommendations apply regardless of how many user sessions you are hosting on your virtual machines.
Remember, application workload outputs, frame rate, or display resolutions will apply stress to your network. As framerates increase, your bandwidth requirement will change.
A good example is when you add Microsoft Teams video conferences without any audio/visual redirection to a typical light workload with a high-resolution display – your bandwidth requirement will increase. We will look at how to improve user experience and performance using Teams AV redirect in Chapter 13, Implementing and Managing Microsoft Teams AV Redirect.
Some of the other typical use cases that have changing bandwidth requirements are as follows:
- Voice
- Real-time communication
- Streaming 4K video
Load testing the applicable use cases and scenarios in your deployment using tools such as Login VSI and PC Mark, which simulate load, is recommended. When load testing or benchmarking, it's important to vary the load sizes and run specific stress tests to simulate your future environment. It is also recommended that you test typical user scenarios in remote sessions to understand your network's requirements and capabilities.
Display resolutions
Your required display resolution will determine the required bandwidth. The following table provides an example of the required bandwidths Microsoft recommends you have for a display resolution with a frame rate of 30 frames per second (FPS). Following these guidelines will help you provide a smooth user experience. The same recommendations apply to both single and multiple user scenarios. Remember, scenarios involving a frame rate under 30 FPS, such as reading static text, will require less available bandwidth than any graphically intensive applications:

We now move on to looking at the experience estimate for Azure Virtual Desktop.
Azure Virtual Desktop experience estimator
Latency can be defined as the delay before data transfer begins after following an instruction for its transfer. Latency does not have to be geographic – it can also be based on your company's network topology. The distance you are from a Microsoft Azure data center can have an impact on the user experience. You can check the round trip time (RTT) of each Azure region using Windows Virtual Desktop Experience Estimator (https://azure.microsoft.com/services/virtual-desktop/assessment/):

Figure 2.1 – Windows Virtual Desktop Experience Estimator
Windows Virtual Desktop Experience Estimator is a great tool to help you pick the appropriate Azure regions in terms of the closest region to deploy your Azure Virtual Desktop environment in. You can also use this tool to understand the best location for a possible Azure Virtual Desktop disaster recovery solution.
Assistive Technologies
The phrase assistive technology is used to describe products or systems that support and assist individuals with disabilities, restricted mobility, or other impairments.
It is important to note that, when using assistive technology workloads, you will need to ensure that the round trip time is less than 20 milliseconds (ms) to achieve a good user experience.
Remote Desktop Protocol bandwidth requirements
Azure Virtual Desktop uses RDP as the connection method to provide remote display and input capabilities over network connections. RDP was initially released with Windows NT 4.0 Terminal Server Edition and has continuously evolved with every future Microsoft Windows and Windows Server release.
From the very beginning, RDP was developed to be independent of its underlying transport stack, and today, it supports multiple types of transport.
RDP is a complex technology that uses different techniques to deliver the server's remote graphics to the client device. Depending on the use case, scenario, availability of the compute resources, and network bandwidth, RDP dynamically adjusts various parameters to deliver the best remote user experience.
RDP multiplexes (multiple messages) multiply Dynamic Virtual Channels (DVCs) into a single data channel sent over different network transports. Did you know that there are separate DVCs for remote graphics, input, device redirection, printing, and others? The total amount of data that's sent over RDP depends on the user's activity – for example, a typical user working with basic textual content for most of the user's session. The bandwidth is low until the user generates a printout of a 100-page document to a printer. The print job will use more network bandwidth compared to the typical textual content that's used within the session.
A network's available bandwidth impacts the remote session's quality of experience. It is important to note that each application and display resolution can require different network configurations. It is essential to ensure that your network configuration meets your needs. It is recommended that you profile your network requirements based on user activity.
Estimating bandwidth utilization
RDP uses various compression algorithms for different types of data. The following table details some estimates for the data transfers:

This table has been taken from Microsoft (https://docs.microsoft.com/azure/virtual-desktop/rdp-bandwidth#estimating-bandwidth-utilization).
As discussed in the previous section, Assessing the network capacity and speed requirements for Azure Virtual Desktop, you need to consider bandwidth changes when you're doing the following:
- Streaming 4K video
- Voice or video conferencing
- Real-time communication
Now, let's look at estimating bandwidth for users who require remote graphics.
Estimating the bandwidth that's used by remote graphics
It is difficult to predict remote desktop bandwidth usage. The bandwidth usage depends on the user's activities and those activities that generate the most remote desktop traffic. Every individual user is different, and differences in their work patterns may change network usage.
One of the recommended ways to assess network bandwidth requirements is to monitor real user session connections. You can monitor connections using the built-in performance counters, network equipment, or third-party tooling.
In most cases, you would estimate network utilization by understanding how RDP works by analyzing your organization's user work patterns.
The remote protocol delivers the remote server's graphics to be displayed on a local client monitor. This process's technical definition is the remote protocol provides the desktop bitmap entirely composed on the server. Sending a desktop bitmap may seem like a simple task. However, it does require a significant amount of resources to achieve. For example, a 1,080p desktop image in an uncompressed format is circa 8 MB in size. Displaying this image on a locally connected monitor with a screen refresh rate of 30 Hz requires approximately 240 MB/s of bandwidth.
RDP uses a combination of different techniques to reduce the amount of data that's transferred over a network, including, but not limited to, those mentioned in this table:

To understand remote graphics, you should consider the following:
- The more complex/richer the graphics, the more bandwidth it will take:
- Text, window UI elements, and solid color consume less bandwidth than anything else.
- Natural images are the more significant contributors to bandwidth use. Client-side caching can help with reducing the natural image bandwidth.
- It is important to note that RDP only transmits changed parts of the screen. When there are no visible updates on the session screen, no updates are sent.
- Image slideshows are also known as video playbacks and other high-framerate content. RDP dynamically uses the required video codecs to deliver content close to the original frame rate. However, graphics are the most significant contributors to bandwidth utilization.
- An idle remote desktop uses minimal bandwidth during idle times.
- When the Remote Desktop Client window is minimized, no graphical updates are sent from the session host.
Please note that the stress you apply to your network depends on both the application workload's output, framerate, and display resolution. If the framerate or display resolution increases, the bandwidth requirement increases. One example is a light workload with a high-resolution display requiring more available bandwidth than a light workload with regular or low resolution. When using high display resolutions, expect to see the bandwidth requirements increase.
The following table provides examples of the data that's used by different graphic scenarios. These figures apply to a single monitor configuration with a 1,920 x 1,080 resolution and with both default graphics and H.264/AVC 444 graphics modes:

This table has been taken from Microsoft (https://docs.microsoft.com/en-us/azure/virtual-desktop/rdp-bandwidth#estimating-bandwidth-used-by-remote-graphics).
Dynamic bandwidth allocation
RDP is designed to dynamically adapt to the changing network conditions. Instead of using the hard limits on bandwidth utilization, RDP uses a capability called continuous network detection, which actively monitors the available network bandwidth and packet round-trip time.
Based on what's been detected, RDP dynamically selects the graphic encoding options and allocates bandwidth for device redirection and other virtual channels.
This technology allows RDP to use the entire network pipe, when available, and can quickly back off when the network is required for other services. RDP can detect this and adjust the image quality, frame rate, or compression algorithms if other applications request the network bandwidth.
Limit network bandwidth use with throttle rate limiting
There's no need to limit bandwidth utilization as limiting may affect the overall user experience in most scenarios. However, in constrained networks, you may want to restrict or limit network utilization to prevent service degradation. Another good example is leased networks (mobile hotspots or pay as you consume connectivity), which charge for the amount of traffic/bandwidth used.
In these cases, the advice is to limit RDP outbound network traffic by specifying a throttle rate in a Quality of Service (QoS) policy.
Important Note
Throttle rate limiting is not supported for reverse connect transport with Azure Virtual Desktop. Microsoft details how to enable this here: https://docs.microsoft.com/en-us/azure/virtual-desktop/shortpath.
Reverse connect transport
Azure Virtual Desktop uses reverse connect transport to establish the remote session and carries RDP traffic from the session host to the broker. The client then connects to the broker. Unlike the traditional on-premises Remote Desktop Services deployments, reverse connect transport doesn't use a TCP listener to receive incoming RDP connections. Instead, it uses outbound connectivity to the Azure Virtual Desktop infrastructure over the HTTPS connection, hence the term reverse connect.
Session host communication channel
Upon starting the Azure Virtual Desktop session host, the installed Remote Desktop Agent service establishes a connection to the AVD broker's persistent communication channel. This communication uses a secure Transport Layer Security (TLS) connection. This serves as a bus for service message exchange between the session host and Azure Virtual Desktop infrastructure. Essentially, this allows Azure Virtual Desktop to know when a session host is available, offline, or has any issues.
Client connection sequence
The following client connection sequence is used for Azure Virtual Desktop:
- Using a supported Remote Desktop Client, the user subscribes to the Azure Virtual Desktop workspace or workspaces. We will cover this in Chapter 3, Designing for User Identities and Profiles, and Chapter 6, Creating Host Pools and Session Hosts.
- Azure Active Directory authenticates the user and returns the token that's used to enumerate resources available to authenticate the user.
- The client passes the token to the Azure Virtual Desktop feed subscription service.
- The Azure Virtual Desktop feed subscription service then validates the token.
- The Azure Virtual Desktop feed subscription service then passes the list of available desktops and remote apps back to the client in a digitally signed connection configuration.
- The client stores the connection configuration for each available resource in a set of .rdp files.
- When a user selects the resource that they want to connect to, the client uses the associated .rdp file, which establishes a secure TLS 1.2 connection to the closest Azure Virtual Desktop gateway instance and passes the connection information.
- The Azure Virtual Desktop gateway validates the request and asks the Azure Virtual Desktop broker to orchestrate the connection.
- The AVD broker service identifies the session host and uses the previously established persistent communication channel to initialize the connection.
- The Remote Desktop stack initiates the TLS 1.2 connection to the same Azure Virtual Desktop gateway instance that's used by the client.
- Once both the client and session host are connected to the AVD gateway, the gateway can then start relaying the raw data between both endpoints; this establishes the base reverse connect transport for the RDP connection.
- Once the base transport has been set, the client initiates the RDP handshake.
You can read more here: https://docs.microsoft.com/en-us/azure/virtual-desktop/network-connectivity#client-connection-sequence.
Connection security
Azure Virtual Desktop Infrastructure, session hosts, and clients all use TLS 1.2 to initiate connections.
Azure Virtual Desktop uses the same TLS 1.2 ciphers, just like Azure Front Door (https://docs.microsoft.com/en-us/azure/frontdoor/front-door-faq#what-are-the-current-cipher-suites-supported-by-azure-front-door).
Important Note
Make sure both the client computers and session host the required TLS 1.2 ciphers; otherwise, you will have connection issues.
For reverse connect transport, both the client and session host connect to the Azure Virtual Desktop gateway. After establishing the TCP connection, the client or session host validates the Azure Virtual Desktop gateway's certificate. Once the base transport has been established, RDP establishes a nested TLS connection between the client and session host using the session host's certificates. By default, the certificate that's used for RDP encryption is self-generated by the OS during the deployment. If desired, customers may deploy centrally managed certificates that have been issued by the enterprise certification authority.
You can also read more about the concept of the Fish tank here: https://ryanmangansitblog.com/2020/01/24/wvd-reverse-connect-the-fish-tank-analogy/.
For more information about configuring certificates, see Microsoft's Windows Server documentation: https://docs.microsoft.com/en-us/troubleshoot/windows-server/remote/remote-desktop-listener-certificate-configurations.
This section covered how to assess and plan for the required network bandwidth. This could be in main offices and home workers. Ensuring you have the correct bandwidth is important to ensure your users have a good user experience when using Azure Virtual Desktop.
Now, let's look at the operating system images you can use for an Azure Virtual Desktop implementation.
Identifying an operating system for an Azure Virtual Desktop implementation
In this section, we will cover the different operating systems available to you.
Supported Azure OS images
Azure Virtual Desktop supports the following operating system images:
- Microsoft Windows 11 Enterprise multi-session
- Microsoft Windows 11 Enterprise
- Microsoft Windows 10 Enterprise multi-session, version 1809 or later
- Microsoft Windows 10 Enterprise, version 1809 or later (Semi-Annual Channel only)
- Microsoft Windows 7 Enterprise
- Microsoft Windows Server 2019
- Microsoft Windows Server 2016
- Microsoft Windows Server 2012 R2
Importantly, Azure Virtual Desktop does not support x86 (32-bit) operating systems or any of the following:
- Microsoft Windows 10 Enterprise N.
- Microsoft Windows 10 Pro.
- Microsoft Windows 10 Enterprise KN operating system.
- Microsoft Windows 7 also does not support virtual disk VHD/VHDX-based profile solutions due to a sector size limitation on managed Azure Storage.
Depending on the OS and version you choose, different OSes and versions have different automation and deployment options, as shown in the following table:

This support table has been taken from Microsoft (https://docs.microsoft.com/azure/virtual-desktop/overview#supported-virtual-machine-os-images).
What is Windows 10 multi-session?
Windows 10 multi-session, also known as Windows 10 Enterprise Multi-Session and Microsoft Windows 10 Enterprise for Virtual Desktops (EVDs), is a new Remote Desktop Session host offering that allows multiple concurrent remote user sessions. Previously, you had no option but to use multi-session using Windows Server operating systems.
Important Note
Windows 11 multi-session support for Azure Virtual Desktop was announced on October 5, 2021. You can read more here: https://techcommunity.microsoft.com/t5/azure-virtual-desktop/windows-11-is-now-generally-available-on-azure-virtual-desktop/ba-p/2810545.
This new version gives users the same Windows 10 desktop experience rather than a server desktop UI. Organizations can also benefit from multi-session cost benefits and use existing per-user Windows licensing rather than the traditional RDS Client Access Licenses (CALs). For more information about licenses and pricing, see the Azure Virtual Desktop pricing page at https://azure.microsoft.com/pricing/details/virtual-desktop/.
Windows 10 multi-session is a virtual edition of Windows 10 Enterprise for use only on Microsoft Azure. The key difference when using Windows 10 multi-session compared to traditional Windows 10 is that this OS reports ProductType as having a value of 3. This is the same value that's used by the Windows Server OS. This property allows the OS to be compatible with existing host management tools, host multi-session-aware applications, and performance optimizations for session hosts.
It is important to note that some application installers can block the installation on Windows 10 multi-session through the installer. If your app doesn't install, contact your application vendor for an updated version or packaging company to repack it into a suitable format.
Windows 10 Enterprise Multi-Session is not to be used with on-premises production environments. This is because it has been optimized for Azure Virtual Desktop using Microsoft Azure.
Important Note
It's against the Microsoft licensing agreement to run Windows 10 Enterprise Multi-Session outside of Azure for production purposes. Furthermore, Windows 10 Enterprise Multi-Session will not activate against on-premises Key Management Services (KMSes).
It is currently impossible to upgrade an existing VM running Windows 10 Professional or Enterprise to Windows 10 Enterprise Multi-Session. When using Windows 10 Enterprise Multi-Session, you may decide to update the product key to another edition. You will not be able to switch back to Windows 10 Enterprise Multi-Session. You will need to redeploy the VM.
Customizing the Windows 10 multi-session image for your organization
You would customize the image just like any image outside of Azure Virtual Desktop. You would deploy the VM in Azure with Windows 10 multi-session and customize it with the required line of business (LOB) applications, settings, and customizations, including optimizations. You can then proceed with Sysprep/generalize, ready to create an image template.
You can find the Windows 10 multi-session images in the Azure gallery. To find the available image templates, navigate to the Azure portal and search for Windows 10 Enterprise for Virtual Desktops. There are two options for integration with Microsoft 365 Apps for enterprise and a plain image, and Microsoft Windows 10 + Microsoft 365 Apps for enterprise and Microsoft Windows 10.
Windows 10 multi-session supported versions
These Windows 10 releases follow the same support life cycle policy as the traditional Windows 10 Enterprise operating system. This means that the March release is supported for 18 months and that the September release is supported for 30 months.
Important Note
Windows 10 Enterprise Multi-Session versions 1809 and later are supported. You can find the supported versions in the Azure gallery. The end of support for Windows 10 can be found here: https://docs.microsoft.com/en-us/lifecycle/products/windows-10-enterprise-and-education.
Profile management solution for Windows 10/11 multi-session
You should consider using FSLogix profile containers when deploying Azure Virtual Desktop environments, especially on non-persistent deployments or other specific use cases requiring a centrally stored profile.
One of the key benefits of using FSLogix is that you can centralize your user profiles and provide a seamless experience for users accessing Azure Virtual Desktop resources.
Azure Virtual Desktop entitled users can use FSLogix at no additional cost. FSLogix comes pre-installed on all Windows 10 Enterprise multi-session images. However, you still need to configure the FSLogix profile container via the registry or group policy for a storage share location and any customizations required specifically for your environment.
We will cover FSLogix profile containers in more detail in Chapter 12, Implementing and Managing FSLogix.
Check out the Azure Virtual Desktop pricing page for a complete list of applicable licenses: https://azure.microsoft.com/pricing/details/virtual-desktop/.
Planning and configuring name resolution for Active Directory and Azure Active Directory Domain Services
Azure Virtual Desktop can be used in a cloud-only organization or a hybrid environment. Hybrid is an approach that's used within IT where some of your IT resources are in-house and others are cloud-based services. You need to ensure that the following is configured/set up before proceeding with an Azure Virtual Desktop project.
For hybrid environments that use Azure AD and Active Directory services, you'll need the following:
- An Azure Active Directory domain.
- A domain controller that is configured and synced with Azure Active Directory. You can configure this with one of the following:
- Azure AD Connect
- Azure Active Directory Domain Services (Azure AD DS)
- An Azure subscription that contains a virtual network connected to Windows Server Active Directory (AD) or Active Directory Domain Services (AD DS).
For cloud-only organizations, you'll need the following:
- An Azure Active Directory organization
- Azure AD DS setup and configured
- An Azure subscription that contains a virtual network connected to the Active Directory Domain Services
The Azure VMs you create for Azure Virtual Desktop must be as follows:
- Standard domain-joined or hybrid AD-joined. VMs can also be Azure AD-joined
- Run a supported OS image.
We will cover Active Directory and the various deployment configurations in more detail in Chapter 3, Designing for User Identities and Profiles, and Chapter 8, Azure AD Join for Azure Virtual Desktop.
Planning a host pools architecture
A host pool is one or multiple virtual machines within Azure using the same image. These are registered as AVD session hosts that have a configured Azure Virtual Desktop agent. It is recommended that all session host virtual machines be deployed from the same template image for optimal user experience in a host pool.
There are two types of host pools:
- The Personal host pool type is used for individual desktop user assignments.
- A Pooled host pool type is where session hosts can have multiple users connecting to multiple session hosts, sharing the compute resources of hosts within that host pool.
There are several additional properties available for configuration for host pools. You can also configure the host pool's load balancing behavior, which includes how many sessions each session host can handle and what the user can do while connected to session hosts in the host pool. You control the resources that have been published to users through app groups, as mentioned previously.
Important:
Please see the link for Azure Virtual Desktop service limits to help when planning and designing your environment: https://docs.microsoft.com/en-us/azure/azure-resource-manager/management/azure-subscription-service-limits#azure-virtual-desktop-service-limits
App groups
The best way to describe an app group is that it's a logical grouping of applications configured for use with a session host pool. There are two app group types:

The host pool deployment automatically creates a desktop app group (named Desktop Application Group). App groups can be removed at any time. It is important to note that you cannot have multiple desktop app groups in a host pool.
When publishing a RemoteApp, first, you need to create a RemoteApp app group. Once created, you can create multiple RemoteApp app groups to cater to the possible different user scenarios required. You can have multiple RemoteApp app groups with overlapping RemoteApps.
When publishing remote resources to users, you should assign the users to specified app groups. When assigning users to app groups, you should consider the following things:
- You can assign users to both a desktop app group and a RemoteApp app group in the same host pool. It is important to note that users can only launch one type of app group per user session from the same host pool. It is not possible to launch both types of app groups within a single session simultaneously.
- Users can be assigned to one or many app groups within the same host pool. The user workspace feed will show a mixture of both app group types.
Important Note
A workspace is described as a logical grouping of application groups in Azure Virtual Desktop. Each AVD app group must be associated with a workspace to see the remote apps and desktops published to users.
End users
Once you've assigned users to the required app groups, they can connect to an Azure Virtual Desktop deployment with any supported Azure Virtual Desktop clients.
Registering the DesktopVirtualization resource provider
Before you can provision Azure Virtual Desktop resources, you need to register the required subscription(s) with the Microsoft.DesktopVirtualization resource provider once. Follow these steps to complete this process:
- Open the Azure Subscriptions services menu:

Figure 2.2 – Various subscriptions

Figure 2.3 – Selecting the required subscription
- Search for the Microsoft.DesktopVirtualization provider and click Register:

Figure 2.4 – Registering the chosen subscription with the Microsoft.DesktopVirtualization provider
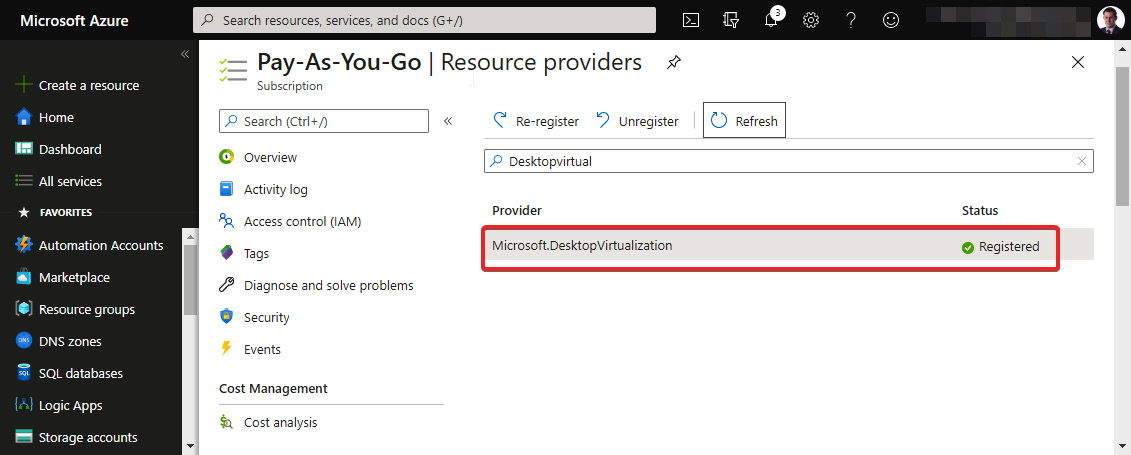
Figure 2.5 – The Microsoft.DesktopVirtalization provider showing as Registered
Once the registration has been completed and shows as Registered, you can deploy Azure Virtual Desktop components within your subscription.
Registering the provider using Azure PowerShell (optional)
The following steps detail the process of registering the provider using PowerShell:
- Check the registration status of the provider:
Get-AzResourceProvider -ProviderNamespace "Microsoft.DesktopVirtualization"
- Register the Microsoft.DesktopVirtualization provider:
Register-AzResourceProvider -ProviderNamespace "Microsoft.DesktopVirtualization"
You'll see the following output:

Figure 2.6 – Powershell cmdlet to register the Desktop Virtualization provider
- Rerunning the same PowerShell cmdlet will confirm the status of the registration:
Register-AzResourceProvider -ProviderNamespace "Microsoft.DesktopVirtualization"
You'll see the following output:

Figure 2.7 – The output of running the register-AZResourceProvider cmdlet
In this section, we showed you how to register the Microsoft.DesktopVirtualization provider using both the GUI within the Azure portal and using Powershell. In the next section, we will look at the resource groups, subscriptions, and management groups limits.
Resource groups, subscriptions, and management groups limits
You can scale an Azure Virtual Desktop environment to over 10,000 sessions hosted per workspace.
It is advised that you consider the Azure Virtual Desktop control plane limitations during the initial design to limit any changes that may be required later:
- Microsoft recommends that you do not deploy 5,000+ VMs per Azure subscription per region. This recommendation is for both host pool types – personal and pooled – for a Windows 10 Enterprise single and multi-session deployment. It is suggested that most organizations will want to use Windows 10 multi-session, which allows multiple users to log on to a session host VM. You can increase the resources (compute and storage) of an individual session host VM to facilitate additional remote sessions.
- There are limits of circa 1,200 VMs per Azure subscription per region for automated session host scaling tools.
- You should create multiple Azure subscriptions in a hub and spoke architecture and connect them via virtual network peering to manage environments with more than 5,000 VMs per Azure subscription in the same region. You can also deploy VMs in different regions within the same subscription to increase your total number of VMs.
- The API throttling limit prevents you from exceeding 600 Azure VM reboots per hour via the Azure portal when using the Azure Resource Manager (ARM) subscription.
Tip
You can reboot all your virtual machines via the operating system by using scripting or third-party products that do not consume any Azure Resource Manager subscription API calls.
- You can deploy 399 virtual machines per Azure Virtual Desktop (ARM) template deployment without using availability sets at the time of writing. Alternatively, you can deploy 200 VMs per availability set.
Tip
You can increase the number of virtual machines per deployment by turning off availability sets in the ARM template or the Azure portal host pool enrolment.
- VM session hostname prefixes within Azure cannot exceed 11 characters due to auto-assigning instance names. It is also important to note that the NetBIOS limit of 15 characters per computer account still applies.
- You can deploy 800 instances of resource types within a resource group.
Important Note
For more information about Azure subscription limitations, see Azure subscription and service limits, quotas, and constraints at https://docs.microsoft.com/en-us/azure/azure-resource-manager/management/azure-subscription-service-limits.
Configuring the location for the Azure Virtual Desktop metadata
Azure Virtual Desktop is currently available for deployment in all Azure regions. IT admins can select the geographical location to store metadata in when creating their host pool virtual machines and associated services. You would want to store the metadata locally to your organizations for data soverancy purposes.
You can find out more about Azure geographies using the Azure data center map: https://azuredatacentermap.azurewebsites.net/. There is no region restriction or limit to where you can access user- and app-specific data.
Azure Virtual Desktop metadata is collected, and the information that's captured includes host pool names, app group names, workspace names, and user principal names in a data center.
When an admin creates a service object, they will be asked to select a location for the service object. The location that's selected essentially determines where the metadata for the object will be stored. As part of its design, you will need to decide where you would like to store your metadata.
For a list of all Azure-associated regions and geographies, see Azure geographies: https://azure.microsoft.com/global-infrastructure/geographies/.
Microsoft currently only supports storing metadata in the following locations:
- United States (US) (generally available)
- Europe (EU) (generally available)
- United Kingdom (UK) (generally available)
- Canada (CA) (generally available)
Important Note
When you select a region to create Azure Virtual Desktop service objects in, you will see regions under both US and EU geographies. It is recommended that you understand which region would work best for your deployment. To find out more, take a look at Microsoft's Azure global infrastructure map: https://azure.microsoft.com/global-infrastructure/geographies/#geographies.
Metadata is encrypted and stored at rest, and georedundant mirrors are kept within the geography.
It is understood that Microsoft is working on more geographies that will become available as the service grows.
Important Note
Microsoft replicates service metadata within the Azure geography for disaster recovery purposes.
Calculating and recommending a configuration for capacity and performance requirements
This section provides a high-level set of recommendations for sizing Azure Virtual Desktop. This will help you to plan and also calculate the costs of what the compute resource may look like. It is advised that you load test all the workloads, even when following guided recommendations.
Multi-session recommendations
The following examples should be used as guidance for initial performance estimates. As you build out your Azure Virtual Desktop environment, you will need to tweak and adjust these configurations to meet the requirements of your user base.
The following table shows the number of users per vCPU and the suggested VM hardware configuration for each workload. It also provides an example of session host sizing recommendations based on the number of users per vCPU and workload type. This example is suitable for 20 users or less:

This table was taken from the Microsoft document Remote Desktop workloads: https://docs.microsoft.com/en-us/windows-server/remote/remote-desktop-services/remote-desktop-workloads.
The following article shows some real-life examples of different performance results from testing different Azure Virtual machine sizes for use with Azure Virtual Desktop: https://ryanmangansitblog.com/2021/09/20/results-from-benchmark-tests-completed-on-avd-and-cloud-pc-virtual-machines/.
The following table provides an example of session host sizing recommendations based on the number of users per vCPU and workload type. The following table shows that this example would be suitable for more than 20 users:

This table was taken from the Microsoft document Remote Desktop workloads: https://docs.microsoft.com/en-us/windows-server/remote/remote-desktop-services/remote-desktop-workloads.
Microsoft recommends using VM sizes between 4 vCPUs and 24 vCPUs. It is not recommended to use less than two cores or more than 32 or more cores per session host.
Tip
Windows 10 require a minimum of two parallel threads for the heavier rendering operations. Having multiple users on a two-core or fewer VM could lead to a poor user experience. It's advised for stability that you use four or more cores when using a multi-user VM.
Recommendations on sizing VMs
When increasing the number of virtual machine cores, it's important to note that the overhead of the VM will increase (system synchronization). For most workloads, it's advised that you stick to no more than 16 cores per session host. As the CPU number increases, the lower the return on investment. The additional capacity is negated by the synchronization overhead.
Microsoft, as per their best practices, states that you should stay in the range of 4 to 24 vCPU cores per session host.
Tip
It is suggested that a 1.75 ratio scenario offers improved burst capacity for applications that have short-term CPU demands.
When you have 20 or more user session connections on a single VM, it is advised that multiple smaller VMs would show better results than one or two larger VMs. It is also recommended that you have used smaller VMs instead of larger ones so that shutdown management is simpler. This is particularly useful for update management. From my testing and field experience, I have always found AMD Azure Virtual Machine skews to offer better performance and user experience compared to the Intel equivalent skews.
A common resource that is sometimes forgotten when sizing resources is the session host virtual disk and associated input/output operations per second (IOPS, pronounced eye-ops). Poor performing storage can result in a degraded user experience.
For persistent VMs (single user/single session), it is recommended that you use VMs with a minimum of two CPU cores per VM. However, for the best results, Microsoft recommends four vCPUs with hyperthreading enabled.
General recommendations for VMs
Microsoft recommends using premium storage (SSD) for Azure Virtual Desktop Session hosts as they offer high-performance and low-latency disk support for the session host virtual machine.
Tip
For a production workload requiring a service-level agreement (SLA), you will need to assign your VM's premium storage (SSD). For more details, see the SLA for virtual machines: https://azure.microsoft.com/support/legal/sla/virtual-machines/v1_8/.
You can enhance the user session experience even further using graphics processing units (GPU), which lets you use graphic-intensive programs such as 3D design, video rendering, and simulation software. You can read more about graphics acceleration by going to the Remote Desktop Services – GPU acceleration guide: https://docs.microsoft.com/en-us/windows-server/remote/remote-desktop-services/rds-graphics-virtualization.
You can read more about the Microsoft Azure graphics acceleration deployment options that are available, as well as the GPU VM sizes offered, by going to the GPU optimized virtual machine sizes page: https://docs.microsoft.com/en-us/azure/virtual-machines/windows/sizes-gpu.
Tip
B-series burstable VMs are helpful for users who don't always need maximum CPU performance. However, these are not so good if you use all the burstable resources. These are also useful for older applications that are delivered via RemoteApp. Just remember to benchmark usage before using it as burstable storage has a very limited use case.
You can find out more about VM types and sizes by going to the Sizes for Windows virtual machines in Azure document: https://docs.microsoft.com/en-us/azure/virtual-machines/windows/sizes.
You can find the pricing information on Microsoft's Virtual Machine Series page: https://azure.microsoft.com/pricing/details/virtual-machines/series/.
Testing workloads
Before rolling out any new desktop virtualization project to production, it is recommended that you run several tests, including simulation tests, to stress test for real-life usage. This will help provide a baseline and ensure that the environment you plan to release offers the resilience and responsive performance required to meet the current and future needs.
Load testing is a really good way to understand the limitations of the desktop environment, which helps with capacity planning as well as managing and maintaining a good user experience.
Tip
You can use tools such as LoginVSI, which can automate load tests for your Azure Virtual Desktop Environment, to help you understand performance, capacity management, and potential user experience issues. You can read more about LoginVSI here: https://www.loginvsi.com/.
Summary
In this chapter, we discussed assessing your current desktop estate to understand current baselines for performance, data, and user experience. We then looked at the considerations for Azure Virtual Desktop, including network bandwidth planning, sizing, and Windows 10 multi-session. Throughout this chapter, tips and recommendations were provided for you to get the most out of your Azure Virtual Desktop environment.
The next chapter will look at the design for user identities and profiles, where we will look at selecting an appropriate licensing model for Azure Virtual Desktop based on our requirements. Here, we will recommend an appropriate storage solution, plan for Azure Virtual Desktop client deployments and user profiles, and recommend a solution for network connectivity and planning for Azure AD Connect for user identities.
Questions
Here are a few questions to test your understanding of this chapter:
- Which tools can you use for assessing your requirements for Azure Virtual Desktop?
- Before you can start to deploy Azure Virtual Desktop, what do you need to register for the subscription?
- What is the name of the tool that's used to gauge the round trip time (latency) of Azure Virtual Desktop?
- What is the benefit of Windows 10 multi-session over other operating system types?
Answers
- Lakeside systrack, Movere, and Azure Migrate.
- Register the Microsoft.DesktopVirtualization provider.
- Windows Virtual Desktop Experience Estimator.
- Windows 10 multi-session offers a familiar Windows 10 experience that's exclusively offered to Microsoft Azure.
Further reading
You can refer to the following links for more information regarding the topics that were covered in this chapter:
- Azure Virtual Desktop for the enterprise – Azure Example Scenarios | Microsoft Docs (https://docs.microsoft.com/en-us/azure/architecture/example-scenario/wvd/windows-virtual-desktop).
- Microsoft Cloud Adoption Framework for Azure – Cloud Adoption Framework | Microsoft Docs (https://docs.microsoft.com/en-us/azure/cloud-adoption-framework/).
- For more information on the Azure subscription limitations, see the following links for management groups (https://docs.microsoft.com/en-us/azure/governance/management-groups/overview) and general limits (https://docs.microsoft.com/en-us/azure/azure-resource-manager/management/azure-subscription-service-limits).
- Deliver remote desktops and apps from Azure with Azure Virtual Desktop – Learn | Microsoft Docs (https://docs.microsoft.com/en-us/learn/paths/m365-wvd/).
Planning and configuring name resolution for Active Directory and Azure Active Directory Domain Services