
The official page for Apache Hadoop is http://hadoop.apache.org. Here, you can find in-depth documentation, manuals, and releases of Apache Hadoop. Hadoop is written in Java and requires JVM installed on your single-node setup to run. It is supported on both GNU/Linux and Windows.
Since the purpose of this chapter is to get introduced to Python programming for Apache Hadoop, a quick way to get our hands on a complete Hadoop ecosystem would be most ideal. Cloud vendor Cloudera hosts a number of free QuickStart VMs that contain a single-node Apache Hadoop cluster, complete with sample scripts and ready links to help us dive straight into managing our cluster. The following sections describe how to get a Hadoop VM running on your machine.
The download link to Hadoop QuickStart VMs from Cloudera is http://www.cloudera.com/content/support/en/downloads/quickstart_vms.html. The VM image comes installed with the CentOS 6.4 Linux operating system and is available for VMWare, VirtualBox, and KVM virtual machine platforms. The version of the QuickStart VM that we will use is Quick Start VM with CDH 5.3.x. Let's choose the free and open source VirtualBox as our VM interface.
Since the VMs are 64-bit, they require a 64-bit host OS, and a virtualization platform that can support a 64-bit guest OS. The file size is 3 GB, and it requires 4 GB of RAM in the virtual machine.
VirtualBox runs on Windows, Linux, Macintosh, and Solaris hosts and supports a large number of guest operating systems, including but not limited to OpenSolaris, OS/2, and OpenBSD. The link to get VirtualBox is https://www.virtualbox.org/wiki/Downloads.
The following steps describe how to get Cloudera's Hadoop VM running smoothly on VirtualBox:
- Unzip the download package from Cloudera to a folder of your choice.
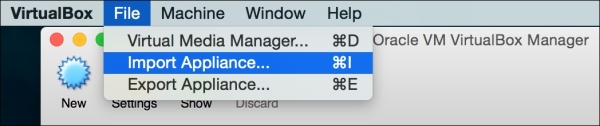
- Open VirtualBox. From the menu bar, go to File, then select Import Appliance. Follow the steps to select the unzipped virtual machine from step 1. This will add the Cloudera VM image to the list of machines; it is compatible to run on VirtualBox:
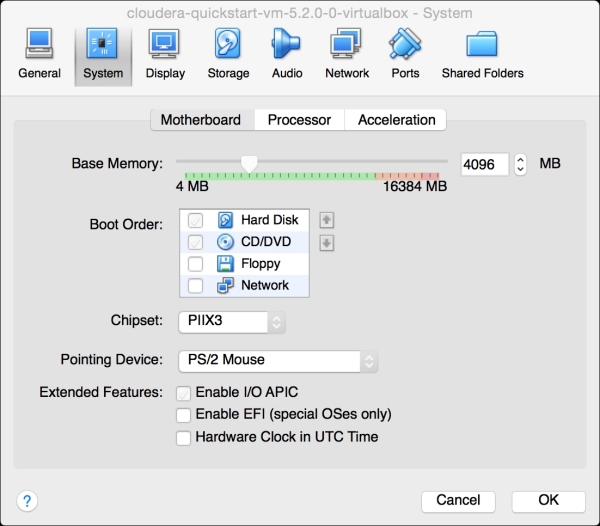
- Select the Cloudera QuickStart machine from the virtual machine list. Click on Settings. Go to System tab, and then click on the Motherboard tab. Ensure that you have at least 4096 MB of RAM selected:
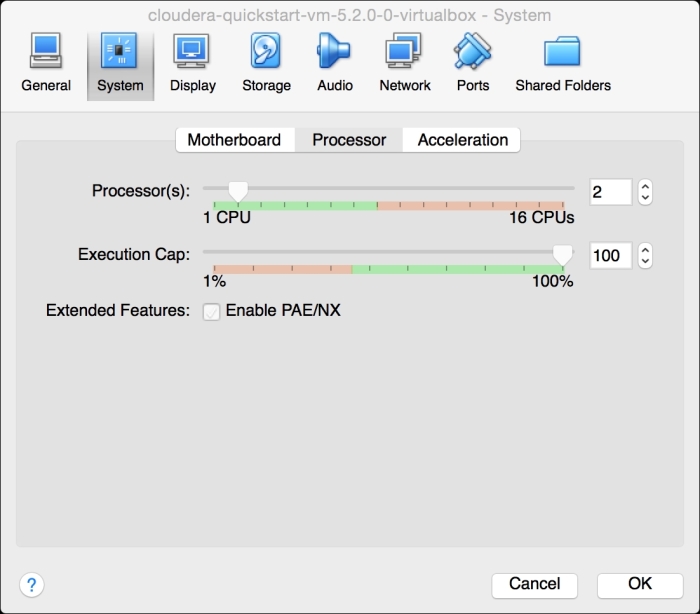
- Go to the Processor tab. Ensure that you have at least two Processor(s) selected:
- Go to the Acceleration tab, and ensure that all Hardware Virtualization checkboxes are selected.
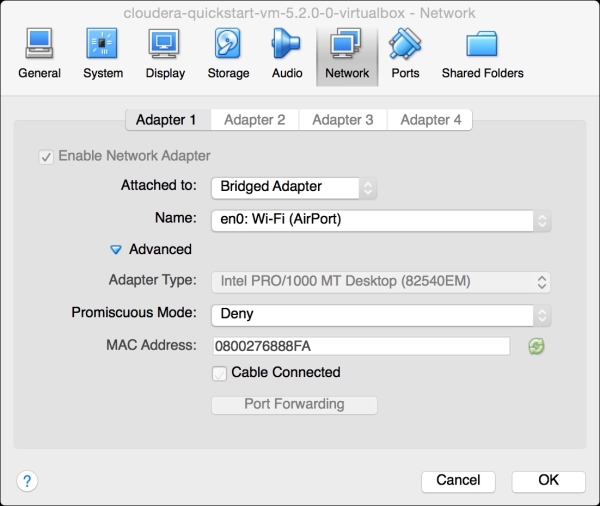
- Go to Network options and ensure that Bridged Adapter is selected:
- Click on OK to save the changes.
- On the same virtual machine, click on Start. This will start the CentOS virtual machine. It might take a few minutes to boot into the operating system:
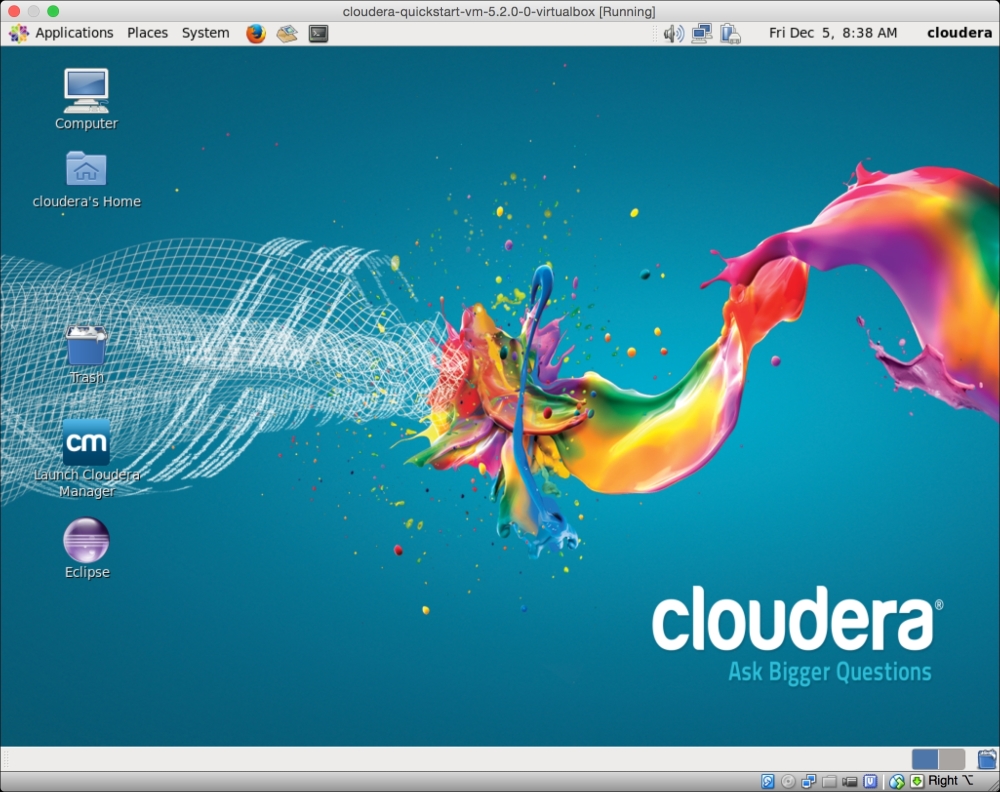
With CentOS now running, we are automatically logged in as the cloudera user. We will do all the computations and scripting in this virtual machine. If required, the username and password credentials are both cloudera. This includes the sudo privileges for the root account, root MySQL, Hue, and Cloudera manager. The home directory is /home/cloudera/.