
In this section, we'll take a look at how to run the terminal version of Wireshark, so that it only has a command-line interface instead of opening up the GUI.
In order to run tshark, you have to open up the command window, and once it's up, we have to browse to where Wireshark is installed because as I've explained, unless you have it in your system path, it'll not be available. So we'll browse again to where Wireshark lives, and we'll do a directory listing. We'll see that we have tshark.exe. This is installed by default with Wireshark. In order to run tshark, all you have to do is, of course, run tshark.exe. If you do so, it automatically begins capturing on your default interface:

You'll notice that it shows the packets that it's capturing directly to the command-line interface, directly to stdout. It does so because it does not have a graphical interface; there's nothing for it to display except for the screen that it's currently using, which is the command interface. You'll see that the output provides a similar display as you would see in Wireshark in the GUI. We have the packet number, the time since the packet capture started, the time difference between the last two packets, the source IP and the source port, the destination IP, the destination port, and so on. If you take a look at tshark.exe -h, just like Wireshark.exe, it'll look very similar. If we scroll up, we have the same arguments that we can use:
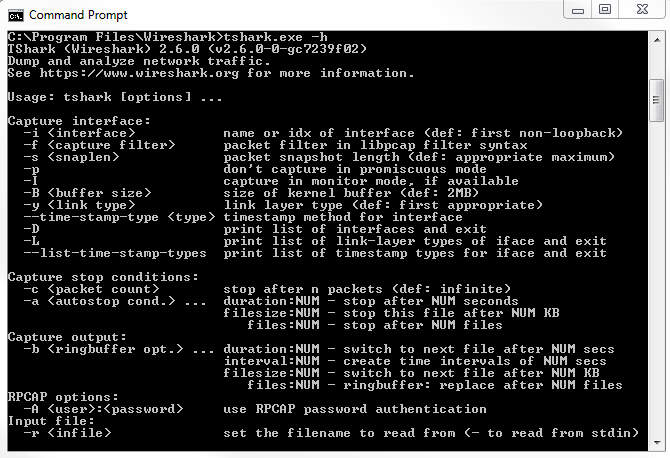
We have -D to display the list of interfaces again and -i for the interface that we want to use. We don't have to define -k so that it automatically starts capturing because tshark doesn't have a GUI for us to do anything in, so it automatically starts capturing anyway. We can set the ring buffer as before; we can define output files; we can do all sorts of things.
For an example, we can type tshark -D just to display all of our interfaces again. To confirm that we want to use interface number 1, we'll type tshark.exe -i 1, which ensures the use of the first interface. Then, we can define an output file as well, so we'll write this out to C:Userssayalit est.pcapng, and now it begins capturing:
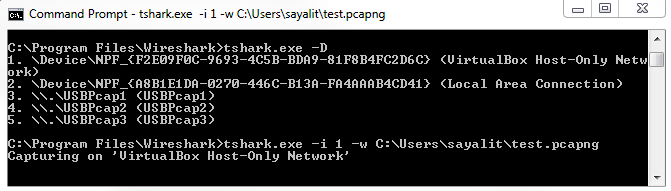
You'll see that it's showing us how many packets it's captured as it runs. In order to stop the capture, simply press Ctrl + C, and it will stop whatever it's doing. Just like with the Wireshark example, we can enhance this line that we've already created and we can define a ring buffer, for example, and say the duration is every 100 seconds. Then, it will do exactly that; every 100 seconds, it'll create a new file:

Tshark is very useful for things that you want to script. If you want to write a batch script or a bash script that will do a capture, and you want to ensure that it uses all the functionality that Wireshark is capable of, and it saves to the pcapng format, and you want to make sure that it does everything just like you would in Wireshark itself, using tshark is a great idea, as well as on systems that have low resources. If you're running this on a Command Prompt, need to do a packet capture on some old system like a Windows 2000 system, or something like that that's barely scraping by, you can run tshark, and it will eliminate a lot of the overheads that you have with running Wireshark, especially if the interface is automatically updating and scrolling with the packets. This gets rid of all of that, and it just gets the data that we need. In our next section, we'll take a look at tcpdump, which is available on almost every Unix or Linux system out there.