
Organizations today are looking for ways to increase collaboration and to provide more self-help resources through the use of tools like SharePoint. Thanks to the built-in Team Site template, it can be fairly easy to build a department-level collaboration site, but there is currently no template that is optimized for use as a true community collaboration site where the content is less structured, more conversational, and where the group will evolve over time, unlike your traditional department site.
This chapter will attempt to address the challenges of using a Team Site for community collaboration so that you can build a community site that can keep people engaged and incorporate the collaboration levels that everyone is looking for.
Community sites can be used to drive collaboration and self-help around a specific topic or system. Examples could include business topics like Lean, Six Sigma, or other process improvement methodologies, or for system support for various ERP, HRIS, or IT systems. The management, education, and governance of SharePoint itself make for a good community site focus, and will be the focus of this chapter. Using this solution as a template though, there could be numerous community sites created for an organization.
The community sites can provide a much better collaboration platform, and also can provide user training and a help platform as well. The key difference for a community site is moving away from the default content of a Team Site which focuses primarily on shared documents and a team calendar and instead focuses on more dynamic and social features focused on the community content. When done properly, people throughout the organization will be willing participants and can help provide that support which better utilizes the company's resources and potentially provide more relevant information. Community sites should be the future of collaboration and perhaps for IT system support.
Just like the Effective Intranet covered in Chapter 1, Building an Effective Intranet, it is essential to start this process by defining what the goals for the site are, followed by defining the information architecture, content, and feature strategy.
Most community sites have varying levels of formality to the content. The formality of the content may be decided upon based on who can contribute content, whether it needs to be reviewed and approved, and whether it is retained in the system long term. On the informal side it could be completely informal collaboration with a very wide range of collaborators using tools like a note board, a threaded discussion list, or perhaps a list of helpful links. This is true user-generated content that can be added quickly and easily, though it may not be as complete or 'authoritative' as more formal content. Moving more towards the formal side, you may also see edited and approved Frequently Asked Question type lists or system and process documentation. As the community fills with information, it becomes more important to start highlighting popular or useful content.
This chapter will provide an overview of configuration steps needed to create a base Community site template, along with example customizations that can be created to provide dynamic and relevant content, which is a key ingredient to building an engaging Community Site solution. The covered solutions include:
- Enterprise Wikis
- Content Rollups
- Community Leaders Group

To get started we will need to provision a new site collection to hold our solution, activate the supporting features, and create a landing page to support our community.
In this case I have selected a Team Site template because it is a good generic building block for sites like this, and it can also be used to create Web Templates that can be used to provision additional sites in the future.
See Choosing a Site Template section in Chapter 1, Building an Effective Intranet for additional background information on the available site templates.
After choosing a site template and creating the site collection, the next step is to activate the initial features needed to support the Community site. The robust feature deployment and activation system supported in SharePoint makes it very easy to fine tune the functionality available within a site, since individual features can be activated as they are required. In many cases these features may already be activated by default, depending on your settings for the web application and overall farm.
Following is a list of the features that are required to be activated on the site being configured for this solution:
- Site Collection features:
- Document ID Service: It assigns IDs to documents in the Site Collection, which can be used to retrieve items independent of their current location.
- Search Server Web Parts: This feature uploads all web parts required for Search Center.
- SharePoint Server Standard Site Collection features: It provides features such as user profiles and search, included in the SharePoint Server Standard License.
- SharePoint Server Enterprise Site Collection features: It provides features such as InfoPath Forms Services, Visio Services, Access Services, and Excel Services Application, included in the SharePoint Server Enterprise License.
- SharePoint Server Publishing Infrastructure: It provides centralized libraries, content types, master pages, and page layouts and enables page scheduling and other publishing functionality for a site collection.
- Site features:
- SharePoint Server Standard Site Collection features: It provides features such as user profiles and search, included in the SharePoint Server Standard License.
- SharePoint Server Enterprise Site Collection features: It provides features such as InfoPath Forms Services, Visio Services, Access Services, and Excel Services Application, included in the SharePoint Server Enterprise License.
- SharePoint Server Publishing: It is used to create a Web page library as well as supporting libraries to create and publish pages based on page layouts.
For anyone that is not familiar with the publishing features, it is important to understand that the Document Libraries setup for publishing, including the resources provisioned when the feature is activated such as the Style Library, will require that all changes be fully published for non-administrators to be able to view the most recent changes. If changes are made to pages, scripts, images, or CSS stylesheets included in any of these libraries and are not fully published, you will see unexpected behaviors such as 404 errors, out of date content, or miscellaneous unexpected SharePoint page level errors.
With the Publishing features enabled at both the Site Collection and web level, we can now create and configure our landing page.
From anywhere on the community site:
- Click Site Actions menu, and select the New Page item.
- Provide a title for the page.
- Click the Create button.
When the page is created it will open in edit mode and be ready for configuration. The next task is to set the appropriate page layout. In the Page tab of the ribbon is an action for the Page Layout. Within the selection panel, a list of options will be displayed by category with an included thumbnail. The Welcome Page category includes some great landing pages, and for this one we will select the Blank Web Part page option as shown in the following screenshot:
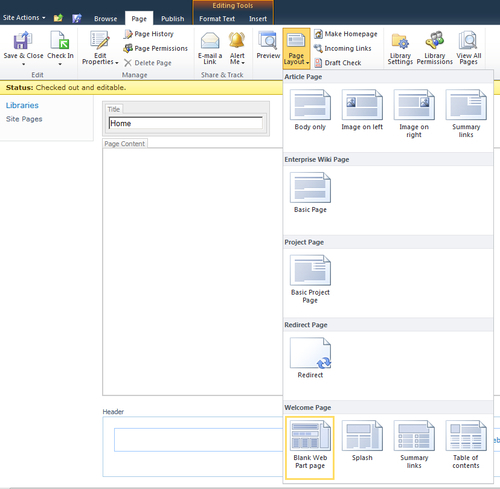
- Next, we will want to set the new page as the site's Homepage. In the Page tab of the ribbon is the Make Homepage action, as shown in following screenshot. Click this action to set the new page as the site's homepage.

Permissions management is one of the things that is typically different when working with community sites. Where a traditional department site is tied to a specific department and likely has an Active Directory security group, the community site is meant to be cross-functional including people from throughout the organization. Making that collaboration easy, especially for new members, often means taking a completely different approach.
The approach that I typically take is to identify the top most Active Directory groups that apply and then grant them Contributor permission level. That could be something like<my domain>domain users which is a standard security group that will include all domain users. Letting everyone contribute by default will make the site easier to maintain and also better support collaboration and innovation.