
It is important that we continue to try and find effective ways to surface content so that it is as easy as possible for users to find and use the content. To do that we are going to leverage two additional Web Parts available in SharePoint Server that can assist here. The Web Parts are:
- Web Analytics Web Part
- Content Query Web Part
The Web Analytics Web Part leverages the Usage and Web Analytics system to provide content reporting to your authors and end users. In the past it has been difficult to provide an accurate list of Frequently Accessed Content, but this Web Part provides that much needed information.
It is important to understand that this is pre-processed information that is generated based on the schedule configured for the Web Analytics reporting. This allows it to execute very fast, but with default settings the content may be up to 24 hours out of date, so new content may not be displayed.
To configure the Web Analytics Web Part:
- Browse to the homepage of the community site.
- Click on the Site Actions menu and select the Edit Page option.
- Select the Insert ribbon tab.
- Select the Content Rollup category.
- Select the Web Analytics Web Part as displayed in the following screenshot:

- For the Add Web Part to option, select Top Right.
- Click on the Add button.
- Edit the Web Part settings.
- Change the Information to Display option to Most Viewed Content.
- Ensure that the Site Scope option is set to This Site and Subsites.
- Ensure that the Period option is set to Proceeding 30 Days.
- Select the Show Frequency option.
- Select the Show Popularity Rank option.
- Select the Show Popularity Rank Trend option.
- Under the Appearance section, change the Title field to Popular Content.
An example of the configured Web Part is displayed in the following screenshot:

The Content Query Web Part allows you to do simple content rollups within a site collection. We are going to configure one that can be used to highlight new pages that are added to the site.
To configure the Content Query Web Part:
- Browse to the homepage of the community site.
- Click on the Site Actions menu and select the Edit Page option.
- Select the Insert ribbon tab.
- Select the Content Rollup category.
- Select the Content Query as displayed in the following screenshot:

- For the Add Web Part to option, select Right.
- Click the Add button.
- Edit the Web Part settings.
- Under the Query section, List Type grouping, set the Show items from this list type field to the Pages Library option.
- Under the Presentation section, Grouping and Sorting grouping, set the Sort items by field to the Created option.
- Ensure that the Show items in descending order option is selected.
- Under the Styles grouping, set the Item Style field to Title, description, and document icon.
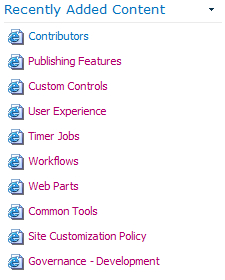
- Under the Appearance section, set the Title field to Recently Added Content.
- Click on the OK button.
An example of the configured Web Part is displayed in the following screenshot:
Next we will add and configure another Content Query Web Part that will highlight the highest rated pages that are added to the site.
To configure the Content Query Web Part:
- Browse to the homepage of the community site.
- Click the Site Actions menu and select the Edit Page option.
- Select the Insert ribbon tab.
- Select the Content Rollup category.
- Select the Content Query as displayed in the following screenshot:
- For the Add Web Part to option, select Top Left.
- Click on the Add button.
- Edit the Web Part settings.
- Under the Query section, List Type grouping, set the Show items from this list type field to the Pages Library option.
- Under the Presentation section, Grouping and Sorting grouping, set the Sort items by field to the Rating (0-5) option.
- Ensure that the Show items in descending order option is selected.
- Under the Styles grouping, set the Item Style field to Title, description, and document icon.
- Under the Fields to Display grouping, Description field, add Rating (0-5); to the field listing to show the current rating for the content.
- Under the Appearance section, set the Title field to Recently Added Content.
- Click on the OK button.
An example of the configured Web Part is displayed in the following screenshot:
