
Chapter 5. Decision and Loop Statements
After completing this chapter, you will be able to:
Make decisions by using the if statement.
Make multiway decisions by using the switch statement.
Perform loops by using the while, for, and do-while statements.
Perform unconditional jumps in a loop by using the break and continue statements.
All high-level languages provide keywords with which you can make decisions and perform loops. C++ is no exception. C++ provides the if statement and the switch statement for making decisions, and it provides the while, for, and do-while statements for performing loops. In addition, C++ provides the break statement to exit a loop immediately and the continue statement to return to the start of the loop for the next iteration.
In this chapter, you will see how to use these statements to control the flow of execution through a C++/CLI application.
Making decisions by using the if statement
The most common way to make a decision in C++/CLI is to use the if statement. You can use the if statement to perform a one-way test, a two-way test, a multiway test, or a nested test. Let’s consider a simple one-way test first.
Performing one-way tests
The following example shows how to define a one-way test in C++/CLI:
if (number < 0)
    Console::WriteLine("The number is negative");
Console::WriteLine("The end");
The if keyword is followed by a conditional expression, which must be enclosed in parentheses. If the conditional expression evaluates to true, the next statement is executed, which in this example will display the message “The number is negative”. Notice that the message “The end” will always be displayed, regardless of the outcome of the test, because it is outside the body of the if statement.
Note
There is no semicolon after the closing parenthesis in the if test. It is a common C++ programming error to put one in by mistake, as shown here:
if (number < 0); // Note the spurious semicolon
This statement is equivalent to the following statement, which is probably not what you intended:
if (number < 0)
    ;   // Null if-body - do nothing if number < 0
If you want to include more than one statement in the if body, enclose the if body in braces ({}), as follows:
if (number < 0)
{
    Console::Write("The number ");
    Console::Write(number);
    Console::WriteLine(" is negative");
}
Console::WriteLine("The end");
Many developers reckon that it is good practice to enclose the if body in braces, even if it only consists of a single statement. This means that the code will still be correct if you (or another developer) add more statements to the if body in the future.
In this exercise, you will create a new application to perform one-way tests. As this chapter progresses, you will extend the application to use more complex decision-making constructs and to perform loops. For now, the application asks the user to enter a date and then it performs simple validation and displays the date in a user-friendly format on the console.
Start Visual Studio 2012 and create a new CLR Console Application project. Name the application CalendarAssistant.
At the top of the source code file, immediately below the using namespace System; line, add the following function prototypes (you will implement all these functions during this chapter):
int GetYear();
int GetMonth();
int GetDay(int year, int month);
void DisplayDate(int year, int month, int day);
At the end of the file, after the end of the main function, implement the GetYear function as follows:
int GetYear()
{
    Console::Write("Year? ");
    String ^input = Console::ReadLine();
    int year = Convert::ToInt32(input);
    return year;
}
Implement the GetMonth function as follows:
int GetMonth()
{
    Console::Write("Month? ");
    String ^input = Console::ReadLine();
    int month = Convert::ToInt32(input);
    return month;
}
This is a simplified implementation; later in this chapter, you will enhance the function to ensure that the user enters a valid month.
Implement the GetDay function as follows:
int GetDay(int year, int month)
{
    Console::Write("Day? ");
    String ^input = Console::ReadLine();
    int day = Convert::ToInt32(input);
    return day;
}
Later, you will enhance this function to ensure that the user enters a valid day for the given year and month.
Implement the DisplayDate function as shown in the following code to display the date as three numbers:
void DisplayDate(int year, int month, int day)
{
    Console::WriteLine("
This is the date you entered:");
    Console::Write(year);
    Console::Write("-");
    Console::Write(month);
    Console::Write("-");
    Console::Write(day);
    Console::WriteLine();
}
Later in this chapter you will enhance this function to display the date in a more user-friendly format.
Add the following code inside the main method, immediately before the return 0; Line:
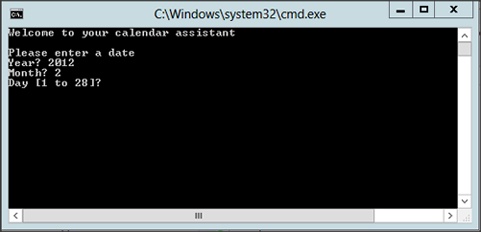
Console::WriteLine("Welcome to your calendar assistant");
Console::WriteLine("
Please enter a date");
int year = GetYear();
int month = GetMonth();
int day = GetDay(year, month);
// Simplified test for now - assume there are 31 days in
// every month :-)
if (month >= 1 && month <= 12 && day >= 1 && day <= 31
)
{
    DisplayDate(year, month, day);
}
Console::WriteLine("
The end
");
This code asks the user to enter a year, month, and day. If the date passes a simplified validation test, the date is displayed on the console. If the date is invalid, it is not displayed at all.
Note
This if statement combines several tests by using the logical AND operator &&. As you learned in Chapter 3, logical tests are performed from left to right. Testing stops as soon as the final outcome has been established. For example, if the month is 0, there is no point performing the other tests—the date is definitely invalid. This is known as short-circuit evaluation.
Build the application and fix any compiler errors that you might have.
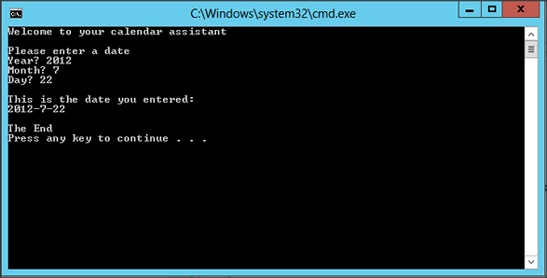
Run the application. Type in valid numbers for the year, month, and day (for example, 2012, 7, and 22).
The application displays the messages shown in the following screen shot:
Observe that the application displays the date because it is valid. The message “The End” also appears at the end of the program.
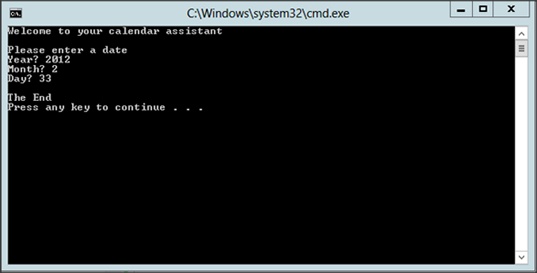
Run the application again, but this time, type an invalid date (for example, 2012, 2, and 33). The application displays the messages shown in the following screen shot:
Notice that because the date you typed was invalid, the application doesn’t display it. Instead, it just displays “The End.” You can make the application more user-friendly by displaying an error message if the date is invalid. To do so, you need to use a two-way test.
Performing two-way tests
The following code shows how to define a two-way test for the Calendar Assistant application:
if (month >= 1 && month <= 12 && day >= 1 && day <= 31
)
{
    DisplayDate(year, month, day);
}
else
{
    Console::WriteLine("Invalid date");
}
Console::WriteLine("
The end
");
The else body defines what action to perform if the test condition fails.
In this exercise, you will enhance your Calendar Assistant application to display an error message if an invalid date is entered.
Continue working with the project from the previous exercise.
Modify the main function, replacing the simple if with an if-else statement to test for valid or invalid dates.
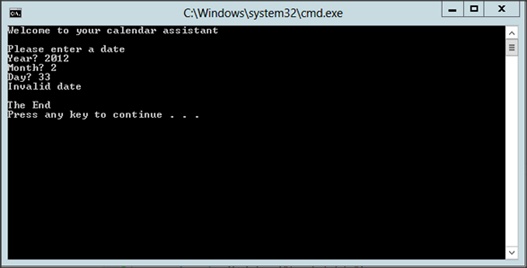
if (month >= 1 && month <= 12 && day >= 1 && day <= 31
)
{
    DisplayDate(year, month, day);
}
else
{
    Console::WriteLine("Invalid date");
}
Console::WriteLine("
The end
");
Build and run the application. Type an invalid date such as 2001, 0, and 31.
The application now displays an error message, as demonstrated in the following screen shot:
Performing multiway tests
You can arrange if-else statements in a cascading fashion to perform multiway decision making.
The following code shows how to use a multiway test to determine the maximum number of days (maxDay) in a month:
int maxDay;
if (month == 4 || month == 6 || month == 9 || month == 11)
{
    maxDay = 30;
}
else if (month == 2)
{
    maxDay = 28;
}
else
{
    maxDay = 31;
}
This code specifies that if the month is April, June, September, or November, set maxDay to 30. If the month is February, maxDay is set to 28. (We’ll ignore leap years for now!) If the month is anything else, set maxDay to 31.
Note
There is a space between the keywords else and if because they are distinct keywords. This is unlike Microsoft Visual Basic .NET, which uses the single keyword ElseIf.
In this exercise, you will enhance your Calendar Assistant application to display the maximum number of days in the user’s chosen month.
Continue working with the project from the previous exercise.
Replace the GetDay function with the following code so that it uses an if-else-if statement to determine the maximum allowable number of days.
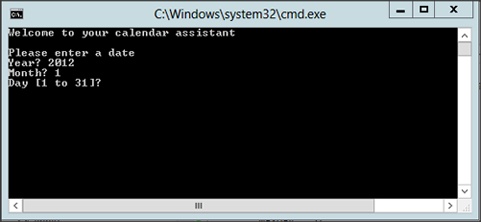
int GetDay(int year, int month)
{
    int maxDay;
    if (month == 4 || month == 6 || month == 9 || month == 11)
    {
        maxDay = 30;
    }
    else if (month == 2)
    {
        maxDay = 28;
    }
    else
    {
        maxDay = 31;
    }
    Console::Write("Day [1 to ");
    Console::Write(maxDay);
    Console::Write("]? ");

    String ^input = Console::ReadLine();
    int day = Convert::ToInt32(input);
    return day;
}
Build and run the application. Type the year 2012 and the month 1.
The application prompts you to enter a day between 1 and 31, as illustrated in the following screen shot:
Type a valid day and close the console window when the date is displayed.
Run the application again. Type the year 2012 and the month 2.
The application prompts you to enter a day between 1 and 28, as shown here:
Type a valid day and close the console window when the date is displayed. (Don’t worry about the date validation in main: You will remove it later and replace it with more comprehensive validation in the GetMonth and GetDay functions.)
Performing nested tests
It is possible to nest tests within one another. This makes it possible for you to perform more complex logical operations. The following code shows how to use nested tests to accommodate leap years correctly in the Calendar Assistant application:
int maxDay;
if (month == 4 || month == 6 || month == 9 || month == 11)
{
    maxDay = 30;
}
else if (month == 2)
{
    bool isLeapYear = (year % 4 == 0 && year % 100 != 0) || (year % 400 == 0);
    if (isLeapYear)
    {
        maxDay = 29;
    }
    else
    {
        maxDay = 28;
    }
}
else
{
    maxDay = 31;
}
If the month is February, you define a bool variable to determine if the year is a leap year. A year is a leap year if it is evenly divisible by 4 but not evenly divisible by 100 (except years that are evenly divisible by 400, which are leap years). The following table shows some examples of leap years and non–leap years.
Year | Leap year? |
1996 | Yes |
1997 | No |
1900 | No |
2000 | Yes |
You then use a nested if statement to test the bool variable isLeapYear so that you can assign an appropriate value to maxDay.
Note
There is no explicit test in the nested if statement. The condition if (isLeapYear) is equivalent to if (isLeapYear != false).
In this exercise, you will enhance your Calendar Assistant application to deal correctly with leap years.
Continue working with the project from the previous exercise.
Modify the GetDay function, replacing the if…else if…else statements to match the block of code just described to test for leap years.
Build and run the application. Type the year 1996 and the month 2. The application prompts you to enter a day between 1 and 29. Type a valid day and then when the date is displayed, close the console window.
Run the application again. Type the year 1997 and the month 2. Verify that the application prompts you to enter a day between 1 and 28.
Run the application several more times using the test data from the previous table.
Making decisions by using the switch Statement
Now that you have seen how the if statement works, let’s take a look at the switch statement. Using the switch statement, you can test a single variable and execute one of several branches depending on the variable’s value.
Defining simple switch statements
The example that follows shows the syntax for the switch statement. The switch statement tests the numberOfSides in a shape and displays a message to describe that shape.
int numberOfSides;   // Number of sides in a shape
...
switch (numberOfSides)
{
    case 3:  Console::Write("Triangle");      break;
    case 4:  Console::Write("Quadrilateral"); break;
    case 5:  Console::Write("Pentagon");      break;
    case 6:  Console::Write("Hexagon");       break;
    case 7:  Console::Write("Septagon");      break;
    case 8:  Console::Write("Octagon");       break;
    case 9:  Console::Write("Nonagon");       break;
    case 10: Console::Write("Decagon");       break;
    default: Console::Write("Polygon");       break;
}
The switch keyword is followed by an expression in parentheses. This expression must evaluate to an integer, a character, or an enumeration value. The body of the switch consists of a series of case branches, each of which comprises the keyword case, a value, and a colon.
The value identifying a case branch must be a constant of integer type. This means that integer numbers, enumeration values, and characters are allowed. For example, 5 and a are valid, but abc is not because it is a string literal.
Note
Each case label specifies a single literal value. You can’t specify multiple values, you can’t define a range of values, and the values must be known at compile time. This means that you can’t, for instance, say case foo, where foo is a variable whose value will only be known when the application executes.
Each case branch can contain any number of statements. At the end of each branch, use a break statement to exit the switch statement.
Note
There is normally no need to use braces around the code in a case branch. The break statement marks the end of each case branch. However, you do need to use braces if you need to declare a variable within the branch code.
You can define an optional default branch in the switch statement. The default branch will be executed if the expression doesn’t match any of the case labels.
Tip
It’s good practice to define a default branch even if you don’t have any specific processing to perform. Including the default branch shows that you haven’t just forgotten it. Also, the default branch can help you trap unexpected values and display a suitable warning to the user.
In this exercise, you will enhance your Calendar Assistant application to display the month as a string such as January or February.
Continue working with the project from the previous exercise.
Modify the DisplayDate function. Rather than display the month as an integer, replace the Console::Write(month) statement with a switch statement that displays the month as a string.
switch (month)
{
    case 1:  Console::Write("January");   break;
    case 2:  Console::Write("February");  break;
    case 3:  Console::Write("March");     break;
    case 4:  Console::Write("April");     break;
    case 5:  Console::Write("May");       break;
    case 6:  Console::Write("June");      break;
    case 7:  Console::Write("July");      break;
    case 8:  Console::Write("August");    break;
    case 9:  Console::Write("September"); break;
    case 10: Console::Write("October");   break;
    case 11: Console::Write("November");  break;
    case 12: Console::Write("December");  break;
    default: Console::Write("Unknown");   break;
}
Build the application.
Run the application several times, typing a different month each time. Verify that the application displays the correct month name each time.
Using fall-through in a switch statement
If you omit the break statement at the end of a case branch, flow of control continues on to the next statement. This process is called fall-through. This can be useful to avoid duplication of code, but be careful not to do it accidentally.
The following example illustrates why fall-through might be useful. This example tests a lowercase letter to see if it is a vowel or a consonant:
char lowercaseLetter;   // Single lowercase letter, for example 'a'
...
switch (lowercaseLetter)
{
    case 'a':
    case 'e':
    case 'i':
    case 'o':
    case 'u':  Console::Write("Vowel"); break;

    default:   Console::Write("Consonant"); break;
}
There is no break statement in the first four case labels. As a result, the flow of control passes on to the next executable statement to display the message Vowel. The default branch deals with all the other letters and displays the message Consonant.
In this exercise, you will enhance your Calendar Assistant application to display the season for the user’s date.
Continue working with the project from the previous exercise.
Modify the DisplayDate function. After displaying the year, month, and day, add the following code after the line Console::Write(day) to display the season:
switch (month)
{
    case 12:
    case 1:
    case 2:  Console::WriteLine(" [Winter]"); break;

    case 3:
    case 4:
    case 5:  Console::WriteLine(" [Spring]"); break;

    case 6:
    case 7:
    case 8:  Console::WriteLine(" [Summer]"); break;

    case 9:
    case 10:
    case 11: Console::WriteLine(" [Fall]"); break;
}
Build the application.
Run the application several times, typing a different month each time. Verify that the application displays the correct season name each time.
Performing loops
For the rest of this chapter, you’ll see how to perform loops in C++/CLI. You’ll also see how to perform unconditional jumps in a loop by using the break and continue statements.
C++ has three main loop constructs: the while loop, the for loop, and the do-while loop.
Note
There is actually a fourth loop type, the for-each loop, but I’ll leave discussing that until we get to arrays.
Let’s look at the while loop first.
Using while loops
A while loop continues executing its body for as long as the condition in parentheses evaluates to true. The following example shows how to write a simple while loop in C++/CLI:
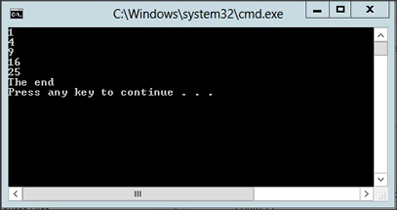
int count = 1;
while (count <= 5)
{
    Console::WriteLine(count * count);
    count++;
}
Console::WriteLine("The end");
You must follow the while keyword with a conditional expression enclosed in parentheses. As long as the conditional expression evaluates to true, the while body executes. After the loop body has been executed, control returns to the while statement and the conditional expression is tested again. This sequence continues until the test evaluates to false.
You must, of course, remember to include some kind of update statement in the loop so that it will terminate eventually. In this example count++ is incrementing the loop counter. If you don’t provide an update statement, the loop will iterate forever, which probably isn’t what you want.
The preceding example displays the following output:
In this exercise, you will enhance your Calendar Assistant application so that the user can type five dates.
Continue working with the project from the previous exercise.
Modify the code in the main function by replacing the entire body of the function with the following code:
Console::WriteLine("Welcome to your calendar assistant");

int count = 1;    // Declare and initialize the loop counter
while (count <= 5)   // Test the loop counter
{
    Console::Write("
Please enter a date ");
    Console::WriteLine(count);

    int year = GetYear();
    int month = GetMonth();
    int day = GetDay(year, month);
    DisplayDate(year, month, day);

    count++;   // Increment the loop counter
}
Build and run the application. The application prompts you to enter the first date. After you have typed this date, the application prompts you to enter the second date. This process continues until you have typed five dates, at which point the application closes, as depicted in the following screen shot:

Using for loops
The for loop is an alternative to the while loop. It provides more control over the way in which the loop executes.
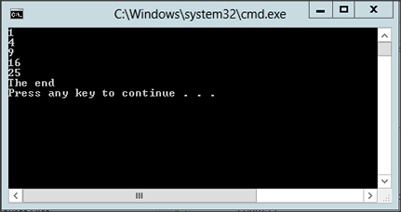
The following example shows how to write a simple for loop in C++/CLI. This example has exactly the same effect as the while loop.
for (int count = 1; count <= 5; count++)
{
    Console::WriteLine(count * count);
}

Console::WriteLine("The end");
The parentheses after the for keyword contain three expressions separated by semicolons. The first expression performs loop initialization, such as initializing the loop counter. This initialization expression is executed once only, at the start of the loop.
Note
You can declare loop variables in the first expression of the for statement. The preceding example illustrates this technique. The count variable is local to the for statement and goes out of scope when the loop terminates.
The second expression statement defines a test. If the test evaluates to true, the loop body is executed, but if it is false, the loop finishes and control passes to the statement that follows the closing parenthesis. After the loop body has been executed, the final expression in the for statement is executed; this expression performs loop update operations, such as incrementing the loop counter.
Note
The for statement is very flexible. You can omit any of the three expressions in the for construct as long as you retain the semicolon separators. You can even omit all three expressions, as in for( ; ; ), which represents an infinite loop
The preceding example displays the output shown in the following screen shot.
In this exercise, you will modify your Calendar Assistant application so that it uses a for loop rather than a while loop to obtain five dates from the user.
Continue working with the project from the previous exercise.
Modify the code in the main function to use a for loop rather than a while loop, as shown here:
Console::WriteLine("Welcome to your calendar assistant");

for (int count = 1; count <= 5; count++)
{
    Console::Write("
Please enter date ");
    Console::WriteLine(count);

    int year = GetYear();
    int month = GetMonth();
    int day = GetDay(year, month);
    DisplayDate(year, month, day);
}
Notice that there is no count++ statement after displaying the date. This is because the for statement takes care of incrementing the loop counter.
Build and run the application. The application asks you to enter five dates, as before.
Using do-while loops
The third loop construct you’ll look at here is the do-while loop (remember, there’s still the for-each loop, which you will meet later). The do-while loop is fundamentally different from the while and for loops because the test comes at the end of the loop body, which means that the loop body is always executed at least once.
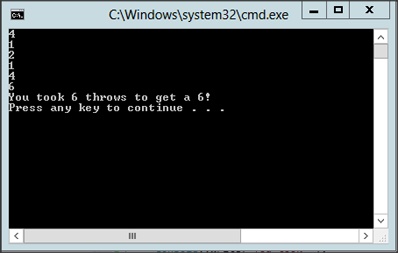
The following example shows how to write a simple do-while loop in C++/CLI. This example generates random numbers between 1 and 6, inclusive, to simulate a die. It then counts how many throws are needed to get a 6.
Random ^r = gcnew Random();
int randomNumber;
int throws = 0;
do
{
    randomNumber = r->Next(1, 7);
    Console::WriteLine(randomNumber);
    throws++;
}
while (randomNumber != 6);

Console::Write("You took ");
Console::Write(throws);
Console::WriteLine(" tries to get a 6");
The loop starts with the do keyword, followed by the loop body, followed by the while keyword and the test condition. A semicolon is required after the closing parenthesis of the test condition.
The preceding example displays the output shown in the following screen shot:
In this exercise, you will modify your Calendar Assistant application so that it performs input validation, which is a typical use of the do-while loop.
Continue working with the project from the previous exercise.
Modify the GetMonth function as follows, which forces the user to type a valid month:
int GetMonth()
{
    int month = 0;
    do
    {
        Console::Write("Month [1 to 12]? ");
        String ^input = Console::ReadLine();
        month = Convert::ToInt32(input);
    }
    while (month < 1 || month > 12);
    return month;
}
Modify the GetDay function as follows, which forces the user to type a valid day:
int GetDay(int year, int month)
{
    int day = 0;
    int maxDay;

    // Calculate maxDay, as before (code not shown here) ... ... ...

    do
    {
        Console::Write("Day [1 to ");
        Console::Write(maxDay);
        Console::Write("]? ");
        String ^input = Console::ReadLine();
        day = Convert::ToInt32(input);
    }
    while (day < 1 || day > maxDay);
    return day;
}
Build and run the application.
Try to type an invalid month. The application keeps asking you to enter another month until you type a value between 1 and 12, inclusive.
Try to type an invalid day. The application keeps asking you to enter another day until you type a valid number (which depends on your chosen year and month).
Performing unconditional jumps
C++/CLI provides two keywords—break and continue—with which you can jump unconditionally within a loop. The break statement causes you to exit the loop immediately. The continue statement abandons the current iteration and goes back to the top of the loop ready for the next iteration.
Note
The break and continue statements can make it difficult to understand the logical flow through a loop. Use break and continue sparingly to avoid complicating your code unnecessarily.
In this exercise, you will modify the main loop in your Calendar Assistant application. You will give the user the chance to break from the loop prematurely, skip the current date and continue on to the next one, or display the current date as normal.
Continue working with the project from the previous exercise.
Modify the main function as follows, which gives the user the option to break or continue if desired:
Console::WriteLine("Welcome to your calendar assistant"); for (int count = 1; count <= 5; count++) { Console::Write(" Please enter date "); Console::WriteLine(count); int year = GetYear(); int month = GetMonth(); int day = GetDay(year, month); Console::Write("Press B (break), C (continue), or "); Console::Write("anything else to display date "); String ^input = Console::ReadLine(); if (input->Equals("B")) { break; } else if (input->Equals("C")) { continue; } DisplayDate(year, month, day); }Build and run the application.
After you type the first date, you are asked whether you want to break or continue. Press X (or any other key except B or C) and then press Enter to display the date as normal.
Type the second date, and then press C followed by Enter, which causes the continue statement to be executed.
The continue statement abandons the current iteration without displaying your date. Instead, you are asked to type the third date.
Type the third date and then press B, which causes the break statement to be executed. The break statement terminates the entire loop.