
10. Lights, Camera, Action

ISO 400 • 1/800 sec. • f/1.8 • 85mm lens
Getting the Most out of the D7200’s Video Capabilities
I don’t shoot much video professionally, but like many of you I’ve taken my share of home videos of my family. Once you had to have a camera for your still photos and a camcorder for your video. Well, that’s all changed within the last few years, and your D7200 is equipped with amazing video technology. I’m going to cover some of the basics in this chapter to get you started. If you’re super serious about video, then I recommend getting your hands on Peachpit’s Creating DSLR Video: From Snapshots to Great Shots.
Recording with Live View
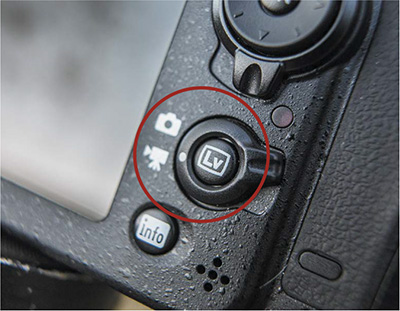
Video recording is a feature of the Live View capabilities of the camera, so you’ll have to put it into active Live View mode to begin capturing video. This is done by rotating the Live View selector to the Movie Live View setting, designated by the movie camera icon, and pressing the LV button (Figure 10.1).
Next, you need to place the red focus box on the subject and hold down the shutter button halfway until the focusing box turns green, indicating your subject is in focus. Your D7200 continues focusing on your subject when you keep the shutter button pressed down halfway. (Pressing the shutter button down all the way will take a photo as usual, so make sure to press the shutter only halfway when making movies.)
Once your subject is in focus, you can push the red dot Movie Record button located next to the shutter release button. Use the Movie Record button to start and stop video recording. Remember, in order to record movies you must have Live View activated and Movie Live View selected. As the camera begins to record, you will notice a few new icons on the back LCD. At the top left is a red Record icon to let you know that the camera is in active recording mode. At the upper right, a timer counts down your remaining recording time. The recording time is directly related to the quality of video you have selected as well as the capacity of your memory card. Lower quality video and larger memory cards equal more recording time. The D7200 has a maximum recording time of 20 minutes when set to the High Quality video setting and 29 minutes and 59 seconds when set to the Normal Quality video setting (see page 166 in your manual for a breakdown of recording times with different movie qualities and frame rates). Keep in mind that these are the maximum times regardless of the size of the memory card. To turn off Movie Live View, make sure you have stopped recording and press the LV button located on the Live View selector. If you wish to use Live View for photography again, then rotate the Live View selector until the camera icon has been selected.
Dedicating a Second Card to Video
I’m not a huge fan of having all my video and photos on one SD card because often I’m using two different programs for editing: one for video and one for photos. It’s just easier for importing to have one card dedicated to photos and the other to video. Plus, it allows me to dedicate my fastest SD card to video.
To dedicate a video card
1. To assign your video recording to a specific SD card slot, press the Menu button. Use the Multi-selector to navigate to the Movie Shooting menu.
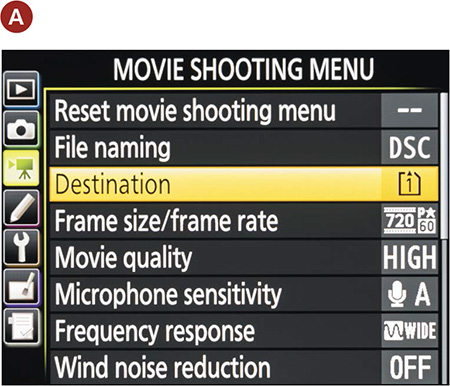
2. Use your Multi-selector to highlight Destination and click the OK button (A).
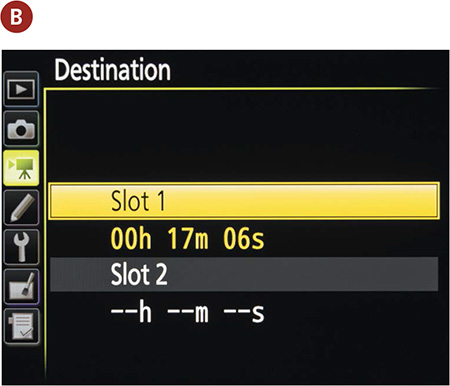
3. Select your desired SD card slot, and press the OK button (B).
4. Now your video will be stored to a dedicated card for easier retrieval.
Video Quality
The best quality your D7200 is capable of is high-definition video with a resolution of 1920 x 1080 pixels (aka 1080p) The 1080 represents the height of the video image in pixels, and the p stands for progressive, which is the method the camera uses to draw the video on the screen (more on this later). You can select a lower resolution video depending on your needs.
For high-definition television and computer/media station viewing, you will be best served by using 1920 x 1080. If you plan on recording for the Internet or portable media devices, first check the requirements for uploading to the particular media or devices. Many social media sites, such as YouTube, Google Plus, and Facebook, support HD video, as do the iPad, iPod touch, and competing devices. But before you decide to render HD video, you should know the key benefit of using the lower resolutions: Lower resolution video requires less physical storage due to a smaller pixel count. This means you can fit more video on the storage card, as well as take less time to upload the video to the Internet.
Setting Movie Quality, Frame Size, and Rate
1. Start by pressing the Menu button. Using your Multi-selector, navigate to the Movie Shooting menu.
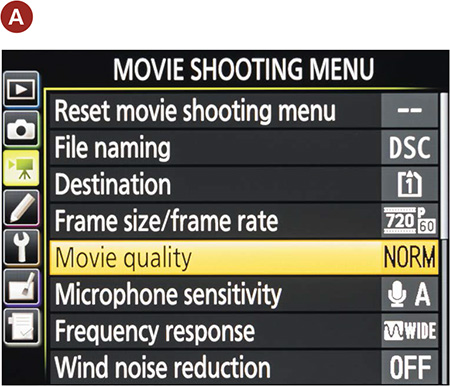
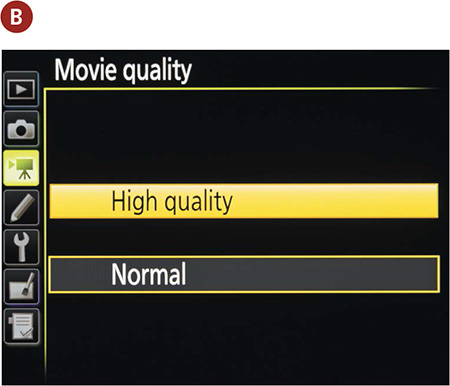
2. Highlight Movie Quality and press the OK button (A).
3. Select the video quality of your choice and press the OK button (B).
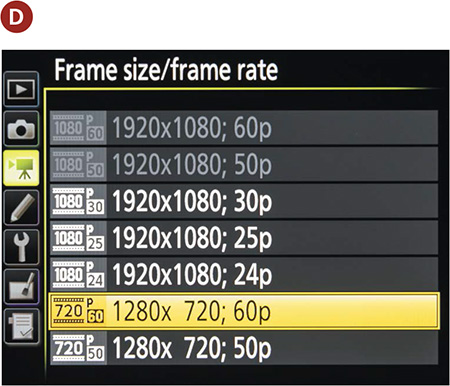
4. Now let’s set the appropriate frame size and rate (denoted in frames per second) by selecting Frame Size/Frame Rate from the Move Shooting menu and pressing OK button (C).

5. Select your desired frame size and rate (D) and press the OK button.
Your video quality as well as frame size and rate are now set and ready for your use. To change them back, simply follow the previous steps but alter the settings as desired.
Sound
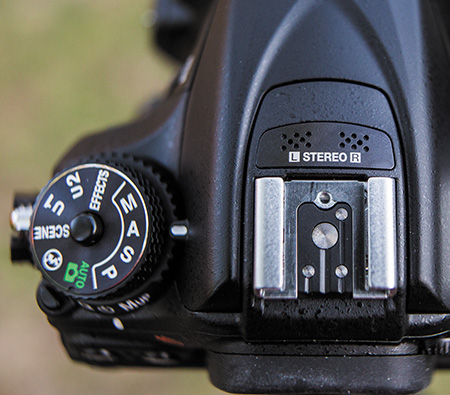
The D7200 doesn’t just shoot video; it’s also capable of capturing great audio. First off, the camera features a built-in stereo microphone located at the front of the accessory shoe (Figure 10.2). The camera is also equipped to allow both an external mic as well as headphones to be used when recording sound. Now, I’m primarily a still photographer, but I have to tell you: The difference between an external mic and an internal one is night and day. If you’re serious about making movies, consider picking up an external mic.
I use a Rode shotgun microphone (Figure 10.3) that mounts to the camera’s hot shoe and plugs into the stereo audio jack. These mics do a very nice job of recording audio for your videos and are one of the least expensive options.

Figure 10.3 The Rode shotgun microphone mounts to the camera’s hot shoe and plugs into the stereo audio jack for recording high-quality sound.
Dialing in the microphone sensitivity
Have you ever noticed when a microphone is just too loud or maybe too soft? I know that when I video-conference with my friends and family, sometimes the microphone just isn’t picking up my voice very well. The same applies to the D7200 microphone. The cool thing is that Nikon did a great job of allowing you to dial in the exact settings you want for the microphone’s sensitivity to sounds. By default the microphone is set to Auto Sensitivity, but let’s review how we can make manual adjustments.
1. Following the directions for setting Movie Quality above, locate the Movie Shooting menu, and press the OK button.
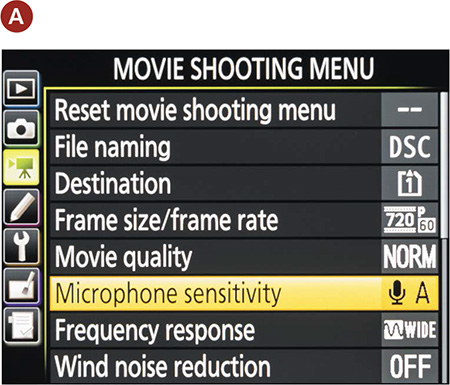
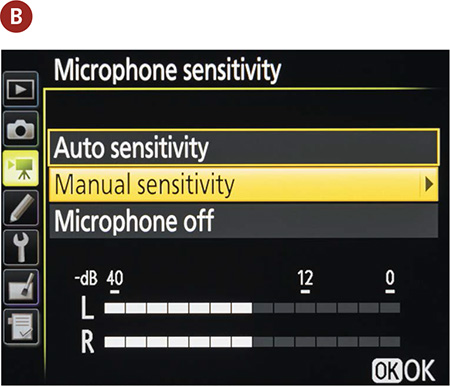
2. Highlight Microphone Sensitivity and press OK again (A).
3. Highlight Manual Sensitivity and press OK (B).
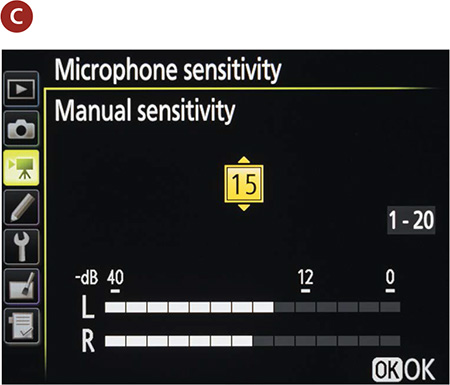
4. Now, using your Multi-selector, move up to increase or down to decrease sound sensitivity and press OK (C).
5. Press the Menu button twice, or the LV button once, to return to Shooting mode.
I recommend checking your sound adjustments to make sure you’re happy with your results. Remember that you can always set the microphone back to Auto Sensitivity by using the previous steps and selecting Auto instead of Manual.
Turning off the sound
Sometimes you may wish to turn the sound off altogether—maybe sound would be distracting or you plan on adding your own soundtrack later. This comes in handy when I add the Eye of the Tiger soundtrack to my daughter’s first-steps videos.
To turn off sound
1. Following the directions for setting Movie Quality above, locate the Movie Shooting menu, and press the OK button.
2. Highlight Microphone Sensitivity and press OK again.
3. Select the Microphone Off option and press OK to lock in the change (A).
4. Press the Menu button twice, or the LV button once, to return to Shooting mode.

Playback
You have a couple of options for reviewing your video once you have finished recording. The first, and probably the easiest, is to press the Image Review button to bring up the recorded image on the rear LCD, and then use the OK button to start playing the video. The Multi-selector acts as the video controller and allows you to rewind, fast-forward, and pause, as well as stop the video altogether (see page 177 of your manual for more information).
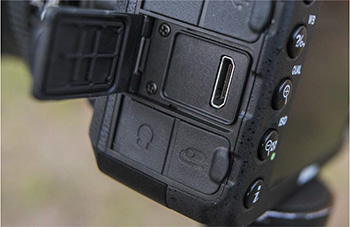
If you would like to watch your high definition video on your television, then you will need to buy an HDMI cable (your TV must support at least 720HD and have an HDMI port to use this option). Plug the HDMI cable into your television and the other end of the cable into your camera’s HDMI port (Figure 10.4). Once you have the cable hooked up, simply use the same camera controls that you use for watching the video on the rear LCD.
If you want to watch your high definition video on your computer, you have two options. If your computer has an HDMI port, then simply plug the cable into your camera and the computer’s HDMI port and off you go. Or use my preferred method of simply importing the file to your computer using a host program like Adobe Lightroom, Aperture, or Nikon’s ViewNX-i. The video file will have the extension .mov at the end of the filename. These files should play on either a Mac or a PC using software that came with your operating system (QuickTime for Mac, and Windows Media Player for PC).
Focusing
Your D7200 has given you several focusing options for Live View/Movie mode. There are benefits to each focus-point option. You can choose Face-priority AF, Wide-area AF, Normal-area AF, and Subject-tracking AF. You will want to choose your focus mode depending on the subject of your video. Face-priority will search for faces within the frame and place a box around each face. When you depress the shutter button halfway, the box will turn from yellow to green once the face is in focus (if not, it will turn red). This is one of the slower focusing modes, so if you have a fast-moving subject, this may not be your first choice. If you want to follow your subject through the frame and keep his face in focus at all times, Subject-tracking AF would be a good option. Wide-area AF and Normal-area AF allow you to choose the subject that you want to focus on. Wide-area provides a larger focusing area than Normal-area AF. Again, the box surrounding your focus point will turn green when the subject is in focus.
To select your Autofocus mode for video
1. Activate Live View by pressing the LV button. Next, Press the AF mode button and rotate the Sub-command dial to the desired AF-area mode.
2. Point your camera at a person and watch as the yellow frame appears over the face in the LCD and press the shutter to begin focus (A).
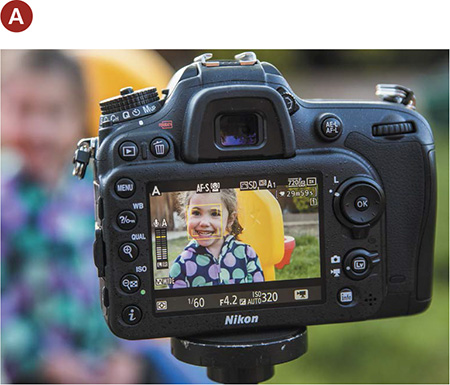
3. Press the red Movie Record button to begin recording the movie.
Editing
You can do limited editing with Nikon’s ViewNX-i (available as a free download). This is a great way to do some quick editing without spending money on external software.
If you are serious about editing your videos, I recommend checking out Adobe’s Premiere Elements. Both of these software packages will give you excellent control as well as more options for video editing.
Expanding your knowledge
I have given you a few quick tips and suggestions in this chapter to get you started with your moviemaking, but if you really want to get serious, there is a lot more you need to know. Videography can be a complex endeavor, and there is much to learn and know if you want to move beyond the simple video capture of the kids in the backyard or the trip to the amusement park. If you really want to explore all that your camera has to offer in the way of video moviemaking, then I suggest you read Creating DSLR Video: From Snapshots to Great Shots. The author, Rich Harrington, is a true master at shooting and editing digital video, and he is a top-notch instructor and author. This book is packed solid with everything you need to know about taking your videomaking to the next level and beyond.
Chapter 10 Assignments
Hold it steady
Shoot a video where you are handholding the camera to the best of your abilities. Now practice with the camera on a tripod. Play back the videos and look for differences in ease of viewing.
Video quality
Shoot video using both the highest quality setting and the lowest quality setting. Then, view your video on the LCD on the back of the camera. Watch to see the difference in the HD quality video versus the lower quality. Also note how much space was used on your memory card between the two videos. Now, connect your camera to your TV and watch the videos. If you have HDMI cable and a high-definition TV, you will see what a drastic difference the quality makes. Once you see the difference, you will know when you want to use lower quality video versus the highest quality.
Share your results with the book’s Flickr group!
Join the group here: flickr.com/groups/nikond7200_fromsnapshotstogreatshots