
12-11. Creating a Trigger
Problem
You need to create a DML database trigger that validates data prior to inserting it into a table, and you want to use Oracle SQL Developer to do so. For instance, you want to create a trigger that will validate an e-mail address prior to inserting a row into the EMPLOYEES table.
Solution
Use the Create Trigger Wizard, type the PL/SQL trigger code into a SQL worksheet, or use the trigger options that are available from the database table worksheet. To start the wizard, go to the File menu and select the New option. Once the Create a New dialog box opens, select Trigger. This will open the Create Trigger window, as shown in Figure 12-34.
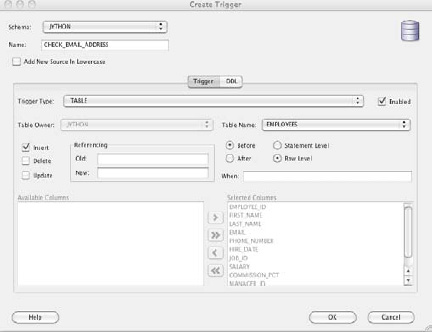
Figure 12-34. Creating a new trigger
The Create Trigger window simplifies the process of creating a trigger because it provides all the essential details that are required up front. Once the information has been completed, the trigger code can be developed using the trigger editor window.
How It Works
As with all the other code creation techniques available in Oracle SQL Developer, there are various different ways to create a trigger. Using the SQL worksheet for a database connection is the best way to manually create a trigger. To do so, you will need to open the SQL worksheet, type the trigger creation code, and click the Run toolbar button to compile and save the code. The many wizards that are available for trigger creation can greatly simplify the process, especially if you are new to PL/SQL or rusty on the details of trigger creation.
As mentioned in the solution to the recipe, the Create Trigger window allows you to specify all the details for creating a trigger. You choose the type of trigger by selecting one of the options available from the drop-down menu. Different options become available in the window depending upon the type of trigger you choose to create. By default, a table trigger is chosen. Using that option, you can select the table from another drop-down list and choose whether the trigger should be executed on INSERT, UPDATE, or DELETE from the specified table. The wizard allows you to specify your own variable names for representing old and new table values. The timing for trigger execution is determined by selecting Before, Statement Level, After, or Row Level and specifying an optional WHEN clause. You can even specify whether the trigger is to be executed based upon a specific column.
If you attempt to enter a trigger name that matches an existing object in the database within the specified schema, you will receive an error message, as shown in Figure 12-35.
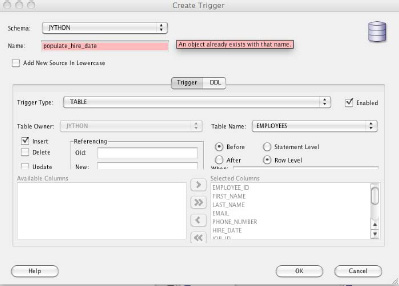
Figure 12-35. Create Trigger window–—object already exists
After finishing with the Create Trigger Wizard and clicking the OK button, the initial trigger creation code will be displayed in an editor (Figure 12-36).
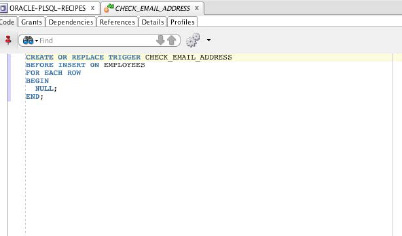
Figure 12-36. Trigger Editor
Type the following code into the editor, and hit the Save button to compile the code and save it into the database:
TRIGGER CHECK_EMAIL_ADDRESS

BEFORE INSERT ON employees

FOR EACH ROW

BEGIN

  IF NOT INSTR(:new.email,'@') > 0 THEN

    RAISE_APPLICATION_ERROR(-20001, 'INVALID EMAIL ADDRESS'),

  END IF;

END;
The Save button will automatically compile the code, and the output will appear in the Messages pane below the editor, as shown in Figure 12-37.

Figure 12-37. Messages log
After the trigger has been successfully compiled and stored into the database, it can be highlighted in the navigator, and right-clicking it will reveal several options (Figure 12-38).
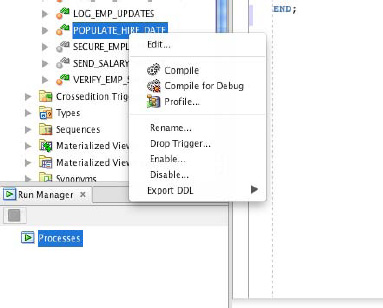
Figure 12-38. Trigger options
These options help allow easy access for dropping, disabling, or enabling the trigger. Choosing the Edit option from this submenu will open the trigger in the editor window to allow for code modifications.
Using the Create Trigger Wizard in Oracle SQL Developer can greatly reduce the time it takes to create a database trigger. By selecting the appropriate options within the wizard, you will be left with only the trigger functionality to code.