
12-13. Compiling Code Within the Navigator
Problem
You want to compile some PL/SQL code within Oracle SQL Developer. In this solution, the navigation menu of your Oracle SQL Developer environment contains code that has a red X on it. This means the code needs to be compiled or that it contains an error.
Solution
Select the code that needs to be compiled, and right-click (Ctrl+click) it. A menu will be displayed that lists several options. Select the Compile option from that menu (Figure 12-45).
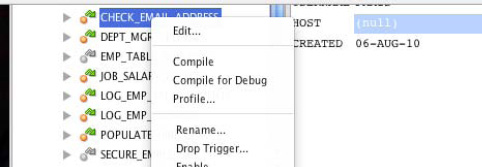
Figure 12-45. Compile option
How It Works
The Oracle SQL Developer navigation menu is very handy for quickly glancing at the code that a database contains. All the code that is successfully loaded into the database will contain a green check mark, whereas any code that has a compilation error will contain a red X label. Sometimes code needs to simply be recompiled in order to validate it and make it usable once again. This is most often the case after a database has just recently been migrated or updated. This can also occur if a particular piece of code depends upon another piece of code that has recently been modified, although Oracle Database 11gR2 and 11gR2 include fine-grained dependencies that help alleviate this issue. Another event that may cause code to require recompilation is if an object that the code references such as a table or view has been changed. Whatever the case, Oracle SQL Developer makes it easy to recompile code by right-clicking it within the navigator and selecting Compile from the pop-up menu.
![]() Note Oracle Database 11g introduced the idea of fine-grained dependencies. This allows PL/SQL objects to remain valid even if an object that they depend upon has changed, as long as the changes do not affect the PL/SQL object. For instance, if a column has been removed from a table and object A depends upon that table but not the specific column that was removed, then object A will remain valid.
Note Oracle Database 11g introduced the idea of fine-grained dependencies. This allows PL/SQL objects to remain valid even if an object that they depend upon has changed, as long as the changes do not affect the PL/SQL object. For instance, if a column has been removed from a table and object A depends upon that table but not the specific column that was removed, then object A will remain valid.
Once the compile task has been completed, a message will be displayed within the Messages panel to note whether the compilation was successful. If there were any issues encountered, they will be listed, each on a separate line, within the Messages window. The messages will contain the error code, as well as the line number that caused the exception to be raised. Double-clicking each error message will take you directly to the line of code that raised the exception so that you can begin working on repairs.