
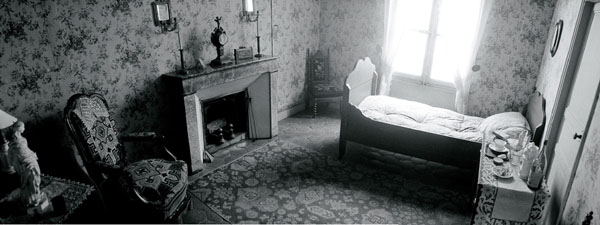
Photo by Francois-Xavier Bouchart.
After the Exposure
There are still two checks on the development of panoramic photography. One is the need to own a specialty camera, and the other concerns the presentation and archival storage of a format that is out of the ordinary. Fortunately, things are improving, especially because of digital technology.
Digital technology, via the Internet and printing, offers totally new solutions to the presentation of photographic work in general, and panoramas in particular. The format lends itself quite well to being displayed on the Web, particularly because of interactive tools and the new possibility of quality ink-jet printing on a rolled-up support. To convince you of this, I need to cite only one example: printing a large format color transparency (6 cm × 17 cm) in traditional photography requires a cumbersome enlarger (5 × 7) that few amateurs can neither afford nor find enough room to install at home. Also, enlarging this color transparency beyond 8″ × 24″ is difficult, requiring three large trays for the gigantic format. With a good flatbed scanner and a color ink-jet printer, the same amateur or professional – when it’s a serious matter of printing – can easily make a 13 × 39 inch print from the same transparency. This would seem to constitute a real habitual change in displaying photographs.
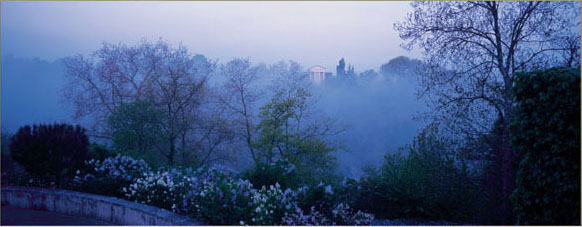
Photo by Jean-Baptiste Leroux.
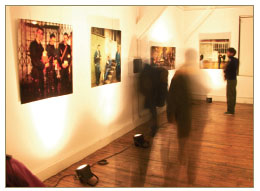
To obtain large-scale traditional prints, like in this exhibit by Christophe Noël, it is still necessary to use a professional color lab.
The archival storage of digital files and traditional film is a constant preoccupation for photographers. The traditional panoramic photographer is confronted with two problems: (1) to find organizing sleeves that accept the atypical film formats in question and (2) to find sleeves that do not deteriorate. In my opinion, the situation seems much more favorable when it comes to safeguarding digital files: the format of the digital images is of no real importance on a CD-ROM where the lifetime needs to be only as long as the average lifetime of the generation of CD-players.
Traditional or Digital Prints?
No other alternative to printing in black and white or color with an enlarger existed until recently. But today, things have changed greatly since it is possible to make images with a simple ink-jet printer. This new method of printing on paper provides a unique solution to the main problems of panoramas, knowing the size of the film and the format of the sheets of paper.
Thanks to the expansion of panoramic photography with small, pocket digital cameras and their automatic joining functions, a real demand for elongated printing paper does exist on the part of the general public and professionals. Currently, only the Epson brand makes it, but everything points in the direction of the competition soon moving into this market as well.
In traditional photography, all color and black-and-white printing from negatives or positives is done with an enlarger, either at home or in a professional printing lab. Conventional formats are the norm, so traditional printing is not very easy when panoramic format photographs are requested. The more the format is elongated, the more difficult things become. A very big enlarger is needed to accommodate the length of the film, as well as a specific lens that can cover the diagonal of the negative. Making large prints requires a lot of room to work with three or four large trays. Therefore, few amateur or professional photographers move in the direction of printing large format panoramas, especially in color.
At least when making cropped panoramic photographs, the film will be much wider than it is high. This forces the photographer to have an enlarger that surpasses the film in size. For example, a medium-format enlarger would be needed to enlarge photographs taken with an XPan, a Noblex 135, or a Horizon 202, since these use 35 mm films with dimensions measuring 24 mm high by 58 mm to 66 mm wide. The difference in space respectively occupied by a 35 mm and a medium-format enlarger is not that great, but it does become significant with 6 cm × 17 cm negatives, which require a 5 × 7 enlarger – a particularly large and expensive piece of equipment. It is rare to find professionals having one for their personal use, whereas medium-format enlargers are fairly common, even with amateurs. With this in mind, those wanting to persevere with traditional photography should look into the 6 × 12 format, because the size and price of a 4 × 5 enlarger is not too prohibitive and it also allows the possibility of entering into large format. And there is no better way to obtain high quality enlargements (i.e., image detail and tonal range of the material) than through traditional large-format enlarging.
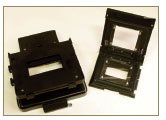
A glass negative carrier for the film, format or with movable blades is ideal for printing from panoramic negatives, especially large ones.
To complete this basic equipment, a lens covering the film diagonal is required. In this way, one needs an 80 mm to 90 mm enlarging lens for 24 mm × 66 mm negatives, and a 150 mm lens for the film used with a Noblex 150 (5 cm × 12 cm). A 150 mm lens can also enlarge 4 × 5 sheet film. Next (and this is not a detail to be overlooked), a negative carrier designed for the film format is needed – something that is quite rare with regard to panoramic formats – or at least a carrier equipped with sliding, movable blades that can adapt to different formats. When using blades, the negative carrier also needs to be able to sandwich the film between two sheets of anti-Newton ring glass. If not, the film risks sagging in the middle, since 35 mm and 120 film is thinner and less rigid than 4 × 5 or larger sheet films.
In most cases, professionals who use the 6 × 17 format (often color transparency film) either take their film to a professional lab or show their work on a light-table. This imposing format, being large enough to be viewed on its own, is most impressive in front of the client and does not necessarily require a loupe.
Paper
No traditional paper (fiber, RC, or color) is marketed in panoramic format sizes. Thus, a 13 × 39 inch poster format would require printing paper on a roll. Because it is expensive to develop these rolls, this is a real handicap, and caused problems for me when I had a 4 × 5 outfitted darkroom. I ended up buying some 20 × 24 inch trays that limited me to prints no longer than 20 inches. This was a bit frustrating starting from 12 cm negatives!
It is necessary to acknowledge that one of the main advantages of digital printing is that it is quite adaptable with regard paper size. Here, paper on rolls and in all sorts of standard sizes exist, perfectly suiting the needs of the panoramic photographer for a much lower cost (especially in color) than traditional printing.
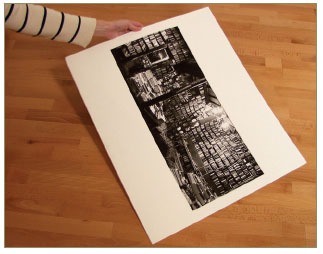
Held in my hand, this panoramic print on a 20 × 24 piece of fiber paper seems small. The actual image is only about 10 inches high.
The distinction between mass-market and professional laboratories is important. If the latter kind can realize any type of request, since they have all sizes of enlargers and paper, the same does not hold true for labs geared toward the general public. Their equipment usually comes down to automatic printing that accepts one or two formats at most. And if mass-market laboratories accept work that exceeds their competence, they subcontract it. Their machines can automatically print only a panoramic format originating from APS film.
Ever since I saw a three-foot long sheet of color paper roll out of my Epson 1290 printer, I have not been able to look back. Only four years before, the largest could print my black-and-white negatives was on 20 × 24 sheets of paper (fiber, of course).
Digital printing has revolutionized the working method. In addition to an undeniably comfortable setting, it adds an ecological dimension (satisfying the need for developing products that are less hazardous to health and the environment) and provides practical solutions for panoramic photographers. We are no longer as limited with regard to the size and color of our prints as we used to be.
Scanning the Originals
Many photographers who previously had worked only with traditional photography have now switched to digital printing. This requires them to scan all their color transparencies and negatives. And here again, digital provides some simple and fresh solutions. Confronted with the exceptional length of panoramic negatives, all that is needed is to find a scanner with a window large enough to project through. Up to around five inches in length (e.g., 6 × 12) the choice is wide-ranging; beyond this, the options are more limited.
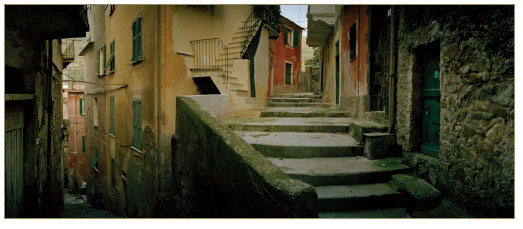
Photo by Macduff Everton.
The choice of a scanner depends on the film size and scan quality desired. Two important criteria are maximum resolution and depth analysis (often called D-max). Traditional panoramas often being of a larger size than 35 mm, it is more important to choose a scanner that offers a higher depth analysis than high resolution, since, as is the case with an enlarger, the larger the film is, the less it will need to be enlarged. Here, need to add that as it is now possible to print very large photographs on roll paper, this requires that the machine scan at least 1600 dpi for a 5 cm × 12 cm color transparency, and even higher for, say, 24 mm × 66 mm. For example, a color transparency of the latter format, intended to be printed 20″ × 36″ at 220 dpi, would need to be scanned at around 2900 dpi.
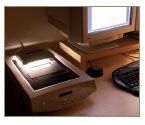
With its transparent 12 cm × 12 cm window, this flatbed scanner can scan panoramic color transparencies measuring up to 12 cm. For this, I have made a 5 cm × 12 cm frame, which is the format size of my transparencies. The frame also lifts them up slightly, avoiding Newton rings.
Up to 2-3/4 inches long (e.g., Hasselblad XPan, Noblex 135, Horizon 202), the film can be scanned with either film or flatbed scanners equipped with a transparent back. Film scanners have a justified reputation for being better in quality. Their D-max is truly superior, and the resolutions they propose are not unrealistic (as opposed those indicated by the cheapest flatbed scanners). But since things evolve quickly with regard to digital equipment, I do not wish to enter into a possibly fruitless discussion here. No sooner is a book published than the available equipment has already evolved past it; so instead, I will simply encourage you to study the market well, prior to making a purchase. Minolta (Dimage Multipro) and Nikon (8000 and 9000) make film scanners up to 3-1/2 inches long whose reputations speaks for themselves, and the Epson Perfection series remains a safe bet for those seeking relatively inexpensive flatbed scanners.
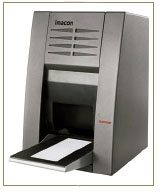
Imacon scanners are known for the quality of their scans. They can also scan originals up to seven inches (18 cm) long, thus can scan color transparencies taken with a 6 × 17 camera.
With films up to about five inches long, usually it is possible to use a flatbed scanner. And as long as the scanner remains nonprofessional, the price will be noticeably lower than with larger-format scanners like the superb Danish Imacon series (e.g., 646, 848). These more expensive models accept films up to seven inches long, even with the bottom-of-the-line version. Flatbed scanners for the general public have also made so much progress that they are now starting to make high-quality scans as well, even with fairly large negatives.

On a scan, Newton rings are a problem caused by the film coming into contact with the thin glass plate of the flatbed scanner. These resemble iridescent concentric rings, like an oil stain left on the ground by a car. The same phenomenon occurs in glass negative carriers for enlargers. To eliminate them, anti-Newton ring glass is used on the side facing the light bulb of the enlarger. This is glass that has been very lightly frosted to prevent the film from sticking to it. But as anti-Newton ring glass does not yet exist for flatbed scanners, it is necessary to make sure that the film never touches the glass plate. This is not easy with long panoramic films; they tend to bow in the center from heat emanating from the glass.
For films longer than seven inches, which includes film from rotational cameras, no solution exists apart from professional labs that have either flatbed scanners with very large surface areas or rotating film-scanners. Also, the work will often be subcontracted outside, so here you will be further prevented from doing the scans yourself – but the results will be irreproachable.
Digital Printout
In the last two chapters, we saw that computers can provide original and innovative solutions to panoramic photography, especially with the joining method. This is also the case after taking the picture. For a few years now, color and black-and-white ink-jet printers have been appearing on the market with ever-increasing photorealistic capabilities. In lieu of a color lab, an amateur or professional can now make photographs at home, and in a small room, since the equipment is not very large.
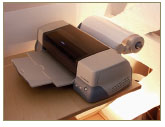
The Epson 1290 A3 + printer, already outdated, can make prints up to around 43 inches long on roll paper.
The digital print provides real working flexibility. One can always debate its quality; but screen markings have become invisible, and certain fine art papers have started to appear on the market. And it is very easy to use. Now it is possible to print in color at home, without additional costs. Along with this advantage, panoramic photographers have a second: size. Certain brands offer the choice of a large range of panoramic format papers as well. This is notably the case with Epson, who has an undeniable lead in this field. Epson markets papers of different qualities and sizes for its line of printers designed for the general public (e.g., the variously sized rolls of its feature product, Glossy Premium Paper).
However, the print driver limits the length of the roll-paper print to 40 inches, most certainly to allow you to print panoramic photographs in the most common and well-known 3:1 aspect ratio. Now, if one uses the entire width of the paper (around 13 inches), this restriction leaves a margin of a half-inch at either end. I do hope that the makers of printers will go beyond this limit, since joined photography allows for 360º montages, which is far beyond the 3:1 ratio. For example, the panoramic photograph on pages 96-97 would have been around 7″8″ long if it had been printed at a width of 13 inches! Finally, with regard to the brands that make paper in the standard format (4:3) only, one has to remain contented with printing one or two panoramic photographs along the length of one sheet.
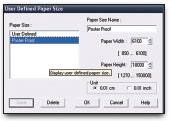
The printer driver for Epson printers allow you to decide the size of the printable area up to around 13 inches wide and 43 inches long.
All professional ink-jet printers of large size work with roll paper, no matter what the support or end-result would be. Thus, one can make two foot-wide panoramic prints on the Epson 7800, without any limitation but the length of the roll itself, and four foot-wide prints with the 9800 and 10,800 models. And in 2004, Epson started selling a new professional printer, the 4800 and brand new 3800, which introduces a new width standard: 17 inches.
It is now commonly agreed that the resolution of a photographic print should be between 220 and 330 dpi when a print is designed to be seen at short distance (e.g., in a book), up to around 12″ × 16″. But it is not at all necessary to adhere to this dictate when making larger prints. A print extending to four feet in one dimension, viewed from a distance of around five feet, and printed at 72 dpi, will still appear very sharp, as I can testify from direct experience.
Elements of Color Management
Regardless of whether the photographs come from a scanner or an assemblage of digital photos, at times it remains necessary to correct them a little with the retouching software, adjusting color, contrast, and brightness. Something I cannot repeat enough is how useful it is, if not essential, to make these corrections on a calibrated screen (or graphic chain). In this way, they are easier to control, whether they are intended to be printed or displayed on the Internet.
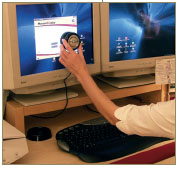
A screen probe, in this case made by Monaco Optix, allows you to precisely calibrate and characterize a monitor. It is highly recommended for making reliable, retouched images.
The largest difficulty encountered at the moment of scanning or printing a photograph is preserving the color and light-level of the original as much as possible. With a noncalibrated graphic sequence, the work is done by eye, via the screen. The scanner and print driver provide a selection of menus that allow you to control various levels and colors. They are becoming better and better designed, and thus more effective, but they will never replace a true calibration by a scanner or printer that really takes print faults and characteristics into account.
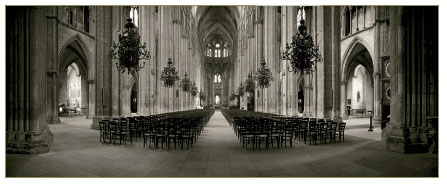
Photo by Arnaud Frich.
Having experimented with both methods, I by far prefer to make my scans without using optimization settings (truly a rough scan). Rather, after opening up the image in the software program, I assign an ICC profile to the scanner (in PhotoShop, menu Image>Mode>Assign Profile) depending on my needs. In this way, I find my original immediately, thus gaining a lot of time and productivity. I print my panoramic photographs the same way, basing this on the print profiles that have been created with regard to my printer, paper, and ink, as well as the print resolution I have selected. And although it is not too much of a problem to redo a 4 × 6 print in order to correct one or two details, it is completely exasperating to restart a three-foot long print from a roll of paper. In this regard, color management has allowed me to cut down on waste. Now I can start to make a large print without hesitation and profit completely from the advantages of digital printing with panoramic photography.
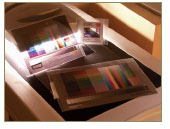
These transparent and opaque IT 8 test cards are used to calibrate scanners and printers, respectively. The color swatches are very precise and registered in a description file. For example, once the test card has been scanned, the profile-generating software compares the results with the colors registered in the file to make a characteristic profile for the machine in question.
ICC profiles are small files containing the color-metric “ID card” of a machine used to reproduce colors. It provides the color-generating software with two very precise kinds of information: first, all the colors that the machine is capable of reading or reproducing (its range), and second, the way it will modify particular colors (since no equipment is exempt from certain faults). In applying an ICC profile to images coming from a given machine, color shifts are better corrected. A profile is obtained during the calibration (more exactly, during the characterization) of the machine, using a test card (the most well-known standard is the IT 8 test card) and profile-generating software, like those made by Monaco-Systems or GretagMacbeth.
Presentation of Panoramic Photos
The presentation of photographic work is the summit of creativity. The photographer has different ways to achieve this, from the most traditional to the most contemporary. In addition to books, exhibits, and slide presentations, Internet distribution must be acknowledged. The spectacular craze for this style of presentation translates into a real change, since today just about anyone can show his or her photographs across the world for free, whereas yesterday it was necessary to publish a book in order to be known by a group of initiates. This capability has profoundly reduced the size of the planet and altered the history of photography.
Distribution of Images on the Internet
The distribution of photographs on the Internet by means of an image bank, or better, one’s own site, has become commonplace and cannot be ignored. This procedure is perfectly appropriate for panoramic photographs as well: either they exceed the width of the screen, and the Internet surfer uses the horizontal scroll box, or they are presented in a window of fixed dimensions where the image can be moved with a mouse.
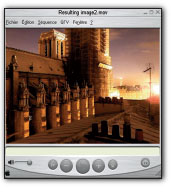
Apple’s QuickTime VR displayer is also compatible with PCs. More and more, this displayer is being installed in computers by default.
There are three different ways to view an interactive image, but the most well-known is undeniably the Apple QuickTimeVR (QTVR). The others remain configurable and less cumbersome as they require neither downloading nor installation on the part of the Internet surfer.
Anyone who has surfed on image sites without ADSL knows that their size is a serious problem. Panoramic photographers not only need to have a resolution that matches surfers’ screens, but – and this is the most important point that unfortunately is often neglected – they also need to have the right color balance profile, so that every viewer can see their photographs in the best of possible conditions. Of course, every screen is different; but respecting certain adjustments and calibrations at least allows you to guarantee that the colors viewed will be the original ones. Still, I do note that Internet surfers are forgiving enough when it comes to viewing images on the Web, but this is due to the range of differences between Mac (only 8% of the international market) and PC screens.
Preparing the Images
Different from printing, here the images are distributed at a small resolution, so a high-performance scanner is not required when one wants to distribute traditional photographs. The photographer needs to meet the requirements for distributing the most faithful of images as possible, regarding color and the overall result. And the rage for ICC color and profiles is undeniable, as we will see further on.
Resolution
Although ADSL connections are spreading throughout Europe and the United States, it’s still far from being the norm. In order to aid Internet surfers, the photographer needs to be careful about the size of his or her images. One way to reduce this is to choose a good resolution (in dpi) and not confuse this with definition (dimension of the image in pixels). On a standard screen, the ideal resolution is 72 dpi (dots per inch). An image with a higher resolution will not be any sharper on the screen.
Next, the photographer needs to decide on the number of pixels for the photograph. This varies depending on whether the image is to be viewed entirely, as with a normal format photograph, or partially in a window that has a zoom function (often its main attraction). Today, most screens have a definition of 600 × 800 pixels. But to avoid having the Internet surfer use the scroll bars of the browser (i.e., the scroll box), an image should not be more than around 750 pixels in size. The typical example is a little bit different if the image is distributed by an Apple, Mgi, Ptviewer, or other brands. Were it not that the size of the visual display window should not go beyond 750 pixels, the image distributed inside theoretically could have any size. But, once again, we have to account for the delivery weakness of normal Internet services (RTC).
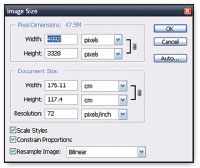
PhotoShop Image Size menu
1. In this field, the level of image definition in pixels is selected.
2. The Resolution field is the area devoted to document size, the ideal resolution is selected, relative to the image’s destination.
Choosing pixels/inch as the unit of measurement is preferred.
Size
The last and most efficient way to maintain a file size compatible with distribution on the Internet is to save the image in compression formats, like JPEG or GIF, and avoiding the TIFF format. The images need to be compressed as much as possible while finding a compromise between the memory size and quality of the distributed image. To do this, one analyzes the quality of the image to be saved on the screen and then picks a rate of compression that does not create too many artifacts.
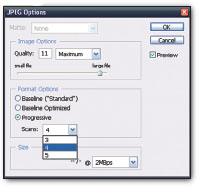
Two menus are available in PhotoShop. The most well-known is the menu Save Under, where one chooses a JPEG compression rate from 12 different levels. Here, it is necessary to move the window a little to see the effect of compression on the image behind it. Between 1 and 4, the rate is high and the impact on the image will be significant. Starting with 5, and depending on the nature of the image, the photograph will also have an acceptable appearance. By moving the cursor from left to right, it’s fairly easy to find the best compromise for each image.
There is a rule stating that there is a maximum ideal compression rate suited for each image, in a large part dependant on the number of the details and the material surface areas. A combination of both will compress much more than just a multitude of details.
The Store Under menu is the quickest for storing an image intended for the Web;I much prefer the Store for the Web menu.
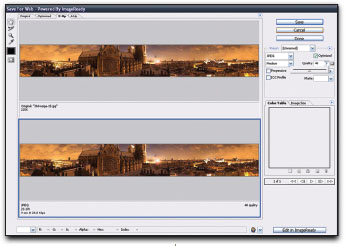
The PhotoShop Store for the Web menu is the ideal menu for preparing images for the Internet. It is practical, easy to understand, and precise. Note that the Progressive box is not checked off.
The second menu, Save for the Web, provides other advantages. One, two, or four windows can be opened, in which one can observe the simultaneous transformation of the image under different JPEG compression rates, as well as at the percentage of desired enlargement. And one can choose neighboring compression rates. Especially with small images, a small area of compression can significantly change the memory size of the image. Thus, to optimize memory size over the whole image, this is the ideal menu.
Whether one stores photographs with the Store or Store for the Web menus, the Progressive option theoretically makes the image appear progressively, little by little, on the Internet surfer’s screen as it is being downloaded. This avoids an overly long waiting time where nothing seems to be happening. In actual use, the opposite occurs most of the time: when one checks off this option, the image has to be downloaded completely before it can be displayed. Therefore, it is wise to make a few tests before stringing a series of images together.
ICC Profile
How do you correctly display the colors of a photograph on every screen in the world? By calibrating everything! In truth, this ideal situation does not exist. However, it is possible to strike a compromise so that the display normally would be correct, because of color management and the proper use of ICC profiles. Browsers, like the well-known Microsoft Internet Explorer, do not manage color, so they are unable to read the ICC Profile built into an image. But they can be tricked into acting like they did, with one condition: the image must be stored in sRGB (i.e., converted to this colorimetric space).
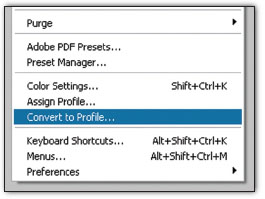
Since the arrival of PhotoShop, version 6, the Image>Mode>Convert or Name a Profile menus are essential for good color management.
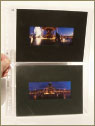
The ICC, or International Color Consortium, created a standard ICC profile, the sRGB (standard Red, Green, and Blue), in the 1990s. This profile, or colorimetric space, is the lowest common denominator among all screens. In this way, any new screen is obliged to reproduce all the colors of this space. This is also the case with pocket digital cameras. When an image is stored there, it does not contain any colors considered off-scale. Thus, it will correctly display the minimum chromatic range demanded of every screen. Although the colors will be displayed faithfully enough, the image can still be either too dark or too light if the Internet surfer has adjusted his or her screen’s brightness control. Regardless of whether one works with color management or not, the two examples shown in Figure 7.20 will typically be present.
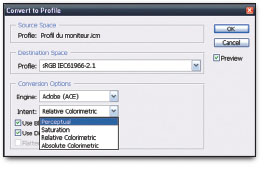
When one decides to convert a given image profile to another, this menu opens.
1. Original profile
2. Color conversion engine (select ACE)
3. Destination profile sRGB
4. It is preferable to observe the image resulting from the mode of conversion on the screen and then choose the Perceptive or Relative mode.
• When color management is activated in PhotoShop (starting with version 6), on a calibrated screen, it is necessary to convert the images prior to storing them, via the menu Store for the Web, no matter what workspace has been chosen (probably Adobe 1998). If this is not done, the image will look pale, even though its saturation appeared correct in the PhotoShop work space. To convert an image for a new ICC profile, it is necessary to scroll down the menu Image>Mode>Convert Profile and choose sRGB as the final profile, Adobe ACE as the conversion motor, and the perceptive or relative mode as the conversion mode, depending on the case in question. Regarding the menu, Store for the Web, it is no longer necessary to subsequently check off the ICC Profile, partly because this adds an average of 4 K to the images (if this is negligible with a 100 K photograph, it doubles the size of a small image). And, as I mentioned earlier, it is also because the majority of Web browsers are not able to read them. Fortunately, however, they act as though their color space was sRGB by default, since it is the smallest common denominator. Thus, if an image is properly converted to sRGB (and not simply tagged in the profile by the menu Assign a Profile), its display will be correct on every monitor, on the condition that it is not too dark (the most frequent scenario).
• Without color management – either by retouching the photos configured with PhotoShop by default or with another software program that does not affect color – all that is needed is to verify that the screen is not too light or dark relative to typical screens using the Web. In this way, it is often tempting to change factory settings in order to align screen brightness with ink-jet prints from the printer (which is noncalibrated). That’s a frequent pitfall. In this case, disengaging the ICC profile option is required since the images are already in sRGB.
Interactive Images
If one is disposed to write in the HTML code for Web pages, one can present any kind of panoramic photograph in an interactive way. Specific and individual solutions are diverse, requiring an entire book on the subject. Thus, I will address only a small number to suggest what is possible with panoramic images on the Web.
The simplest solutions (i.e., not requiring any competence with the HTML code on the part of the photographer) are those based on the viewers that are required to be installed on the Internet surfer’s computer. These can be large enough, since the most well-known among them, Apple QTVR, which functions on all platforms, is more than 6 Mb. The MGI viewer, also fairly common, is more than 1.7 Mb. When the Internet surfer wants to view an interactive image, the viewers start up automatically. To prepare them, the photographer just needs to store them in the right format (.mov), using the joining software.
To avoid being too dependant on the presence or absence of these particular viewers, another universal alternative exists. Other viewers do not take up too much room (less than 50 K) and do not need to be installed beforehand: they start up from the Internet site visited. For the photographer, it is enough to add the file jar (e.g., ptviewer.jar or panoapplet.jar) to the root of the site (i.e., in the same folder as the HTML pages). Then, one writes a code resembling this in the area of the HTML page where the interactive image is to appear, as shown in the following example:
<APPLET archive=ptviewer.jar code=ptviewer.class weight=600 height=300>
<PARAM name=filevalue= “photopano.jpg”>
</APPLET>
Color management is often neglected, but it is nevertheless indispensable for working with images on the computer. It is truly the foundation of the photographer’s digital darkroom. It is not the objective of this book to explain color management entirely, but only to remove some problems that are associated with it. With this in mind, you will find several sources at the back of the book, under the Internet sites and bibliography headings.
A more conventional and much more universal displayer than Apple’s.
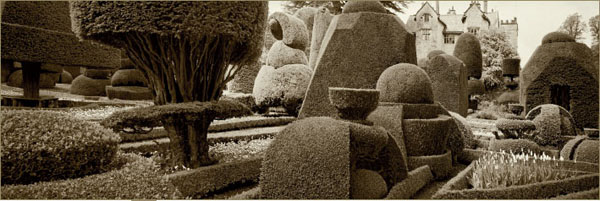
Photo by David J. Osborn.
All panoramic photographs stored as JPEG files need to be rendered inactive. In this example, the display window has a size of 300 × 600 pixels and will open the image panophoto.jpg with the Panorama Tools viewer (ptviewer.jar). Using the mouse and some typewritten keys (+,–, etc.), the Internet surfer can turn the photo every way, as well as scroll and zoom. Customizing this code has been very well outlined and explained in the book, La Photographie interactive avec QuickTimeVR, by Gérard Perron.
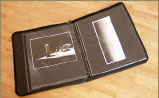
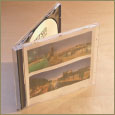
A book is a transportable and prestigious way to present your photographic work.
A book (spiral-bound shown in Figure 7.24) remains an ideal support for presenting a group of photographs. It’s the most complimentary solution for images. As none specifically exist for panoramic formats, the prints will be oriented on a differently sized rectangular sheet. Under these conditions, it is possible to decide whether or not to center the photo, place it on a strip of paper, or cut a window mat. The most well-known brands are Prat and Panodia. Panodia also sells ring binders that are less prestigious but very well made.
Two types of pages are available for books or ring binders: normal pages in transparent plastic and pages in ultra-transparent polyester (for example, one finds them in the Panodia Printibook). These pages are not sealed and are perfectly neutral. The book-style presentation with pages in polyester is particularly elegant.

A box-style presentation also has its followers, since the removal of images from the box gives a more formal aspect to the presentation.
Another typically photographic solution consists of making a series of prints on standard-sized paper and placing them in a display box, with or without a window mat. Certain brands make boxes using acid-free materials and neutral pH glues in order to obtain museum-quality archival conditions. This is notably the case with Stouls and Serc boxes (10″ × 12″ and larger). Panodia also makes display cases, but they are not quite as concerned about using archival materials.
When I first became interested panoramic formats over 20 years ago, they were completely marginalized. Thus, it was rare to find frames for them in the nonspecialty market. However, today things are starting to change because of the development of digital photography, as well as the recent craze for Philip Plisson’s panoramic photographs (in particular, his well-known image of the Isle des Poulains). Presently, one finds panoramic format frames in different sizes, but only in a 3:1 ratio (e.g., 8″ × 24″ or 12″ × 36″).
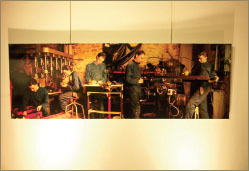
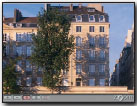
For his exhibit, Christophe Noël chose a laminated display method. This gives a streamlined quality to the presentation.
More and more people are buying panoramic posters, and a quite a few amateur photographers have also begun printing in this format. So it no longer has any reason to be called marginal, since it is now as easy to make as a conventional 3:2 format.
The fashion for laminated displays is also perfectly adapted to this elongated format, since the photograph, sometimes very long at the cost of not being very high, is suitably flush-mounted this way. Flush-mounting consists of bonding the borderless image on a rigid support (thick aluminum or plastic). To obtain an impeccable finish and to protect the photo, the use of an anti-UV varnish is also recommended. This framing procedure is less costly than framing under glass with a window mat. However, the latter option still has many advocates, as it can be quite beautiful, especially with the wonderful Clear-Color glass, which is totally invisible.
The projection of large panoramic color transparencies is not possible without specially-designed projectors. But it is possible to project any kind of cropped 35 mm or 6 × 6 medium transparency, just as long the length does not exceed 36 mm and 56 mm, respectively. (Keeping the image at the center of the slide frame aids in maintaining consistency when projecting a series.) However, there is one exception: panoramic photographs from a Horizon 202 swing-lens camera, which are 58 mm long. By placing these in glass-lined, 6 × 6 slide frames, the photograph will be cropped only one millimeter on each end, which is totally negligible. Also, a medium format projector will be needed for medium-format transparencies. These are made by Hasselblad (PCP 80) and Rollei (P66A), among others; they are also sold used.
If you decide to put your slides in frames, a very simple and effective solution is to crop the original format to the panoramic format by placing a piece of aluminum foil above and/or below the slide’s image. The edge is very clear-cut, does not sag, and will serve as a very sharp mask during projection. In addition, the foil melts only at a very high temperature, so it does not become misshapen and will not burn during projection!
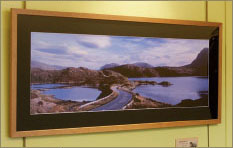
In this exhibit, Hervé Sentucq presented his series of images in traditional frames with window mats. This is traditional, but never out of fashion.
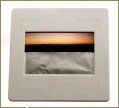
A piece of aluminum foil transforms this 35 mm photograph into a panoramic image that is ready to be projected.
Glassine pages are being progressively replaced by PVC plastic pages, which cost about the same.
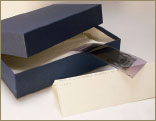
The ultimate answer involves acid-free paper envelopes. These are stacked in a box made from conservation through the passage of time.
Once the photographs have been made, it is necessary to safeguard their conservation over the passage of time. Thus, archival conditions are essential, whether they are negatives (color or black and white), color transparencies, or digital files. The presentation of originals is tied directly to the conditions of conservation (degradation of support, atmosphere of the room, etc.) or – something new – whether or not the digital files are obsolete.
Each type of original is a particular case. The archival constraints of a negative used only to make a print or a scan, a color transparency viewed on a light-table, or a digital file stored on a CD-ROM or DVD are very different.
Whether black-and-white or color, negatives have only one purpose: to yield positives, either printed or scanned. So one must make sure that they are protected from dust by a protective material that does not damage them. A number of solutions are available to photographers today, from the cheapest and least protective to the ideal, acid-free solution. For the latter, there are sleeves in special acid-free paper (Serc) or different kinds of plastic.
• Glassine page/sleeves: The most economical solution, but they do not completely fulfill the ideal conditions for conservation. Chemically acidic, they eventually deteriorate the negatives they are supposed to protect.
• Plastic page/sleeves: The most typical and common of these are in PVC, and made by Panodia. They can be found in numerous formats, punched with holes for storage in a binder. Panodia also makes them in a more neutral and stable plastic, polypropylene, which is preferable.
• Acid-free paper sleeves: Made by Serc, these allow the storage of film strips (ideally, one per sleeve) in numerous format sizes: 35 mm, 120, 4 × 5, and so on. Afterward, the sleeves are stored in museum-quality, acid-free cardboard boxes.
Today, storage pages and sleeves are standardized and easily obtainable, no matter the size of the original, from 35 mm to 8 × 10 sheet film. Thus, you should find them without too much trouble at your local store. Panoramic negatives fit standardized sleeves because the film usually is arranged in strips containing a few photos each. Thus, for example, one might cut strips of three panoramic photographs instead of six normal 35 mm photographs.
In addition to being scanned or printed, and depending on its size, color transparency film can either be mounted in frames for projection or presented in transparent pages for viewing on a light table. Starting with the 5 cm × 12 cm format, the viewing of color transparencies is quite nice and will be even better when seen through a wide-view 4x loupe. Here, it is important to store the images in a support that allows them to be viewed without removal, so as to expose them to as little dust as possible. A number of solutions are conceivable here:
• Slide frames, with or without glass (Gepe), unfortunately are available for 35 mm and medium format (6 × 6) only. And if projecting 35 mm slides is the norm, it much rarer to do so with 6 × 6 (actual size 56 mm × 56 mm), and almost impossible with larger dimensions. By cropping (i.e., covering parts of the transparency), it is possible to project smaller panoramic format sizes using 35 mm and 6 × 6 frames; but not even transparencies taken with an XPan or a 35 mm Noblex can be projected, since they are too long (66 mm). However, as mentioned earlier, one exception does exist: images taken with a Horizon 202 swing-lens camera. These measure 24 mm × 58 mm long, so they can be put in 6 × 6 frames, but with a loss of one millimeter on each side. Still, this guarantees an original slide presentation!
• Transparent sleeves (e.g., Panodia, Prat) are the most common and practical solution for protecting color transparencies, and are also good for occasional viewing. The sleeves come in PVC and polyethylene, the latter being neutral and more stable. Slide the frame-mounted transparencies or 120 film (in its protective wrap) directly inside the sleeves.
• Black or white mounts, adhesive or nonadhesive, consist of an opaque frame with a window that is clear in front and frosted at the back. The white ones can be marked easily, but the black ones allow for better viewing on a light-box. The mounts can also be arranged in the Panodia sleeves in groups of two, three, or more. And though they are undeniably practical, they exist only in the 24 mm × 66 mm panoramic format – or in other words, for the XPan or the 35 mm Noblex (which are lucky to benefit from them since they happen to be of the same size). Other formats, including the popular 6 × 17, must be custom-made. I describe my method for doing this in the Tip described later.
I made some customized display mounts for my color transparencies, since none are sold for the Noblex 150 format (5 cm × 12 cm). In this way, I can store two transparencies in the Panodia M138 pages.
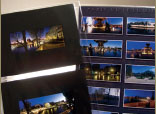
Digital files change the storage habits of photographers a bit. For once, panoramic photographs are not distinguished from normal format photographs since all end up digitally engraved on the same computerized support. Over the past 10 years, the main support was the CD-ROM, which can store 650 million bytes. These progressively are being replaced by the DVD, which allows up to 4.7 Gb, or around seven times more space. Beyond this obvious gain in size, it is necessary to add that the panoramic photographer who works with the joining method in digital creates very large files. Here, it is not an exception to create 300 Mb files, or just two photographs per CD-ROM. Thus, the DVD is not only the support of the future, but also the solution for photographers who need to store very sizeable images.
The small amount of space available on CD-ROM and DVD cases nevertheless allows small representations of images to be printed on the display card.
The great unknown concerning the storage of digital files is the actual life span of the supports. But an even more pressing problem is the average life of the players. Even if a CD-ROM has a life expectancy of a century, it is unlikely that there will be very many players for them in a hundred years. Thus, I believe that the real concern for the photographer of today is to be able to store his or her images on high-quality CD-ROMs or DVDs. These should be able to last until the next generation of computerized support comes along, without any alteration problems, and then allow for a smooth transition to the new technology when the necessary moment arrives. This transfer will take a certain amount of time in the case of large photo-libraries, but will guarantee the conservation of absolutely intact originals. And this, too, is a new phenomenon. Finally, it is a good idea to make two copies of each CD or DVD, storing them in two different places. Unlike traditional photographic image matrices, here it is possible to keep two digital originals; thus, one should not overlook this advantage.
In making my display mounts, I use black Canson paper (240g) in the A4 format (8-1/4″ × 11-3/4″), cut in half. In the middle of each resultant piece, I cut a 5 cm × 12 cm window with a utility knife, this being the format for Noblex 150 color transparencies. I further modify the width of the paper to the format of the Panodia M 138 pages, which are designed to hold two 5″ × 7″ images, one above the other. I leave the transparency in its protective sleeve and I glue this in turn to the Canson paper with Filmoplast ® acid-free paper adhesive. This takes a little bit of time, especially if one has a large group of images, but it’s very inexpensive.

Photo by Pete Simard.