Chapter 9. Transforming data in your browser
This chapter covers
- Creating and editing items in the browser
- Creating new Phoenix routes, controllers, views, and templates
- Using Phoenix’s form-builder helpers to create HTML forms
You can create, edit, and delete auction items and persist the changes in a real database, but you currently have no way to use those functions in the browser. What you need are HTML forms that enable users of your site to do those things—you certainly aren’t giving them access to your IEx console.
In this chapter, you’ll create those forms. As you do so, you’ll touch almost every part of the route that data takes on its way through Phoenix—from the router to the template (we discussed that route in chapter 3).
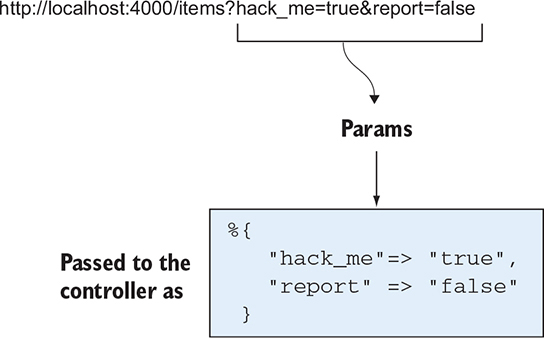
Figure 9.1 shows how a user request travels through Phoenix. You can trace a user request through the server, endpoint, router, controller, view, and template, back to the user. With the exception of the endpoint, you’ll touch on each of these areas in this chapter.
Figure 9.1. A trace of a user request as it goes through Phoenix

9.1. Handling new routes in your application
You need a way for your users to get to the web page they’ll interact with—you need a route that will respond to a request for a URL. The router module for your application can be found at auction_umbrella/apps/auction_web/lib/auction_web/router.ex.
9.1.1. Adding a new route
When you previously listed your database items on a web page, you used an already-existing route and controller (get "/", PageController, :index). These were the defaults set up by the Phoenix mix phx.new.web generator. It’s time for you to branch out a bit and create your own controller, view, and templates to allow users to edit and update items.
The router.ex file contains the module that defines the routes for your website as well as the controllers and routes to route requests to. You need to define a new route (how about /items) that will be the base route for everything you eventually need to do for your items (create, read, update, delete). The Phoenix.Router module has functions that allow you to match on a specific type of request and route. You already have get "/" defined, and you can use the delete/4, get/4, patch/4, post/4, and put/4 functions to define more.
Typically, for a RESTful application like the one you’re building, each of the actions is defined for a resource. The routes in table 9.1 would typically be defined for an item.
Table 9.1. Typical RESTful routes
|
HTTP method |
Handler CRUD action |
Example route |
Typical purpose |
|---|---|---|---|
| GET | index | /items | Provides a listing of Items or an overview of the Item resource |
| GET | new | /items/new | Displays a form to enable a user to provide attributes to create a new Item |
| POST | create | /items | Creates a new Item based on the attributes in the request payload; typically, this is hit from GET /items/new |
| GET | show | /items/:id | Views a single Item based on an identifier (like ID number) |
| GET | edit | /items/:id/edit | Displays a form so a user can provide attributes to edit a single Item identified by :id |
| PATCH or PUT | update | /items/:id | Updates an existing Item based on the attributes in the request payload; typically, this is hit from GET /items/:id/edit |
| DELETE | delete | /items/:id | Deletes an existing Item identified by :id |
Imagine this, though: your number-one user comes to you requesting a special endpoint that only they know about, in order to display specific auction item listings. One of the nice things about Phoenix is that it doesn’t limit you to specific actions or even to typical ideas about how the web works. If you want to allow a user to list items by requesting http://localhost:4000/cow/jumped/over.moon.html.js/forrealtho, you can certainly do that. Other users may scratch their heads, wondering what the web developer was thinking the day they made that route, but it’s entirely possible.
But although that is technically possible, it’s certainly not idiomatic or expected by your users. It would also probably confuse the future you or any developers you eventually bring on to your project. As a result, it’s best to stick to convention. And more good news for the conventionalists among us—Phoenix makes that incredibly easy.
You could define a route for your application for each of the RESTful actions in table 9.1. If you did that, you could use the functions in Phoenix.Router to allow those. For example, Phoenix.Router.get/4 takes the following parameters:
- The path to match from the URL (/items)
- The controller module that should handle the request
- The function in the module to call
- Any further options you’d like to specify (see the documentation for details)
If you defined all of those, your controller would look something like the following listing.
Listing 9.1. Defining a set of RESTful routes for items
defmodule AuctionWeb.Router do
  use AuctionWeb, :router

  pipeline :browser do
    # ...
  end

  scope "/", AuctionWeb do
    pipe_through :browser # Use the default browser stack

    get    "/items",          ItemController, :index        1
    get    "/items/new",      ItemController, :new
    post   "/items",          ItemController, :create
    get    "/items/:id",      ItemController, :show
    get    "/items/:id/edit", ItemController, :edit
    patch  "/items/:id",      ItemController, :update
    put    "/items/:id",      ItemController, :update
    delete "/items/:id",      ItemController, :delete
  end
end
- 1 Because this is nested inside the AuctionWeb scope, Phoenix will look for the function AuctionWeb.ItemController.index.
Those eight lines define the standard RESTful routes for the Item resource. This is so standard and is done so often that Phoenix has provided a function that makes it much easier—Phoenix.Routes.resources/4, which expects the following parameters:
- The base path to match the route on (/items, in this case)
- The controller module that should handle the request
- An optional list of options
- An optional block that allows you to define “nested” resources (which we’ll cover in chapter 11)
Using this function reduces those eight lines to one, as follows.
Listing 9.2. Using Phoenix.Routes.resources/4
defmodule AuctionWeb.Router do
  use AuctionWeb, :router

  pipeline :browser do
    # ...
  end

  scope "/", AuctionWeb do
    pipe_through :browser # Use the default browser stack
    get "/", PageController, :index
    resources "/items", ItemController        1
  end
end
- 1 All the boilerplate from listing 9.1 is in this one line.
The resources "/items", ItemController line creates the same eight routes that the eight lines in listing 9.1 created. This is obviously very nice and time-saving, allowing you to define a whole swath of routes with a single function call. You’ll use this function extensively when you define routes in this book.
The first thing you want to do is list your items on a web page. You’ve done that previously at the "/" route, but let’s also provide the list at "/items", which is where it will live in the long term. (You’ll free up "/" for some awesome marketing copy.)
For now, you only want that one route, but you know that you’ll soon want to expand it to allow most of the RESTful interactions (if not all of them). For that reason, you’ll define your route with the Phoenix.Routes.resources/4 function. But because you currently only want to implement the :index action of that resource, you can pass an option to Phoenix.Routes.resources/4 to direct it to only create that one route. You can do that with the only: [:index]option. Adding that to listing 9.2 will cause it to look like this.
Listing 9.3. Restricting the resource route creation
defmodule AuctionWeb.Router do
  use AuctionWeb, :router

  pipeline :browser do
    # ...
  end

  scope "/", AuctionWeb do
    pipe_through :browser # Use the default browser stack

    get "/", PageController, :index
    resources "/items", ItemController, only: [:index]       1
  end
end
- 1 Only the index action will be recognized by your Phoenix application.
Why limit it to only create the :index action, especially when you know you’ll very quickly implement more of the actions? I think it’s good practice to only permit routes that you have already implemented or are currently implementing. Otherwise, you may get into the flow of implementing one route and forget that you also permitted other options.
Phoenix.Routes.resources/4 also has an except option (which, if you used it, would make your resource declaration option look like except: [:show, :new, :create, :edit, :update, :destroy]). I personally add the actions I’d like to permit through an allow list (using only), rather than block the routes I want to prevent (using except).
9.1.2. Adding a new controller
Now that the route is defined, you need to implement the controller that you directed the route to: AuctionWeb.ItemController. Adding a new controller is relatively easy, especially after you’ve done it a couple of times.
Open a new file located at auction_umbrella/apps/auction_web/lib/auction_web/controllers/item_controller.ex. In that file, define a module as normal (named AuctionWeb.ItemController), and then bring in the code to handle requests for Phoenix (with use AuctionWeb, :controller). Once that’s done, you can start adding functions for your actions. The following listing shows the barebones implementation of a Phoenix controller with no defined actions.
Listing 9.4. Barebones AuctionWeb.ItemController implementation
defmodule AuctionWeb.ItemController do
  use AuctionWeb, :controller               1
end
- 1 Brings in a few helpers that Phoenix requires (look in .../auction_web/lib/auction_web.ex)
This in itself won’t handle any of the actions for the resource route. In the previous section, you told the router that AuctionWeb.ItemController would handle resource requests for /items (but only for the :index action). You need to implement an index/2 function that will handle the request.
A Phoenix controller action is called with two parameters:
- The Plug.Conn struct that handles all the connection information for the request and response
- The parameters of the user request (such as an id or query)
In the case of a call to index, you need the Plug.Conn struct, so you can continue to build up a response to the user request, but you don’t actually care about any parameters the user passed in with their request. This action is specifically built to list the items up for auction, so the user doesn’t have any control over what’s seen. You can thus ignore the params passed to your function.
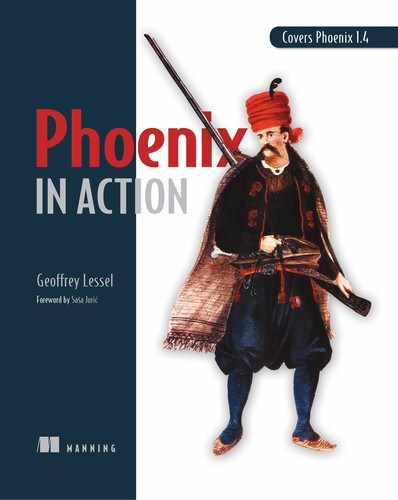
Figure 9.2 illustrates how params are passed into the controller. In this case, you can safely ignore the hack_me and report keys, as you don’t need them to successfully complete the request/response cycle.[1]
If your mind was racing, thinking about controller function definitions and pattern matching on the params, nice job! That’s a more advanced technique that can be very powerful when handling user requests.
Figure 9.2. How params are passed into the controller
You’ve actually already implemented this in the current AuctionWeb.PageController.index/2 function. You just need to copy the code from that function into your new function. The function will fetch the complete list of items in the database and render a view and template as a response. The following listing contains that code for AuctionWeb.ItemController.index/2.
Listing 9.5. Adding index/2 to AuctionWeb.ItemController
defmodule AuctionWeb.ItemController do
  use AuctionWeb, :controller

  def index(conn, _params) do                   1
    items = Auction.list_items()
    render(conn, "index.html", items: items)
  end
end
- 1 Remember, preceding a variable name with an underscore (_) indicates you’re acknowledging it but won’t need it.
As you can see, render will pass conn, index.html, and items to AuctionWeb.ItemView, which you’ll define next.
9.1.3. Adding a new view
As you’ll recall from chapter 6, the Phoenix.Controller.render/3 function passes its parameters to a view module named, in this case, AuctionWeb.ItemView. Phoenix automatically infers the correct view module name based on the controller module name. Typically, the view module is very minimal. All the heavy lifting is done by Phoenix when you add use AuctionWeb, :view to the module definition. Create a new file at auction_umbrella/apps/auction_web/lib/auction_web/views/item_view.ex and add the following code to that view file.
Listing 9.6. Defining AuctionWeb.ItemView
defmodule AuctionWeb.ItemView do
  use AuctionWeb, :view            1
end
That’s it! You can further use this module to add helper functions that you need or want to call in your EEx templates, but you don’t need to add anything for now.
9.1.4. Adding a new template
As explained in chapter 6, the view passes on the Plug.Conn struct along with any other assigns you’ve declared (like @items) to the correct template. Figure 9.3 illustrates what we discussed in chapter 6. You declared the “correct” template when you called render conn, "index.html", items: items in AuctionWeb.ItemController.index/2—it will attempt to render index.html.
Figure 9.3. Reviewing how a controller and template relate
You’re replicating (for now) the page you modified in chapter 6, so you can copy the EEx code from that file to this new one. This template will simply list the items for auction in your database. Create a new file at auction_umbrella/apps/auction_web/lib/auction_web/templates/item/index.html.eex and key in the following code.
Listing 9.7. Listing the items in the database
<ul>
  <%= for item <- @items do %>                                            1
    <li><strong><%= item.title %></strong>: <%= item.description %></li>
  <% end %>
</ul>
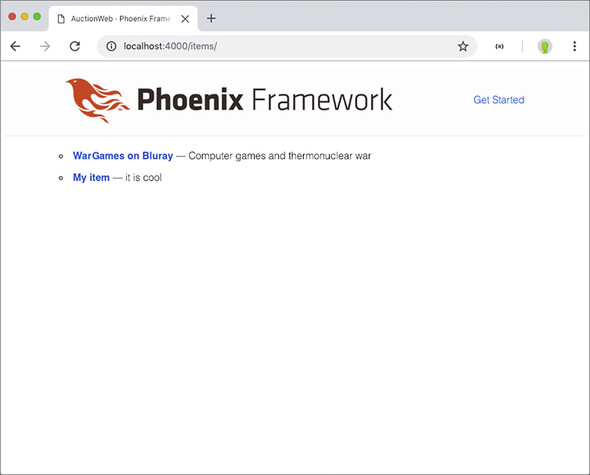
If you start up the Phoenix server with mix phx.server and navigate to http://localhost:4000/items, you’ll see your list of items, just like in chapter 6.
Figure 9.4 shows what I see when I load up the page in my browser.
Figure 9.4. The list of items in your database—in the browser!

9.2. Viewing the details of a single item
A list of items is nice, but if a user wants to bid on an item, they’ll probably want to view the details for that item. Beyond that, you need a page that allows users to bid on individual items. You’ll combine those two pages into a single page based on the item ID. In a RESTful application, that sort of page is typically served by the show action and lives at a path like /items/:id, where :id is the unique identifier of the individual item.
Let’s add that route and page to your application.
9.2.1. Defining the show route and function
In the router file, you’ve already specified that you want RESTful routes for items, but you’ve limited the action to only: [:index]. You need to add :show to that list and then define the AuctionWeb.ItemController.show/2 function to handle the requests.
In the AuctionWeb.Router module, simply append :show to the list of allowed routes for the resource.
Listing 9.8. Adding the :show action to the allowed list
defmodule AuctionWeb.Router do
  use AuctionWeb, :router
  pipeline :browser do
    # ...
  end

  # ...

  scope "/", AuctionWeb do
    pipe_through :browser # Use the default browser stack

    get "/", PageController, :index
    resources "/items", ItemController, only: [:index, :show]     1
  end
end
- 1 Add the resources definition here.
Next, you need to modify AuctionWeb.ItemController to implement a show/2 function. You want the function to do a few things:
- Accept a user request for a specific Item, specified by a unique identifier
- Retrieve that Item from the database using the unique identifier
- Render a web page that shows the details of the Item
Previously, the AuctionWeb.ItemController.index/2 function didn’t care what parameters the user passed in with their request because it made no difference in what was rendered. In the case of show/2, however, you need to know which Item the user requested. That identifier will be passed in a parameter map as the second argument to show/2 (the first argument being the Plug.Conn struct).
As you’ll recall, one of the great things about Elixir is that you can define functions with pattern matching built in. In this case, you’ll define the show/2 function to pattern-match on the params map to ensure that an id is indeed passed in with the request. If a user attempts to load a show page without an id or with some other param (item_id, maybe), the function won’t match, and they’ll receive an error. This will satisfy the first requirement in your list of three things the function should accomplish.
For the second requirement (retrieve the Item from the database), you’ll use the public interface you wrote for dealing with your auction database. In this case, you use Auction.get_item(id) and bind the result to a variable. Finally, you pass that variable to the render/3 function, which will use it to render the web page for the user.
Putting all this together, you can write show/2 as follows.
Listing 9.9. Implementing show/2
defmodule AuctionWeb.ItemController do
  use AuctionWeb, :controller

  # def index...
  def show(conn, %{"id" => id}) do        1
    item = Auction.get_item(id)
    render(conn, "show.html", item: item)
  end
end
- 1 Ensures that an id is present in the params map of the request and binds it to the id variable for use in the function
When you defined your routes with the resources/2 function in listing 9.8, the :show route defined a route like get "/items/:id", ItemController, :show. The :id in the route definition is a pattern-match holder. Anything matching the pattern of /items/* will forward the request to the controller, with whatever’s in * as the id param.
9.2.2. Defining the show.html template
You don’t need to change anything in AuctionWeb.ItemView for your template to be rendered, so you’ll pass right over it and move on to the template itself. You can be as fancy with this template as you like, but for now I’ll present a very simple implementation.
Your template will simply render each of the attributes of the item with an attribute title and value. Because you passed item into the Phoenix.Controller.render/3 function in AuctionWeb.ItemController.show/2, it will be available in your template as @item.
Create a file at auction_umbrella/apps/auction_web/lib/auction_web/templates/item/show.html.eex and write the HTML you’d like. My implementation is in the following listing.
Listing 9.10. Showing the details of an item
<h1><%= @item.title %></h1>       1

<ul>
  <li><strong>Description:</strong> <%= @item.description %></li>
  <li><strong>Auction ends at:</strong> <%= @item.ends_at %></li>
</ul>
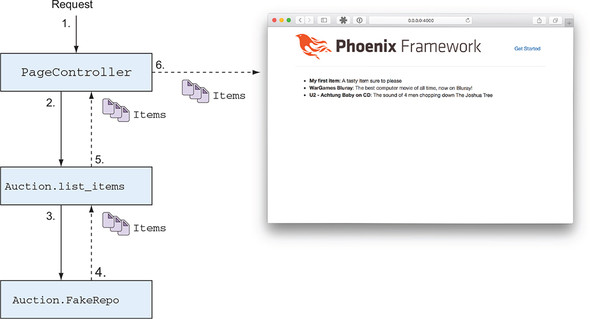
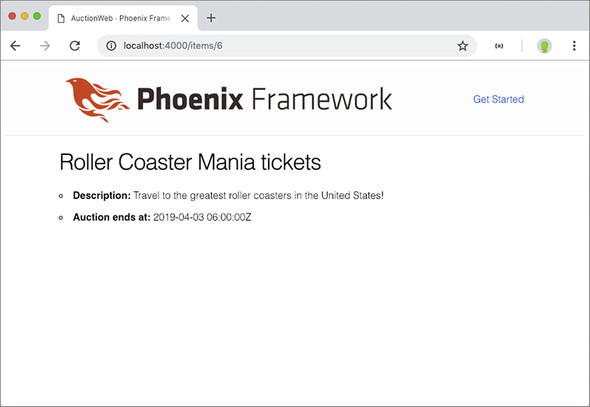
If you point your browser to a URL containing the id of an item in the database, you’ll see something similar to figure 9.5. It’s not the flashiest of pages, but it gets your data onto a web page, which is what you were aiming for.
Figure 9.5. Showing the details of an item
Your next problem is that unless your users know the exact ID of the item they’re interested in, they’ll never be able to see these details. You need to link to the individual item pages from the index page.
9.2.3. Linking to individual items
To link to the individual items, you need to modify the index.html.eex file and use a new helper function that Phoenix provides: Phoenix.HTML.Link.link/2. Phoenix automatically imports Phoenix.HTML.Link into your templates, so you can simply call link/2. link/2 requires two parameters: the text that you’d like the link to be linked from, and some options (importantly including the page to link to).
Something to keep in mind before you actually make the modifications to index.html.eex is that the Phoenix router generates named routes that you can use in your application. To see those routes, their names, and where they link to, you can run mix phx.routes from auction_umbrella/apps/auction_web. This is the output of that command from my local version:
> mix phx.routes
page_path  GET   /           AuctionWeb.PageController :index
item_path  GET   /items      AuctionWeb.ItemController :index
item_path  GET   /items/:id  AuctionWeb.ItemController :show         1
- 1 You’ll only see the resource actions you put into your allow list.
You can see in the last two lines of output that you have a named route: item_path. You can use that named route when you specify the URL to link to in link/2.
Named routes require some parameters of their own:
- The Plug.Conn struct of the request (available in the templates as @conn).
- The action to link to and, if required, an id or a struct that has an id attribute (like an Auction.Item). Because you’re looping through all the items, you can simply pass each item into the named route function so that its own id can be inferred by the function.
With these things in mind, let’s modify your index page so that the names of the auction items are the link’s text. If a user clicks on the name, it will take them to the show page of that item. You can modify index.html.eex as follows.
Listing 9.11. Linking to each item’s own page
<ul>
  <%= for item <- @items do %>
    <li>
      <strong><%= link(item.title, to: Routes.item_path(@conn, :show, item))
      %></strong> -                                                      1
      <%= item.description %>
    </li>
  <% end %>
</ul>
%></strong> - 1
<%= item.description %>
</li>
<% end %>
</ul>
- 1 Uses the item_path helper to generate a link to each item
When I load up http://localhost:4000 locally, I see the page in figure 9.6. It may be a bit hard to tell, with images printed in black and white, but each item name is a blue link that I can click to take me to the show page of that item.
Figure 9.6. Items linked from the index page
9.3. Creating items through web forms
You can view your items in a browser, and you can create and modify items inside an IEx session. What you need now is a way to create and modify items in a browser. Most websites provide a way for users or admins to do that kind of thing through a web form. In this section, you’ll create a web form that allows you to create an item.
The steps in this section will be similar to those for the index action, but they won’t be quite as extensive, because most of the modules have been created already. You’re just going to add to them.
9.3.1. Defining the new and create routes
It’s time to expand the allowed list to include the :new and :create actions. This will increase the HTML methods available in your app to those in table 9.2.
Table 9.2. Implemented RESTful routes
As when you added the :show action, you need to add the :new and :create actions to the allowed list for the items resource. Edit the AuctionWeb.Router module as follows.
Listing 9.12. Adding :new and :create to your items resource
defmodule AuctionWeb.Router do
  use AuctionWeb, :router

  pipeline :browser do
    # ...
  end

  # ...

  scope "/", AuctionWeb do
    pipe_through :browser # Use the default browser stack

    get "/", PageController, :index
    resources "/items", ItemController, only: [:index, :show, :new, :create]1
  end
end
- 1 Add the resources function call here.
This is largely unchanged, but you’ve added new and create to the allow list.
9.3.2. Defining the “new” controller function
With that done, you can move on to creating the controller actions required to handle the requests. You’ll need to implement AuctionWeb.ItemController.new/2 and AuctionWeb.ItemController.create/2. Both of these functions will accept two parameters: the Plug.Conn struct that contains the request and response information, and the map of parameters from the user request.[2] For new/2, you don’t care about the user request params, because you don’t need them to display an empty form for creating a new item. But for create/2, you care a great deal about the user request params—they contain all the information about the item that the user would like to create.
You may be starting to see a pattern in these controller functions—they all have the same required parameters.
You’ll first implement the new/2 function, as it’s the first step in the process of creating a new item. There are two things you need your controller to do:
- Set up a new Auction.Item changeset with no set attributes
- Pass that struct to the template for rendering a form for user input
Why do you want a blank changeset? Phoenix provides some form-builder helpers that allow you to easily track and display errors. When you eventually create an edit/update form, you’d like the form to be the same as the new/create form. For it to be a single implementation, you need a changeset to allow Phoenix’s form-builder helpers to do their thing.
Setting up the changeset will also require some new implementation in your Auction public interface module. But before you head back into that module, you’ll write the controller function with how you’d like the public interface to be used. Then, you’ll implement the function.
All you really need to do in the controller is set up a blank changeset. The following listing calls a function, Auction.new_item/0, that will set up the empty changeset. The second step, passing the struct to the template, will be handled through the Phoenix.Controller.render/3 function. The following listing shows the new/2 function.
Listing 9.13. Implementing AuctionWeb.ItemController.new/2
defmodule AuctionWeb.ItemController do
  # ...
  def new(conn, _params) do
    item = Auction.new_item()                 1
    render(conn, "new.html", item: item)
  end
end
- 1 Sets up a new blank item for the form that will be eventually rendered
Note that Auction.new_item/0 doesn’t yet exist—you need to implement that. All you need it to do is return an empty Auction.Item changeset, and the following listing shows how simple that can be. This module is implemented in auction_umbrella/apps/auction/lib/auction.ex.
Listing 9.14. Implementing Auction.new_item/0
defmodule Auction do
  alias Auction.{Repo, Item}
  # ...
  def new_item, do: Item.changeset(%Item{})        1
end
If you’d like, fire up an IEx session and the Phoenix server with iex -S mix phx.server and look at what Auction.new_item/0 returns:
iex(1)> Auction.new_item()        1
#Ecto.Changeset<
  action: nil,
  changes: %{},
  errors: [title: {"can't be blank", [validation: :required]}],
  data: #Auction.Item<>,
  valid?: false
>
- 1 Calls your newly created function, which returns an Ecto changeset
You can see that you have errors in the changeset because you have no title. You can also see that no changes are being tracked, and the changeset is considered invalid.
There’s also an attribute called action, which tracks what kind of action was attempted on the changeset—in this case nil, because you didn’t attempt to create, update, or delete it. You can use this attribute to conditionally display errors to the user. When you create a brand new changeset with Auction.new_item/0, you have errors, but you don’t want to display those errors to the user (displaying them would be confusing, since they haven’t entered any information yet).
9.3.3. Defining the “new” template
Now that you’ve created the empty changeset and defined the controller function, you can move on to creating the form that will be displayed to the user and accept their input. The Phoenix.HTML.Form module contains a number of helper functions you’ll use to build your form. The documentation has plenty of great examples and usage information,[3] but table 9.3 briefly outlines each of the functions you’ll use.
Table 9.3. Some useful functions in Phoenix.HTML.Form
Create a new file at auction_umbrella/apps/auction_web/lib/auction_web/templates /item/new.html.eex and input the HTML in the following listing. Note that Phoenix brings in a minimal stylesheet to provide some default styling.
Listing 9.15. Creating a template at .../templates/item/new.html.eex
<h1>New Item</h1>

<%= form_for @item, Routes.item_path(@conn, :create), fn f -> %>
  <%= label f, :title %>                                          1
  <%= text_input f, :title %>

  <%= label f, :description %>
  <%= textarea f, :description %>

  <%= label f, :ends_at, "Auction ends at" %>                     2
  <%= datetime_select f, :ends_at %>

  <div>
    <%= submit "Submit" %>
  </div>
<% end %>
- 1 label can automatically generate a human-readable label based on the column name (represented by an atom) provided here.
- 2 Sometimes you may need to provide the full string for the label as the third argument.
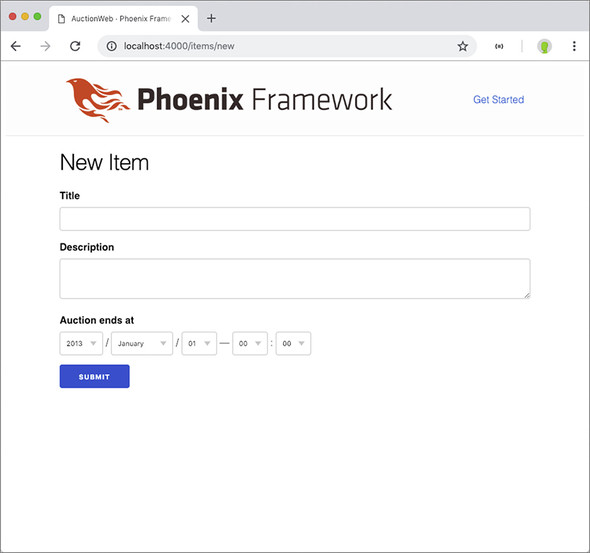
If you start up your Phoenix server (mix phx.server) and load up http://local host:4000/items/new, you’ll see something similar to figure 9.7.
Figure 9.7. Loading http://localhost:4000/items/new after defining the new template
9.3.4. Defining the create controller function
You’ve defined the form that enables users to submit the data required to create a new item, but if you try submitting that form, you’ll get an error. Why? Well, the URL you pointed your form to (item_path(@conn, :create), which is POST /items) doesn’t yet handle requests. You need to define the AuctionWeb.ItemController.create/2 controller function so it can handle those requests, accepting the same parameters as the other controller functions: the Plug.Conn struct and the user parameters submitted in the request.
If you did try out your form before discovering that it would fail, you’d have seen something like the following in the Phoenix server logs:
14:38:29.152 [info] POST /items                                           1
14:38:29.167 [debug] Processing with AuctionWeb.ItemController.create/2   2
  Parameters: %{"_csrf_token" =>
     "ITxiPmdYCzgzJQpsCDZ0BUBSZzJDJgAAMr7L02MBun98IlDSy11J2Q==", "_utf8" =>
     "✓", "item" => %{"description" => "it is cool", "ends_at" => %{"day" =>
     "5", "hour" => "9", "minute" => "0", "month" => "4", "year" => "2021"},
     "title" => "My item"}}
  Pipelines: [:browser]
14:38:29.198 [info] Sent 500 in 46ms                                      3
- 1 Shows the request was received
- 2 Shows which module and function are handling the request
- 3 Shows that Phoenix sent a response along with the response code
For every request that Phoenix handles, you’ll see log statements similar to these. In this case, you can see the parameters that were submitted along with the request. There’s a _csrf_token that ensures the request was submitted from a form that you control (it’s generated automatically by the form_for form-builder function), but the important thing here is the item map, which contains the data submitted with the form. You can see the description, ends_at, and title attributes.
The AuctionWeb.ItemController.create/2 function will care about what’s in the parameters (unlike new/2 and index/2) because all of the user’s submitted form data is in there. You’ll pattern-match on that item map in your function definition, create the item, and redirect the user to the new item’s page.
Listing 9.16. Implementing AuctionWeb.ItemController.create/2
defmodule AuctionWeb.ItemController do
  # ...
  def create(conn, %{"item" => item_params}) do
    {:ok, item} = Auction.insert_item(item_params)            1
    redirect(conn, to: Routes.item_path(conn, :show, item))
  end
end
- 1 Pattern-matches on {:ok, item} to successfully create an item in the database based on the params received
You’re pattern-matching the return value of Auction.insert_item/1 for the success case, and redirecting the connection to the individual item path on success.
What happens in the case of an error (if the Auction.Item was invalid, for example)? For now, you’ll get an error at the controller level because it wouldn’t match the pattern {:ok, item} successfully (it would return {:error, item} instead). You’ll handle the error path momentarily. But first you need to make a small change in your Auction module.
Auction.insert_item/1 was written before you implemented changesets. Now that we’ve discussed changesets, you can modify the function to pass the attributes through a changeset, which will do all the necessary things required of the changeset before the data is inserted into the database. The changes required are very minimal, as shown in the following listing.
Listing 9.17. The new Auction.insert_item/1
defmodule Auction do
  alias Auction.{Repo, Item}
  # ...
  def insert_item(attrs) do
    %Item{}
    |> Item.changeset(attrs)        1
    |> @repo.insert()
  end
end
This changeset will allow you to track the changes and errors you need in order to present them to the user.
With that change made, if you now submit your form with valid data, you should see it flow from the new form page (new) to the individual item page (show). For example, I entered some data into the form in figure 9.8, and I was taken to the page shown in figure 9.9. If you submit the form with bad data (such as an ends_at date in the past), you’ll get an error from the controller.
Figure 9.8. Your filled-out new item form

Figure 9.9. Redirected to the new item’s detail page
This redirection not only indicates to the user that the item was created successfully, but it also gives them a chance to view the details.
Handling errors in the changeset
If the Auction.Item.changeset/2 function determines that the changeset is invalid, Auction.insert_item/1 will return {:error, item}, with item being the changeset with an errors attribute. In the case of an invalid item, you want to rerender the form and notify the user of any errors so they can fix them. You need to make changes in two places: AuctionWeb.ItemController.create/2 and .../templates/item/new .html.eex. In the former, you need to handle the error case and render the form again. In the latter, you need to display any relevant errors.
In the controller, you’ll modify the function to use a case statement, which takes the result of one function and matches that result to potential cases. The first match’s function is executed.
Listing 9.18. Matching the return value of Auction.insert_item/1
defmodule AuctionWeb.ItemController do
  # ...
  def create(conn, %{"item" => item_params}) do
    case Auction.insert_item(item_params) do                               1
      {:ok, item} -> redirect(conn, to: Routes.item_path(conn, :show, item))
      {:error, item} -> render(conn, "new.html", item: item)
    end
  end
end
- 1 Takes the argument provided (the return value of Auction.insert_item) and pattern-matches the result, running the first matched state
As stated in the requirements for this function, if the item is inserted correctly ({:ok, item}), you redirect the user to the item’s show page. If the item isn’t inserted correctly ({:error, item}), you render the new page again. This time, the item variable has a list of errors that need to be corrected to make the changeset valid. You can use that in the template to inform the user.
When you first issued the command mix phx.new, one of the files that was generated for you was AuctionWeb.ErrorHelpers. These helpers can be used in your templates to display errors—in particular AuctionWeb.ErrorHelpers.error_tag/2. error_tag/2 is smart enough to not display the errors unless an action has been attempted on the changeset (an insert, update, or delete). It knows whether or not one has been attempted by looking at the action attribute in the changeset struct. You’ll use error_tag/2 much like you use text_input/2, because it accepts the same inputs: the form and the attribute to display an error for.
You can modify the new.html.eex template to display each field’s errors below the field (see figure 9.10). You’ll also see if there’s an action set for your changeset, and if there is, display an error banner indicating that the form has errors needing correction. The following listing implements these changes.
Listing 9.19. Showing errors on your form
<h1>New Item</h1>

<%= form_for @item, Routes.item_path(@conn, :create), fn f -> %>
  <%= if @item.action do %>                                       1
    <div class="alert alert-danger">
      Unfortunately, there are errors in your
      submission. Please correct them below.
    </div>
  <% end %>

  <%= label f, :title %>
  <%= text_input f, :title %>
  <%= error_tag f, :title %>                                      2

  <%= label f, :description %>
  <%= textarea f, :description %>
  <%= error_tag f, :description %>                                2

  <%= label f, :ends_at, "Auction ends at" %>
  <%= datetime_select f, :ends_at %>
  <%= error_tag f, :ends_at %>                                    2

  <div>
    <%= submit "Submit" %>
  </div>
<% end %>
- 1 If @item.action is defined, you know you have errors, so display this banner.
- 2 These error_tags will display any errors that exist for the field.
Figure 9.10. Errors showing up near the form fields

With these changes made, you can now see the errors below the fields that have them, when someone submits an invalid item.
9.4. Editing items through web forms
The last step you have to cover in this chapter is editing your items through web forms. We’ll move a bit more quickly through this section, because many of the steps are similar to those covered in the previous sections, where you listed, viewed, and created items.
Briefly, these are the steps you’ll take:
- Add the edit and update actions to the list of allowed routes for the resource.
- Define the edit/2 and update/2 controller functions.
- Create an edit.html.eex template file.
9.4.1. Defining the edit and update routes
First, you need to add :edit and :update to the allowed list for the Auction.Item resource.
Listing 9.20. Adding edit and update to the routes
defmodule AuctionWeb.Router do
  # ...
  scope "/", AuctionWeb do
    pipe_through :browser # Use the default browser stack

    get "/", PageController, :index
    resources "/items", ItemController, only: [  1
      :index,                                    1
      :show,                                     1
      :new,                                      1
      :create,                                   1
      :edit,                                     1
      :update                                    1
    ]                                            1
  end
end
- 1 For the sake of line length, I broke the list into multiple lines.
At this point, the only action missing from your only allowed list is :delete. You may be tempted to change the list to except: [:delete] instead of the long list for only, and you can certainly do that. Personally, I rest easier knowing that I have an allowed list as opposed to a block-list protecting my routes.
9.4.2. Defining the “edit” controller function
You’ve got the route defined. Now you just need a controller function to handle the request. We’ll focus first on edit, so that you can present the form to the user before you have to deal with processing it.
By now you probably know the drill: AuctionWeb.ItemController.edit/2 accepts a Plug.Conn struct and a map of the request params. In this case, you need to know which item the user wants to edit, so you’ll grab that information as you pattern-match in the function definition.
Listing 9.21. Defining AuctionWeb.ItemController.edit/2
defmodule AuctionWeb.ItemController do
  # ...
  def edit(conn, %{"id" => id}) do
    item = Auction.edit_item(id)             1
    render(conn, "edit.html", item: item)
  end
end
- 1 This is a new function that you’ll define next.
The controller function is pretty straightforward, but you need to define another function in the Auction module that sets up a changeset for the item with the specified ID. That function is also very straightforward.
Listing 9.22. Defining Auction.edit_item/1
defmodule Auction do
  # ...
  def edit_item(id) do
    get_item(id)
    |> Item.changeset()       1
  end
end
- 1 Returns an Ecto changeset so the changes can be appropriately tracked
Your function returns an Ecto changeset so the changes, errors, and validations can be passed through to each subsequent step.
9.4.3. Defining the edit.html.eex template
You’d ideally like your edit form to be exactly the same as your create form. You could just copy and paste the form code from new.html.eex into edit.html.eex, but then if you needed to make a change to the form in the future, you’d have to change it in both places. Thankfully, Phoenix provides a way to render HTML templates within other HTML templates. That means that you can create form.html.eex and include it in both new.html.eex and edit.html.eex. That way, if any changes are needed in the future, you just have to change one file.
With that in mind, you also need a different way to specify which route you need to point the form to, and even which HTML action is required! More specifically, you need the form to POST to /items when you’re creating a new item, and to PUT or PATCH to /items/:id when you’re updating an item. The function that renders the template can accept a list of assigns you’d like available in the rendered template, just like in a controller. Knowing that, you can pass the route and action that you need the form to point to through the render function and into the form template.
Let’s first edit the new.html.eex template, so you can see what it looks like to render a template within it. You only need to provide the template name and the assigns you’d like available within the template. The following listing shows what your .../templates/item/new.html.eex template should look like.
Listing 9.23. Rendering one template inside another
<h1>New Item</h1>

<%= render("form.html", item: @item, action: Routes.item_path(@conn,
     :create)) %>                                                    1
- 1 Most of the heavy lifting is done inside form.html.eex.
That looks pretty simple, right? The heavy lifting of your form is now done in .../templates/item/form.html.eex. Apart from one small change, as indicated in the following listing, you can just cut and paste the form code from the old version of new.html.eex to form.html.eex.
Listing 9.24. Creating the form template
<%= form_for @item, @action, fn f -> %>            1
  <%= if @item.action do %>
    <div class="alert alert-danger">
      Unfortunately, there are errors in your
      submission. Please correct them below.
    </div>
  <% end %>

  <%= label f, :title %>
  <%= text_input f, :title %>
  <%= error_tag f, :title %>

  <%= label f, :description %>
  <%= textarea f, :description %>
  <%= error_tag f, :description %>

  <%= label f, :ends_at, "Auction ends at" %>
  <%= datetime_select f, :ends_at %>
  <%= error_tag f, :ends_at %>

  <div>
    <%= submit "Submit" %>
  </div>
<% end %>
- 1 Uses the @action assign to allow different routes to be taken, depending on where you render the form
The only change required is on the first line, where you tell form_for/3 where to point the form it generates. Because you passed item_path(@conn, :create) into the template as the @action assign, you can tell form_for/3 that @action contains the information it needs. That also frees you up to call this template from an edit.html.eex template.
The .../templates/item/edit.html.eex template will look as simple as new.html.eex does now.
Listing 9.25. Creating the edit.html.eex template
<h1>Edit <%= @item.data.title %></h1>

<%= render("form.html", item: @item,
                        action: Routes.item_path(@conn, :update, @item.data)) %>1
- 1 Most of the heavy lifting for edit is done inside form.html.eex.
You may have noticed that the edit template is very similar to the new template, with a couple of important differences:
- You use the item’s title in the h1 tag of the page.
- You need to pass the item data to item_path so it knows how to build the :update path (remember that update requires the ID, which it will get from the item).
In both of these cases, you access the attributes through @item.data. It’s forgivable to think that you could just call @item.title to get to it, but remember, @item is a changeset, not an Auction.Item struct. The attributes of the underlying record of the changeset can be accessed through the data attribute of the changeset.
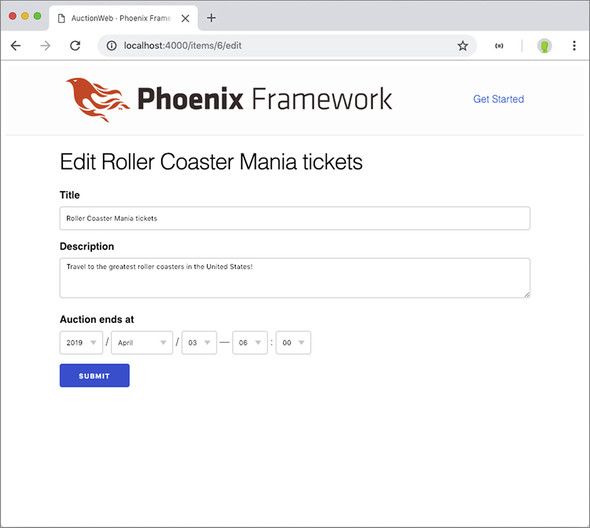
If you navigate to the detail page of an item in your database and tack on /edit in the URL (such as http://localhost:4000/items/4/edit), you’ll see the form you created for new but prefilled with information from the item. Figure 9.11 shows what I see when I edit my “Roller Coaster Mania tickets” item.
Figure 9.11. Editing the “Roller Coaster Mania tickets” item
I can edit any information I need to from here, and click Submit to submit the changes. But so far, that controller function hasn’t been defined (AuctionWeb.ItemController.update/2). Let’s define it now.
9.4.4. Defining AuctionWeb.ItemController.update/2
update/2 will be remarkably similar to create/2—you need the params from the item’s form, but this time you also need the ID of the item to update. You’ll also pattern-match on the success or failure of the submission, so you know where to send your user next. Finally, you’ll also use Auction.update_item/2 instead of Auction .create_item/1.
Listing 9.26. Defining update/2
defmodule AuctionWeb.ItemController do
  # ...
  def update(conn, %{"id" => id, "item" => item_params}) do
    item = Auction.get_item(id)
    case Auction.update_item(item, item_params) do                         1
      {:ok, item} -> redirect(conn, to: Routes.item_path(conn, :show, item))
      {:error, item} -> render(conn, "edit.html", item: item)
    end
  end
end
- 1 A case statement is used here, just as in create.
Looks very familiar, doesn’t it (like a mix between show/2 and create/2)? You’ll find that once you catch on to the main concepts of Phoenix (and Elixir), making it do the things you need will become easier and easier, because a lot of the idioms are the same and patterns repeat themselves.
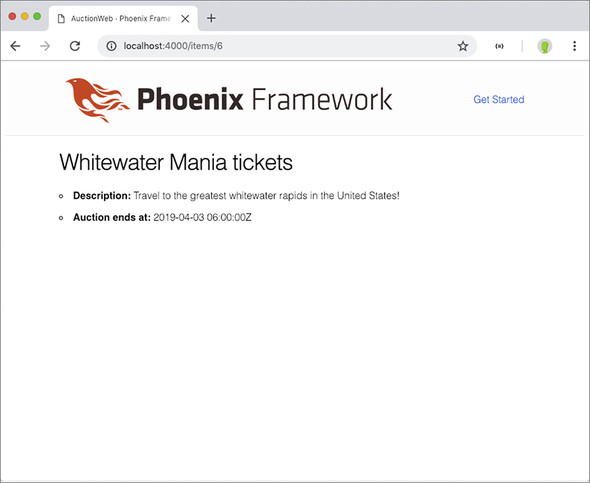
After implementing update, I edited my “Roller Coaster Mania tickets” to be “Whitewater Mania tickets” instead (see figure 9.12).
Figure 9.12. These are Whitewater Mania tickets now.
Wow, you made it! This was a pretty long and deep chapter, but it covered the essential actions that a user will take every day on your websites. There are some other things that would be nice to have on the site (like links to edit each item from their detail pages) but we’ve covered enough in this chapter that you should be able to tackle those things on your own.
Summary
- A good workflow when adding new functionality is to
- Add the routes
- Create the controller (if necessary)
- Create the controller functions
- Create the HTML template
- A RESTful resource contains actions for index, show, new, create, edit, update, and delete.
- Each controller function accepts two parameters: a Plug.Conn struct and the parameters from the user request.
- Phoenix’s built-in form-builder functions make building a form easy—especially when fed a changeset.
- You can render a template inside another template. This can be helpful when more than one template needs to share the same HTML.