Chapter 10. Plugs, assigns, and dealing with session data
This chapter covers
- Creating modules that implement the Plug behavior
- Passing information through your application in assigns
- Handling user authentication
In the past couple of chapters, you’ve created routes and controllers needed for creating, viewing, and editing items for your auction web application. That’s been great, but there’s a glaring hole: bids. How can you have an auction without bids? Furthermore, how can you track who a bid is from if you don’t have users?
Before you expand the number of structs in your application by adding bids (which you’ll do in the next chapter), we’ll discuss creating users in your application. The main focus of this chapter is using session data in your application. Session data will allow you to know when a user is logged in and what pages they’re visiting.
Figure 10.1 illustrates this concept. Each user of your auction site carries session data in their browser that lets you know who they are. Phoenix will use that session data to build a custom response for them as they navigate the site.
Figure 10.1. A user’s session data will help Phoenix build a web page specific to them.
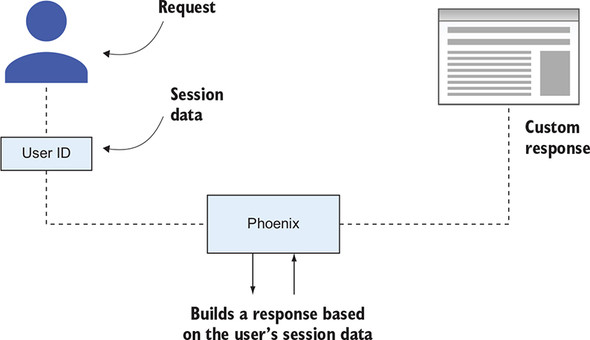
These custom responses could be as simple as displaying their name in a welcome message, or as complex as restricting access to certain parts of the auction site based on their permission level.
10.1. Preparing your application for user registration
The first step you need to take in this chapter is to define what a user is. Will they have usernames or just an email address? What information will you collect about them? These are decisions that you need to make before you allow user registration. And for the most part, these choices will be implemented on the Auction side of your umbrella application (as opposed to the Phoenix-focused AuctionWeb side).
There are three things you need to do in Auction before you move back over to Phoenix:
- Define a schema to describe the data of a user.
- Create a database migration to create a place to hold that user data.
- Define a changeset for the user.
- Define some API endpoints to interact with the user data in the database.
You’ll take them in order.
10.1.1. Defining the Auction.User schema
Your auction site is going to be pretty bare-bone. You don’t need a whole lot of information about your users—just enough to ensure they’re unique and identifiable. A username, email address, and password will be plenty in your case.
All three will be string data types, which you’ve seen before. But you’ll introduce a new schema field type: the virtual type, which won’t actually enter the database. You don’t want to store your users’ passwords in a string column unencrypted, so you’ll encrypt them before they enter the database. You’ll store the encrypted password in a column named hashed_password, but you’ll still accept the user’s password input in a password attribute. Accepting an attribute but not having a spot in the database for it is what makes this a virtual type. This may sound a bit confusing now, but it will make sense when you see the code.
In chapter 7, you covered Ecto migrations and schemas, and you’ll use them again in this section. If you need a reminder on the details of those topics, take a look back at that chapter before moving on here.
You’ve decided on your requirements, so let’s create an Auction.User module. This file will exist at auction_umbrella/apps/auction/lib/auction/user.ex, and the following listing shows the contents of that file with the schema defined.
Listing 10.1. Defining the Auction.User module
defmodule Auction.User do
  use Ecto.Schema

  schema "users" do
    field :username, :string
    field :email_address, :string
    field :password, :string, virtual: true         1
    field :hashed_password, :string
    timestamps()
  end
end
- 1 virtual: true means that this field won’t be persisted in the database.
You can use this schema to help you determine what your migration will look like. Each of these fields (with the exception of password) will be a column in the users table of your database. That table doesn’t yet exist, so you need to create it first.
10.1.2. Creating a migration to create the users table
You could create the migration from scratch, but it’s much nicer to use Ecto’s Mix tasks for the heavy lifting—specifically, mix ecto.gen.migration. You only need to pass it the name of the migration you want to create.
Be sure to run the task from the auction_umbrella/apps/auction/ directory. Here’s what it looked like when I ran the task:
> mix ecto.gen.migration create_users       1
Compiling 1 file (.ex)
Generated auction app
* creating priv/repo/migrations/20181213015711_create_users.exs
- 1 create_users is the name of the migration.
The file this task creates is a template for an Ecto migration—you just need to fill in the details. You already know which fields you want and what data types they are, so populating the migration is pretty easy.
We’ve already discussed most of the functions used in the migration in the following listing, but one hasn’t been mentioned. unique_index/2 is a database constraint that ensures, at a database level, that no two entries will have the same username.
Listing 10.2. The migration to create the users table
defmodule Auction.Repo.Migrations.CreateUsers do
  use Ecto.Migration

  def change do
    create table(:users) do
      add :username, :string
      add :email_address, :string
      add :hashed_password, :string
      timestamps()
    end

    create unique_index(:users, [:username])       1
  end
end
- 1 Creates a database constraint ensuring that username is universally unique
Once the migration has been created and saved, you can migrate the database by running mix ecto.migrate:
> mix ecto.migrate
17:58:19.828 [info]  == Running 20181213015711
     Auction.Repo.Migrations.CreateUsers.change/0 forward       1
17:58:19.829 [info]  create table users
17:58:19.887 [info]  create index users_username_index
17:58:19.893 [info]  == Migrated 20181213015711 in 0.0s
- 1 Ecto knows that you’re migrating your database in the forward direction.
With that, you have a users table in your database!
10.1.3. Defining changesets for Auction.User
You know you want validations for your user data, so you’re going to want a changeset. In fact, you’ll likely want more than one changeset. We covered changesets in previous chapters, but I didn’t mention that you’re not limited to one changeset per module.
Why would you want multiple changesets? Well, each changeset could correspond to different actions the user takes. Suppose there are two different forms that a user of your website will be interacting with:
- A user registration form in which they enter a password
- A user profile form, where they can update profile information apart from a password
You definitely need the password when you create the user, or if the user is changing the password, but otherwise, you won’t want password information to get through to the database. For other edit/update situations, you can restrict the password from reaching the database by using two different changesets: a registration one, and a profile update one. If the password is included in the profile update changeset, you can filter it out so it never gets past the changeset function.
If password is in the list of changes, you hash it using the comeonin hex package, which provides multiple ways to encrypt data. You can read about the different algorithms and how to choose one, but I’ve chosen the Pbkdf2 implementation for the application because it requires no other dependencies on your local machine. comeonin and Pbkdf2 are external dependencies, so you need to add them to the mix.exs file for the auction application. The following listing shows what the auction deps function looks like now.
Listing 10.3. Including comeonin and pbkdf2_elixir as deps
defmodule Auction.MixProject do
  # ...
  defp deps do
    [
      {:ecto_sql, "3.0.3"},
      {:postgrex, "0.14.1"},
      {:comeonin, "~> 4.1"},            1
      {:pbkdf2_elixir, "~> 0.12"}       1
    ]
  end
end
- 1 Add these lines.
After you add those dependencies, make sure you run mix deps.get in your terminal to fetch those new packages.
For the changeset with the password, you’ll want to validate the presence of password, a minimum length (I chose 5 characters), and you’ll want to hash the password if it’s in the list of changes. If it’s not being changed, you won’t worry about hashing it. Keep in mind, password isn’t a field that’s persisted in the database—hashed _password is.
You can make your own changes in a changeset by using the Ecto.Changeset .put_change/3 function. It requires the changeset, the key the change is associated with, and the value of the change. You’ll use that function in your password-hashing function, which will store the hashed version of the password in the hashed_password attribute.
Your normal changeset will also do a few important things:
- Require the username and email_address to be present
- Validate that the username is at least three characters long
- Ensure that the username is unique in the database
Note
The unique_index in the migration will ensure that the username is unique in the database, and unique_constraint in the changeset will convert the database error into a changeset error if it’s not unique.
The following listing puts this all together.
Listing 10.4. Defining the Auction.User changesets
defmodule Auction.User do
  import Ecto.Changeset                                                   1

  # ...

  def changeset(user, params \ %{}) do
    user
    |> cast(params, [:username, :email_address])
    |> validate_required([:username, :email_address, :hashed_password])   2
    |> validate_length(:username, min: 3)
    |> unique_constraint(:username)
  end

  def changeset_with_password(user, params \ %{}) do
    user
    |> cast(params, [:password])
    |> validate_required(:password)
    |> validate_length(:password, min: 5)
    |> validate_confirmation(:password, required: true)
    |> hash_password()
    |> changeset(params)                                                  3
  end

  defp hash_password(%Ecto.Changeset{changes: %{password: password}} =
   changeset) do                                                        4
    changeset
    |> put_change(:hashed_password, Auction.Password.hash(password))
  end
  defp hash_password(changeset), do: changeset
end
changeset) do 4
changeset
|> put_change(:hashed_password, Auction.Password.hash(password))
end
defp hash_password(changeset), do: changeset
end
- 1 Imports Ecto.Changeset
- 2 Ensures a password exists for the user
- 3 Uses the regular changeset inside the one for passwords
- 4 Uses pattern matching in the function definitions to determine if password is in the list of changes
You probably noticed that the preceding code calls a function in a module that doesn’t yet exist. You need to implement Auction.Password.hash/1 next. Why make it its own module? The main reason is that it’s a great place to put all the password-management functions you’ll create. The Auction.User module, itself, shouldn’t be concerned with how you implement password encryption.
Your password module will be small at first, only containing hash/1. In the following listing, you simply hand off the work of hashing the password string to the Pbkdf2 module you included in your list of dependencies. I created this file at auction_umbrella/auction/lib/auction/password.ex.
Listing 10.5. Implementing the beginnings of the Auction.Password module
defmodule Auction.Password do
  import Pbkdf2, only: [hash_pwd_salt: 1]         1

  def hash(password), do:
    hash_pwd_salt(password)                       2
end
- 1 You’re only using the hash_pwd_salt/1 function, so you can limit it to being the only one imported.
- 2 This function comes from Pbkdf2.
The best way to demonstrate how this new function is used is to try it out in an IEx session. Load one up (iex -S mix) and try it out as follows. Put a set of attributes through the general changeset, and then through changeset_with_password.
Listing 10.6. Trying out the changesets in IEx
iex(1)> alias Auction.User
iex(2)> User.changeset(
iex...> %User{},
iex...> %{username: "geo", email_address: "[email protected]",
     password: "security"})
#Ecto.Changeset<
  action: nil,
  changes: %{email_address: "[email protected]", username: "geo"},   1
  errors: [hashed_password: {"can't be blank", [validation: :required]}],
  data: #Auction.User<>,
  valid?: false
>

iex(2)> User.changeset_with_password(
iex...> %User{},
iex...> %{username: "geo", email_address: "[email protected]",
iex...> password: "security", password_confirmation: "security"})
#Ecto.Changeset<
  action: nil,
  changes: %{
    email_address: "[email protected]",
    hashed_password:
     "$2b$12$hvLAzfjp4WQRPC2aTK7YFuOpKBnbWmGkM6wPWRxXyijjW.XsjpzCm",       2
    password: "security",
    username: "geo"
  },
  errors: [],
  data: #Auction.User<>,
  valid?: true
>
- 1 Notice that the password didn’t make it through the filter on your regular changeset because it wasn’t included in your cast call.
- 2 Check out this password hash. This string is what will be persisted to the database.
The hashed_password attribute only shows up in your list of changes when you use the changeset_with_password version of the changeset. Otherwise, no password changes are sent to the database. You can use different changesets, depending on what should (or shouldn’t) make it to your database.
10.1.4. Creating API functions in Auction
You don’t want the Phoenix side of your application to directly access database-related functions—you want to keep a strong boundary between those domains. Just as with Auction.Item, you’ll want some functions in Auction that allow you to look up an Auction.User by ID and by username/password combo, that set up a new user changeset for user registration, and that insert new users into the database. (We won’t be covering editing and updating users in this book, but you’ll learn enough by the end of the chapter to implement those yourself.) Each of these functions will look very similar to the Auction.Item functions.
The following listing shows the functions you need to add to your Auction module.
Listing 10.7. Implementing the new Auction functions
defmodule Auction do
  alias Auction.{Repo, Item, User}      1
  # ...

  def get_user(id), do: @repo.get!(User, id)

  def new_user, do: User.changeset_with_password(%User{})

  def insert_user(params) do
    %User{}
    |> User.changeset_with_password(params)
    |> @repo.insert
  end
end
- 1 Adds Auction.User to the list of aliases
These functions will set you up to deal with users on the Phoenix side of your application umbrella.
10.1.5. User registration web flow
You’ve taken care of the database and business logic for registering users. Now you need a way to allow users to register for an account. That means that you’ll create a new RESTful route, including a new controller, view, and some templates. In chapter 9, we discussed how to create these things, so we’ll move through those steps more quickly in this chapter. If you need a refresher, take a look back at chapter 9.
Let’s start with the router. For now, you’ll only implement the new, create, and show routes for users. You aren’t going to allow the listing of registered users (which would be index), nor are you going to implement an update or change function for user information (which would be a good idea in a real-world application, but space is limited in this book).
Route the requests to the AuctionWeb.UserController, as shown in the following listing.
Listing 10.8. Creating RESTful routes for your User resource
defmodule AuctionWeb.Router do
  # ...
  scope "/", AuctionWeb do
    pipe_through :browser
    # ...
    resources "/users", UserController, only: [:show, :new, :create]      1
  end
end
- 1 Limits your routes to the show, new, and create actions
Once the routes are defined, you need to implement the controller module and create corresponding AuctionWeb.UserController.show/2, new/2, and create/2 functions. As a reminder, each function takes two arguments: a Plug.Conn struct and the request parameters from the user. Just like with AuctionWeb.ItemController, you’ll care about the user parameters for show (the ID of the user) and create (the attributes for the user to create):
- show/2 needs to know the ID of the user to look up and needs to pass the template the user to display.
- new/2 doesn’t need any request parameters but needs to pass an Auction.User changeset to the template for the new user form.
- create/2 needs the attributes the user submitted from the new user form. If the new user is valid, create/2 will redirect the user to the show/2 route. If the user is invalid, it will rerender the form.
Create a new file at auction_umbrella/apps/auction_web/lib/auction_web/controllers/user_controller.ex and implement AuctionWeb.UserController, as in the following listing.
Listing 10.9. The AuctionWeb.UserController controller
defmodule AuctionWeb.UserController do
  use AuctionWeb, :controller

  def show(conn, %{"id" => id}) do
    user = Auction.get_user(id)
    render conn, "show.html", user: user
  end

  def new(conn, _params) do
    user = Auction.new_user()
    render conn, "new.html", user: user
  end

  def create(conn, %{"user" => user_params}) do
    case Auction.insert_user(user_params) do                               1
      {:ok, user} -> redirect conn, to: Routes.user_path(conn, :show, user)
      {:error, user} -> render conn, "new.html", user: user
    end
  end
end
Now that the controller is implemented, the next steps the request data takes is through the view and finally the template. Just as in chapter 9, you’ll create a very minimal AuctionWeb.UserView and then move on to creating your templates. The following listing shows the full implementation of AuctionWeb.UserView. Save it to .../auction_web/views/user_view.ex.
Listing 10.10. AuctionWeb.UserView implementation
defmodule AuctionWeb.UserView do
  use AuctionWeb, :view            1
end
- 1 Brings in all you need for now
You can now create the template and the user form. You aren’t collecting a whole lot of information from your users—the following listing shows all you need in the .../auction_web/templates/user/new.html.eex file.
Listing 10.11. Creating new.html.eex
<h1>User Registration</h1>

<%= form_for @user, Routes.user_path(@conn, :create), fn f -> %>
  <%= if @user.action do %>                                        1
    <div class="alert alert-danger">
      Unfortunately, there are errors in your submission.
       Please correct them below.
    </div>
  <% end %>

  <%= label f, :username %>
  <%= error_tag f, :username %>
  <%= text_input f, :username %>

  <%= label f, :email_address %>
  <%= error_tag f, :email_address %>
  <%= text_input f, :email_address %>

  <%= label f, :password %>
  <%= error_tag f, :password %>
  <%= password_input f, :password %>

  <%= label f, :password_confirmation %>
  <%= error_tag f, :password_confirmation %>
  <%= password_input f, :password_confirmation %>

  <div>
    <%= submit "Submit" %>
  </div>
<% end %>
With this, you have something you can see in your browser. Make sure the Phoenix server is running and visit http://localhost:4000/users/new. You should see something like figure 10.2.
Figure 10.2. The user registration form

If you fill out the form, you’ll get an error because you haven’t yet created the show.html.eex template—but if you get that error, it means the form submission successfully created the user and redirected correctly. If there are any validation errors, the form will be rerendered with error messages accompanying the fields that have errors.
You don’t need a really fancy page for AuctionWeb.UserController.show/2. Just like the item’s show page, you only need a listing of the attributes and their values, as in figure 10.3. The following listing shows how I implemented this (in .../auction_web/templates/user/show.html.eex).
Listing 10.12. The user details page
<h1>User details</h1>

<dl>
  <dt>Username</dt>
  <dd><%= @user.username %></dd>
  <br />
  <dt>Email address</dt>
  <dd><%= @user.email_address %></dd>        1
</dl>
- 1 You don’t need to show any further detail at this point in your app’s life.
Figure 10.3. Viewing the details of the new user
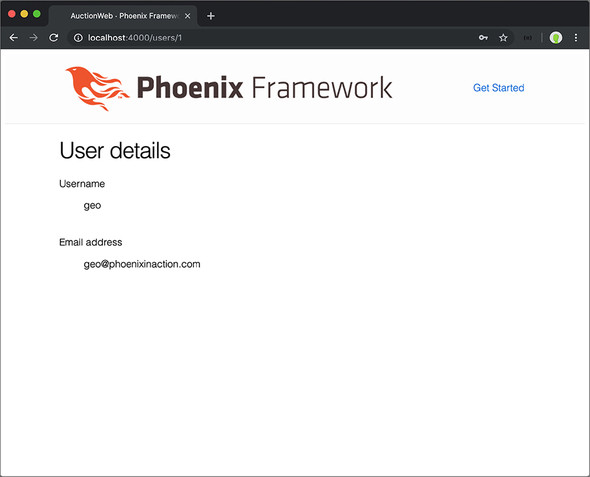
Once you save that file and reload the page, you’ll see something like figure 10.3 (only with your information and not mine).
10.2. Handling user login and sessions
What you’ve created so far in this chapter is pretty cool, but there’s a small problem: any user can see the details of any other user if they know the other user’s ID number. Nothing protects a user’s information because no permissions are checked before loading the information. In the real world, you want to limit who can view a user’s information to that user.
How can you know who’s viewing the page? Right now, you can’t. You need to ask a user to log in and then track them as they navigate the site. Once you know who’s viewing a page, you can limit which pages they can see and what’s displayed on those pages.
To track a user from request to request, you need to create a Plug.Session for the user when they log in. In that session, you store their user_id. On each web page load, you look up the user based on that user_id and verify that they’re on an allowed page and possibly modify the page to show them only what they’re allowed to see.
The good news is that Phoenix has session support built-in—you don’t have to do anything. Beyond that, the data in the session can be encrypted if you want to keep your users’ prying eyes out of the data you store in there. If you open .../auction_web/endpoint.ex, you’ll see all the plugs that the connection is fed through before it hits the router. One of those is Plug.Session, shown in the following listing, and it’s generated by default.
Listing 10.13. The section of endpoint.ex that sets up your session
defmodule AuctionWeb.Endpoint do
  # ...

  # The session will be stored in the cookie and signed,
  # this means its contents can be read but not tampered with.
  # Set :encryption_salt if you would also like to encrypt it.    1
  plug Plug.Session,
    store: :cookie,
    key: "_auction_web_key",
    signing_salt: "T/6rc89M"                                      2

  # ...
end
- 1 You can encrypt your session by setting :encryption_salt here.
- 2 Your signing_salt will be different than mine. Security!
You can also see, in your router module (at .../auction_web/router.ex), that the default browser pipeline runs through a plug named :fetch_session. That plug sets up the session so it can be read from and written to within the Plug.Conn struct that passes from point to point during a request.
You’ll do a couple of things in this section to support user logins:
- Create a new route and accompanying controller, functions, view, and templates for /login and /logout.
- Insert the user user_id into the session cookie if the login was successful.
10.2.1. Creating the route, controller, view, and templates for logging in and out
You should be pretty familiar with the flow at this point, so I’ll quickly outline how I implemented each of these. We’ll come back to anything that you haven’t covered previously. The goal here is to get a lot of the boilerplate out of the way before diving into the meat of this section.
I named the controller SessionController and used the routes login and logout.
Listing 10.14. Adding new routes in .../auction_web/router.ex
defmodule AuctionWeb.Router do
  # ...

  scope "/", AuctionWeb do
    # ... user and item resources
    get "/login", SessionController, :new              1
    post "/login", SessionController, :create          1
    delete "/logout", SessionController, :delete       1
  end
end
- 1 I used three of the RESTful resource routes, but split them out into individual definitions (instead of using resources/4) in order to use specific routes for them.
Instead of using resources "/sessions", you want custom names for the login and logout routes. In such cases, it can be easier to specify them individually, as in the preceding listing.
The only function you need to implement at the moment is new, shown in the following listing.
Listing 10.15. Creating .../auction_web/controllers/session_controller.ex
defmodule AuctionWeb.SessionController do
  use AuctionWeb, :controller

  def new(conn, _params) do
    render conn, "new.html"
  end

  def create(conn, %{"user" => user}) do
    # you'll implement this later in the chapter      1
  end

  def delete(conn, _params) do
    # you'll implement this later in the chapter      b
  end
end
The new function will render the new.html.eex template through SessionView, created in the following listing.
Listing 10.16. Creating .../auction_web/views/session_view.ex
defmodule AuctionWeb.SessionView do
  use AuctionWeb, :view                1
end
- 1 Brings in everything you need for your view
Finally, you need to build the actual login form in apps/auction_web/templates/session/new.html.eex.
Listing 10.17. Creating .../auction_web/templates/session/new.html.eex
<h1>Log In</h1> <%= form_for @conn, Routes.session_path(@conn, :create), [as: :user],
- 1 This version of form_for accepts a connection instead of a changeset. as: :user will namespace the fields under “user” when it’s POSTed to the server.
These additions give you a solid groundwork upon which you can build the session-handling capabilities of your application. You should be familiar enough with Phoenix at this point to understand what’s happening in each of the preceding listings. Now that those are out of the way, let’s dive into something new.
10.2.2. Implementing the dirty details of sessions and authentication
You’ve implemented the things you need to bring up the login form, but we haven’t yet discussed how to check whether the username and password supplied by the user matches an existing user. Beyond that, if it does relate to an actual user, how do you log them in? You’ll implement those things in this section.
If you load http://localhost:4000/login (after ensuring that your Phoenix server is running), you’ll see the page in figure 10.4.
Figure 10.4. The user login page
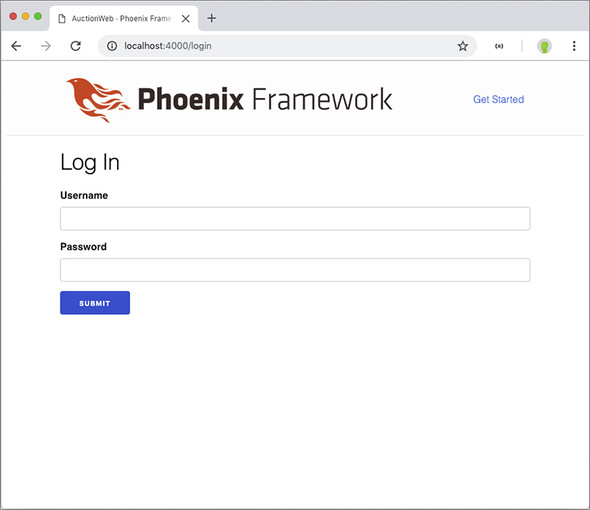
If you submit that form, however, you’ll get an error, because you have yet to implement the AuctionWeb.SessionController.create/2 function. Here’s how this function should work:
- If a user can be found with the username/password combination that was submitted, you store the user_id in the session.
- If a user can’t be found, you set a generic error message in the flash and render the login form again. The flash is a great place to store temporary messages for the user.
To look up a user based on the submitted username and password, you also need to implement a new function in the Auction API module. This function should return the Auction.User if one is found, or return false (or, really, anything else) if one isn’t found.
First, let’s write the controller to match how this API should work. The following listing implements the previous points.
Listing 10.18. Implementing AuctionWeb.SessionController.create/2
defmodule AuctionWeb.SessionController do
  def create(conn, %{"user" => %{"username" => username, "password" =>
   password}}) do
    case Auction.get_user_by_username_and_password(username, password) do 1
      %Auction.User{} = user ->                                           2
        conn
        |> put_session(:user_id, user.id)                                 3
        |> put_flash(:info, "Successfully logged in")
        |> redirect(to: Routes.user_path(conn, :show, user))
      _ ->                                                                4
        conn
        |> put_flash(:error, "That username and
         password combination cannot be found")
        |> render("new.html")
    end
  end
end
- 1 You’ll implement this function next.
- 2 Pattern-matches against %Auction.User{} struct and binds that to user for use in the function that follows
- 3 Plug.Conn.put_session/3 stores a value for a key in a conn.
- 4 This pattern (_) matches anything else.
Now you need to think about how Auction.get_user_by_username_and_password/2 should work:
- Attempt to retrieve an Auction.User from the database with the supplied username.
- If one exists, verify that the password matches the hashed password stored in the database.
- If it matches, return the Auction.User record.
- If it doesn’t match, return false.
- If one doesn’t exist, pretend you’re doing the work of hashing a password to check for its existence, and return false.
Figure 10.5 offers a visual representation of the decision tree your code will run through.
Figure 10.5. The decision tree for the authentication module

You may be wondering about the third step: why pretend to hash a password if a user doesn’t even exist in the database? The answer is to hamper would-be attackers on your site. Some web-attack software is so precise it can detect minute differences in the speed of responses from the server. If you didn’t make the server do the work of hashing a password when you couldn’t find a user, some software could detect the shorter request/response cycle (resulting from not checking a password hash) and would know that the user wasn’t found for the supplied username.
This is also why you display only a generic error message to the user. You don’t want the requester to know that the username was found and the password was wrong. That would lead to an attacker knowing one of the two things that keep unauthorized people out of an account. This is a common-enough practice (or should be) that the pbkdf2_elixir package you’re using for hashing includes a dummy hashing function. You’ll utilize it in your function.
In keeping with the spirit of having your modules worry about as few things as possible, you’ll offload the password-hashing activities to the Auction.Password module. You’ll implement those functions momentarily. For now, let’s write the other functionality in the Auction.get_user_by_username_and_password/2 function.
Listing 10.19. Implementing Auction.get_user_by_username_and_password/2
defmodule Auction do
  alias Auction.{Repo, Item, User, Password}               1
  @repo Repo
  # ...

  def get_user_by_username_and_password(username, password) do
    with user when not is_nil(user) <- @repo.get_by(User, %{username:
     username}),
         true <- Password.verify_with_hash(password, user.hashed_password) do
      user
    else
      _ -> Password.dummy_verify
    end
  end
end
- 1 Adds Auction.Password to the list of aliases
You now know enough about how your functions will work that you can implement Auction.Password.verify_with_hash/2 and Auction.Password.dummy_verify/0. Just like Auction.Password.hash/1, your functions will be simple wrappers around functions provided by your hashing package of choice, pbkdf2_elixir. The following listing shows the full module.
Listing 10.20. Implementing more of Auction.Password
defmodule Auction.Password do
  import Pbkdf2                                  1

  def hash(password), do:
    hash_pwd_salt(password)                      2

  def verify_with_hash(password, hash), do:
    verify_pass(password, hash)                  2

  def dummy_verify, do: no_user_verify()         2
end
- 1 You’re now using most of the functions in the Pbkdf2 module, so you can remove the only limitation.
- 2 These functions come from Pbkdf2.
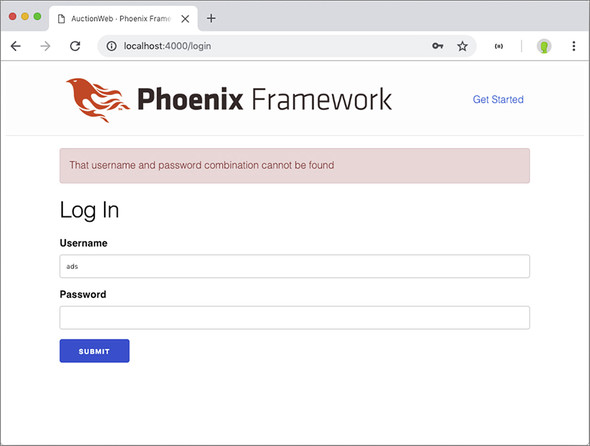
You’ve implemented enough now that you can try submitting the login form at http://localhost:4000/login. I suggest submitting the form with invalid information first, to check out the error message you receive. Figure 10.6 shows what I received.
Figure 10.6. Submitting invalid information to the login form
If you submit the form with the username and password you created earlier, your controller should successfully redirect you to your user details page and inform you of your successful login (see figure 10.7).
Figure 10.7. Redirected to the user details page

You may be wondering where those flash messages are being rendered—you didn’t implement them. One piece of the HTML that’s rendered as a response is the layout. By default, that layout is located at .../auction_web/templates/layout/app.html.eex, and in that file the :error and :info flashes are generated for you. The layout wraps each page’s template, so this would be a great place to display the login info for a logged-in user, or a link to log in if they haven’t already.
10.3. Plugs
I’m excited. I’m excited for you because you get to learn about plugs—potentially for the first time. Plugs are crazy simple and very powerful, so—for safety—strap in and read on.
You need a way to get the user information on each page request for authentication and to customize what HTML is returned to the user. You’ve saved the user_id in the session cookie, which is stored in the user’s browser memory, so ideally you can use that to look up the user and provide the user information for every request.
This focus on things that happen on every request (or nearly every request) brings us to plugs. You’ve undoubtedly noticed that the AuctionWeb.Endpoint and AuctionWeb.Router modules are littered with calls to plug :this_function and plug ThatModule. A Plug is simply a behavior that accepts a connection request (the Plug.Conn struct that’s passed into every controller function), transforms it in some way, and then passes it on. There are two types of plugs: functions and modules.
For a function to be considered a Plug, it has to do two things:
- Accept two parameters: a Plug.Conn struct and options
- Return a Plug.Conn struct
For a module to be considered a Plug, it also needs to do two things:
- Define an init/1 function that initializes any arguments or options for the plug
- Define a call/2 function that does what the function version of a Plug does: accepts two parameters and returns a Plug.Conn struct
The idea and implementation of plugs is simple yet extremely powerful. How powerful, you may wonder? Almost the entire journey a request/response cycle takes throughout the Phoenix framework is handled by plugs. You could build your own web framework by implementing a series of plugs if you’re so inclined. There’s nothing stopping you from plugging your own plug into the cycle to set up whatever needs setting up.
Function plugs are good for small tasks, but it’s nice to contain implementations of ideas, like plugs, in their own modules. For that reason, you’ll implement your authentication plug in its own module. This plug should check for the existence of a user_id in the session, and if it’s there, put that user record into the conn as an assign (which you can then access in a template).
Given this data flow, you can implement a module plug as follows. I created this module at .../lib/auction_web/authenticator.ex.
Listing 10.21. Creating an authentication module plug
defmodule AuctionWeb.Authenticator do
  import Plug.Conn

  def init(opts), do: opts        1

  def call(conn, _opts) do        1
    user =
      conn
      |> get_session(:user_id)
      |> case do
        nil -> nil
        id -> Auction.get_user(id)
      end
    assign(conn, :current_user, user)
  end
end
Plug.Conn.get_session(conn, :user) returns either an Auction.User record or nil. If it’s not nil, you retrieve the user by their id. Either way, you store that as the current_user in the connection conn. Any function that handles the connection conn after this plug will have the current_user information available.
The next question is, “Where do you plug this thing in?” You want this plug to run on every connection request that’s made from a browser, so the perfect place would be in the browser pipeline in the router. The current browser pipeline is shown in the following listing.
Listing 10.22. The current browser pipeline
defmodule AuctionWeb.Router do
  use AuctionWeb, :router

  pipeline :browser do
    plug :accepts, ["html"]
    plug :fetch_session
    plug :fetch_flash
    plug :protect_from_forgery
    plug :put_secure_browser_headers
  end
  # ...
  scope "/", AuctionWeb do
    pipe_through :browser           1
    # ...
  end
end
- 1 You currently route all your requests through the browser pipeline.
Every request that goes through the / top-level route is piped through this browser pipeline. You need to fetch the session before you try to access it in your plug (with Plug.Conn.get_session/2), so perhaps the best place to put the authenticator is at the end of that browser pipeline.
The following listing shows the authenticator plug in the pipeline.
Listing 10.23. Adding the authenticator plug to the browser pipeline
defmodule AuctionWeb.Router do
  use AuctionWeb, :router

  pipeline :browser do
    plug :accepts, ["html"]
    plug :fetch_session
    plug :fetch_flash
    plug :protect_from_forgery
    plug :put_secure_browser_headers
    plug AuctionWeb.Authenticator           1
  end
  # ...
end
- 1 Add the plug here.
When the connection finally hits the plug AuctionWeb.Authenticator line, it knows to call init/1 and then call/2 from that module. As long as you stick to the Plug contract, your module can be plugged in to the application.
Now you can do things like check to see if the user is logged in before displaying a login link. Or you could welcome them by name. Or you could limit their viewing of user profiles.
Let’s implement the first item in that list: if a user isn’t logged in, display a login link in the header area (and some other navigation).
10.4. Adding site navigation
Right now, a user would have to be pretty familiar with the structure of your site to know how to navigate it. The only links you’ve provided users with so far are links to item details. Clearly, users will need to do more than that. What you need is to display a simple navigation header on each page of the site as a user navigates.
You could add the same code to each view template or even render a shared partial template on each of those pages, but a better idea is to edit the layout template. The layout template is like the outer peel of your templates. It renders first and then renders your view template inside it (see figure 10.8). The layout template is where the Phoenix Framework logo and the Get Started link, which are currently rendered on every page of your site, come from.
Figure 10.8. The layout template wraps every page template of your site.

By default, the template that’s rendered on each request is the app.html.eex template, found at .../auction_web/templates/layout/app.html.eex. I say by default because you can configure your controller or controller functions to render themselves inside a different template if you like, though we won’t cover that in this book.
When you open that file for editing, you’ll see all the HTML boilerplate, including the html, head, and body tags that make up the shell of your site. For now, you’ll add some links to the main areas of the site (/items and /login if users aren’t logged in; /items, /users/:id, and /logout if they are logged in). You’re likely a better designer than I am, so feel free to put your links in a different spot—I’m putting mine just after the closing header tag (</header>).
You can check to see if the user is logged in by looking at the value of @current_user in the layout template. If it’s not nil, it’s a user (because the connection has gone through the authenticator plug). The following listing shows a snippet of my implementation (the part just after the </header> tag).
Listing 10.24. Rendering site navigation
<div class="container" style="border-bottom: 1px solid #777777;
     margin-bottom: 2rem; padding-bottom: 1rem;">
  <%= link "Items", to: Routes.item_path(@conn, :index) %>
  |
  <%= if @current_user do %>
    Logged in as <%= link @current_user.username,
     to: Routes.user_path(@conn, :show, @current_user) %>
    |
    <%= link "Log out", to: Routes.session_path(@conn, :delete), method:
     :delete %>                                                          1
  <% else %>
    <%= link "login", to: Routes.session_path(@conn, :new) %>
  <% end %>
</div>
- 1 Specifies the :delete method for the link because you defined the route to listen for :delete.
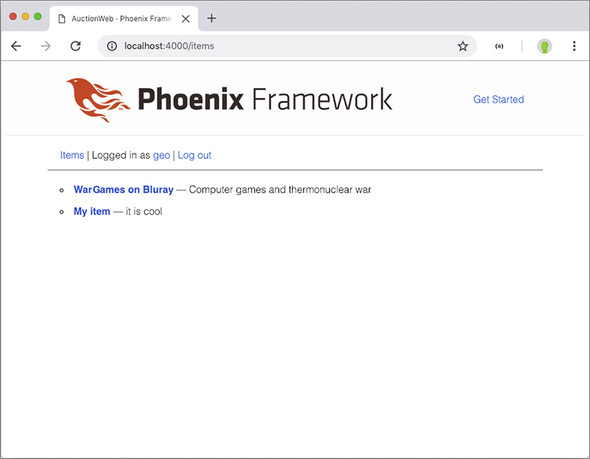
Figure 10.9 shows what my browser renders before I’m logged in, and figure 10.10 shows what it renders after I’m logged in.
Figure 10.9. Navigation when logged out
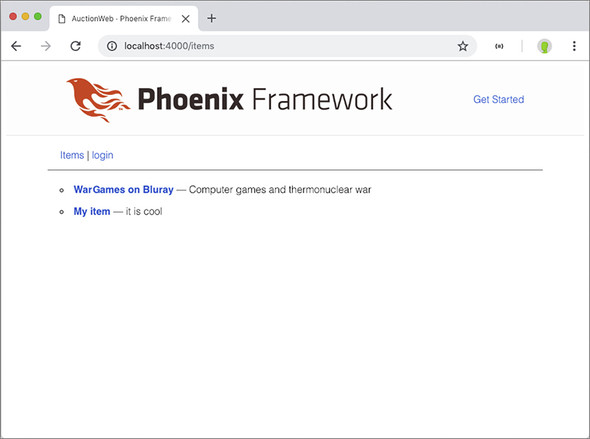
Figure 10.10. Navigation when logged in
You’ve now set up your site to display different navigational links depending on whether a user is logged in or not. You can use similar logic in your views to display navigation paths based on any number of conditions.
10.4.1. Implementing the log out function
You have a link to log out, but if you click on that link, you’ll get an error. AuctionWeb.SessionController.delete/2 is the last session controller function you need to implement. You’ll use a number of functions from Plug.Conn to log out your user. You’ll do the following things:
- Clear the session.
- Drop it from the response.
- Redirect the user to the list of items.
The following listing shows how.
Listing 10.25. Logging the user out by dropping their session
defmodule AuctionWeb.SessionController do
  use AuctionWeb, :controller
  # ...
  def delete(conn, _params) do
    conn
    |> clear_session()
    |> configure_session(drop: true)                  1
    |> redirect(to: Routes.item_path(conn, :index))
  end
end
- 1 Dropping the session means it’s not included in your response to the user.
This will clear any cookies in the user’s browser of data that would indicate that they’re logged in to the site. You’ll then treat them as a visitor.
10.5. Restricting users from certain pages
We’ve covered a lot in this chapter and gone a long way toward locking your system down, but we need to cover one final thing: if a user tries to view the details of another user, you want to do the following:
- Disallow it.
- Redirect the user to the items page.
- Show the user a message in the error flash.
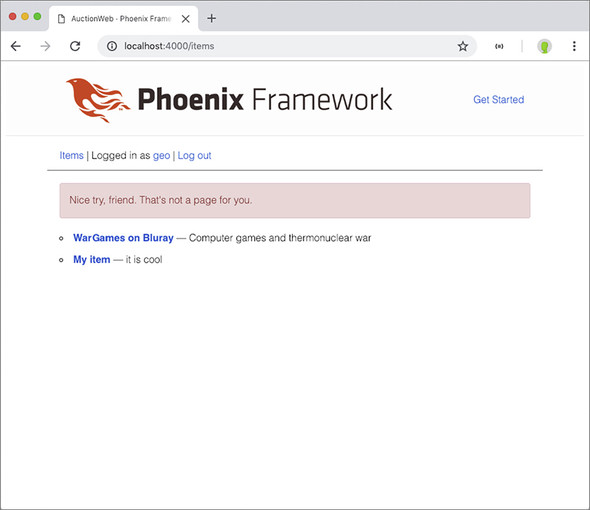
Figure 10.11 shows what my implementation generates in that situation.
Figure 10.11. Protecting user profiles
One way to do that is to check the current_user in the assign. If it’s nil, the user shouldn’t be on any user page. If it’s an Auction.User, then you compare its id with the id of the requested user. If they’re equal, you let the user in because they’re viewing their own profile. If they’re not equal, you send the user packing.
You’ll split out the authorization check into a separate function so you can use it later in some other spot if you want. Plus, that allows you to implement a plug as a function. Open your AuctionWeb.UserController and modify it with the following code.
Listing 10.26. Restricting a user from accessing another user’s profile
defmodule AuctionWeb.UserController do
  use AuctionWeb, :controller
  plug :prevent_unauthorized_access when action in [:show]              1

  def show(conn, %{"id" => id}) do
    user = Auction.get_user(id)
    render(conn, "show.html", user: user)
  end

  # ...

  defp prevent_unauthorized_access(conn, _opts) do
    current_user = Map.get(conn.assigns, :current_user)

    requested_user_id =
      conn.params
      |> Map.get("id")
      |> String.to_integer()

    if current_user == nil || current_user.id != requested_user_id do   2
      conn
      |> put_flash(:error, "Nice try, friend. That's not a page for you.")
      |> redirect(to: Routes.item_path(conn, :index))
      |> halt()                                                         3
    else
      conn                                                              4
    end
  end
end
- 1 Limits the plug to only run when you’re handling the :show action
- 2 Checks to see if no user is logged in or if the logged-in user’s ID isn’t the same as the requested ID
- 3 Tells the plugs to stop processing the request
- 4 If access is allowed, you return the original conn untouched (a Plug has to return a Plug.Conn).
Whenever a user tries to load someone else’s profile, or when a logged out user tries to access any user profile, they’ll be redirected to the list of items with an error message. When I attempt to do either one of those things, I get the page in figure 10.11. Use a pattern like this whenever you need to restrict access to certain areas of your site.
One of the benefits of implementing these checks in a plug is that you can put them in their own module or use them in other areas of your site. The function in listing 10.26 is specific to looking at user profiles, so it probably won’t be useful in other areas as it is, but you can use similar ideas all over your site.
For now, we’ll leave this topic and move on. But the next chapter will again use the idea of tracking users as they navigate your site—we’ll discuss allowing users to create and bid on items.
Summary
- Use virtual columns in a schema to keep data from being persisted in a database.
- Never store user passwords in your database without first encrypting them. When displaying error messages after a login attempt, provide as few identifying details as possible.
- You can create multiple changesets for a single module and focus those changesets to only allow certain attributes through, based on the situation.
- You can track a user with a session cookie as they navigate your site. By default, it’s signed but not encrypted, meaning the contents can be viewed but not tampered with.
- Plugs are extremely powerful even though their behavior “contract” is very simple. Almost the entire request/response cycle in Phoenix is processed with plugs.