In This Chapter
Understanding the Content panel
Using the Content panel to add artwork to images
If you consider yourself a bit on the noncreative side, don't worry. Elements has a huge collection of predefined artwork you can add to your images. This chapter takes a peek at this predefined artwork, but for more on how to integrate your photos with the kinds of decorative details Elements offers, check out Book IX, Chapters 1 and 2, where we talk in more detail about creating projects and sharing files.
Rather than letting you create textures, frames, and background designs on your own, Elements stores a huge amount of prefab artwork. All this is available to you when you are editing images and creating presentations. In this chapter, we cover the Content panel and all the options you have to use the artwork and effects that Elements puts at your fingertips.
When you launch Elements you won't see the Content panel. You choose Window
The Content panel contains two drop-down menus and a set of icons used for sorting the available artwork. When you choose one item from the first drop-down list, the second list reflects choices within the primary category. For example, choose By Type and the second drop-down list displays menu items within the Type category.

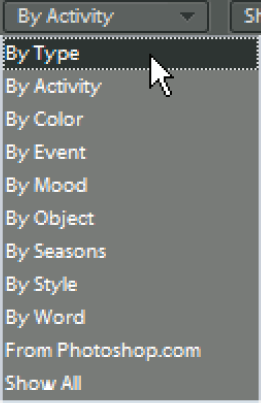
Click the first drop-down list, and you find a set of different categories, as shown in Figure BC2-2. As you select one of these categories, the second drop-down list changes to reflect subcategory items. The categories and their respective subcategories include
Type: Click By Type and the subcategory choices appear as shown in Figure BC2-3. You can choose items such as background, frames, shapes, text, and so on.
Activity: Activities shown in Figure BC2-4 display artwork related to things such as cooking, gardening, home improvement, movies, and storytelling.
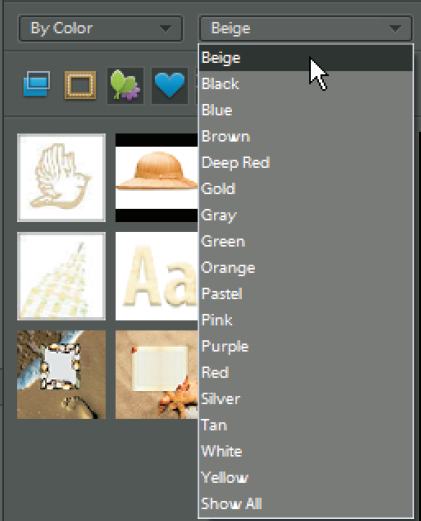
Color: Click By Color, as shown in Figure BC2-5, and you see options related to various color schemes.
Event: Events shown in Figure BC2-6 hold a vast number of activity events, such as birthdays, various USA holidays, school activities, sports activities, and more.
Mood: The list shown in Figure BC2-7 displays artwork relative to emotions, such as adventurous, fun, formal, relaxed, romantic, and so on.
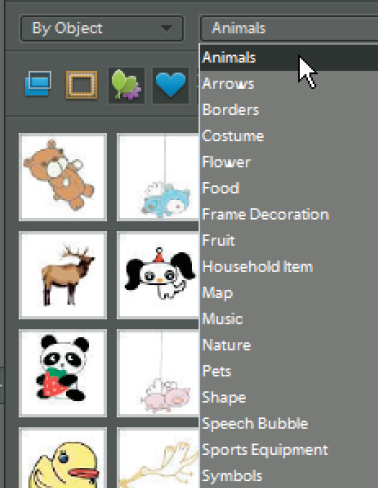
Object: The list shown in Figure BC2-8 provides items such as graphic elements, flowers, decorations, music, shapes, symbols, and more.
Seasons: Open the list shown in Figure BC2-9 and choose from one of the four seasons for all your spring, summer, fall, and winter artwork.
Style: The By Style group shown in Figure BC2-10 is a miscellaneous list of items such as cartoons, decorative, kids, pastels, patterns, photographic, scrapbook, textures, and more.
By Word: Choose By Word, as shown in Figure BC2-11, and the second list changes to a text box where you type a search word used for searching metadata. For example, if you want to use some arrowheads, type arrow in the text box and click the Find button. The results display arrowheads artwork.
From Photoshop.com: Choose From Photoshop.com, as shown in Figure BC2-12, and the list displays artwork uploaded to your Photoshop.com library.
Show All: Click Show All, as shown in Figure BC2-13, and no subcategory items are available to choose. The Show All category displays all artwork from all categories.


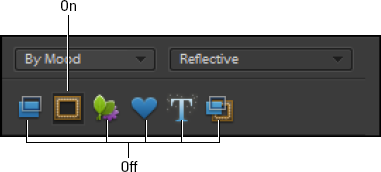
You have several filter categories you can use to show/hide items displayed after choosing a category and subcategory. When you select a filter, you turn the filter on/off. You have to look closely at the icons to see whether they are on or off. If the icon appears indented and sporting a tiny highlight, it is on. If it appears without a highlight and indentation, it is off.
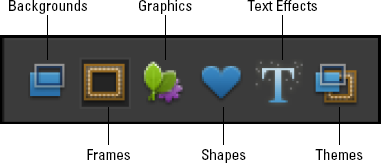
The different filter options are available to you by clicking the icons shown in Figure BC2-14. These include
Backgrounds: Click this item to turn off all background designs. Backgrounds might be textures you want to add behind images containing transparent areas or when creating projects such as greeting cards. For more information on creating projects and greeting cards, see Book IX, Chapter 1.
Frames: Click this item to hide all frames. Elements provides you with an assortment of frame designs you can use for framing your pictures.
Graphics: Click this item to hide all graphic designs. For more information on using graphics in Elements, see Book V, Chapter 1.
Shapes. Click this item to hide all shapes. For more information on using shapes in Elements, see Book V, Chapter 1.
Text Effects: Click this item to hide Text Effects such as embossed text designs, drop shadows on text, and more. For more information on creating text in Elements, see Book V, Chapter 4.
Themes: Themes provide you with a thematic expression for artwork. You might have some art centralized around a theme. Click this item to hide assortments within theme categories.
Regardless of what category, subcategory, and filter you choose, you drag items from the Content panel to your image or onto a new blank file. When an item is placed in the Image window, you can size, reshape, and rotate the item using the standard tools from the Tools panel.
In Figure BC2-15, we added a background to a blank new file and upsized it a bit to create the effect you see in the figure. The various options you have after dragging an item from the Content panel to an image or blank new file include
Width/Height: You can drag the corner handles on the placed graphic to size it or type values in the Width/Height text boxes. When the Constrain Proportions check box is selected, typing one value for either height or width supplies the corresponding value in the other check box to keep the graphic constrained to proportions.
Tip
When Constrained Proportions is checked and you drag a handle, you don't need to press the Shift key to constrain the dimensions of the object.
Rotate: Type a value in the text box to rotate the object.
Rotate/Scale/Skew: By default, Rotate is selected, and the values typed in the item above correspond to rotating an object. The second icon is used for scaling the object. Click this icon and the text box adjacent to the three icons is used for supplying text for scaling. Click the third icon and type values for skewing the object.
Corner handles: Click and drag a corner handle in or out to scale the object. Press the Ctrl/

Rotate handle: Position the cursor around the circle at the bottom of the middle handle, click, and drag to rotate the object.
OK/Cancel: Click the Check Mark icon to accept your edits. Click the icon adjacent to the Check Mark to cancel the edits.
Content Panel Object: Click an object in the Content panel and drag to the Image window.

Unfortunately, we don't have enough room in this book to cover adding all objects from the Content panel to a new blank file or an existing image. Fortunately though, the process is the same for all the items you want to use in the Content panel. We encourage you to play with the Content panel and explore using a sample of each object for each category to make yourself familiar with them.
In the meantime, follow these steps to see how easy it is to work with the Content panel:
Open an image in Full Edit mode.
Minimize the photo so it remains open and visible in the Photo Bin.
Create a blank file.
Choose File

Open the Content panel.
If the Content panel is not open, choose Window
Filter the Categories.
For this example, we use the Frames objects. Click Filter for Frames to turn it on, and click all the other filters to turn them off, as shown in Figure BC2-16.
Choose the categories.
Choose Mood from the first drop-down list and Reflective from the second drop-down list as shown in Figure BC2-16.
Drag a frame from the Content panel to the Image window.
In Figure BC2-17, we chose the Brown Sepia frame and dragged it to the Image window.
Size the frame to fit the image size.
Drag the corner handles to size the frame to the desired size.
Click the Check Mark icon in the lower-right corner or press the Enter key to accept the edits.
Import a photo.
Drag the photo from the Photo Bin to the Image window.
Size the photo.
Notice the toolbar in the top-left corner of the Image window shown in Figure BC2-18. The slider is used to size the photo up or down. Move the slider to the desired position. If you want to add an additional photo, click the yellow icon in the toolbar to add it. When finished, click the Check Mark icon to finish the edits.
Choose File
Save As and save your work.