Moving and Copying Data
YOU’VE LEARNED HOW TO SELECT your data and how to edit it, but that’s not enough. You also need to know how to move it. You can do this using either a drag-and-drop method with your mouse, or use the Windows Clipboard to cut and paste your data.
Caution

| Make sure that the cells you are moving data into are empty. If your move will overwrite existing data in the destination cells, Excel will display an alert message allowing you to cancel the move before you delete your own data. |
Dragging and Dropping Data
You already experimented with dragging the mouse earlier in this chapter as you practiced selecting cells, but drag and drop can also be used to move data from one location on your spreadsheet to another.
1. | Select the cells you want to move. |
2. | Move the mouse pointer to the highlighted border of your selection. The mouse pointer will change into a four-sided arrow. |
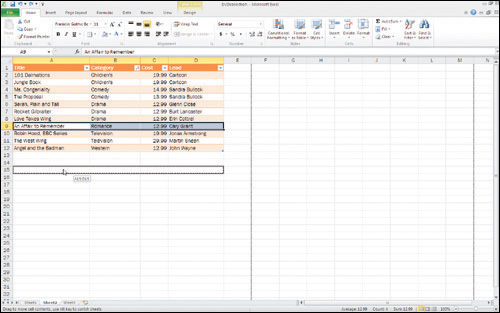
3. | Click and hold while you use the mouse to drag the cells to the new destination (see Figure 1-21) and release the mouse button to accept the change. |
Using Cut, Copy, and Paste
Cut and paste are often thought of as the keyboard equivalent of the drag-and-drop method. There are Ribbon command buttons for these options, but once you are more comfortable with their actions, you will probably use the keyboard shortcuts more often.
If you want to use the commands listed in Table 1-3 to move data from one location to a new destination on your spreadsheet:
| Keystroke Shortcut | Ribbon Path | Icon |
|---|---|---|
| Ctrl+X | Home > Clipboard > Cut | |
| Ctrl+C | Home > Clipboard > Copy | |
| Ctrl+V | Home > Clipboard > Paste |
1. | Select the data cells you want to move, following the steps you learned in “Selecting Cells on a Spreadsheet,” earlier in this chapter. |
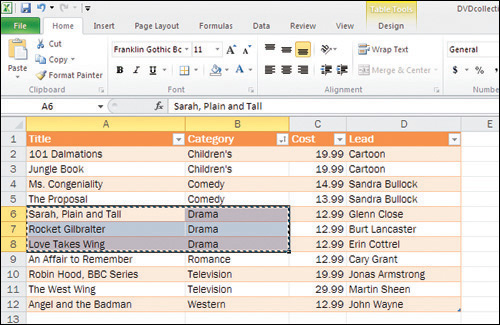
2. | Press Ctrl+X. The data will be temporarily surrounded by a marquee (which looks ants marching around the cells), as in Figure 1-22. Figure 1-22. A marquee appears around the outside border of the cell range to be cut.
|
3. | Select the destination cell and press Ctrl+V to move the data. |
Tip
If you already entered your data in a row and wished you’d entered it in a column instead (or vice versa), you don’t have to delete it and start over. Copy the data and then select the destination cell and choose Home > Clipboard > Paste (arrow). Choose Transpose (see Figure 1-23) and Excel will reformat the data for you.
Figure 1-23. The Transpose feature will re-orient your data from rows to columns, or the reverse.


