
Learning Objectives
By the end of this chapter, you will be able to:
- Use pure functions in Redux reducers and selectors
- Solve advanced function testing situations
- Apply currying, partial application, and closures in modern JavaScript applications
- Implement a compose function for use in a backend for frontend (BFF) built with micro
- Apply JavaScript built-ins to write in an immutable style specifically in a Redux application
- Implement a query and a mutation in the context of a BFF using GraphQL
- Select from three approaches to handle side effects in a React/Redux application
In this chapter, you will learn about the concepts of functional programming, how to apply them in JavaScript, and identify them "in the wild" in popular libraries such as React, Redux, and systems such as the GraphQL query language.
Introduction
Functional programming leans heavily on the mathematical definition of functions. Mathematical functions are defined through a declaration expression. The functional programming style is also declarative (as opposed to imperative programming) and promotes expressions over statements.
JavaScript has functional programming constructs built into it. Unlocking the functional programming style in JavaScript is crucial to reaching a deeper understanding of the language and its ecosystem.
As part of each section, React, Redux, and DOM access and testing patterns in JavaScript will be used to illustrate pragmatic functional programming in JavaScript. More recent developments such as GraphQL and backend for frontends (BFFs) will also be included to show how functional programming permeates both the present and the future of the JavaScript programming language.
Functional programming concepts can explain why Redux reducers and React render functions can't contain API calls. A lot of JavaScript patterns and best practices are enabled by functional constructs in the language; leveraging functional programming leads to more expressive, concise JavaScript programs that are easier to reason about, modify, and extend.
Functions – First-Class Citizens
Functions being first-class means they are considered by the language to be like any other "value" type. This means that, in JavaScript, a function can be used just like a number, a string, a Boolean, an array, an object, and so on.
Note
Now would probably be a good time to see how well-versed in JavaScript data types everyone is. The primitives are Boolean, Null, Undefined, Number, (BigInt), String, Symbol, Object à Array/Set/Map. They can be found under the Object data type.
First-Class Functions – Idiomatic JavaScript Building Blocks
Another way to define first-class support is as "functions are first-class if they are regular values." That means that a function can be assigned (as a value) to a variable, passed into other functions as a parameter, and be the return value of another function. Let's try and understand the preceding concept with code examples.
A function can be assigned to a variable in JavaScript and applied to function expressions (as follows) and arrow functions. A variable can hold a reference to an already defined function or a function that's been declared inline. The function can be named or anonymous:
const fn = function run() {
return 'Running...';
};
function fnExpression() {}
const otherFn = fnExpression;
const anonymousArrow = () => {};
A function can be set as a value in an Array:
const fn = () => {};
const operations = [
fn,
function() {
console.log('Regular functions work');
},
() => console.log('Arrows work too')
];
A function can be set as a value in an object. This example uses ECMAScript 6/2015 shorthand properties and methods. We also assert that the output of Module.fn is the same as the output of fn:
const fn = () => 'Running...';
const Module = {
fn,
method1() {},
arrow: () => console.log('works too')
};
console.assert(Module.fn() === 'Running...');
A function can be passed as an argument to another function:
const fn = () => 'Running...';
function runner(fn) {
return fn();
}
console.assert(runner(fn) === 'Running...');
Inversion of Control Using First-Class Functions
Having first-class functions in JavaScript means that injecting a dependency can be as small as passing a function.
In languages where functions are not first-class, we might have to pass an object (instance of a class) into a constructor to be able to inject a dependency into the consumer of said dependency. In JavaScript, we can leverage the fact that functions are first-class citizens and simply inject a function implementation. The simplest example of this comes from the preceding runner function. It calls whatever function is passed into it as a parameter.
This type of dependency is very useful in JavaScript. Types are dynamic and tend to go unchecked. The benefit of class and class types such as checked errors and method overloading don't exist in JavaScript.
JavaScript functions have a simple interface. They are called with zero or more parameters and cause side effects (network requests, file I/O) and/or output some data.
In a dependency injection scenario without types or type checks, passing a single function instead of a whole instance is very beneficial for the dependency's consumer (the code where the dependency is injected into).
The following example illustrates a scenario where a JavaScript application can be run both on the client and the server. This is called a universal JavaScript application, that is, a JavaScript program that runs both in Node.js and in browsers. Universal JavaScript is usually achieved through a combination of build tools and patterns such as dependency injection.
In this case, when an HTTP call is made server-side, a header-based authorization mechanism is used. When the HTTP call is made from the client, a cookie-based authorization mechanism is used.
See the following function definition:
function getData(transport) {
return transport('https://hello-world-micro.glitch.me').then(res => res.text())
}
Server-side code that consumes getData would look like the following, where an axios function instance is created to default the authorization header. This function instance is then passed as transport to getData:
const axios = require('axios');
const axiosWithServerHeaders = axios.create({
headers: { Authorization: 'Server-side allowed' }
});
getData(axiosWithServerHeaders);
Client-side code that consumes getData would look like the following. Again, an axios function instance is created, this time with the withCredentials option (which enables the sending/receiving of cookies) enabled:
import axios from 'axios';
const axiosWithCookies = axios.create({
withCredentials: true
})
getData(axiosWithCookies);
The preceding example shows how we can leverage first-class function support to share code between applications running in different JavaScript environments by delegating the implementation of the transport mechanism for the HTTP request. Passing a function as a parameter is the idiomatic JavaScript way to do dependency injection.
Functions that Enable Asynchronous I/O and Event-Driven Programming in JavaScript
I/O, that is, non-blocking, and the JavaScript event loop are at the core of JavaScript's popularity both for browser-based applications and more recently server-side applications with Node.js. JavaScript is single-threaded, which means it is easy to reason about. Race conditions and deadlocks are nearly impossible to find in a JavaScript program.
JavaScript's asynchronous programming model of non-blocking interactions with input and output mechanisms means that if a program is I/O-bound, JavaScript is a very efficient way to handle it. JavaScript doesn't wait for the I/O to finish; instead, it schedules for the code to resume execution when the I/O has completed using the event loop.
For event-driven programming, the function is a lightweight container for logic that needs to be executed at a later point in time. Functions and event-driven programming in JavaScript have led to patterns such as the addEventListener Web API, the Node.js error-first callback, and the subsequent move to an A+ Promise-compliant specification in ECMAScript 6/ECMAScript 2015.
All the patterns here expose a function that accepts a function as one of its parameters.
The addEventListener Web API allows JavaScript programs running in the browser to execute a function when an event occurs on a DOM element; for example, we can listen to scroll, click, or keyboard events. The following example will print Scrolling… if you scroll. It should be run in a browser JavaScript environment:
document.addEventListener('scroll', () => {
console.log('Scrolling...');
});
Node.js error-first callbacks are used in any I/O API it exposes. The following example shows how to handle errors from the Node.js filesystem module, fs. The callback that's passed always has an error property as its first parameter. This error is null or undefined when there is no error and has an Error value if an error occurs:
const fs = require('fs');
fs.readdir('.', (err, data) => {
// Shouldn't error
console.assert(Boolean(data));
console.assert(!err);
});
fs.readdir('/tmp/nonexistent', (err, data) => {
// Should error
console.assert(!data);
console.assert(Boolean(err));
});
The Web Fetch API exposes an A+ Promise implementation. An A+ Promise is an object that encapsulates asynchronous logic and has .then and .catch functions, which accept a function as a parameter. Promises are a more recent and advanced way to abstract I/O in JavaScript compared to the error-first Node.js callback approach. The Fetch API is not available natively in Node.js; however, it is available as an npm module for use in Node.js. This means that the following code works in Node.js:
const fetch = require('node-fetch');
fetch('https://google.com')
.then(response => {
console.assert(response.ok);
})
.catch(error => {
// Shouldn't error
console.assert(false);
console.error(error.stack);
});
More recent versions of Node.js (10+) expose a Promise interface for some of its APIs. The following is equivalent to the earlier filesystem access and error handling but using the Promise interface instead of error-first callbacks:
const fs = require('fs').promises;
fs.readdir('.')
.then(data => {
console.assert(Boolean(data));
})
.catch(() => {
// Shouldn't error
console.assert(false);
});
fs.readdir('/tmp/nonexistent')
.then(() => {
// Should error
console.assert(false);
})
.catch(error => {
// Should error
console.assert(Boolean(error));
});
JavaScript Built-In Array Methods that Showcase First-Class Function Support
JavaScript comes with several built-in methods on the Array object. A lot of these methods showcase first-class function support.
The Array#map function returns the array of the output of the function that's passed and is applied to each element. The following example shows a common use case, which is to convert an array of objects into an array of primitive values by extracting a certain object key for each element. In this case, the id property of the objects is returned in a new array:
const assert = require('assert').strict
assert.deepStrictEqual(
[{id: '1'}, {id: '2'}].map(el => el.id),
['1', '2']
);
The Array#filter function returns elements of the array for which the function passed as a parameter returns a truthy value. In the following case, we filter out any element that is less than or equal to 2:
const assert = require('assert').strict
assert.deepStrictEqual(
[1, 2, 3, 4, 5].filter(el => el > 2),
[3, 4, 5]
);
The Array#reduce function takes a function parameter is called for each element with an accumulator and the current element value. Reduce returns the last output of the passed function parameter. It is used to change the shape of the array, for example, summing over each element in the array:
console.assert([2, 4].reduce((acc, curr) => acc + curr) === 6);
The Array#flatMap function returns the flattened output of the function that's passed as a parameter and is applied to each of the elements in the array. The following example is a case where the new array is double the length of the initial one since we return a pair of values for flatMap to flatten into an array:
const assert = require('assert').strict
assert.deepStrictEqual(
[1, 2, 3, 4, 5, 6].flatMap(el => [el, el + 1]),
[ 1, 2, 2, 3, 3, 4, 4, 5, 5, 6, 6, 7 ]
);
Note
flatMap is a stage 4 feature that's works in Node.js 11+ and is supported natively in Chrome 69+, Firefox 62+, and Safari 12+.
The Array#forEach function calls the function that's passed as a parameter on each element of the array. It is equivalent to a for loop, except it can't be broken. The function that's passed will always be called on each element:
let sum = 0;
[1, 2, 3].forEach(n => {
sum += n;
});
console.assert(sum === 6);
The Array#find function calls the function that's passed as a parameter on each element of the array until the function returns a truthy value, at which point it returns that value or there are no more elements to call it against, at which point it returns undefined:
console.assert(['a', 'b'].find(el => el === 'c') === undefined);
The Array#findIndex function calls the function that's passed as a parameter on each element of the array until the function returns a truthy value, at which point it returns the index or there are no more elements to call it against, at which point it returns -1:
console.assert(['a', 'b'].findIndex(el => el === 'b') === 1);
The Array#every function calls the function that's passed as a parameter on each element of the array. At each iteration, if the passed function returns a false value, .every breaks and returns false. If .every gets to the end of the array without the function that's being passed as the parameter returning a false value, it returns true:
console.assert([5, 6, 7, 8].every(el => el > 4));
The Array#some function calls the function that's passed as a parameter on each element of the array. At each iteration, if the passed function returns a truthy value, .some breaks and returns true. If .some gets to the end of the array without the function that's being passed as the parameter returning a truthy value, it returns false:
console.assert([0, 1, 2, 5, 6, 7, 8].some(el => el < 4));
The Array#sort function calls the function that's passed as a parameter to sort the array. The passed function is called with two elements of the array (which we will call a and b). If it returns a value greater than 0, a will appear before b in the sorted array. If the comparison function returns a value less than 0, b will appear before a in the sorted array. If the comparison function returns a value equal to 0, a and b will appear in the same order as in the original array, that is, relative to each other:
const assert = require('assert').strict
assert.deepStrictEqual(
[3, 5, 1, 4].sort((a, b) => (a > b ? 1 : -1)),
[1, 3, 4, 5]
);
There are other Array methods, specifically ones that operate on non-function arguments. This is a good way to show how much more powerful the methods that support passing a function are.
Exercise 70: Re-Implementing includes, indexOf, and join with some, findIndex, and reduce
In this exercise, you will reimplement Array#includes, Array#indexOf, and Array#join using the array methods Array#some, Array#findIndex, and Array#reduce by leveraging first-class function support. They are more powerful versions of their primitive-only counterparts.
The final output of npm run Exercise70 should have all the assertions passing. This means that we have now got includes, indexOf, and join functions that are compliant with the following assertions:
- includes should return true if the value is in array.
- includes should return false if the value is in array.
- indexOf should return the index if the value in the array.
- indexOf should return -1 if value not in the array.
- join should work with no delimiter passed.
- join should work with a comma delimiter.
Note
In this exercise, we will have tests and a skeleton for the methods in the starter file, exercise-re-implement-array-methods-start.js. The file can be run with node exercise-re-implement-array-methods-start.js. This command has been aliased with npm scripts to npm run Exercise70.
Perform the following steps to complete this exercise:
- Change the current directory to Lesson10. This allows us to use pre-mapped commands to run our code. Now, run the npm run Exercise70 command (or node exercise-re-implement-array-methods-start.js):
Note
npm scripts are defined in the scripts section of package.json. The working solution for this exercise can be run using the npm run Exercise70.js. The file on GitHub.
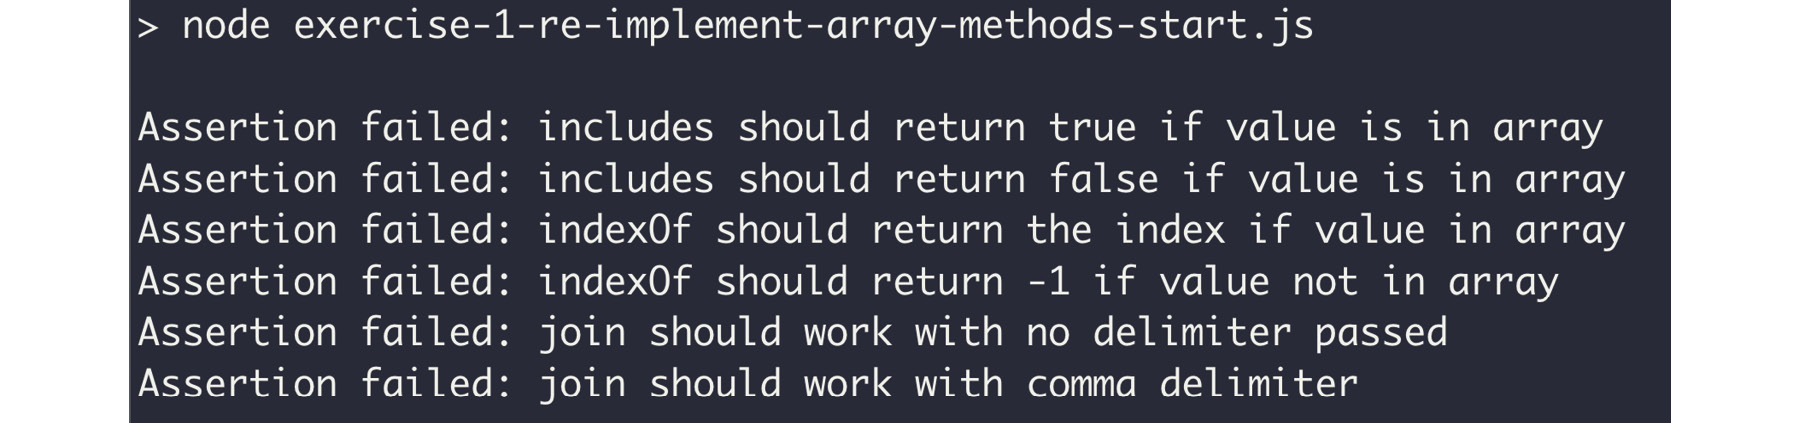
Figure 10.1: Initial output of npm run Exercise70
These errors show that the tests that have been provided are currently failing because the implementations don't work as expected (since they currently do nothing).
- Implement includes in exercise-re-implement-array-methods-start.js:
function includes(array, needle) {
return array.some(el => el === needle);
}
There is an includes skeleton that we will replace. The function we can use to implement includes is .some. What we will do is check that any/some element of the array is equal to the needle parameter.
- Run npm run Exercise70. This should give the following output, which means that includes works as expected according to our two assertions (the assertion errors for includes are gone):

Figure 10.2: Output after implementing includes
The needle is a primitive type, so doing el === needle is good enough if we need to compare something.
- Use .findIndex to implement indexOf:
function indexOf(array, needle) {
return array.findIndex(el => el === needle);
}
After this step, running npm run Exercise70 should give the following output, which means that indexOf works as expected according to our two assertions (the assertion errors for indexOf are gone):

Figure 10.3: Output after implementing includes and indexOf
Finally, we will implement join using .reduce. This function is trickier to implement since reduce is a very generic traversal/accumulation operator.
- Start by concatenating the accumulator with the current element:
function join(array, delimiter = '') {
return array.reduce((acc, curr) => acc + curr);
}
- Run npm run Exercise70. You will see that "should work with no delimiter passed" now passes:

Figure 10.4: Implementing includes, indexOf, and a naïve join
- In addition to concatenating the accumulator with the current element, add the delimiter in between them:
function join(array, delimiter = '') {
return array.reduce((acc, curr) => acc + delimiter + curr);
}
Following is the output of the preceding code:

Figure 10.5: Final output of npm after running the exercise
This exercise shows how functions that support passing another function into them are more powerful than their equivalents, which only receive primitive parameters. We have shown this by reimplementing the primitive parameter functions using their function-parameter counterparts.
In the next exercise, we will show you another JavaScript use case for Array functions that support function parameters.
Exercise 71: Computing the Price of a Basket Using Map and Reduce
In this exercise, you will use the array's map, filter, and reduce functions to complete a simple transformation from a list of line items to a basket's total cost.
Note
In this exercise, you will have tests and a skeleton for the methods in the starter file, exercise-price-of-basket-start.js. The file can be run with node exercise-price-of-basket-start.js. This command has been aliased with npm scripts to npm run Exercise71. The working solution for this exercise can be run using the npm run Exercise71 file on GitHub.
- Change the current directory to Lesson10. This allows us to use pre-mapped commands to run our code. Run npm run Exercise71 (or node exercise-price-of-basket-start.js). You will see the following:

Figure 10.6: Initial output of npm run
The failing assertions show that our skeleton implementation doesn't output what it is supposed to since the contents of basket1 should tally to 5197 and the contents of basket2 should tally to 897. We can run this calculation manually: 1 * 199 + 2 * 2499 is 5197 and 2 * 199 + 1 * 499 is 897.
- First, get the line item price, which is done by mapping over each item in totalBasket and multiplying item.price by item.quantity:
function totalBasket(basket) {
return basket.map(item => item.price * item.quantity);
}
console.log(totalBasket(basket1))
console.log(totalBasket(basket2))
Running npm run Exercise71 should give you the following output:

Figure 10.7: Output of npm run and totalBasket with line item calculation in a .map
Note how the assertions are still failing since we're not adding the line item prices up; we're just returning an array of the line item price.
- Next, use reduce to sum the accumulator and current line item price, and remove the console.log:
function totalBasket(basket) {
return basket
.map(item => item.price * item.quantity)
.reduce((acc, curr) => acc + curr);
}
The final output of npm run Exercise71 should not have assertion errors:

Figure 10.8: Final output with totalBasket implemented
Adding the reduce step sums over the line item prices that we calculated with the initial map. Now totalBasket returns the correct total price for both basket1 and basket2, which is 5197 and 897, respectively. Hence, the following assertions are now true:
- basket1 should tally up to 5197.
- basket2 should tally up to 897.
This exercise shows how to use map and reduce to first transform an array of objects into an array of primitive values and then aggregate data from that intermediate array.
Child-Parent Component Communication in React
The popular JavaScript user interface library React leverages the first-class nature of functions in JavaScript for its Component API interface.
A Component only explicitly receives props from the component that is consuming it. This consumption of one Component by another in React is usually referred to as rendering since its own rendering is the only place where one component can use another.
In this situation, the parent component (the one that renders) can pass props to the child component (the one that is being rendered), like so:
import React from 'react';
class Child extends React.Component {
render() {
return <div>Hello {this.props.who}</div>;
}
}
class Parent extends React.Component {
render() {
return (
<div>
<Child who="JavaScript" />
</div>
);
}
}
In contrast to other popular user interface libraries such as Vue.js and Angular where there are two concepts for parent-child communication, in Vue.js, props are passed from parent to child and events are emitted from the child to the parent. In Angular, input binding is used for passing data from the parent to child. The parents listen to events that are emitted by the child and react to them.
React does not expose a construct that allows data to be passed back to the parent; there are only props. To achieve child-parent communication, React champions a pattern whereby a function is passed as a prop to the child. The passed function is defined in the parent's context and therefore can do what it wishes in that parent component, such as updating the state, triggering a Redux action, and so on:
import React from 'react';
class Child extends React.Component {
render() {
return (
<div>
<button onClick={this.props.onDecrement}>-</button>
<button onClick={this.props.onIncrement}>+</button>
</div>
);
}
}
class Parent extends React.Component {
constructor() {
super();
this.state = {
count: 0
};
}
increment() {
this.setState({
count: this.state.count + 1
});
}
decrement() {
this.setState({
count: this.state.count - 1
});
}
render() {
return (
<div>
<p>{this.state.count}</p>
<Child
onIncrement={this.increment.bind(this)}
onDecrement={this.decrement.bind(this)}
/>
</div>
);
}
}
This pattern also exposes one of the big problems of first-class functions in JavaScript. When mixing classes/instances and first-class functions, by default, the function on a class instance object is not automatically bound to it. In other words, we have the following:
import React from 'react';
class Child extends React.Component {
render() {
return <div>
<p><button onClick={() => this.props.withInlineBind('inline-bind')}>inline bind</button></p>
<p><button onClick={() => this.props.withConstructorBind('constructor-bind')}>constructor bind</button></p>
<p><button onClick={() => this.props.withArrowProperty('arrow-property')}>arrow property</button></p>
</div>;
}
}
class Parent extends React.Component {
constructor() {
super();
this.state = {
display: 'default'
};
this.withConstructorBind = this.withConstructorBind.bind(this);
}
// check the render() function
// for the .bind()
withInlineBind(value) {
this.setState({
display: value
})
}
// check the constructor() function
// for the .bind()
withConstructorBind(value) {
this.setState({
display: value
})
}
// works as is but needs an
// experimental JavaScript feature
withArrowProperty = (value) => {
this.setState({
display: value
})
}
render() {
return (
<div>
<p>{this.state.display}</p>
<Child
withInlineBind={this.withInlineBind.bind(this)}
withConstructorBind={this.withConstructorBind}
withArrowProperty={this.withArrowProperty}
/>
</div>
);
}
}
Callback props are core to any sort of child-parent communication in React since their props are the only way to communicate from parent to child and child to parent. The next activity aims to implement an onCheckout prop that the consumer of the Basket component can use to react when the Basket's checkout button is clicked.
Activity 15: onCheckout Callback Prop
In this activity, we will implement an onCheckout prop to display the number of items in the shopping cart during checkout.
Note
Activity 15 comes with a preconfigured development server and a skeleton for the methods in the starter files, that is, activity-on-checkout-prop-start.js and activity-on-checkout-prop-start.html. The development server can be run with npm run Activity15. The working solution for this activity can be run using the npm run Activity15 file on GitHub.
- Change the current directory to Lesson10 and run npm install if you haven't done so in this directory before. npm install downloads the dependencies that are required in order to run this activity (React and Parcel). This command is an alias of npx parcel serve activity-on-checkout-prop-start.html.
- Go to http://localhost:1234 (or whichever URL the start script output) to see the HTML page.
- Click on the Proceed to checkout button. You will notice that nothing happens.
Note
The solution for this activity can be found on page 625.
The next exercise will show you how to leverage state and props to add a product to our basket. This exercise's starting code isn't strictly the same as what we finished with after the activity. For example, the state was hoisted from the Basket component to the App component.
Exercise 72: Adding a Product to the Basket
In this exercise, we will modify the addProduct method to update the number of items in the basket when the Add to basket option is clicked.
Note
Exercise 72 comes with a preconfigured development server and a skeleton for the methods in the starter files, that is, exercise-add-product-start.js and exercise-add-product-start.html. The development server can be run with npm run Exercise72. This command is an alias of npx parcel serve exercise-add-product-start.html. The working solution for this exercise can be run using the npm run Exercise72 file on GitHub.
- Change the current directory to Lesson10. Run npm install if you haven't done so in this directory before. Now, run npm run Exercise 72. You will see the application starting up, as follows:

Figure 10.9: Output of npm run Exercise 72
For the development server to live-reload our changes and to avoid configuration issues, edit the exercise-add-product-start.js file directly.
- Go to http://localhost:1234 (or whichever URL the start script output). You should see the following HTML page:

Figure 10.10: Initial application in the browser
When clicking of Add to Basket, the application crashes and shows a blank HTML page.
- Update App#addProduct to fix the crashes.
addProduct(product) {
this.setState({
basket: {
items: this.state.basket.items.concat({
name: product.name,
price: product.price,
quantity: 1
})
}
});
}
Instead of setting the basket value to {}, we use the JavaScript Array's concatenate method to take the current items in the basket (this.state.basket.items) and add the passed-in product parameter with quantity: 1.
- To find out what happens when we click Add to Basket, we need to find the onClick handler for the Add to Basket button and then diagnose the issue with the this.addProduct() call (basket being set to {}):
<button onClick={() => this.addProduct(this.state.product)}>
Add to Basket
</button>
When we click the Add to Basket button, we will see the following:
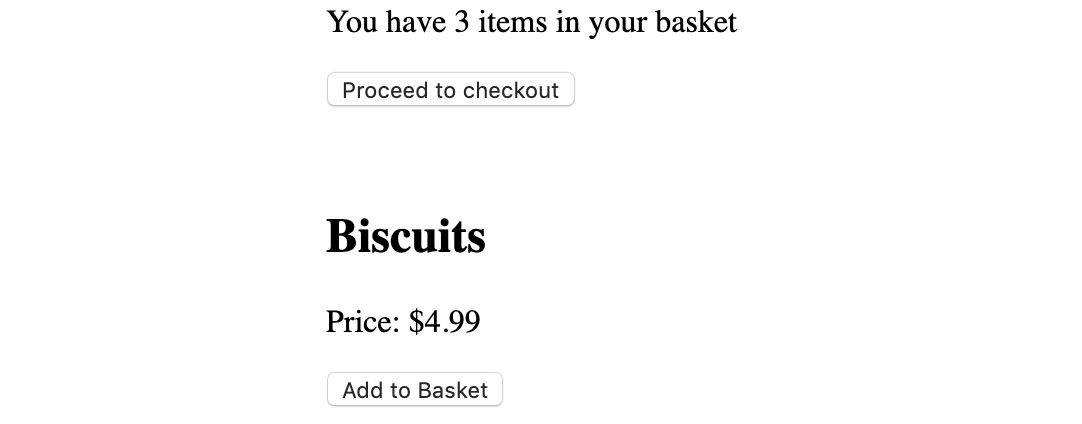
Figure 10.11: Implemented Add to Basket after one click
When we click Add to Basket again, we will see the following:
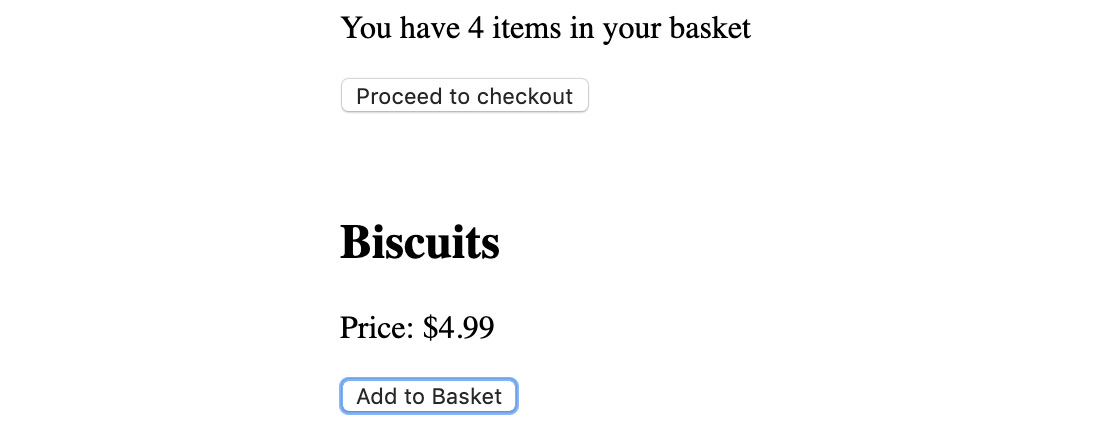
Figure 10.12: Implemented Add to Basket after two clicks
First-Class Functions in React Render Props
Render props are a React component pattern where a component delegates the rendering of a whole area to its parent.
A render prop is a function that returns JSX (since it needs to be renderable). It tends to be called with child-specific data. That data is then used by the implementation of the prop to render JSX. This pattern is very popular with library authors since it means they can focus on implementing the logic of the component without having to worry about how to allow the user to override the rendered output (since it is all delegated back to the user).
A very simple example of a render prop is to delegate the rendering to the parent component, but the action or data comes from the component that exposes a render prop. ExitComponent wraps the window.close() functionality but delegates render to its renderExit prop:
class ExitComponent extends React.Component {
exitPage() {
window.close();
}
render() {
return <div>{this.props.renderExit(this.exitPage.bind(this))}</div>;
}
}
This means that, for example, our ExitComponent can be used for both the links and buttons on the exit page.
This is what the ExitButton code might look like:
class ExitButton extends React.Component {
render() {
return (
<ExitComponent
renderExit={exit => (
<button
onClick={() => {
exit();
}}
>
Exit Page
</button>
)}
/>
);
}
}
Note how the actual page exit logic is not handled anywhere in the component; it is all left up to ExitComponent to implement. The rendering of the button is fully handled here; ExitComponent doesn't have to know about it.
The following is how an ExitLink component might be implemented. Again, note how ExitComponent knows nothing about links and how ExitLink knows nothing about closing the window.;
class ExitLink extends React.Component {
render() {
return (
<ExitComponent
renderExit={exit => (
<a
onClick={e => {
e.preventDefault();
exit();
}}
>
Exit
</a>
)}
/>
);
}
}
Exercise 73: Rendering Basket Contents with a Render Prop
In this exercise, we will use render props to render items to the shopping basket, thereby making a flexible Basket component.
Note
Exercise 73 comes with a preconfigured development server and a skeleton for the methods in the starter files, that is, exercise-render-prop-start.js and exercise-render-prop-start.html. The development server can be run with npm run Exercise73. This command is an alias of npx parcel serve exercise-render-prop-start.html. The working solution for this exercise can be run using the npm run Exercise73 file on GitHub.
Perform the following steps to complete this exercise:
- Change the current directory to Lesson10 and run npm install if you haven't done so in this directory before. npm install downloads the dependencies that are required in order to run this activity (React and Parcel). Now, run npm run Exercise73. You will see the application starting up, as follows:

Figure 10.13: Output after running the start file
For the development server to live-reload our changes and to avoid configuration issues, edit the exercise-render-prop-start.js file directly.
- Go to http://localhost:1234 (or whichever URL the starting script output). You should see the following HTML page:

Figure 10.14: Initial application in the browser
- Find where Basket is being rendered and add a renderItem prop, which is a function from the item to JSX. This is the implementation of the render prop that Basket will use to render each basket item:
{this.state.status === 'SHOPPING' && (
<Basket
items={this.state.basket.items}
renderItem={item => (
<div>
x{item.quantity} - {item.name} - $
{(item.price / 100).toFixed(2)} each{' '}
</div>
)}
onCheckout={this.handleCheckout}
/>
)}
- Go to the Basket#render method and map over each this.props.items, using this.props.renderItem to render the item:
render() {
return (
<div>
<p>You have {this.props.items.length} items in your basket</p>
<div>{this.props.items.map(item => this.props.renderItem(item))}</div>
<button onClick={() => this.props.onCheckout(this.props.items)}>
Proceed to checkout
</button>
</div>
);
}
To see our changes, we can go to the browser and see how the basket items are rendered:
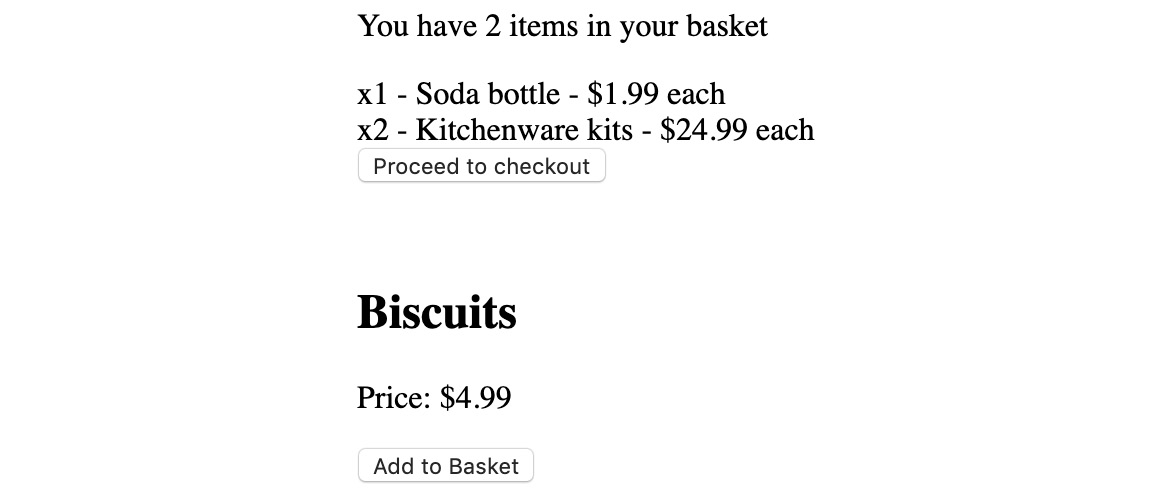
Figure 10.15: Rendering the basket items
Our Basket component now renders the items according to the function that's defined by the component rendering it. This makes Basket more powerful (it can render items) but still highly reusable. In different instances, we could use Basket with a renderItem prop that renders nothing, the breakdown of the item, or the line item price for the basket item, for example.
First-class functions and the patterns we have covered are crucial to writing idiomatic JavaScript. Another way we can leverage functional programming in JavaScript is by using pure functions.
Pure Functions
Pure functions are functions that don't have side effects and for the same input, arguments will return the same output value(s). A side effect can be anything from mutating the value of an argument passed by reference (which in JavaScript mutates the original) to mutating the value of a local variable, or doing any sort of I/O.
A pure function can be thought of as a mathematical function. It only operates using input and only affects its own output.
Here is a simple pure function, the identity function, which returns whatever is passed to it as a parameter:
const identity = i => i;
Notice how there are no side effects and no mutation of parameters or creation of new variables. This function doesn't even have a body.
Pure functions have the advantage of being simple to reason about. They're also easy to test; there is usually no need to mock any dependencies out since any and all dependencies should be passed as arguments. Pure functions tend to operate on data since they're not allowed to have side effects if data is their only dependency. This reduces the testing surface area.
The cons of pure functions are that pure functions technically can't do anything interesting such as I/O, which means no sending of HTTP requests and no database calls.
Note
An interesting gap in the definition of pure functions is JavaScript async functions. Technically they can still be pure if they don't contain side effects. In practice, an async function is likely to be used to run asynchronous operations with await such as accessing the filesystem, HTTP, or database requests. A good rule of thumb is that if a function is async, it likely uses await to do some sort of I/O and therefore it is not pure.
Redux Reducers and Actions
Redux is a state management library. It imposes a few constraints on the user to improve the predictability of state updates and the long-term scalability of the codebase.
Let's look at a simple Redux counter implementation to highlight some features:
const {createStore} = require('redux');
const counterReducer = (state = 0, action) => {
switch (action.type) {
case 'INCREMENT':
return state + 1;
case 'DECREMENT':
return state - 1;
default:
return state;
}
};
const store = createStore(counterReducer);
The store initializes its state to 0:
console.assert(store.getState() === 0, 'initalises to 0');
The store's internal state is only exposed through the read-only interface of getState. To update the state, an action needs to be dispatched. Calling dispatch with the INCREMENT and DECREMENT types show that the counterReducer works as expected and reduces the actions in the store:
store.dispatch({type: 'INCREMENT'});
console.assert(store.getState() === 1, 'incrementing works');
store.dispatch({type: 'DECREMENT'});
console.assert(store.getState() === 0, 'decrementing works');
Note
There are three pillars of Redux, as per the Redux documentation: https://redux.js.org/introduction/three-principles.
The three pillars of Redux are illustrated in the preceding example. We have a system with a single store, the state is read-only (and accessed through getState), and changes are made by our reducer, which is a pure function. counterReducer takes state and an action and returns a new value without mutating state or action.
In exchange for following these rules, we get a predictable and performant state container for our JavaScript applications. A single store means there is no question as to where the state is stored; the read-only state forces updates to be done through dispatching actions and reducing them. Since reducers are pure functions, they're both easy to test and reason about since they will give the same output for the same input and will not cause side effects or unwanted mutations.
Redux is used to manage the state. Up until now, we have been storing our data in a React state.
Exercise 74: Redux Dispatching Actions and Reducing Them into State
In this exercise, we will move the state of our data into Redux in order to separate data manipulation and state updates from code that renders data to the page.
Note
Exercise 74 comes with a preconfigured development server and a skeleton for the methods in the starter files, that is, exercise-redux-dispatch-start.js and exercise-redux-dispatch-start.html. The development server can be run with npm run Exercise74. The working solution for this exercise can be run using the npm run Exercise74 file on GitHub.
Perform the following steps to complete this exercise:
- Change the current directory to Lesson10 and run npm install if you haven't done so in this directory before. This command is an alias of npx parcel serve exercise-redux-dispatch-start.html. Now, run npm run Exercise74. You will see the application starting up, as follows:

Figure 10.16: Output of npm run Exercise74
- Go to http://localhost:1234 (or whichever URL the starting script output). You should see the following HTML page:

Figure 10.17: Initial Exercise74 application in the browser
Notice how clicking the buttons doesn't work.
- Implement App#continueShopping by dispatching an action of the CONTINUE_SHOPPING type:
continueShopping() {
this.props.dispatch({
type: 'CONTINUE_SHOPPING'
});
}
- In appReducer, implement the corresponding state reduction. For CONTINUE_SHOPPING, we only need to change the status in the state since it is what we use to display the checkout view or the main product and basket view:
switch(action.type) {
// other cases
case 'CONTINUE_SHOPPING':
return {
...state,
status: 'SHOPPING'
};
// other cases
}
- Implement App#finish by dispatching an action of the DONE type:
finish() {
this.props.dispatch({
type: 'DONE'
});
}
- In appReducer, implement the corresponding state reduction. We only need to change the status in state since it is what we use to display the Done view:
switch(action.type) {
// other cases
case 'DONE':
return {
...state,
status: 'DONE'
};
// other cases
}
- Implement handleCheckout by dispatching an action of the START_CHECKOUT type:
handleCheckout(items) {
this.props.dispatch({
type: 'START_CHECKOUT',
basket: {
items
}
});
}
- In appReducer, implement the corresponding state reduction. For START_CHECKOUT, we only need to change the status in the state since it is what we use to display the checkout view or the main product and basket view:
switch(action.type) {
// other cases
case 'START_CHECKOUT':
return {
...state,
status: 'CHECKING_OUT'
};
// other cases
}
Note
The basket object is not being reduced, so it can be omitted from the action at dispatch.
- Implement addProduct by dispatching an action as follows. For ADD_PRODUCT, we need the newProduct, as well as the action type:
addProduct(product) {
this.props.dispatch({
type: 'ADD_PRODUCT',
newProduct: {
name: product.name,
price: product.price,
quantity: 1
}
});
}
- In appReducer, implement the corresponding state reduction, which takes the new product and adds it to the current basket of items:
switch(action.type) {
// other cases
case 'ADD_PRODUCT':
return {
...state,
basket: {
items: state.basket.items.concat(action.newProduct)
}
};
// other cases
}
The appReducer, in full, should now look as follows:
const appReducer = (state = defaultState, action) => {
switch (action.type) {
case 'START_CHECKOUT':
return {
...state,
status: 'CHECKING_OUT'
};
case 'CONTINUE_SHOPPING':
return {
...state,
status: 'SHOPPING'
};
case 'DONE':
return {
...state,
status: 'DONE'
};
case 'ADD_PRODUCT':
return {
...state,
basket: {
items: state.basket.items.concat(action.newProduct)
}
};
default:
return state;
}
};
- Go to http://localhost:1234 (or whichever URL the starting script output). The application should now respond to clicks, as expected:
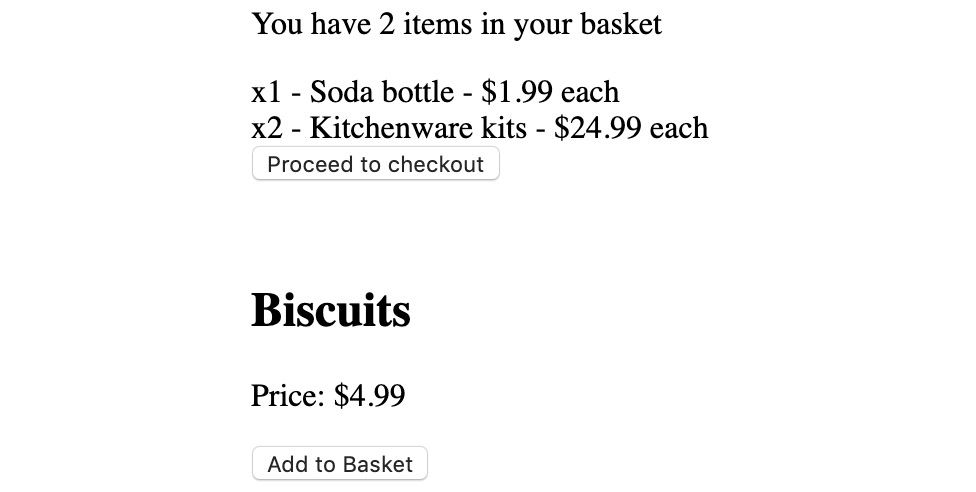
Figure 10.18: Application with clicks responding
Adding items to baskets and navigating through the application (proceed to checkout, done, continue shopping) should behave as it did prior to the Redux store implementation.
Testing Pure Functions
Pure functions are easy to test since they are fully encapsulated. The only thing that can change is the output, that is, the return value. The only thing that can affect the output is the parameter/argument values. What's more, for the same set of inputs, the output of a pure function needs to be the same.
Testing pure functions is as simple as calling them with different inputs and asserting on the outputs:
const double = x => x * 2;
function test() {
console.assert(double(1) === 2, '1 doubled should be 2');
console.assert(double(-1) === -2, '-1 doubled should be -1');
console.assert(double(0) === 0, '0 doubled should be 0');
console.assert(double(500) === 1000, '500 doubled should be 1000');
}
test();
Redux reducers are pure functions, which means to test them, we can use the approach we just looked at in the previous example.
Exercise 75: Testing a Reducer
In this exercise, we will write tests for part of the reducer we used in the previous exercise, that is, the ADD_PRODUCT case of the appReducer.
Note
Exercise 75 comes with tests and a skeleton for the methods in the starter file, exercise-reducer-test-start.js. The file can be run with node exercise-reducer-test-start.js. This command has been aliased with npm scripts to npm run Exercise75. The working solution for this exercise can be run using the npm run exercise6 file on GitHub.
Perform the following steps to complete this exercise:
- Change the current directory to Lesson10. This allows us to use pre-mapped commands to run our code.
- Now, run npm run Exercise75 (or node exercise-reducer-test-start.js). You will see the following output:

Figure 10.19: Empty tests passing after running the start file
A simplified appReducer that only contains the ADD_PRODUCT action reduction is present in this starter file, along with a test function, which is where the new tests are going to be added. The output doesn't contain errors because we haven't created any tests yet.
Note
To get the output of appReducer, it should be called with a state object and the relevant action. In this case, the type should be 'ADD_PRODUCT'.
- As in the previous examples, we will use assert.deepStrictEqual, which checks for the deep equality of two objects. We can write a failing test like so. We're calling appReducer with state and the relevant action:
function test() {
assert.deepStrictEqual(
appReducer(
{
basket: {items: []}
},
{
type: 'ADD_PRODUCT',
newProduct: {
price: 499,
name: 'Biscuits',
quantity: 1
}
}
),
{}
);
}
If we run npm run Exercise75, we will see the following error. This is expected since appReducer doesn't return an empty object as the state:

Figure 10.20: Errors shown after executing the start file
- We should use assert.deepStrictEqual to ensure that appReducer adds the new product as expected. We will assign the expected value to an expected variable and the actual value to an actual variable. This will help keep the test more readable:
function test() {
const expected = {
basket: {
items: [
{
price: 499,
name: 'Biscuits',
quantity: 1
}
]
}
};
const actual = appReducer(
{
basket: {items: []}
},
{
type: 'ADD_PRODUCT',
newProduct: {
price: 499,
name: 'Biscuits',
quantity: 1
}
}
);
assert.deepStrictEqual(actual, expected);
}
The output should now not be throwing any errors:

Figure 10.21: Test passed as no errors were found
The following is the output after we run the node exercise-reducer-test.js command:
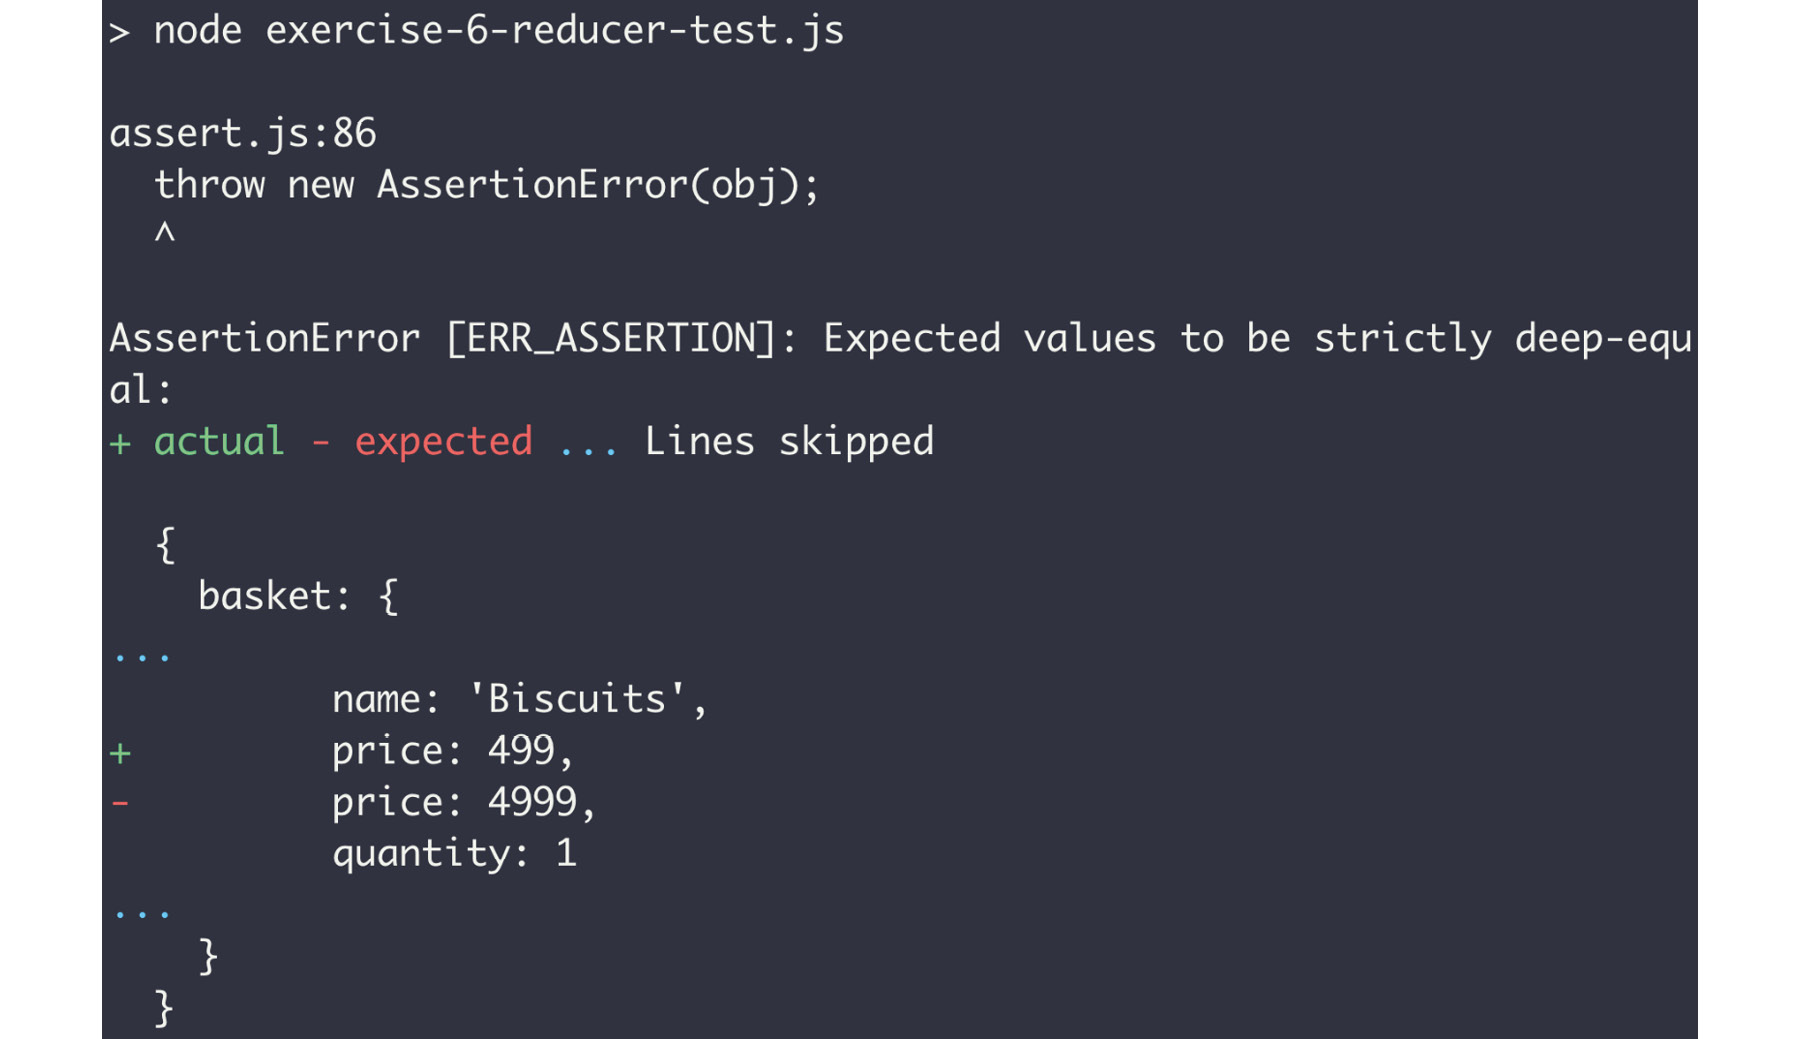
Figure 10.22: Output showing assertion failing
Redux Selectors
Selectors are an additional Redux concept that means we can encapsulate internal store state shape with selectors. The consumer of a selector asks for what it wants; the selector is left to implement that with store state shape-specific knowledge. Selectors are pure functions; they take store state and return one or more sections of it.
Since selectors are pure functions, they are simple to implement. The following exercise shows us how to use selectors so that instead of putting messaging data in the render function or when passing props, we do it in a pure function.
Exercise 76: Implementing a Selector
In this exercise, we will use selectors and take advantage of their simplicity to render items to the shopping basket.
Note
Exercise 76 comes with a preconfigured development server and a skeleton for the methods in the starter files that is, exercise-items-selector-start.js and exercise-items-selector-start.html. The development server can be run with npm run Exercise76. The working solution for this exercise can be run using the npm run Exercise76 file on GitHub.
- Change the current directory to Lesson10 and run npm install if you haven't done so in this directory before.
- Run npx parcel serve exercise-items-selector-start.html and execute npm run Exercise76. You will see the application starting up, as follows:

Figure 10.23: Output after running the start html file
For the development server to live-reload our changes and to avoid configuration issues, edit the exercise-items-selector-start.js file directly.
- Go to http://localhost:1234 (or whichever URL the starting script output). You should see the following HTML page:

Figure 10.24: Initial application in the browser
Note how no basket items are being rendered. This is because of the initial implementation of selectBasketItems. It returns an empty array:
const selectBasketItems = state => [];
- Implement selectBasketItems by drilling down into the state with dot notation and short-circuiting. Default to [] if there is any issue with the state:
const selectBasketItems = state =>
(state && state.basket && state.basket.items) || [];
The application should now work as expected again; the items will be displayed:
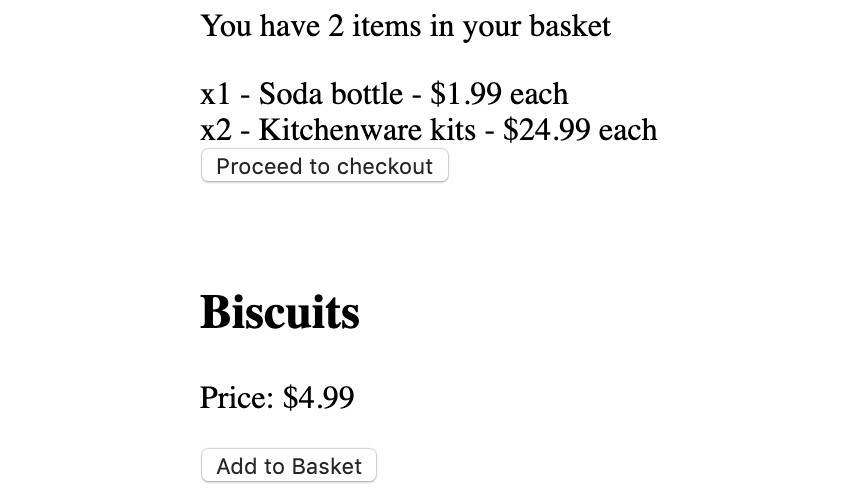
Figure 10.25: Application after implementing selectBasketItems
The selectBasketItems selector takes the full state and returns a slice of it (the items). Selectors allow us to further abstract the internal shape of state inside the Redux store from how it is used in the React components.
Selectors are a crucial part of a React/Redux application. As we have seen, they allow the React components to be decoupled from Redux's internal state shape. The following activity aims to give us the ability to write tests for selectors. This is a similar scenario to testing a reducer, which we did in a previous exercise.
Activity 16: Testing a Selector
In this activity, we will test the selector for various states of the items array and ensure that the selector returns an array corresponding to the items in the basket. Let's get started:
- Change the current directory to Lesson10. This allows us to use pre-mapped commands to run our code.
Note
Activity 16 comes with tests and a skeleton for the methods in the starter file, activity-items-selector-test-start.js. This file can be run with node activity-items-selector-test-start.js. This command has been aliased with npm scripts to npm run Activity16. The working solution for this exercise can be run using the npm run Activity16 file on GitHub.
Inside the test function, using assert.deepStrictEqual, do the following:
- Test that, for empty state(s), the selector returns [].
- Test that, for an empty basket object, the selector returns [].
- Test that, if the items array is set but empty, the selector returns [].
- Test that, if the items array is not empty and set, the selector returns it.
Note
The solution for this activity can be found on page 626.
Pure functions are predictable, easy to test, and easy to reason about. Both first-class functions and pure functions tie into the next JavaScript functional programming concept: higher-order functions.
Higher-Order Functions
A higher-order function is a function that either takes a function as a parameter or returns a function as a value.
This builds on top of JavaScript's first-class function support. In a language that doesn't support first-class functions, it is difficult to implement higher-order functions.
Higher-order functions enable function composition patterns. In most instances, we use higher-order functions to augment an existing function.
bind, apply, and call
There are a few JavaScript built-in methods on the Function object: bind, apply and call.
Function#bind allows you to set the execution context for a function. When called, bind returns a new function with the first parameter to the call bound as the this context of the function. The following arguments to bind are used when the returned function is called. When the bound function is called, parameters can be supplied. These will appear in the argument list, after the parameters are set during the call to bind.
bind is used extensively in React code when passing functions as props that still need to access the current component's this to do operations such as setState or to call other component methods:
import React from 'react';
class Parent extends React.Component {
constructor() {
super();
this.state = {
display: 'default'
};
this.withConstructorBind = this.withConstructorBind.bind(this);
}
// Check the render() function
// for the .bind()
withInlineBind(value) {
this.setState({
display: value
});
}
// Check the constructor() function
// for the .bind()
withConstructorBind(value) {
this.setState({
display: value
});
}
render() {
return (
<div>
<p>{this.state.display}</p>
<Child
withInlineBind={this.withInlineBind.bind(this)}
withConstructorBind={this.withConstructorBind}
/>
</div>
);
}
}
The Function#bind method can also be used when testing that a function is thrown in tests. For example, running the function would mean having to write a try/catch that somehow fails the test if the catch is not triggered. With bind and the assert module, this can be written in a much shorter form:
// Node.js built-in
const assert = require('assert').strict;
function mightThrow(shouldBeSet) {
if (!shouldBeSet) {
throw new Error("Doesn't work without shouldBeSet parameter");
}
return shouldBeSet;
}
function test() {
assert.throws(mightThrow.bind(null), 'should throw on empty parameter');
assert.doesNotThrow(
mightThrow.bind(null, 'some-value'),
'should not throw if not empty'
);
assert.deepStrictEqual(
mightThrow('some-value'),
'some-value',
'should return input if set'
);
}
test();
Function#apply and Function#call allow you to call a function without using the fn(param1, param2, [paramX]) syntax, as well as setting the this context in a similar way to Function#bind. The first parameter to Function#apply is the this context, while the second parameter is an array or array-like and contains the parameters the function expects. Similarly, the first parameter to Function#call is the this context; the difference in regards to Function#apply lies in the definition of parameters. In Function#call, they're an argument list, just like when using Function#bind, as opposed to the array that Function#apply expects.
Note
Array-like objects, also known as indexed collections, the most used of which are the arguments object in functions, and the NodeList Web API, are objects that follow part of the Array API (for example, implementing .length) without implementing it fully. Array functions can still be used on them with JavaScript's apply/call.
Function#apply and Function#call don't strictly meet the higher-order function criteria. At a stretch, since they're methods on function objects, we could say that they're implicitly higher-order functions. The function object they're called on is an implicit parameter to the apply/call method call. By reading from the function prototype, we can even use them like so:
function identity(x) {
return x;
}
const identityApplyBound = Function.prototype.bind.apply(identity, [
null,
'applyBound'
]);
const identityCallBound = Function.prototype.bind.call(
identity,
null,
'callBound'
);
console.assert(
identityApplyBound() === 'applyBound',
'bind.apply should set parameter correctly'
);
console.assert(
identityCallBound() === 'callBound',
'bind.call should set parameter correctly'
);
In this example, we show that apply and call are higher-order functions, but only in as far as they can be used with functions on other functions.
Function#apply and Function#call have historically converted array-like objects into Arrays. In ECMAScript 2015+ compliant environments, the spread operator can be used in a similar fashion.
The three following functions allow you to convert Array-likes into Arrays using Function#apply, Function#call, and array spread, respectively:
function toArrayApply(arrayLike) {
return Array.prototype.slice.apply(arrayLike);
}
function toArrayCall(arrayLike) {
return Array.prototype.slice.call(arrayLike);
}
function toArraySpread(arrayLike) {
return [...arrayLike];
}
Currying and Partial Application
A curried function is a function that, instead of taking the number of parameters it needs in one go, will accept one parameter at a time.
For example, if a function takes two parameters, its curried equivalent will be called twice, with one parameter each time.
Currying can, therefore, be expressed as taking an n-parameter function and turning it into a function that can be called n times with one parameter each time. The classic denomination for an n-parameter function is to call it n-ary. With that in mind, currying is the transformation from an n-ary function to an n-length set of unary function calls:
const sum = (x, y) => x + y;
const sumCurried = x => y => x + y;
console.assert(
sum(1, 2) === sumCurried(1)(2),
'curried version works the same for positive numbers'
);
console.assert(
sum(10, -5) === sumCurried(10)(-5),
'curried version works the same with a negative operand'
);
Partial application and currying are often introduced together and conceptually, they go hand in hand.
With a two-parameter function that is curried, it takes two calls with one parameter, with each doing the same work as the two-parameter un-curried function. When it is called once, it has half the necessary parameters fully applied. The function resulting from that first call is a partial application of the overall function:
const sum = (x, y) => x + y;
const sumCurried = x => y => x + y;
const add1Bind = sum.bind(null, 1);
const add1Curried = sumCurried(1);
console.assert(
add1Bind(2) === add1Curried(2),
'curried and bound versions behave the same'
);
console.assert(add1Bind(2) === 3, 'bound version behaves correctly');
console.assert(add1Curried(2) === 3, 'curried version behaves correctly');
In other words, a partial application is a way of expressing the transformation from the function that takes n parameters to a function that takes n – m parameters, where m is the number of parameters that have been partially applied.
Currying and partial application are useful if we want to be able to reuse generic functionality. The partial application doesn't require currying; currying is the case of turning a function into one that can be partially applied. The partial application can also be done using bind.
Currying and partial application allow you to start with a very generic function and turn it into a more specialized function with every application.
Currying standardizes the number of parameters at each call. The partial application does not have such limitations. You can partially apply with more than one parameter at a time.
A unary function is simpler than a binary function, which is simpler than an N-ary (with N > 2) function.
Also, currying is simpler if we only allow one parameter to be applied at any time. We can see the arbitrary n-parameter partial application with more runtime complexity since each function needs to run some logic on whether this call is the final call or not.
A generic n-ary curry can be defined as follows in ES2015:
const curry = fn => {
return function curried(...args) {
if (fn.length === args.length) {
return fn.apply(this, args);
}
return (...args2) => curried.apply(this, args.concat(args2));
};
};
Leveraging Closures React Function Components
When defining a function, anything that's in scope of the function at definition time will remain in scope at call/execution time. Historically, closures were used to create private variable scopes. The closure is this function and its remembered definition-time scope:
const counter = (function(startCount = 0) {
let count = startCount;
return {
add(x) {
count += x;
},
substract(x) {
count -= x;
},
current() {
return count;
}
};
})(0);
We leverage this within React render functions to cache props and state in the local render scope.
React function components also leverage closures, especially with hooks:
import React from 'react';
function Hello({who}) {
return <p>Hello {who}</p>;
}
const App = () => (
<>
<Hello who="Function Components!" />
</>
);
Function components are quite powerful since they're a bit simpler than class components.
When using a state management solution such as Redux, most of the important state is in the Redux store. This means that we can write mainly stateless functional components since the store manages any stateful part of our application.
Higher-order functions allow us to effectively deal with functions and augment them. Higher-order functions build on top of first-class function support and pure functions. Much in the same way, function composition builds on higher-order functions.
Function Composition
Function composition is another concept that leaks over from mathematics.
Given two functions, a and b, compose returns a new function that applies a to the output of b, which is then applied to a given set of parameters.
Function composition is a way to create a complex function from a set of smaller ones.
This will mean you might end up with a bunch of simple functions that do one thing well. Functions with a single purpose are better at encapsulating their functionality and therefore help with separation of concerns.
Composing functions ties in with currying and the partial application of functions since currying/partial application is a technique that allows you to have specialized versions of generic functions, like so:
const sum = x => y => x + y;
const multiply = x => y => x * y;
const compose = (f, g) => x => f(g(x));
const add1 = sum(1);
const add2 = sum(2);
const double = multiply(2);
To explain the following code, it stands to reason that we have the following:
- Doubling 2 and then adding 1 is 5 (4 + 1).
- Adding 1 to 2 and then doubling is 6 (3 * 2).
- Adding 2 to 2 and then doubling is 8 (4 * 2).
- Doubling 2 and then adding 2 is 6 (4 + 2).
The following uses our already defined functions, add1, add2, and double, and shows how we would use compose to implement the preceding cases. Note that compose applies the rightmost parameter first:
console.assert(
compose(add1, double)(2) === 5
);
console.assert(
compose(double, add1)(2) === 6
);
console.assert(
compose(double, add2)(2) === 8
);
console.assert(
compose(add2, double)(2) === 6
);
An alternative way to define compose is using a left-to-right traversal (with reduce). This has the benefit of allowing us to pass an arbitrary number of arguments when calling the output of composing. To this effect, we reduce from the first parameter to the last parameter, but the output of reducing is a function that supports any number of arguments and calls the previous output after the current function when called.
The following code uses parameter rest to allow for an arbitrary number of functions to be composed:
const composeManyUnary = (...fns) => x =>
fns.reduceRight((acc, curr) => curr(acc), x);
Then, it returns a function that takes a single parameter, x (hence, it's unary). When this second function is called, it will call all the functions that were passed as parameters to composeManyUnary from right to left (the function that was the last parameter will be called first). The first iteration of reduceRight will call the rightmost function with x as its parameter. Subsequent functions are called on the output of the previous function call. The second-to-last function in the parameter list is called with the output of the last function in the parameter list that's applied to x. The third-to-last function in the parameter list is called with the output of the second-to-last function and so on until there are no more functions to call.
Exercise 77: A Binary to n-ary Compose Function
In this exercise, we will implement an n-ary compose function can be used to compose an arbitrary number of functions.
Note
Exercise 77 comes with tests and a skeleton for the methods in the starter file, exercise-2-to-n-compose-start.js. The file can be run with node exercise-2-to-n-compose-start.js. This command has been aliased with npm scripts to npm run Exercise77. The working solution for this exercise can be run using the npm run Exercise77 file on GitHub.
- Change the current directory to Lesson10. This allows us to use pre-mapped commands to run our code.
- Now, run npm run Exercise77 (or node exercise-to-n-compose-start.js). You will see the following output:

Figure 10.26: Running the start file of the exercise
The assertions for compose3, composeManyUnary, and composeManyReduce are all failing, mainly because they're currently aliased to compose2.
- A compose for two functions is already implemented:
const compose2 = (f, g) => x => f(g(x));
compose3 is a naive three-parameter compose function that takes the third parameter, calls it first, then calls the second parameter on the output of the first call.
- Finally, it calls the first parameter on the output of the second parameter, like so:
const compose3 = (f, g, h) => x => f(g(h(x)))
Note
The function that is the furthest to the right of the parameter definition is called first.
Considering the parameters as an array and that JavaScript has a reduceRight function (which traverses an array from right to left while also keeping an accumulator, much like reduce), there is a path forward forming.
- After implementing compose3, we can run npm run Exercise77 again and see that the assertion for compose3 is not failing anymore:

Figure 10.27: Output after implementing compose3
- Use parameter rest to allow for an arbitrary number of functions to be composed:
const composeManyUnary = (...fns) => x =>
fns.reduceRight((acc, curr) => curr(acc), x);
- After implementing composeManyUnary, the corresponding failing assertion is now passing:

Figure 10.28: Output after implementing compose3 and composeManyUnary
- Define that compose is using a left-to-right traversal (with reduce):
const composeManyReduce = (...fns) =>
fns.reduce((acc, curr) => (...args) => acc(curr(...args)));
We can composeManyReduce with three functions, that is, f, g, and h. Our implementation will start reducing through the functions. At the first iteration, it will return a function that will take however many arguments (args). When called, it will call f(g(args)). On the second iteration, it will return a function that takes an arbitrary number of arguments and returns f(g(h(args)). At this point, there are no more functions to iterate through, so the final output of a function that takes a set of arguments and returns f(g(h(arguments))) is the output of the composeManyReduce function.
After implementing composeManyReduce, the corresponding failing assertion is now passing:

Figure 10.29: Implementing compose3, composeManyUnary, and composeManyReduce
Function Composition in the Real World with a Simple BFF
A BFF is a server-side component that wraps (API) functionality in a way that is specific to the user interface it serves. This is as opposed to an API that is designed to export general business logic. The backend for frontend might consume an upstream API or the backing service directly, depending on the architecture. A company might have a set of core services to implement business logic and then a BFF for their mobile application, another BFF for their web frontend, and a final BFF for their internal dashboard. Each of the BFFs will have different constraints and data shapes that make the most sense for their respective consumers.
General-purpose APIs tend to have a larger surface area, are maintained by a different team, and have multiple consumers, which in turn leads to the API's shape evolving slowly. The API endpoints are not specific to the user interface, so the frontend application might have to make a lot of API requests just to load up a single screen. A backend for frontend alleviates these issues since each page or screen can have its own endpoint or dataset that it uses. The backend for a frontend will orchestrate the fetching of any relevant data.
To implement the backend for frontend, micro will be used. micro is a library for "Asynchronous HTTP microservices" and was built by Zeit. It is very small compared to Express or Hapi. In order to do this, it leverages modern JavaScript features as async/await calls, and its composition model is based on function composition. That is, what would be a middleware in Express or Hapi is a higher-order function that takes a function as a parameter and returns a new function. This is a great opportunity to use compose since the interface of the functions that are being composed are function in as a parameter and function out as a return value.
Note
The very brief documentation for micro can be found at https://github.com/zeit/micro. The library itself is barely a couple of hundred lines of JavaScript.
A micro "Hello world" might look as follows. micro accepts a single HTTP handler function that can be async or not. Either way, it is await-ed. It doesn't have a built-in router, which is one of the core APIs that's exposed by Express or Hapi. The output of the handler is sent back as the HTTP response body with a 200 status code:
const micro = require('micro');
const server = micro(async () => {
return '<p>Hello micro!</p>Run this with <code>node example-2-micro-hello.js</code>';
});
server.listen(3000, () => {
console.log('Listening on http://localhost:3000');
});
Adding request timer logging can be done with the built-in JavaScript console.time and console.timeEnd functions:
// handler and server.listen are unchanged
const timer = fn => async (req, res) => {
console.time('request');
const value = await fn(req, res);
console.timeEnd('request');
return value;
};
const server = micro(timer(hello));
Function composition is the frontend, while the center of micro is the API. Adding a more complex operation such as API key authentication doesn't make integration any more difficult.
The authenticate function can have as much complexity as it wants. If it accepts a function parameter and returns a function that takes a req (request) and res (response) object, it will be compatible with other micro packages and handlers:
// handler, timer and server.listen are unchanged
const ALLOWED_API_KEYS = new Set(['api-key-1', 'key-2-for-api']);
const authenticate = fn => async (req, res) => {
const {authorization} = req.headers;
if (authorization && authorization.startsWith('ApiKey')) {
const apiKey = authorization.replace('ApiKey', '').trim();
if (ALLOWED_API_KEYS.has(apiKey)) {
return fn(req, res);
}
}
return sendError(
req,
res,
createError(401, `Unauthorizsed: ${responseText}`)
);
};
const server = micro(timer(authenticate(handler)));
The micro library leverages function composition so that dependencies between each level of request handling are made obvious.
Exercise 78: Leveraging Compose to Simplify the Micro Server Creation Step
In this exercise, you will refactor the timer and authentication example from the previous section to use compose.
Note
Exercise 78 comes with a preconfigured server and a run method alias in the starter files, that is, exercise-micro-compose-start.js. The server can be run with npm run Exercise78. The working solution for this exercise can be run using the npm run Exercise78 file on GitHub.
Perform the following steps to complete this exercise:
- Change the current directory to Lesson10 and run npm install if you haven't done so in this directory before.
- First, run the node exercise-micro-compose-start.js command. Then run npm run Exercise78. You will see the application starting up, as follows:

Figure 10.30: Running the start file of this exercise
- Accessing the application with the following curl should yield an unauthorized response:
curl http://localhost:3000
The following is the output of the preceding code:
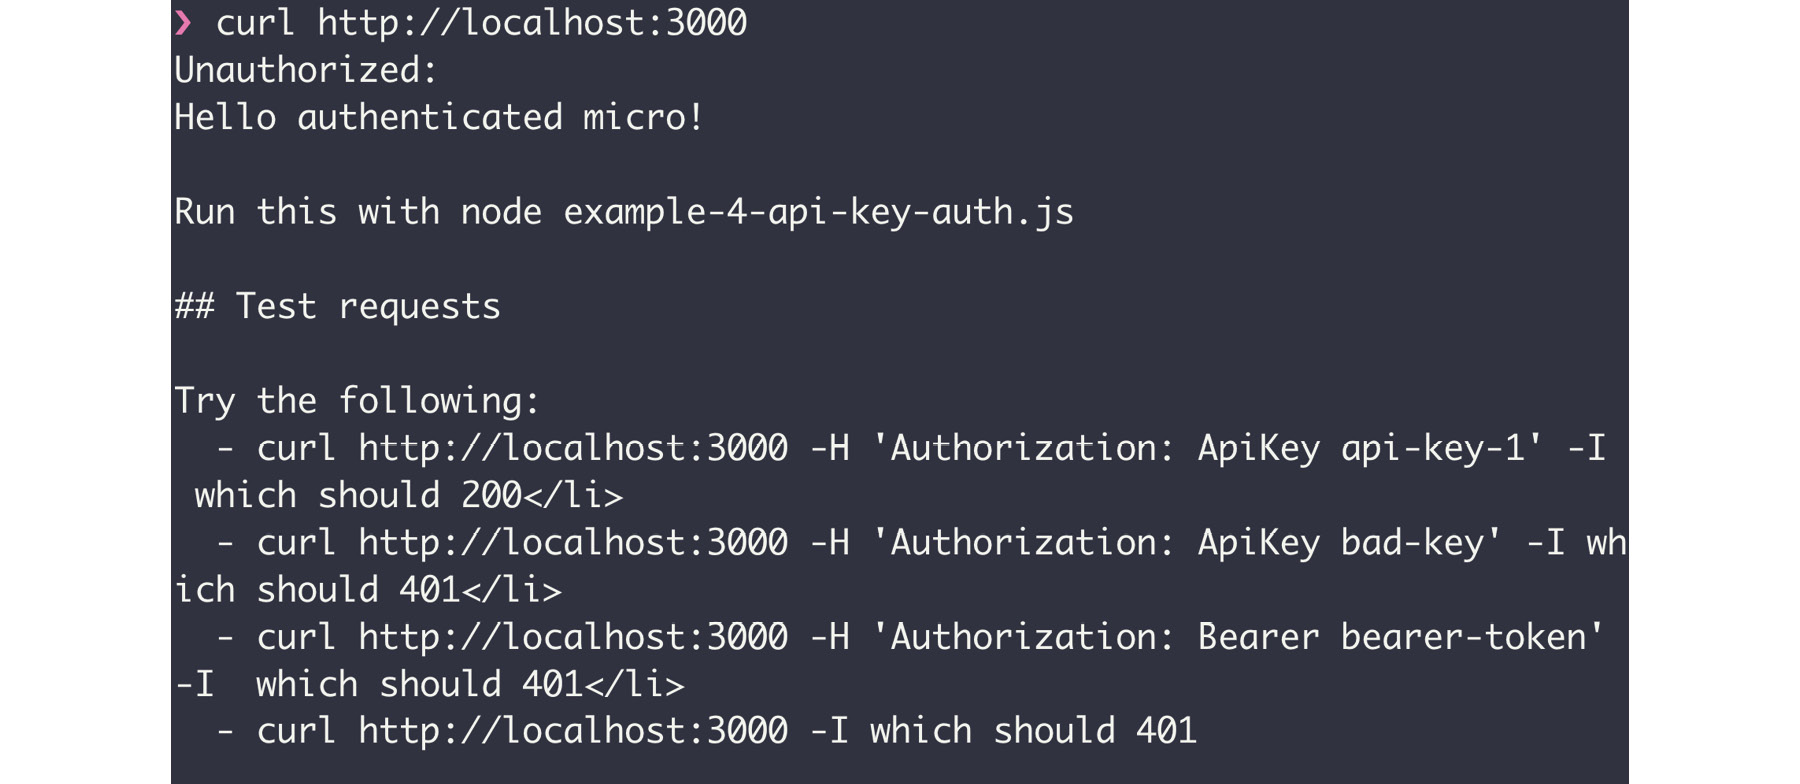
Figure 10.31: cURL of the micro application
Note that the compose function is pre-populated in this module.
- Instead of calling each function on the output of the previous one, we will use compose and call its output to create the server. This will replace the server-creation step:
const server = compose(
micro,
timer,
authenticate,
handler
)();
The server-creation step initially looked as follows, which is quite verbose and possibly difficult to read. The compose version clearly shows the pipeline that a request will have to come through:
const server = micro(timer(authenticate(handler)));
- Restart the application for the changes to take place. Once npm run Exercise78 is up and running, you should be able to curl:
curl http://localhost:3000
Following is the output of the preceding code:
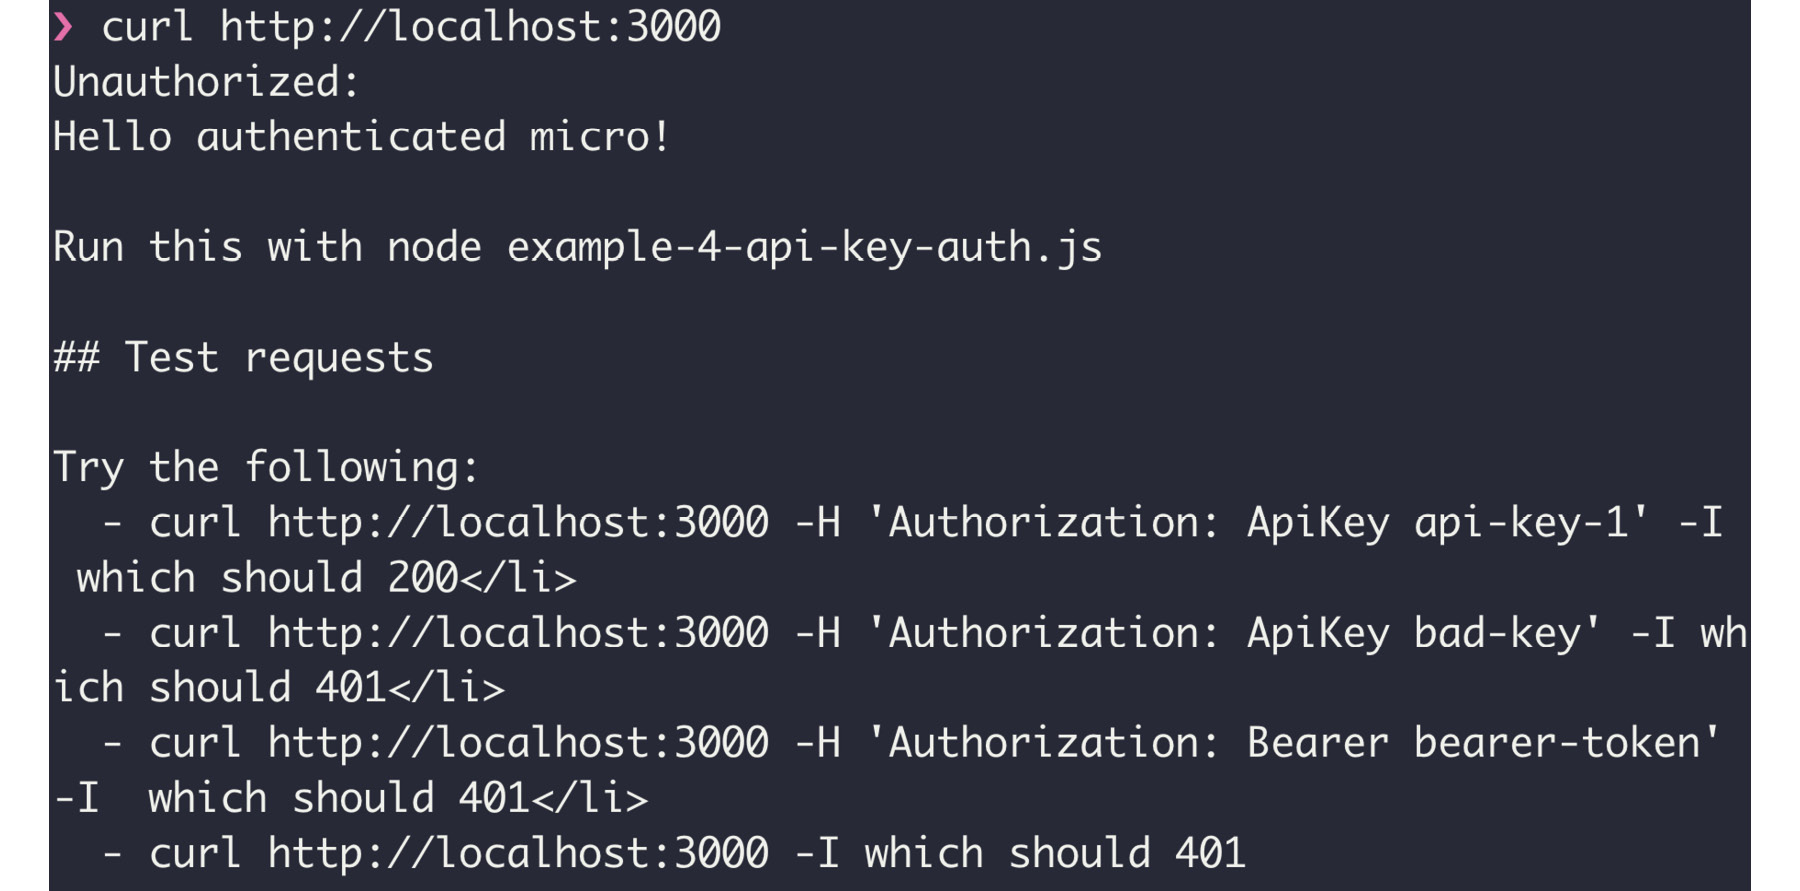
Figure 10.32: cURL of the micro application with compose
In this exercise, we saw that the compose refactor didn't affect the functionality of the application. It is possible to try different requests as per the response.
The preceding problem can be sorted with the following code:
curl http://localhost:3000 -H 'Authorization: ApiKey api-key-1' -I
The following requests will fail with a 401 error since we are not setting a valid authorization header:
curl http://localhost:3000 -H 'Authorization: ApiKey bad-key' -I
curl http://localhost:3000 -H 'Authorization: Bearer bearer-token' -I
For comparison, here is the equivalent BFF application using Express and its middleware-based composition model. It implements similar functionality to the micro BFF we finished this exercise with:
const express = require('express');
const app = express();
const responseText = `Hello authenticated Express!`;
const timerStart = (req, res, next) => {
const timerName = `request_${(Math.random() * 100).toFixed(2)}`;
console.time(timerName);
req.on('end', () => {
console.timeEnd(timerName);
});
next();
};
const ALLOWED_API_KEYS = new Set(['api-key-1', 'key-2-for-api']);
const authenticate = (req, res, next) => {
const {authorization} = req.headers;
if (authorization && authorization.startsWith('ApiKey')) {
const apiKey = authorization.replace('ApiKey', '').trim();
if (ALLOWED_API_KEYS.has(apiKey)) {
return next();
}
}
return res.status(401).send(`Unauthorized: <pre>${responseText}</pre>`);
};
const requestHandler = (req, res) => { return res.send(responseText);
};
app.use(timerStart, authenticate, requestHandler);
app.listen(3000, () => {
console.log('Listening on http://localhost:3000');
});
Knowing about the possibilities that function composition brings will mean more reflection goes into the design of the function interface (inputs and outputs) so that, for example, compose can be leveraged. The next section covers immutability and side effects, which are necessary so that we can compose a set of partially applied or pure functions.
Immutability and Side Effects
In a pure function context, the mutation of variables is considered a side effect and therefore a function where the mutation occurs, especially of variables that live beyond the execution of the function, is not pure.
Immutability in JavaScript is hard to enforce but the language gives us good primitives to write in an immutable style. This style leans heavily on operators and functions that create a copy of data instead of mutating in place.
It is possible to write entire sections of applications without using side effects. Any data manipulation is possible without side effects. Most applications, however, need to load the data so that it is displayed from somewhere and possibly save some of the data somewhere as well. These are side effects that need to be managed.
A Look at Redux Action Creators
Action creators create Redux actions. They're useful to abstract the constants and centralize what actions the Redux store supports.
Action creators always return a new action object. Creating and returning a new object is a good way to guarantee the immutability of the return value at least as far as the action creator is concerned. If the action creators returned some version of their parameters, it could make for surprising outputs:
const ADD_PRODUCT = 'ADD_PRODUCT';
function addProduct(newProduct) {
return {
type: ADD_PRODUCT,
newProduct
};
}
Instead of calling dispatch with a manually marshaled object, it can be called with the output of an action creator:
this.props.dispatch(addProduct(newProduct))
Exercise 79: Refactoring the React/Redux Application to Use Action Creators
Action creators are a great way to abstract the action shape from the React component.
Note
Exercise 79 comes with a preconfigured development server and a skeleton for the methods in the starter files, that is, exercise--refactor-action-creators-start.js and exercise-refactor-action-creators-start.html. The development server can be run with npm run Exercise79. The working solution for this exercise can be run using the npm run exercise10 file on GitHub.
In this exercise, you will go from using inline action definitions to using action creators.
Perform the following steps to complete this exercise:
- Change the current directory to Lesson10 and run npm install if you haven't done so in this directory before. npm install downloads the dependencies that are required in order to run this activity (React, Redux, react-redux, and Parcel).
- First, run npx parcel serve exercise-refactor-action-creators-start.html. To see the application during development, run npm run Exercise79. You will see the application starting up, as follows:

Figure 10.33: Running the start file of this exercise
For the development server to live-reload our changes and to avoid configuration issues, edit the exercise-refactor-action-creators-start.js file directly.
- Go to http://localhost:1234 (or whichever URL the starting script output). You should see the following HTML page:
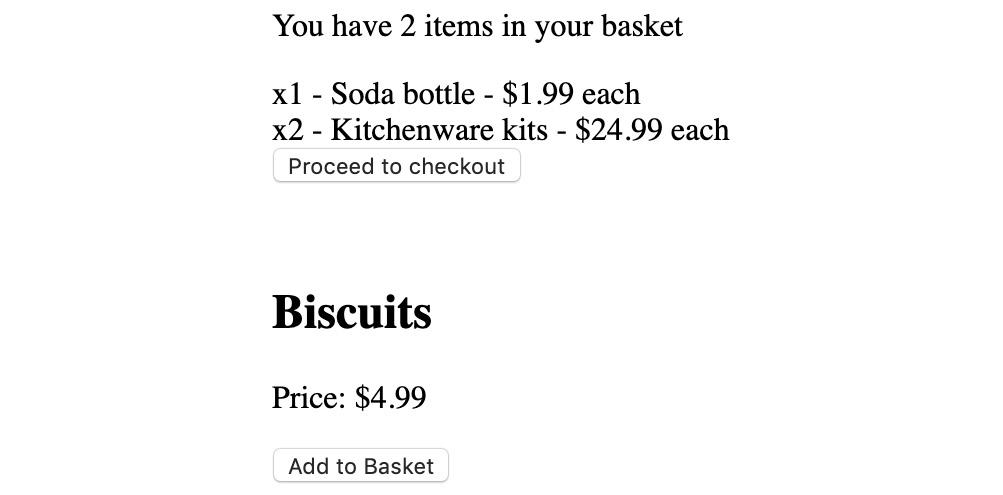
Figure 10.34: Initial application in the browser
- Implement the startCheckout, continueShopping, done, and addProduct action creators:
function startCheckout(items) {
return {
type: START_CHECKOUT,
basket: {
items
}
};
}
function continueShopping() {
return {
type: CONTINUE_SHOPPING
};
}
function done() {
return {
type: DONE
};
}
function addProduct(newProduct) {
return {
type: ADD_PRODUCT,
newProduct: {
...newProduct,
quantity: 1
}
};
}
These return the following action types, respectively: START_CHECKOUT, CONTINUE_SHOPPING, DONE, and ADD_PRODUCT.
- Update handleCheckout to use the corresponding startCheckout action creator:
handleCheckout(items) {
this.props.dispatch(startCheckout(items));
}
- Update continueShopping to use the corresponding continueShopping action creator:
continueShopping() {
this.props.dispatch(continueShopping());
}
- Update finish to use the corresponding done action creator:
finish() {
this.props.dispatch(done());
}
- Update addProduct to use the corresponding addProduct action creator:
addProduct(product) {
this.props.dispatch(addProduct(product));
}
- Check that the application still behaves as expected:
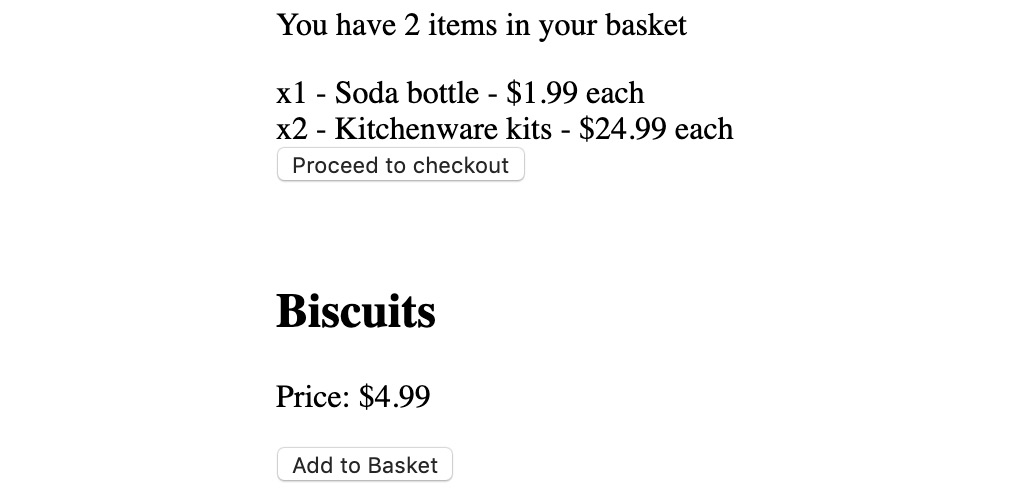
Figure 10.35: Application after refactoring the action creators
React-Redux mapStateToProps and mapDispatchToProps
The core proposition of react-redux is the connect function which, as its name suggests, connects components to the store. It has a signature of connect(mapStateToProps, mapDispatchToProps) (component) and returns a connect component.
In most examples, the mapStateToProps function has been stated => state, which makes sense in a small application where all the state is relevant for the connected component. In principle, selectors should be used in mapStateToProps to avoid passing too many props and therefore the component re-renders when data it doesn't even use changes. The following is a small example of the mapStateToProps function:
const mapStateToProps = state => {
return {
items: selectBasketItems(state),
status: selectStatus(state),
product: selectProduct(state)
};
};
Let's complete an exercise using mapStateToProps.
Exercise 80: Abstracting State Management Using the mapDispatchToProps Function
In this exercise, you will manage the state using a mapDispatchToProps function that leverages selectors to abstract the internal shape of the redux store.
Perform the following steps to complete this exercise:
- Change the current directory to Lesson10 and run npm install if you haven't done so in this directory before.
- First, run npx parcel serve exercise-map-to-props-start.html. Then, during development, run npm run Exercise80. You will see the application starting up, as follows:
Note
Exercise 80 comes with a preconfigured development server and a skeleton for the methods in the starter files, that is, exercise-map-to-props-start.js and exercise-map-to-props-start.html. The development server can be run with npm run Exercise80. The working solution for this exercise can be run using the npm run Exercise80 file on GitHub.

Figure 10.36: Output of npm run Exercise80
- Go to http://localhost:1234 (or whichever URL the starting script output). You should see a blank HTML page. This is due to mapStateToProps returning an empty state object.
Note
The audit explains which pieces of state (from the store) are used by the App component and how product, items, and status are the slices of state being used.
- Create a new selector for status:
const selectStatus = state => state && state.status;
- Create a new selector for product:
const selectProduct = state => state && state.product;
- In mapStateToProps, map items, product, and status to their corresponding selectors, which are applied to the state:
const mapStateToProps = state => {
return {
items: selectBasketItems(state),
status: selectStatus(state),
product: selectProduct(state)
};
};
- Take the functions that call dispatch in the App component and extract them to mapDispatchToProps, taking care to remove this.props from this.props.dispatch. Dispatch is the first parameter to mapDispatchToProps. Our code should now look as follows:
const mapDispatchToProps = dispatch => {
return {
handleCheckout(items) {
dispatch(startCheckout(items))
},
continueShopping() {
dispatch(continueShopping());
},
finish() {
dispatch(done());
},
addProduct(product) {
dispatch(addProduct(product));
}
};
};
- Replace the references in App#render to this.handleCheckout. Instead, call this.props.handleCheckout:
{status === 'SHOPPING' && (
<Basket
items={items}
renderItem={item => (
<div>
x{item.quantity} - {item.name} - $
{(item.price / 100).toFixed(2)} each{' '}
</div>
)}
onCheckout={this.props.handleCheckout}
/>
)}
- Replace the references in App#render to this.continueShopping and this.finish. Instead, call this.props.continueShopping and this.props.finish, respectively:
{status === 'CHECKING_OUT' && (
<div>
<p>You have started checking out with {items.length} items.</p>
<button onClick={this.props.continueShopping}>
Continue shopping
</button>
<button onClick={this.props.finish}>Finish</button>
</div>
)}
- Replace the references in App#render to this.addProduct. Instead, call this.props.addProduct:
{status === 'SHOPPING' && (
<div style={{marginTop: 50}}>
<h2>{product.name}</h2>
<p>Price: ${product.price / 100}</p>
<button onClick={() => this.props.addProduct(product)}>
Add to Basket
</button>
</div>
)}
- Open http://localhost:1234, to see that the application now behaves as expected. You can add products, go to the checkout, and finish or continue shopping:
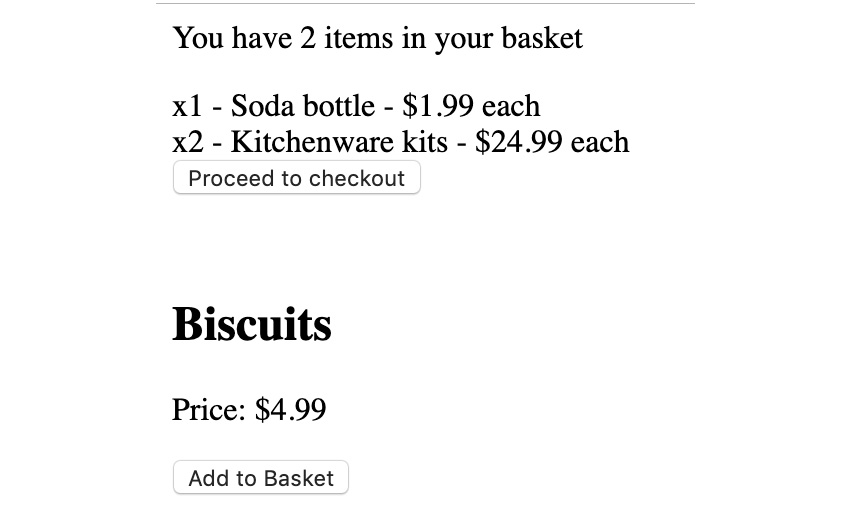
Figure 10.37: Application after mapStateToProps/mapDispatchToProps refactor
The application now works with the properly implemented mapStateToProps and mapDispatchToProps functions. React and Redux are further abstracted from each other. There is no more state in React components, nor are there direct calls to the store's dispatch method. This means that, in principle, another state management library could be used to replace Redux and the React code wouldn't change; only the glue code between the state manager and the React App component would change.
Redux Reducers In Depth
Redux reducers should not mutate the Redux store state. As compared to first principles, pure functions are easier to test, and their outcome is easier to predict. As a state management solution, Redux has two roles: to keep the state as expected and to make sure updates are propagated efficiently and promptly.
Pure functions can help us achieve that goal by operating with immutability in mind. Returning copies helps with change detection. For example, it is costlier to detect that a large section of the keys within an object have been updated than to detect that an object has been replaced by a shallow copy of itself. In the first instance, an expensive deep comparison that walks through the whole object to detect differences in primitive values and/or structure would have to be done. In the shallow copy case, the fact that the object reference is different is all it takes to detect the change. This is trivial and has to do with the === JavaScript operator, which compares objects by reference.
Changing JavaScript-Native Methods to an Immutable Functional Style
Map/filter/reduce do not mutate the initial array they operate on. Throughout the following snippet, the values for initial remain unchanged. Array#map returns a copy of the array so that it doesn't mutate the array it is operating on. The same is true for Array#reduce and Array#filter; they're both used on an array but don't change any values in place. Instead, they create new objects:
// Node.js built-in
const assert = require('assert').strict;
const initial = [
{
count: 1,
name: 'Shampoo'
},
{
count: 2,
name: 'Soap'
}
];
assert.deepStrictEqual(
initial.map(item => item.name),
['Shampoo', 'Soap'],
'demo map'
);
assert(
initial.map(item => item.count).reduce((acc, curr) => acc + curr) === 3,
'demo map reduce'
);
assert.deepStrictEqual(
initial.filter(item => item.count > 1),
[{count: 2, name: 'Soap'}],
'demo filter'
);
Object rest and spread syntax, which was introduced in ECMAScript 2018, is a great way to create shallow copies of objects and exclude/override keys. The following code combines Array#map and object rest/spread to create a shallow copy of the array (using Array#map) but also creates shallow copies of the objects inside the array using rest/spread:
// Node.js built-in
const assert = require('assert').strict;
const initial = [
{
count: 1,
name: 'Shampoo'
},
{
count: 2,
name: 'Soap'
}
];
assert.deepStrictEqual(
initial.map(item => {
return {
...item,
category: 'care'
};
}),
[
{
category: 'care',
count: 1,
name: 'Shampoo'
},
{
category: 'care',
count: 2,
name: 'Soap'
}
],
'demo of spread (creates copies)'
);
assert.deepStrictEqual(
initial.map(({name, ...rest}) => {
return {
...rest,
name: `${name.toLowerCase()}-care`
};
}),
[
{
count: 1,
name: 'shampoo-care'
},
{
count: 2,
name: 'soap-care'
}
],
'demo of rest in parameter + spread'
);
The array's rest and spread syntax predate the object's spread/rest since it was part of ECMAScript 2015 (also known as ES6). Much like its object counterpart, it is very useful for creating shallow copies. Another use case we have already seen is converting Array-like objects into fully-fledged Arrays. The same trick can also be used with iterrable such as Set.
In the following examples, Array spread is being used to create a copy of an array before sorting it and being used to convert a Set into an Array. Array spread is also being used to create a copy of all but the first element of an array:
// Node.js built-in
const assert = require('assert').strict;
const initial = [
{
count: 1,
name: 'Shampoo'
},
{
count: 2,
name: 'Soap'
}
];
assert.deepStrictEqual(
// Without the spread, reverse() mutates the array in-place
[...initial].reverse(),
[
{
count: 2,
name: 'Soap'
},
{
count: 1,
name: 'Shampoo'
}
],
'demo of immutable reverse'
);
assert.deepStrictEqual(
[...new Set([1, 2, 1, 2])],
[1, 2],
'demo of spread on Sets'
);
const [first, ...rest] = initial;
assert.deepStrictEqual(first, {count: 1, name: 'Shampoo'});
assert.deepStrictEqual(rest, [
{
count: 2,
name: 'Soap'
}
]);
Object.freeze makes an object read-only if it's running in strict mode.
For example, the following snippets of code will use throw since we're trying to add a property to a frozen object in strict mode:
// Node.js built-in
const assert = require('assert').strict;
const myProduct = Object.freeze({
name: 'Special Sauce',
price: 1999
});
assert.throws(() => {
'use strict';
myProduct.category = 'condiments';
}, 'writing to an existing property is an error in strict mode');
assert.throws(() => {
'use strict';
myProduct.name = 'Super Special Sauce';
}, 'writing a new property is an error in strict mode');
Object.freeze is seldom used in practice. JavaScript, as a language designed to run in the browser, is built to be very permissive. Runtime errors exist but should be avoided, especially for something that is bound to be an application issue: writing to a property that is read-only.
What's more, Object.freeze only throws in non-strict mode. Take a look at the following example, where accessing and mutating properties on a frozen object is allowed because, by default, JavaScript runs in non-strict mode:
// Node.js built-in
const assert = require('assert').strict;
const myProduct = Object.freeze({
name: 'Special Sauce',
price: 1999
});
assert.doesNotThrow(() => {
myProduct.category = 'condiments';
}, 'writing to an existing property is fine in non-strict mode');
assert.doesNotThrow(() => {
myProduct.name = 'Super Special Sauce';
}, 'writing a new property is fine in non-strict mode');
Instead of enforcing immutability, engineering teams often choose to adhere to coding standards that embrace an immutable style.
Note
It is also possible to leverage libraries such as Immutable.js, which provides persistent immutable data structures that are implemented in an efficient manner.
Handling Side Effects in a React/Redux Application React Life Cycle Hooks
The React component's render() method should be pure, so it does not support side effects. Being able to predict whether a component needs to re-render based on its inputs (props and state) means a lot of otherwise wasteful updates can be avoided. Since every state or prop update can cause a call to render, it is probably not the best spot to place API calls.
What the React documentation suggests is to use the componentDidMount life cycle method. componentDidMount runs after the component is mounted. In other words, it runs the first time the component is rendered on a page if it wasn't being rendered in the previous state of the React application.
We can use componentDidMount to send the HTTP request with fetch. The fetch Promise's .then can be used to update the state from the server response:
import React from 'react';
class App extends React.Component {
constructor() {
super();
this.state = {};
}
componentDidMount() {
fetch('https://hello-world-micro.glitch.me')
.then(response => {
if (response.ok) {
return response.text();
}
})
.then(data => {
this.setState({
message: data
});
});
}
render() {
return (
<div>
<p>Message: {this.state.message}</p>
</div>
);
}
}
Handling Side Effects in a React/Redux Application React Hooks
As a recent addition to React, hooks allow function components to leverage all the features that used to be specific to class components.
The previous example can be refactored into a function component that uses the useState and useEffect hooks. useState is a way we can use state with React function components using a hook. React will re-render the function component when the state from useState changes. useEffect is a counterpart to componentDidMount and is called before the render of the component if the component wasn't being rendered in the application's previous state:
import React, {useEffect, useState} from 'react';
const App = () => {
const [message, setMessage] = useState(null);
useEffect(() => {
if (!message) {
fetch('https://hello-world-micro.glitch.me')
.then(response => {
if (response.ok) {
return response.text();
}
})
.then(data => {
setMessage(data);
});
}
});
return (
<div>
<p>Message: {message}</p>
</div>
);
};
Handling Side Effects in a React/Redux Application Redux-Thunk
A thunk is a way to delay the evaluation of a function. It is a way to do lazy evaluation in languages that don't support it out of the box:
let globalState;
function thunk() {
return () => {
globalState = 'updated';
};
}
const lazy = thunk();
console.assert(!globalState, 'executing the thunk does nothing');
lazy();
console.assert(
globalState === 'updated',
'executing the output of the thunk runs the update'
);
It is also a way to encapsulate side effects. Since we have first-class functions, we pass the thunk around, which is allowed in pure functions (the thunk is just a function), although calling the thunk itself might have side effects.
redux-thunk is quite simple; instead of passing an action creator that returns an object (with a type field and possibly a payload), the action creator returns a function that takes the store's dispatch and getState as parameters.
Inside the thunk, it is possible to access the current store state and dispatch actions, which will be reduced into the store. See the following example with Redux and redux-thunk:
// store is set up, App is connected, redux-thunk middleware is applied
import React from 'react';
class App extends React.Component {
componentDidMount() {
// this looks like any action creator
this.props.dispatch(requestHelloWorld());
}
render() {
return (
<div>
<p>Message: {this.props.message}</p>
</div>
);
}
}
function requestHelloWorld() {
// this action creator returns a function
return (dispatch, getState) => {
fetch('https://hello-world-micro.glitch.me')
.then(response => {
if (response.ok) {
return response.text();
}
})
.then(data => {
dispatch({
type: 'REQUEST_HELLO_WORLD_SUCCESS',
message: data
});
})
.catch(error => {
dispatch({
type: 'REQUEST_HELLO_WORLD_ERROR',
error
});
});
};
}
Introduction to GraphQL Language Schemas and Queries
GraphQL is a query language. It exposes a typed schema to run queries against. The massive benefit of GraphQL is that the client requests what information it needs. This is a direct effect of having a typed schema.
We will add GraphQL to our BFF using express-graphql, which is compatible with micro. We need to provide our GraphQL endpoint with a schema and resolvers so that it can respond to client requests. Such a server is provided in the Exercise 12 start file (change the working directory to Lesson10, run npm install followed by npm run Exercise81, and navigate to http://localhost:3000 to see it in action).
A sample GraphQL query that returns a basket can work within the following GraphQL schema definition. Note how we have three types, that is, Query, basket, and basketItem. A basket contains a list of basketItems under an items property. The query contains the top-level GraphQL query fields, which in this case is just basket. To query for basketItems, we must load the corresponding basket and expand the items field:
type basket {
items: [basketItem]
}
"""BasketItem"""
type basketItem {
name: String
price: Int
quantity: Int
id: String
}
"""Root query"""
type Query {
basket: basket
}
A tool that comes baked into Node.js GraphQL server components is GraphiQL. It is an interface for GraphQL that allows users to go through the schema and provides documentation of the schema.
The query that we entered reads as follows: load the basket top-level query field, expand its items field, and populate the name, quantity, and price of the basketItem elements in the basket's items field:
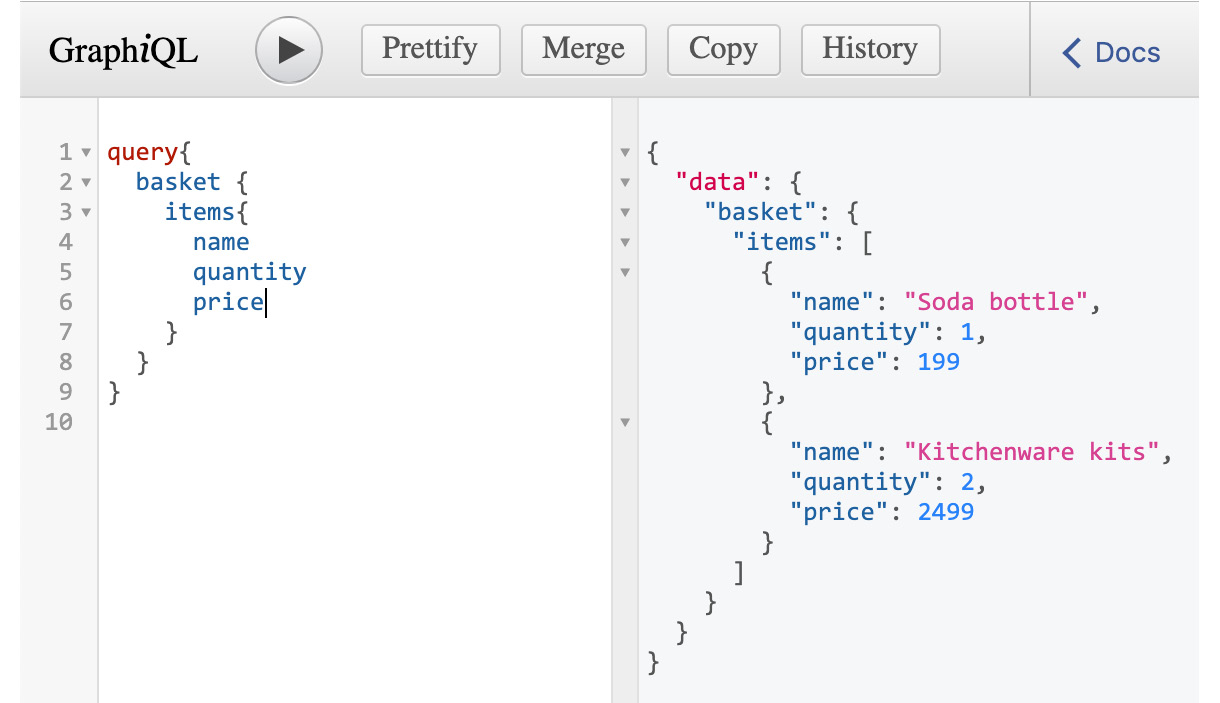
Figure 10.38: GraphiQL user interface and a GraphQL query that fetches fully expanded basket items
Running Updates with GraphQL Mutations and Resolvers
In a query and schema world, one thing that's sorely missing is a way to run write operations. That is where GraphQL mutations come in. Mutations are structured update operations.
Resolvers are a server-side GraphQL implementation detail. A resolver is what resolves a GraphQL query. Resolvers run from the top to the bottom of the schema chain. When resolving a query, fields on an object are executed in parallel; when resolving a mutation, they're resolved in sequence. The following is an example of a mutation being used:
const mutation = new GraphQLObjectType({
name: 'Mutation',
fields() {
return {};
}
});
Note
More guides on GraphQL can be found at https://graphql.org.
Exercise 81: Implementing a BFF Mutation with micro and GraphQL
In this exercise, we will use micro and GraphQL to implement a BFF mutation.
Perform the following steps to complete this exercise:
Note
Exercise 81 comes with a preconfigured server and a skeleton for the methods in the starter file exercise-graphql-micro-start.js. The development server can be run with npm run Exercise81. The working solution for this exercise can be run using the npm run Exercise81 file on GitHub.
- Change the current directory to Lesson10 and run npm install if you haven't done so in this directory before. npm install downloads the dependencies that are required so that we can run this activity (micro and express-graphql).
- Run node exercise-graphql-micro-start.js. Then, during development, run npm run Exercise81. You will see the application starting up, as follows:

Figure 10.39: Running the start file of this exercise
- Go to http://localhost:3000 (or whichever URL the starting script output). You should see the following GraphiQL page:

Figure 10.40: Empty GraphiQL user interface
- Add a LineItemCost constant, which is a field definition (plain JavaScript object):
const LineItemCost:
= {
type: GraphQLInt,
args: {id: {type: GraphQLString}},
resolve(root, args, context) {
return 4;
}
};
Our LineItemCost should have a type property set to GraphQLInt since the output of LineItemCost calculation is an integer. LineItemCost should also have an args field, which should be set to {id: {type: GraphQLString}}. In other words, our mutation takes an id argument that is a string (which is congruent with the sample data we have). For the mutation to return something, it needs a resolve() method. For now, it can return any integer. The resolve method of a mutations takes the root as the first parameter and the args as the second parameter.
- Let's implement the actual resolve method of LineItemCost now. First, we need to look up the item from basketItems by ID using .find(el => el.id === args.id). Then, we can calculate the cost of the item (item.price * item.quantity), as follows:
const LineItemCost = {
type: GraphQLInt,
args: {id: {type: GraphQLString}},
resolve(root, args, context) {
const item = basketItems.find(i => i.id === args.id);
return item ? item.quantity * item.price : null;
}
};
- Create a mutation constant that's a GraphQLObjectType. See how the query is initialized; its name should be Mutation:
const mutation = new GraphQLObjectType({
name: 'Mutation',
fields() {
return {};
}
});
- Add LineItemCost to the mutation fields() return value. This means that LineItemCost is now a top-level mutation. It can be called if mutation exists on the GraphQL schema:
const mutation = new GraphQLObjectType({
name: 'Mutation',
fields() {
return {LineItemCost};
}
});
- Add mutation to the GraphQLSchema schema:
const handler = graphqlServer({
schema: new GraphQLSchema({query, mutation}),
graphiql: true
});
- Send the following query to your server (through GraphiQL). Enter it on the left-hand side editor and click the Play button:
mutation {
cost1: LineItemCost(id: "1")
cost2: LineItemCost(id: "2")
}
Note
This mutation is using what are called GraphQL aliases since we can't run the mutation under the same name twice.
The output should be as follows:
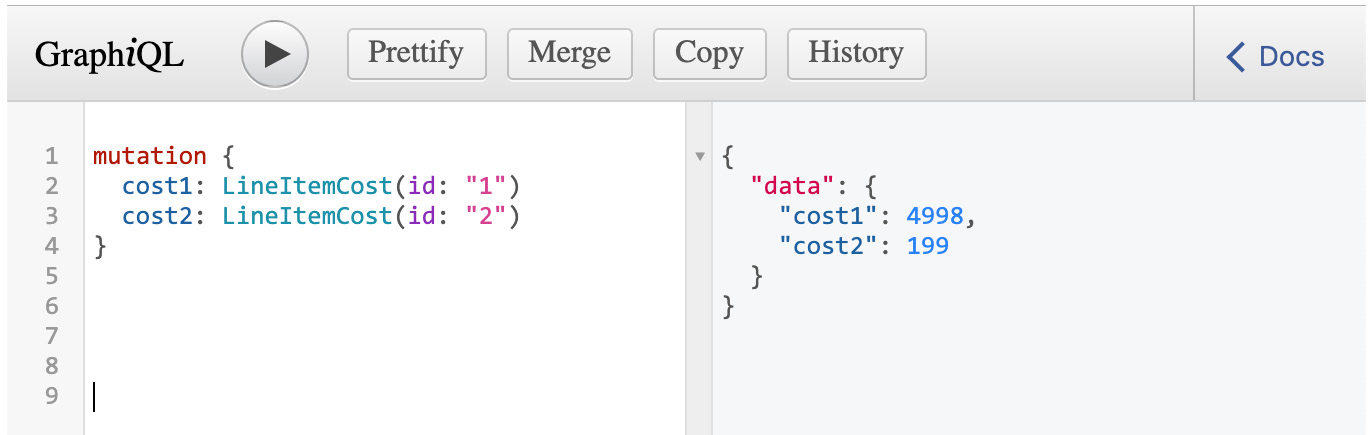
Figure 10.41: GraphiQL with LineItemCost aliased mutation queries for IDs "1" and "2"
To make the basket example more realistic, we will load the initial basket data from the GraphQL BFF, using the GraphQL query, redux-thunk, to handle the side effect, and a new reducer to update the Redux store state. The aim of the next activity is to show you how we can integrate a GraphQL BFF with a React/Redux application with redux-thunk.
Activity 17: Fetching the Current Basket From BFF
In this activity, we will fetch initial basket data from GraphQL BFF to re-render items to the shopping basket, thus updating the initial state of the basket. Let's get started:
Note
Activity 17 comes with a preconfigured development server and a skeleton for the methods in the starter files, that is, activity-app-start.js and activity-app-start.html. The development server can be run with npm run Activity17. The working solution for this activity can be run using the npm run Activity17 file on GitHub.
- Change the current directory to Lesson10 and run npm install if you haven't done so in this directory before.
- Run the BFF for Activity 17 and npx parcel serve activity-app-start.html. During development, run npm run Activity17.
- Go to http://localhost:1234 (or whichever URL the starting script output) to check the HTML page.
- Write a query that will fetch basket items from the BFF. You can use the GraphQL UI at http://localhost:3000 to experiment with this.
- Create a requestBasket (thunk) action creator that will call fetchFromBff with the query from the previous step.
- Chain a .then onto the fetchFromBff() call to dispatch a REQUEST_BASKET_SUCCESS action with the right basket payload.
- Add a case to the appReducer that will reduce a REQUEST_BASKET_SUCCESS action with a basket payload into the state.
- Add requestBasket to mapDispatchToProps.
- Call requestBasket, which is mapped to dispatch, in App#componentDidMount.
Note
The solution for this activity can be found on page 628.
Summary
First-class functions are part and parcel of using a popular library such as React and its patterns. They also power any and every delegation of implementation, especially on built-ins such as Array. Another core tenet of functional programming is pure functions. Using pure functions for complex data manipulation logic or an abstraction layer around a data structure is a great pattern that was put forward by the popular Redux state management solution. Any side effects and/or dependencies that must be mocked make it that much harder to reason about a complex data manipulation. Higher-order functions and specific techniques such as currying and partial application are widespread in day-to-day JavaScript development. Currying and partial application is a way to design functions with an interface that makes each step of specialization "savable" since it is already a function that has already been applied with a certain number of parameters.
The composition can have real value if a function application pipeline has been spotted. For example, modeling HTTP services as pipelines makes quite a lot of sense. On the other hand, the Node.js HTTP server ecosystem leaders use a middleware-based composition model, micro, which exposes a function composition model. Writing JavaScript in an immutable style allows libraries to have a cheap way to check whether something has changed or not. Side effects in React and Redux are handled outside the regular flow of pure functions, that is, render functions and reducers. Redux-thunk is quite a functional solution to the problem, albeit at the cost of making functions valid actions. Pure Redux actions are JavaScript objects with a type of property.
In this book, we've learned about various frameworks, including React, Angular, and related tools and libraries. It has taught us about the advanced concepts you need to know about to build modern applications. Then, we learned how to represent an HTML document in the Document Object Model (DOM). Later, we combined our knowledge of the DOM and Node.js to create a web scraper for practical situations.
In the next part, we created a Node.js-based RESTful API using the Express library for Node.js. We had a look at how modular designs can be used for better reusability and collaboration with multiple developers on a single project. We also learned how to build unit tests that ensure that the core functionality of our program is not broken over time. We saw how constructors, async/await, and events can load our applications with high speed and performance. The final part of this book introduced you to functional programming concepts such as immutability, pure functions, and higher-order functions.