11
Internationalization
INTERNATIONALIZATION AND LOCALIZATION
Using the built‐in translation functions in WordPress, you can easily make your plugin available to a wide variety of people without any knowledge of your users’ written languages. The process of translation is handled for you by WordPress if you follow a few simple steps during the development process.
Internationalization deals with making sure strings of text are wrapped in specific function calls. It is the practice of making text ready for localization. The shorthand term for internationalization is i18n, which you may encounter in some situations.
Localization is the process of translating text for a specific locale. WordPress handles the localization process by checking for specific translation files and performing the translation. It's a plugin's job to handle internationalization so that localization can take place. The shorthand term for localization is L10n.
Why Internationalize?
Internationalizing your plugin can benefit both you and your plugin users. Compared to the more complex functionality you'll likely use when developing a plugin, internationalization will seem much easier after you follow the guidelines set out in this chapter.
- You benefit by having a larger audience of people using your plugin.
- Users benefit by using the plugin in their language.
Some plugin authors even develop relationships with translators of their plugins after working closely together to get a translation done. Forming relationships with new people is always a benefit of working on open source projects, and by internationalizing your plugin, you open the door for more possibilities than with plugins that aren't internationalized.
Understanding Internationalization in Professional Work
Generally, when preparing your plugin for translation, you would do so if it is intended for public release because many of your users may run sites in languages other than your own.
Not all plugins are for use by the public. When performing custom client development, it's not always necessary to follow the steps outlined in this chapter. If your client's site is in only a single language, there might not be a need for translation. However, some clients run multilingual sites and may use a multilingual plugin that enables their content to be read in several languages. In this case, your plugin should be internationalized. You should always check with your client to see whether internationalization is a requirement.
Although it's not always necessary to internationalize text for client work, it is considered best practice to internationalize all text. This saves you from potentially having to recode it for translation later if the client changes their mind about needing translatable text, and it's always good to stick to best practices when coding.
Also, a potential benefit to learning the tools in this chapter is having an extra bullet point on your résumé for clients in need of this skill.
Getting Your Plugin Ready for Translation
The first step is to identify the text domain that your plugin will use. This is a unique identifier and denotes all text that belongs to your plugin. The text domain must match the slug of your plugin, meaning if your plugin is contained within a folder called pdev‐plugin, the text domain will be pdev‐plugin. It's important to note that if your plugin is hosted on Wordpress.org, the text domain much match the slug of your plugin URL, for example: wordpress.org/plugins/<slug>.
On occasion, there may be a case for defining a custom text domain that does not match your plugin's name. To do this, you can define a custom text domain in your plugin header like so:
/** Plugin Name: PDEV Plugin* Author: Michael Myers* Text Domain: halloween-plugin*/
This step is required only if you need to set a custom text domain that differs from your plugin name.
Now that you have identified the text domain for your plugin, you'll make your plugin translatable by using the load_plugin_textdomain() function.
<?phpload_plugin_textdomain( $domain, $abs_rel_path, $plugin_rel_path );?>
This function tells WordPress to load a translation file if it exists for the user's language and accepts the following parameters:
-
$domain: A unique string that identifies text in your plugin that has been prepared for translation. You should give this the same value as the name of your plugin folder, as described earlier. -
$abs_rel_path: A deprecated parameter that should no longer be used. Setting this tofalseis best. -
$plugin_rel_path: Relative path to the translations of your plugin from the user's plugin directory (WP_PLUGIN_DIR).
If you were creating a plugin with a folder name of pdev‐plugin, your code would look like this:
<?phpadd_action( 'init', 'pdev_load_textdomain' );function pdev_load_textdomain() {load_plugin_textdomain( 'pdev-plugin', false, 'pdev-plugin/languages' );}?>
Here, the $domain value is pdev‐plugin to match the plugin folder name, the $abs_rel_path value is false because it's unneeded, and the $plugin_rel_path value is pdev‐plugin/languages because this is where you store translation files. You'll also notice you are using the init hook to register your plugin translations.
The last parameter is the directory of the plugin (
pdev‐plugin) and a subdirectory of the plugin (
languages). It's important to create an extra folder in your plugin called languages to house any translations for your plugin. If you ever get more than a handful of translations, you'll want this folder because placing all those files in the top directory of your plugin can get messy.
Echoing and Returning Strings
WordPress has many useful functions for making internationalization easy. Every time you add textual content in your plugin, you should wrap it in one of the WordPress translation functions. This will identify the text string as a translatable string within your plugin.
Each one of these functions has at least one parameter that you'll use: $domain. This is the unique variable used in the “Getting Your Plugin Ready for Translation” section: pdev‐plugin. The value of this variable enables WordPress to recognize it as a part of your plugin's translation files.
When viewing the core WordPress files, you'll likely notice that $domain is never set. WordPress uses the default, so your plugin should have a unique string to set it apart from the core.
The __() Function
The __() function works by making your text ready for translation and returning it for use in PHP. This function accepts two parameters.
-
$text: The text that is available for translation -
$domain: The text domain defined for your plugin
In this example, you will assign the return value of __() to a PHP variable. Note that this function uses a double underscore, not a single underscore.
<?php$text = __( 'WordPress is a wonderful publishing platform.', 'pdev-plugin' );?>
The _e() Function
The _e() function makes your text ready for localization. It works similarly to echo in PHP by displaying text on the screen. The function accepts two parameters: $domain and $text. The $text variable is the content you want translated. Now add a fun message to the site's footer using an action hook (see Chapter 5, “Hooks”).
<?php// Hook our message function to the footer.add_action( 'wp_footer', 'pdev_footer_message' );// Function that outputs a message in the footer of the site.function pdev_footer_message() {// Output the translated text._e( 'This website runs on the coolest platform ever — WordPress.','pdev-plugin' );}?>
The esc_attr__() Function
esc_attr__() is the internationalization equivalent of the esc_attr() WordPress function (see Chapter 4, “Security and Performance”). It escapes HTML attributes, so anything passed to it won't break HTML validation standards or open up a site to potential security vulnerabilities.
esc_attr__() returns the translation for use in PHP. Now create a function that returns a link to a terms of service page on an example site and display it.
<?php// A function that returns a link to the website's terms of service page.function pdev_terms_of_service_link() {return '<a href="https://example.com/tos" title="' .esc_attr__( 'Visit the Terms of Service page', 'pdev-plugin' ) . '">' .__( 'Terms of Service', 'pdev-plugin' ) . '</a>';}// Display the output of the pdev_terms_of_service_link() function.echo pdev_terms_of_service_link();?>
The esc_attr_e() Function
esc_attr_e() works the same as the esc_attr__() function except that it displays the translation on the screen. For example, you might display a link to the dashboard page in the WordPress admin, so you want to make sure the title attribute of the link works correctly. You can also use the _e() function from earlier.
<a href="<?php echo admin_url(); ?>"title="<?php esc_attr_e( 'Visit the WordPress dashboard','pdev-plugin' ); ?>"><?php _e( 'Dashboard', 'pdev-plugin' ); ?></a>
The esc_html__() Function
esc_html__() is the equivalent of the WordPress function esc_html() (see Chapter 4) for translations. You need to use this function in situations in which HTML would be inappropriate for use. This function returns its output for use in PHP.
Suppose a form was submitted with the content of a <textarea> in which a default text message is provided. You'd escape the input the user submitted or escape the default message that the translator provides.
<?phpfunction pdev_get_text_message() {/* If the user input any text, escape it. */if ( !empty( $_POST['pdev-text'] ) )$message = esc_html( $_POST['pdev-text'] );/* If no text was input, use a default, translated message. */else$message = esc_html__( 'No message input by the user.', 'pdev-plugin' );return $message;}?>
The esc_html_e() Function
esc_html_e() behaves the same as the esc_html__() function except that it displays the translated text on the screen instead of returning it. For example, you may be adding a form with some default text in a <textarea> but want to make sure no HTML is shown.
<textarea name="pdev-text" id="pdev-text"><?php esc_html_e( 'Please input a description.', 'pdev-plugin' ); ?></textarea>
The _x() Function
Sometimes, you need to provide context for translations. The _x()function does the same thing as the __() function described earlier, except _x() accepts an additional parameter $context. This function's purpose is to provide a context in which a specific text string is used. The parameters available are as follows:
-
$text: The text that is available for translation -
$context: Context information for the translators -
$domain: Text domain defined for your plugin
Suppose you're creating a plugin in which you use the text Pounds in several places. Pounds has many different meanings depending on the context. It could mean a unit of weight, or it could be British currency. You can provide a context for these particular instances of Pound.
<?php_x( 'Pounds', 'Unit of Weight', 'pdev-plugin' );_x( 'Pounds', 'British currency', 'pdev-plugin' );?>
The _ex() Function
_ex() is a function to use when you need to note a specific context for a string of text. It works the same as the _x() function except that it echoes its output instead of returning it.
You may use the same text in several places throughout your plugin, but each instance means something different. The term post is often used in blogging systems as both a noun and a verb. When internationalizing, you need to mark the difference between the two by using a context.
Use the second parameter, $context, to provide a context to translators on how the term is used in this instance.
The following example shows two uses of the term post and how it can be used as both a noun and a verb:
<?php// Displaying “Post” as a noun._ex( 'Post', 'noun', 'pdev-plugin' );// Displaying “Post” as a verb._ex( 'Post', 'verb', 'pdev-plugin' );?>
Well‐written text is important. Before using a contextual translation function, ask yourself if the text itself can be written in a more intuitive manner. Instead of using a generic term such as post, you can make this easier to understand for plugin users and translators.
Post as a noun can be better written as “Select a post,” and post as a verb could be better written as “Post a comment.” Therefore, you wouldn't need to use the _ex() function in either case. You could use _e() instead.
<?php_e( 'Select a post', 'pdev-plugin' );_e( 'Submit post', 'pdev-plugin' );?>
The esc_attr_x() Function
esc_attr_x() is a marriage between two of the earlier translation functions: esc_attr__() and _x(). It enables you to translate text, provide a context for translation, and escape it for use in HTML attributes. This function returns translated text for use in your plugin, but it does not have a similar function for printing text to the screen.
In the following example, the function displays a link to the WordPress admin. Use the esc_attr_x() function in the title attribute of the link so that any unwanted characters are properly escaped and to provide a context for the text string “Admin.”
<?phpfunction pdev_plugin_display_post_link( $post_id ) {// The text for the link.$pdev_link_text = _x('Admin','admin link','pdev-plugin');// The text for the “title” attribute of the link.$pdev_link_title = esc_attr_x('Admin','admin link','pdev-plugin');/* Display the link on the screen. */echo '<a href="' . admin_url() . '"title="' . $pdev_link_title . '">' . $pdev_link_text . '</a>';}?>
The esc_html_x() Function
esc_html_x() merges the esc_html__() and _x() functions into a single function that allows for text translation, escapes unwanted HTML, and provides a context to translators.
Suppose you created a plugin that allows users to fill in a form about their favorite things and submit it to the site owner for review. Further suppose you have an optional input field called pdev‐favorite‐food that needs a default value translated in the case of the users not disclosing their favorite food. In this example, you use the term “None,” which is a common word and may be used in various circumstances. You should provide a context such as “favorite food” or “favorite item” to differentiate this instance of “None” from others.
<?phpfunction pdev_get_favorite_food() {// If the user input a favorite food.if ( !empty( $_POST['favorite-food'] ) )$pdev_favorite_food = esc_html( $_POST['favorite-food'] );// If no favorite food was chosen, set a default.else {$pdev_favorite_food = esc_html_x('None','favorite food','pdev-plugin');}return $pdev_favorite_food;}?>
The _n() Function
As a developer, you may not always know how many items will be returned for use in your code. You can use the _n() function to differentiate between the singular and plural forms of text. Not only will this function figure out which form should be used, it also will enable you to make each form translatable. Both the singular and plural forms need to be internationalized because the order in which words appear for plural and singular forms is different in various languages.
The _n() function's parameters are different from some of the other translation functions. The accepted parameters are as follows:
-
$single: The text to be used if the number is singular -
$plural: The text to be used if the number is plural -
$number: The number to compare against to use either the singular or plural form -
$domain: Text domain defined for your plugin
$single represents the singular version of the text, and $plural represents the plural version of the text. $number is a parameter that you cannot know at the moment of writing your code. It's an unknown integer that can have various values.
Not all languages use only two forms (singular and plural). However, you only need to take care of these two forms. If a language requires more than two forms, translators will provide this in the translation files and WordPress' localization process will use the correct form.
Now create a function that counts the number of posts published on the site and prints the value in a sentence using the printf() function (see the “Using Placeholders” section).
<?phpfunction pdev_count_published_posts() {// Count the number of posts.$pdev_count_posts = wp_count_posts();// Get the count for the number of posts with a post_status of ‘publish’.$count = $pdev_count_posts->publish;// Display a sentence, letting the user know how many posts are published.printf( _n('You have published %s post.', 'You have published %s posts.',$count,'pdev-plugin' ),$count );}?>
The two sentences used look similar in English, and many developers may think it's easier to get away with “You have published %s post(s).” Although this works in some languages, it likely won't work in most.
For an example of why this method wouldn't work, look at the word journal in French. Using “journal(s)” in this case wouldn't apply because the plural form of journal is journaux.
The _nx() Function
The _nx() function is a combination of the _n() and _x() translation functions. It allows for the differentiation of singular and plural forms of text and a context for the text.
In this example, you create a function that grabs all of a site's post tags and lists the number of posts that have been given each particular tag. The _nx() function provides a way for you to display the text based on the post count of each tag and provide a context for translation of the text.
<?phpfunction pdev_list_post_tag_counts() {// Get all post tags in an alphabetical list.$tags = get_terms( 'post_tag', array( 'orderby' => 'name', 'order' => 'ASC' ) );// Open unordered list.echo '<ul>';// Loop through each post tag and display its post count and name.foreach ( $tags as $tag ) {echo '<li> ' .$tag->name . ' — ';printf(_nx('%s post','%s posts',$tag->count,'post count','pdev-plugin'),$tag->count);echo '</li>';}// Close unordered list.echo '</ul>';}?>
The _n_noop() Function
There are some cases in which you might have singular and plural forms of text that you don't want translated on the spot but need translated later. This is useful when you have large lists of messages but don't know which to display until a variable has been set.
The _n_noop() function adds these values to the translation files. Rather than returning a translated string like most other translation functions, it returns an array with both values.
Suppose you created two custom post types (see Chapter 8, “Content”) called video and music to give your plugin users some nifty features for their site. You have some messages you'd like translated, but you want to keep the code easy to reuse and short. In the following example, you create a function that takes a parameter of $post_type. This displays the appropriate message depending on the value of this parameter.
<?phpfunction pdev_count_posts_of_custom_types( $post_type = 'video' ) {// Get a count of all posts of the given post type.$all_posts = wp_count_posts( $post_type );// Get the count of the published posts.$count = $all_posts->publish;// Prepare an array of messages.$pdev_messages = array('video' => _n_noop( 'You have %s video.', 'You have %s videos.','pdev-plugin' ),'music' => _n_noop( 'You have %s music file.','You have %s music files.', 'pdev-plugin' ));// Get the message for the custom post type given.$pdev_message = $pdev_messages[$post_type];// Print the message for the custom post type given and its count.printf( _n($pdev_message['singular'],$pdev_message['plural'],$count,'pdev-plugin'), $count );}?>
The previous example uses the _n_noop() function to build the array of messages, but it used the _n() function to display the translated message. This enabled you to translate only the message needed at the moment instead of each message.
The _nx_noop() Function
_nx_noop() combines the _n_noop() function and the _x() function to enable setting up text for later translation and providing a context for translators on how the text is used in the plugin. It works the same as _n_noop() by adding the text to translation files but not translating it when used in PHP.
Building off the previous example of showing the number of posts published by type, you can use the _nx_noop() function to add a context.
<?phpfunction pdev_count_posts_of_custom_types( $post_type = 'video' ) {// Get a count of all posts of the given post type.$all_posts = wp_count_posts( $post_type );// Get the count of the published posts.$count = $all_posts->publish;// Prepare an array of messages.$pdev_messages = array('video' => _n_noop('%s video','%s videos','video post count','pdev-plugin'),'music' => _n_noop('%s music file','%s music files','music post count','pdev-plugin'));// Get the message for the custom post type given.$pdev_message = $pdev_messages[$post_type];// Print the message for the custom post type given and its count.printf( _n($pdev_message['singular'],$pdev_message['plural'],$count,'pdev-plugin'), $count );}?>
Using Placeholders
You may have noticed the use of symbols such as %s and %1$s in previous examples. These are placeholders for variables. Placeholders are useful because they enable you to translate strings without breaking them apart.
The translation functions in WordPress cannot output placeholders on their own. The placeholders are merely there for translators to properly set within the text of their translation files. Placeholders must be converted to a given variable in PHP.
The printf() and sprintf() PHP functions are useful when using placeholders. Both functions can replace the placeholder with a given variable. Use printf() to print text to the screen and sprintf() to return text. Each function takes in a first parameter of $text, which is the text you're translating. Both can then receive any number of extra parameters that represent the placeholders in the $text variable.
Now take a look at the following example of a translated sentence that works in English but breaks in many other languages:
<?phpfunction pdev_display_blog_name() {_e( 'The name of your blog is ', 'pdev-plugin' );echo get_bloginfo( 'name' );_e( '.', 'pdev-plugin' );}?>
Although the text in that function is internationalized, it's not done in a way that's easily translatable. This is where placeholders come in. They enable you to set a variable in the text and keep it as one sentence.
Now rewrite that function in a way that makes it easier for translators to translate. Use printf() to print the sentence to the screen and convert the placeholders.
<?phpfunction pdev_display_blog_name2() {printf(__( 'The name of your blog is %s.', 'pdev-plugin' ),get_bloginfo( 'name' ));}?>
Now create a function that returns the tagline of the site in a sentence using the sprintf() function.
<?phpfunction pdev_get_blog_tagline() {return sprintf(__( 'The tagline of your site is %s.', 'pdev-plugin' ),get_bloginfo( 'description' ));}?>
Sometimes you need multiple placeholders in one text string. Luckily, both printf() and sprintf() handle this wonderfully. The big difference here is that you shouldn't use %s. It's best to use numbered placeholders instead because the order of words in other languages may be different than your own.
In the following example, you use multiple placeholders to display a sentence depending on the number of posts published on the blog, along with the blog title.
<?phpfunction pdev_display_blog_name_and_post_count() {// Get the number of posts.$count_posts = wp_count_posts();// Get the number of published posts.$count = $count_posts->publish;// Get the site name.$site_name = get_bloginfo( 'name' );// Display a sentence based on the number of posts published.printf(_n('There is %1$s post published on %2$s.','There are %1$s posts published on %2$s.',$count,'pdev-plugin'),$count, $site_name);}?>
In the example function, the %1$s placeholder represents the $count variable, which returns the number of published posts. The %2$s placeholder represents the value of $site_name, which was set to the name of the site.
Internationalizing JavaScript
Some plugins require JavaScript to function properly (see Chapter 6, “JavaScript”). Because the internationalization functions in WordPress are written in PHP, you can't use them inside JavaScript files. This makes it a little tougher to translate but not impossible.
WordPress provides a function called wp_localize_script() that enables you to pass translated text to an external file. You can then use the translated strings within your JavaScript. Take a look at what this function looks like:
<?phpwp_localize_script( $handle, $object_name, $l10n );?>
-
$handlemust match the$handleparameter of a script that's already registered with WordPress (see Chapter 6). -
$object_nameis a unique identifier that represents this set of translations. -
$l10nis an array of translations with named keys that each has a value of a singletranslated string.
To understand how all this comes together, you need to create a plugin that uses JavaScript. You use a simple script here. To delve more into the process of using JavaScript, read the thorough explanation in Chapter 6. Your plugin will add two input buttons to the site's footer. When either of the buttons is clicked, a translated message appears.
The first step is to create a new plugin folder called pdev‐alert‐box and place a new PHP file called pdev‐alert‐box.php in this folder. In the pdev‐alert‐box.php file, add your plugin information (Chapter 2, “Plugin Framework”).
<?php/*** Plugin Name: PDEV Alert Box* Plugin URI: https://example.com* Description: A plugin example that places two input buttonsin the blog footer that when clicked display an alert box.* Version: 0.1* Author: WROX* Author URI: https://wrox.com*/
Next, you need to load your translation as described in the “Getting Your Plugin Ready for Translation” section.
/* Add the translation function after the plugins loaded hook. */add_action( 'plugins_loaded', 'pdev_alert_box_load_translation' );/*** Loads a translation file if the page being viewed isn't in the admin.** @since 0.1*/function pdev_alert_box_load_translation() {/* If we're not in the admin, load any translation of our plugin. */if ( !is_admin() )load_plugin_textdomain( 'pdev-alert-box', false, 'pdev-alert-box/languages' );}
At this point, you need to load your script using the wp_enqueue_script() function. After calling that function, you can localize your script using the wp_localize_script() function. It is important that this function is called after the script has been registered because the $handle variable has to be set.
/* Add our script function to the print scripts action. */add_action( 'wp_print_scripts', 'pdev_alert_box_load_script' );/*** Loads the alert box script and localizes text strings that need translation.** @since 0.1*/function pdev_alert_box_load_script() {/* If we're in the WordPress admin, don't go any farther. */if ( is_admin() )return;/* Get script path and file name. */$script = trailingslashit( plugins_url( 'pdev-alert-box' ) ).'pdev-alert-box-script.js';/* Enqueue our script for use. */wp_enqueue_script( 'pdev-alert-box', $script, false, 0.1 );/* Localize text strings used in the JavaScript file. */wp_localize_script( 'pdev-alert-box', 'pdev_alert_box_L10n', array('pdev_box_1' => __( 'Alert boxes are annoying!', 'pdev-alert-box' ),'pdev_box_2' => __( 'They are really annoying!', 'pdev-alert-box' ),) );}
Now you add a couple of fun input buttons to the footer of the site. Notice the use of the esc_attr__() function from earlier in the chapter to translate and escape the value attributes of the buttons.
/* Add our alert box buttons to the site footer. */add_action( 'wp_footer', 'pdev_alert_box_display_buttons' );/*** Displays two input buttons with a paragraph. Each button has an onClick()* event that loads a JavaScript alert box.** @since 0.1*/function pdev_alert_box_display_buttons() {/* Get the HTML for the first input button. */$pdev_alert_box_buttons = '<input type="button" onclick="pdev_show_alert_box_1()"value="' . esc_attr__( 'Press me!', 'pdev-alert-box' ) . '"/>';/* Get the HTML for the second input button. */$pdev_alert_box_buttons .= '<input type="button" onclick="pdev_show_alert_box_2()"value="' . esc_attr__( 'Now press me!', 'pdev-alert-box' ) . '"/>';/* Wrap the buttons in a paragraph tag. */echo '<p>' . $pdev_alert_box_buttons . '</p>';}?>
Your plugin's PHP file is complete. You now need to add a JavaScript file called pdev‐alert‐box‐script.js to your plugin folder. After it's created, you can add two functions for displaying the alert boxes on the screen. Within the pdev‐alert‐box‐script.js file, add the JavaScript.
/*** Displays an alert box with our first translated message when called.*/function pdev_show_alert_box_1() {alert( pdev_alert_box_L10n.pdev_box_1 );}/*** Displays an alert box with our second translated message when called.*/function pdev_show_alert_box_2() {alert( pdev_alert_box_L10n.pdev_box_2 );}
Because you're working across multiple files, it may be hard to see how the files interact with one another.
The two most important parameters from the call to wp_localize_script() are the $object_name and $l10n parameters. In the example plugin, you specifically set $object_name to pdev_alert_box_L10n and $l10n to an array of key/value pairs.
When needing a translation in the JavaScript file, you used $object_name.$l10n[$key]. In the JavaScript function for the first alert box, this looks like this:
alert( pdev_alert_box_L10n.pdev_box_2 );Developer Handbook Resource
This chapter covers a lot of information about proper ways to internationalize your plugin to support languages across the globe. As always, the WordPress.org Plugin Developer Handbook is a great resource for digging into each one of these topics at a deeper level.
https://developer.wordpress.org/plugins/internationalization/how-to-internationalize-your-plugin
CREATING TRANSLATION FILES
Now that you've done all the hard work of internationalizing the text strings in your plugin, you have one more step to complete. This step requires much less work than the previous steps. You need to create a default translation file to kick‐start the translation process for potential translators.
To provide a consistent look at how this process works, you can work with the PDEV Alert Box plugin from the “Internationalizing JavaScript” section.
The MO and PO Files
When translators create translations of your plugin, they use your plugin's portable object template (POT) file to create two files: pdev‐alert‐box‐$locale.mo and pdev‐alert‐box‐$locale.po. The portable object (PO) files are translation files that are then translated to machine object (MO) files. The MO files are loaded by the user's WordPress installation to provide the translated strings to the plugin.
pdev‐alert‐box is the $domain parameter used in the translation functions throughout the plugin. $locale is a variable that represents the language and regional dialect. For example, WordPress uses en_US as its default language. en represents English, and US represents the region.
The PO file is the file used by translation tools to allow for human‐readable text. Translators work with this file to provide a translation. The PO file isn't necessary to run a translation of your plugin, but it's always nice to package it with your plugin download for use by other users who may want to update any text to suit their needs.
The MO file is created from the finished translation. WordPress uses it to translate internationalized text strings from your plugin.
WordPress users set their locale in their wp‐config.php file. This tells WordPress to look for any translations with that locale and load them. If users set their locale to fr_FR (French), WordPress would load a file called pdev‐alert‐box‐fr_FR.mo if it existed in your plugin.
Translation Tools
Many translation tools around the web are open source and free to download. Each tool isn't covered in detail here because they all have different ways to create translations. However, there is a list of supported translation tools for WordPress.
The following are available tools for translation:
- Poedit:
https://poedit.net - GlotPress:
https://glotpress.blog - WP CLI:
https://developer.wordpress.org/cli/commands/i18n - Launchpad:
https://translations.launchpad.net - KBabel:
https://i18n.kde.org - GNU Gettext:
https://gnu.org/software/gettext
One of the most common tools for plugin developers is Poedit. It has a simple, point‐and‐click interface that enables developers to create a POT file from their plugin.
GlotPress is a new web‐based tool from the people behind the WordPress project that promises to enable a single person or a team to work on translating software. It is now being used to facilitate the translation process for the WordPress software at https://translate.wordpress.org.
How to Create a POT File
Using Poedit from the “Translating Tools” section, you can create a POT file. You need to input only a few pieces of information, and Poedit does the rest for you.
- Select File ➪ New on the main menu.
- Set the language of the translation. In this example, you'll use English.
- Before you can add sources, you need to save the file.
- Save your file as
plugin‐name.potin your plugin'slanguagesfolder. For example, the PDEV Alert Box plugin would bepdev‐alert‐box.pot. - Select the Extract From Sources button.
- A Settings box appears with three tabs, as shown in Figure 11‐1.
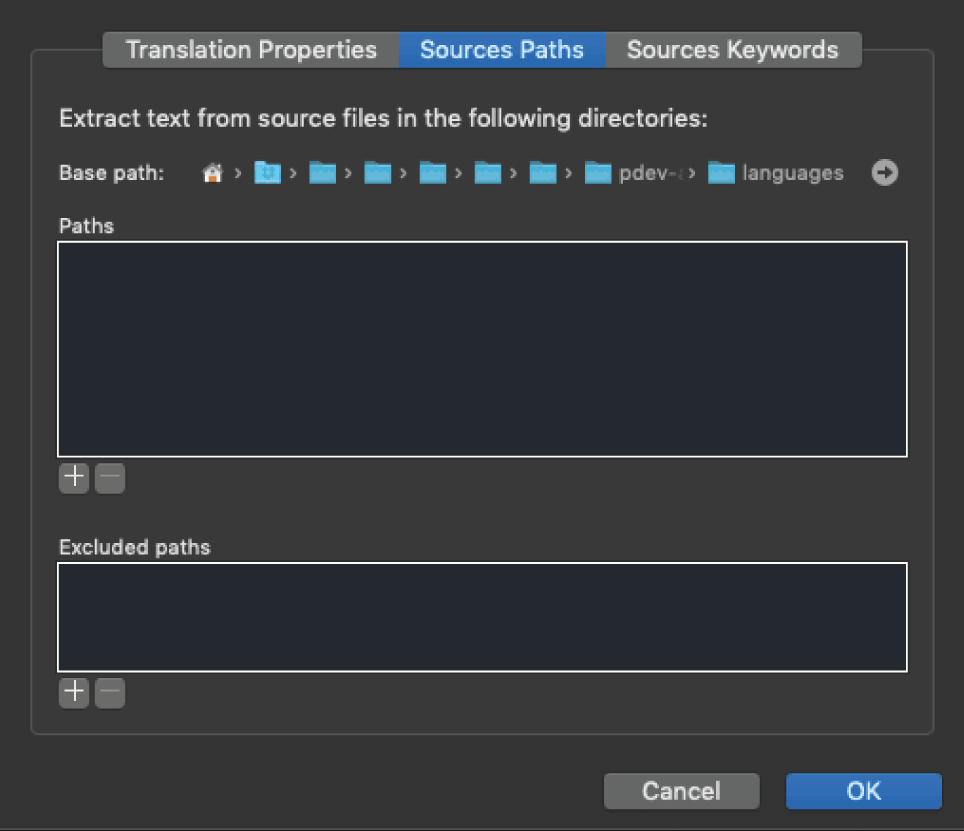
FIGURE 11‐1: Settings box
- On the Translation Properties tab, fill in the input boxes that are relevant to your plugin, leaving the Charset box as
UTF‐8. - On the Sources Paths tab, add a new path to the root directory for your plugin.
- On the Sources Keywords tab, enter each function name from the “Echoing and Returning Strings” section of this chapter as a new keyword. For example, enter
esc_attr_e()asesc_attr_e. - Click OK and save your POT file settings.
After you complete this process, Poedit synchronizes your POT file with your plugin, and you will have completed the process of preparing your plugin for translation.
Command Line
Another popular option for generating a POT file is using the WP CLI i18n commands. Simply run the following WP CLI command to create a POT file for your WordPress plugin in the current directory:
# Create a POT file for the WordPress plugin/theme in the current directory$ wp i18n make-pot . languages/my-plugin.pot
For more information, visit the official WP CLI documentation website: https://developer.wordpress.org/cli/commands/i18n
Where to Store Translation Files
Many plugins add translation files in the top level of their plugin folder. Although translations will work when using this method, it can get a bit messy and is discouraged. If you have a plugin with many other files, it may become much too unorganized if you take this route.
For the cleanest, most organized system, create an extra directory in your plugin folder called languages. When you release your plugin, you can store your default translation files in this folder. When translators send you translation files for your plugin, you simply drop those files in the languages folder. Be sure to add both the PO file (for translators) and the MO file (for WordPress) of the translation you're given.
SUMMARY
The biggest lesson to take away from this chapter is that people use WordPress in all corners of the world. To have a good plugin for public download, it is essential that you prepare it for translation. This can set your plugin apart from the many thousands of plugins that aren't internationalized. After you start putting the tools of this chapter into practice, you can see how easy it is to make your plugin more powerful and build a larger community around your work.