12
REST API
CODE DOWNLOADS FOR THIS CHAPTER
The code downloads for this chapter are found at www.wiley.com/go/prowordpressdev2e on the Downloads tab.
It was June 2013 when the WordPress REST API project was first born as a plugin, and by 2015 it had been merged into WordPress Core, making it available to everyone without the need of a separate plugin. Since then, this API has been iterated on and improved, helping it become one of the most important things to understand for professional WordPress plugin development.
WHAT THE REST API IS
Representational State Transfer (REST) is a set of constraints that are useful for creating web services. These six fundamental constraints are as follows:
- Uniform interface: The URLs used for access in the system need to be uniform, consistent, and accessible using a common approach such as
GET. - Client‐server: Clients and servers may evolve separately without any dependency on each other as long as the interface between them is not altered.
- Stateless: The server does not store anything about the latest HTTP request made by the client. Every request is treated as a new request.
- Cacheable: All resources must be cacheable. Caching can be implemented on the server or client side.
- Layered system: This system allows for a layered system architecture where a client cannot tell whether it is connected to an intermediary server or the end server.
- Code on demand (optional): Most of the time you will be sending static representations of resources in the form of XML or JSON. This optional constraint allows you to return executable code, such as JavaScript, to support part of your application.
Together, these constraints provide a holistic approach to building a complete and scalable web application with proper separation of duties, while also being relatively simple to interface with.
In a RESTful web application, requests are sent to specific URIs, and depending on the type of request, the URI, and the payload sent with it, the web application will send back any number of different responses, usually formatted in JSON, HTML, or XML.
In WordPress, this boils down to sending various types of HTTP requests to specific URIs (commonly referred to as endpoints) to retrieve and/or manipulate some data (likely from a cache or the database) in a secure and performant way.
WHAT YOU CAN DO WITH THE REST API
Practically speaking, the WordPress REST API provides a nonvisual window into creating, reading, updating, and deleting (CRUD) anything that happens to be stored inside WordPress. You'll use the following HTTP methods when interacting with WordPress via the REST API:
-
GET: Retrieves data from the server such as a post -
POST: Adds data to the server, such as a post, comment, or even media attachments -
PUT: Used to edit or update existing data on the server, such as a post -
DELETE: Removes data from the server, like deleting a user
Where you would normally click around through a website or the admin area, now you can access all the same functionality without the user interface, instead using a series of requests to make your own interfaces using the data you've requested. In short, you can build really cool applications that do not necessarily look, act, or feel like a web application, never revealing to anyone that it is using WordPress to power it all. This truly transforms WordPress into an application framework.
ACCESSING THE WORDPRESS REST API
All newer versions of WordPress have the REST API available by default. You can perform a simple GET request to retrieve data directly via your browser by visiting https://example.com/wp-json/wp/v2.
This request will return a JSON response with all sorts of information about the WordPress REST API. Adding specific endpoints to the URL will allow you to retrieve specific types of data from WordPress. As an example, let's retrieve a list of users.
https://example.com/wp-json/wp/v2/usersAs you can see, this returns a list of users within your WordPress website who have published a piece of content. Another useful example is using a simple argument to search for a subset of the data returned. For example, let's search all published posts that match the search keyword Halloween.
https://example.com/wp-json/wp/v2/posts?search=halloweenThese are basic examples that show how to access the WordPress REST API in browser. Throughout this chapter, you'll cover many different ways of retrieving and working with data within WordPress.
When working with JSON data, it can be helpful to install a browser extension to format the data in a more readable manner. If you are using Chrome, I recommend the JSON Formatter extension located at http://bit.ly/2QQL4Wy. You can see how unformatted JSON looks in Figure 12‐1 compared to the formatted JSON in Figure 12‐2.

FIGURE 12‐1: Unformatted JSON
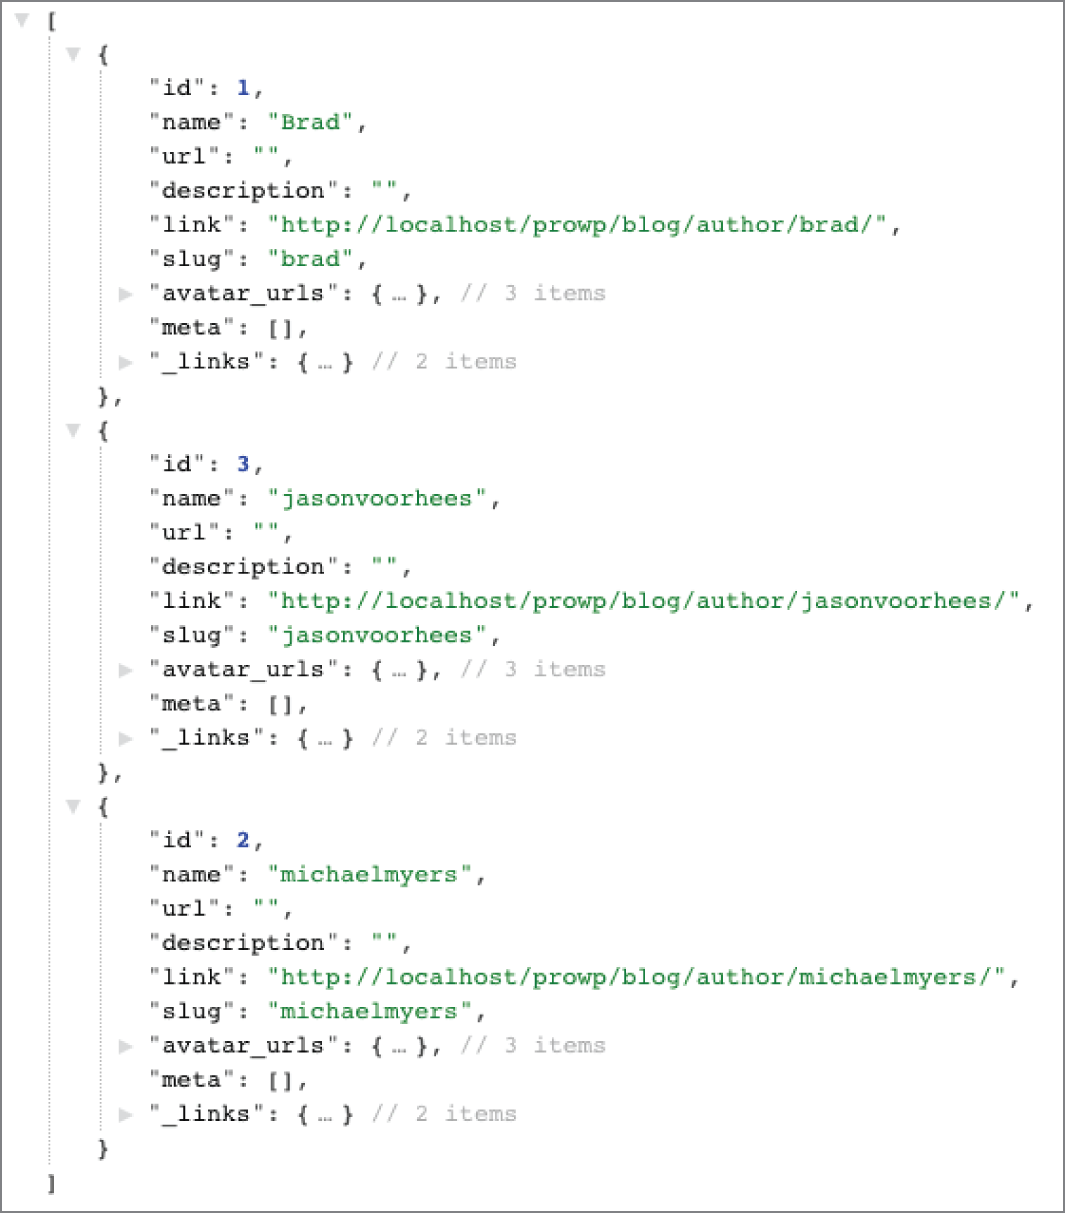
FIGURE 12‐2: Formatted JSON
Default Endpoints
In the previous section, you hit two different REST API endpoints: users and posts. WordPress, by default, has several endpoints available for retrieving all types of data.
- Posts:
/wp/v2/posts/ - Post Revisions:
/wp/v2/posts/<id>/revisions/ - Pages:
/wp/v2/pages/ - Page Revisions:
/wp/v2/pages/<id>/revisions/ - Categories:
/wp/v2/categories/ - Tags:
/wp/v2/tags/ - Comments:
/wp/v2/comments/ - Taxonomies:
/wp/v2/taxonomies/ - Media:
/wp/v2/media/ - Users:
/wp/v2/users/ - Post Types:
/wp/v2/types/ - Post Statuses:
/wp/v2/statuses/ - Settings:
/wp/v2/settings/ - Themes:
/wp/v2/themes/ - Search:
/wp/v2/search/ - Blocks:
/wp/v2/blocks/ - Block Revisions:
/wp/v2/blocks/<id>/autosaves/ - Block Renderer:
/wp/v2/block‐renderer/
It's easy to see how much data is available by default from the WordPress REST API.
REST API Clients
When working with an API, whether it be the WordPress REST API or another source, it can be helpful to use a REST API client to verify the request calls and data results quickly. This can help you quickly confirm the API endpoints, that authentication is working as needed, and that the data returned is what you expect. The following sections discuss two popular REST API clients.
Insomnia
A free and open source client for Mac, Windows, and Linux, Insomnia is a great option when working with APIs. Specify the request URL, payload, headers, and authorization all in one place. To view a full list of features and to download Insomnia, visit https://insomnia.rest.
Postman
Postman is a popular collaboration platform for API development. Currently, Postman has apps available for Mac, Windows, or Linux systems. A proprietary option, with premium features, Postman has a good free version that supports the basics that you'll need to validate, authenticate, and test against an API. To view all features and download it, visit https://www.getpostman.com.
Both Insomnia and Postman give you an intuitive UI to interact with any available API. As an example, let's use a simple GET request to return post ID 1, which is most likely the Hello World example post created when you installed WordPress. First open the Insomnia app on your computer. If this is your first time running Insomnia, you will be prompted to either create a new request or import one from a file, so click New Request. Enter a name for your new request environment like Localhost Testing and click the Create button. Now enter the WordPress REST API request URL and click Send. In this example, the request URL will be as follows:
http://localhost/prowp/wp-json/wp/v2/posts/1
The results returned for post ID 1 are displayed in the Preview tab, as shown in Figure 12‐3.
As you can see, using a REST API client tool can quickly help you validate the data you are working with. Once you have perfected your API requests, you can begin integrating those requests into your custom WordPress plugins.
Try using a REST API client to request data from the default WordPress API endpoints you reviewed in the “Default Endpoints” section earlier in this chapter.

FIGURE 12‐3: Post results
Authentication
All data that is public in WordPress can be accessed via the REST API and does not require authentication. For example, a published post on your website is public and therefore available to retrieve using the REST API. Draft posts are not public, because they are not published yet, so you will need to authenticate with WordPress to retrieve that information.
Let's look at an example accessing draft post data from the command line using SSH. If you are using macOS or Linux, you can use SSH from the terminal without any special software. On Windows, you'll need to install an SSH client like Putty (https://www.putty.org).
On a Mac, open your Terminal application and enter the following command, replacing localhost with the WordPress website you want to access:
curl -X GET http://localhost/wp-json/wp/v2/postsThis command will return a set of published posts from your local website. Now let's try retrieving draft posts.
http://localhost/wp-json/wp/v2/posts?status=draftYou'll notice that an error message is returned: Status is forbidden. This is because you have not authenticated with WordPress, so draft posts are not available. As a basic example of authentication, you'll use the Basic Authentication handler plugin for WordPress: https://github.com/WP-API/Basic-Auth. This plugin does exactly what it says: it uses basic authentication to send your username and password with every request. This is a basic form of authentication and should only be used for testing, as there are other, more secure methods available for production websites.
Once you have installed and activated the plugin, you can now pass your credentials through the request to access draft blog posts like so:
curl -X GET --user username:password -i http://localhost/wp-json/wp/v2/posts?status=draft
Simply replace username and password with your WordPress username and password to properly authenticate your account within the request. WordPress will now return your draft posts.
Now let's look at the same example using the Insomnia REST API client you reviewed in the previous section. Using a GET request without authentication, you will receive a Status is forbidden 400 error message, shown in Figure 12‐4.

FIGURE 12‐4: Error message
To authenticate, simply click the Auth tab and select Basic Auth. Enter your username and password and send the request again. This time the request is authenticated, and the results are returned and displayed, as shown in in Figure 12‐5.
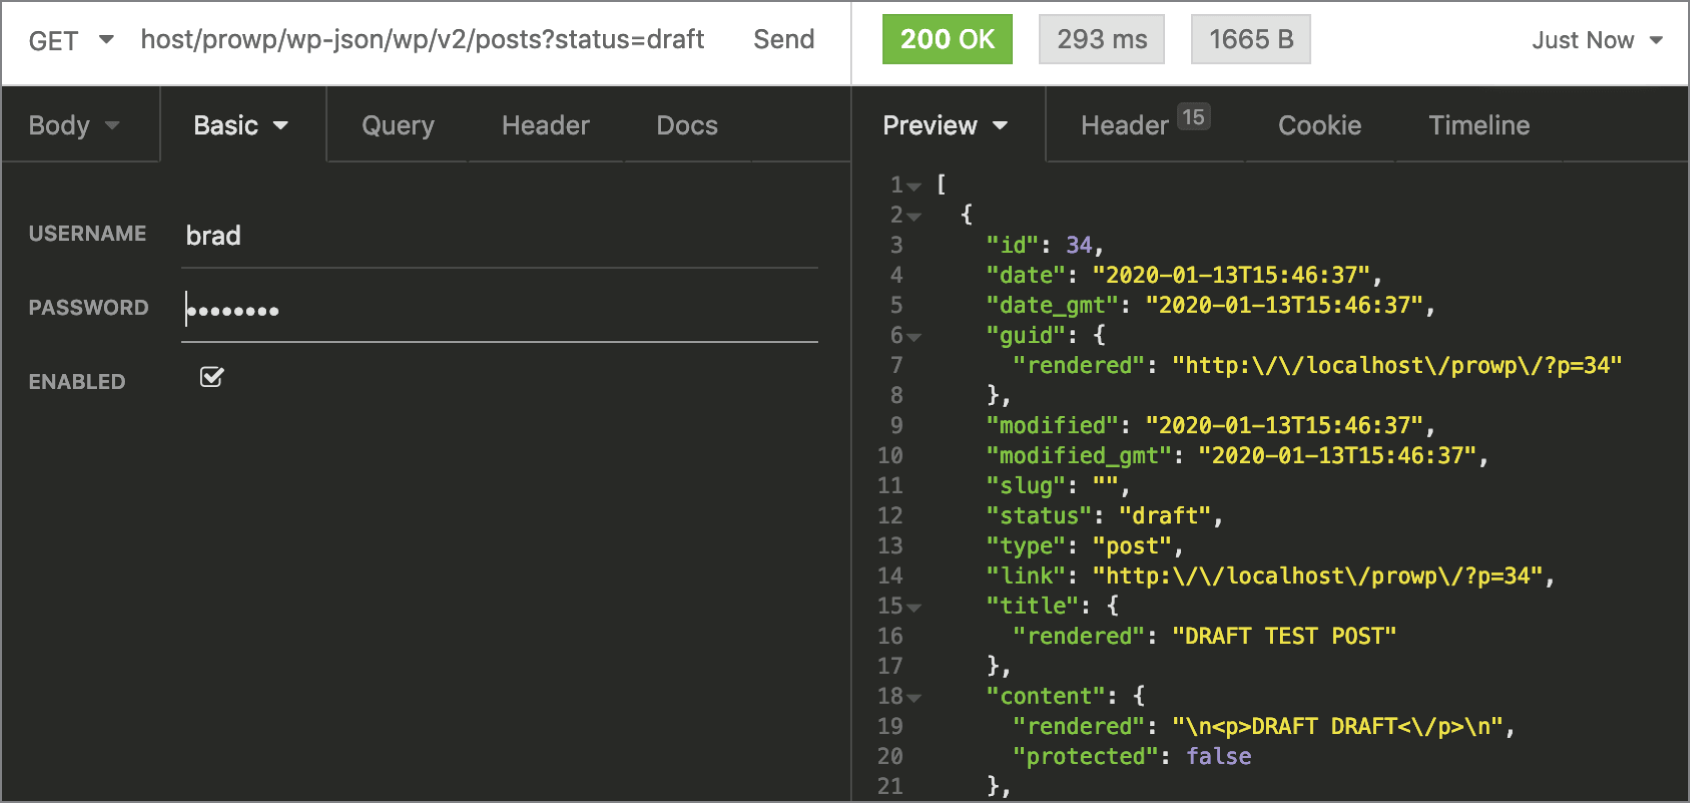
FIGURE 12‐5: Authentication worked
As you can see, this is a basic example demonstrating how to authenticate with WordPress to retrieve nonpublic data using the WordPress REST API. Later in this chapter we'll cover accessing REST API data within a custom plugin utilizing the HTTP API.
Enhanced Authentication
As shown in the previous example, basic authentication allows you to access data not publicly available from the WordPress REST API. The downside to this method is that the auth credentials are sent in plain text with every request, so as you would expect, this is not very secure. Let's look at some enhanced authentication options available when accessing the REST API.
- Application Passwords: Authenticate users by generating a unique password for each application without revealing the user's main account password. Application passwords can be revoked for each application individually.
- JWT (JSON Web Tokens) Authentication: JSON Web Tokens are an open standard (RFC 7519) that defines a compact and self‐contained way for securely transmitting information between two systems as a JSON object.
- OAuth 1.0a Server: Use the OAuth 1.0a protocol to allow delegated authorization allowing applications to access the REST API using a set of secondary credentials.
- REST API Authentication: A more robust option is the REST API Authentication plugin from miniOrange. This plugin supports multiple authentication options including basic auth, key authentication, JWT authentication, and OAuth 2.0. The plugin is freely available on WordPress.org. A premium version, with enhanced features and professional support, is also available.
Custom Endpoints
As with almost everything in WordPress, the REST API can be extended, making it easy to return any custom data you might need. To do this, you will register a custom endpoint for the REST API. These custom endpoints can return any type of dataset you require.
Let's create a custom endpoint that returns the first post title for a specific author in WordPress. First let's construct a custom function to return the exact data you are looking for.
/*** Grab latest post title by the author ID** @param array $data Options for the function.* @return string|null Post title for the latest, * or null if none.*/function pdev_return_post_title_by_author_id( $data ) {$posts = get_posts( array('author' => absint( $data['id'] ),) );if ( empty( $posts ) ) {return new WP_Error( 'no_author', 'Invalid author', array( 'status' =>404 ) );}return $posts[0]->post_title;}
As you can see, you create a custom function called pdev_return_post_title_by_author_id(), which accepts a $data parameter. You'll use the get_posts() function to query the posts within WordPress. You are passing in the author ID value via the $args parameter to return posts for a given author only. For security reasons, you wrap the author ID value in absint() to confirm that only an integer is passed through the function. If the $posts variable is empty, meaning get_posts() returned no results, you'll set a custom WP_Error notice to alert the system that no posts matched with the author ID provided. Finally, you'll return the post title if a match is found.
Now that your function is in place to return the results, let's create a custom REST API endpoint to return the results. To do so, you'll utilize the register_rest_route() function, which accepts the following parameters:
-
$namespace: A URL segment unique to your plugin. -
$route: The base URL for the route being added. -
$args: Optional array of options for your endpoint. -
$override: If the route already exists, should we override it?
If your namespace is pdev‐plugin/v1 and your route is /
author, then the URL for it will be /wp‐json/pdev‐plugin/v1/author/.
Now let's register the custom endpoint for the example. You'll see the namespace, route, and an array of $args to define the method and callback function to use, as shown in the following code:
add_action( 'rest_api_init', 'pdev_custom_endpoint' );// Register your REST API custom endpointfunction pdev_custom_endpoint() {register_rest_route( 'pdev-plugin/v1', '/author/(?P<id>d+)',array('methods' => 'GET','callback' => 'pdev_return_post_title_by_author_id',));}
Now you have a custom REST API endpoint located here:
http://localhost/prowp/wp-json/pdev-plugin/v1/author/<ID>where <ID> is the author ID whose post you want to retrieve. As a test, let's send a GET request to the new endpoint. In this example, you want to find the latest post from Jason Voorhees, who is user ID 3 in WordPress. In this example, the post titled “My Time at Crystal Lake” is returned, since that is the latest post published by Jason. You can see the results when you access the new custom endpoint, as shown in Figure 12‐6.

FIGURE 12‐6: “My Time at Crystal Lake” post
Let's review the full REST API custom endpoint plugin, shown here:
<?php/*Plugin Name: PDEV REST API Custom EndpointPlugin URI: https://example.com/Description: Register a custom endpoint in the WP REST APIAuthor: WROXAuthor URI: http://wrox.com*//*** Grab latest post title by the author ID** @param array $data Options for the function.* @return string|null Post title for the latest, * or null if none.*/function pdev_return_post_title_by_author_id( $data ) {$posts = get_posts( array('author' => absint( $data['id'] ),) );if ( empty( $posts ) ) {return new WP_Error( 'no_author', 'Invalid author', array( 'status' =>404 ) );}return $posts[0]->post_title;}add_action( 'rest_api_init', 'pdev_custom_endpoint' );// Register your REST API custom endpointfunction pdev_custom_endpoint() {register_rest_route( 'pdev-plugin/v1', '/author/(?P<id>d+)',array('methods' => 'GET','callback' => 'pdev_return_post_title_by_author_id',));}
THE HTTP API
On the modern web, Internet‐based services communicate with each other: web‐based readers gather data from blog feeds and Twitter accounts, and personal websites display Facebook posts or YouTube videos.
Your site should be no exception to this interoperability. In this section, you'll learn how to make WordPress exchange information with the remote services API and open it to a whole new level of perspective.
WordPress features a number of functions that help make HTTP requests easily, called the HTTP API.
This section explains what exactly an HTTP request is, what it can be used for, and why you will once again thank WordPress for lending a convenient hand and doing the cumbersome parts for you.
What Is an HTTP Request?
Hyper Text Transfer Protocol (HTTP) is the networking protocol that is no less than the foundation of data communication for the World Wide Web.
HTTP Request Concepts
Even if you cannot name or explain the following concepts yet, you have already experienced them in your everyday life online, using a web browser. HTTP is a request/response protocol in the client/server computing model.
- Client/server: An application (the client) talks to another application (the server) that itself can respond to many clients at the same time. In the HTTP model, a client is, for example, a web browser, such as Firefox running on your computer, and the server is a web server powered, for instance, by Apache, PHP, and MySQL and running WordPress. A client can also be a web indexing spider robot or a PHP script that fetches and parses a web page to retrieve information. You do this later in this chapter.
- Request/response protocol: The client submits an HTTP request (basically “Hello, I'm Firefox, please send me file example.html”), and the server sends back a response (“Hello, I'm the Apache running PHP; here is the file, it is 4kb in size,” followed by the file itself). Both requests contain potentially interesting information you learn to decipher and use.
Dissecting an HTTP Transaction
An HTTP transaction is a simple and clear‐text communication between the client and the server.
The Client Sends a Request
The client request typically consists of a few lines sent in clear text to the server. Using Firefox as a web browser and trying to load http://example.com/file.html from a Google result page would translate into the following query:
GET /file.html HTTP/1.1Host: www.example.comUser-Agent: Mozilla/5.0 (Windows; U; Windows NT 5.0) Firefox/3.6Referer: https://www.google.com/search?q=example.comCookie: lastvisit=235456684
The first line starts with GET. A GET session is how you tell the server you want to retrieve a document, here file.html from host example.com. Other main requests methods you can use are HEAD (to just receive the server response headers) and POST (to submit data to a form).
Notice also how information such as the referrer URL or the user agent string is also sent by the client. In Chapter 4, “Security and Performance,” you read that this data should not be trusted. Indeed, in an example later, you learn how to forge these values to anything.
The Server Sends a Response
The server response consists of three parts: the headers, with information about the response; a blank line; and then the response body.
The headers are a few lines of information and can be something like this:
HTTP/1.1 200 OKDate: Mon, 31 October 2020 22:38:34 GMTServer: Apache/1.3.3.7 (Unix) (Red-Hat/Linux)Last-Modified: Sun, 30 Oct 2020 23:11:55 GMTSet-Cookie: lastvisit=235456951Content-Length: 438Content-Type: text/html; charset=UTF-8
The first interesting information is the status code, here 200. Each server response should have a status code giving details on how the transaction was handled by the server: 200 means OK, and 404 means not found. Table 12‐1 lists the main HTTP status codes you can use.
TABLE 12-1: Main HTTP Status Codes
Source: http://en.wikipedia.org/wiki/List_of_HTTP_status_codes
| STATUS CODE | SIGNIFICATION |
| 200 | OK |
| 301 | Moved Permanently |
| 302 | Moved Temporarily |
| 403 | Forbidden |
| 404 | Not Found |
| 500 | Internal Server Error |
| 503 | Service Unavailable |
Of course, you don't have to memorize all these status codes, but with some experience you can quickly remember the main classes, as detailed in Table 12‐2.
TABLE 12-2: HTTP Status Code Classes
| STATUS CODE | SIGNIFICATION |
| 2xx | Request was successful. |
| 3xx | Request was redirected to another resource (like in the case of a URL shortener). |
| 4xx | Request failed because of a client error (for instance, a wrong username/password combination). |
| 5xx | Request failed because of a server error (like a bad configuration or a broken script). |
The server response also generally discloses information about the software running on the server, the content‐type of the document it serves, and its length.
Some Caveats on Checking HTTP Responses
When you want to programmatically check the existence and validity of a link with an HTTP request, you can break your analysis down into two steps. If the request is successful and the response code is 404, you know the link does not exist. Otherwise, you may have to check things more carefully, depending on the context.
- If the request is an
is_wp_error(), it can be because the URL to check is malformed but also because there is a temporary glitch preventing your web server from accessing the URL (connection problem, DNS timeout, and so on). - If the response code is in the 5xx family (a server error; remember Table 12-2), this is probably a temporary server error, so you need to check again later.
- Some web servers are configured to handle “Not Found” errors differently than expected. For instance,
http://example.com/iconswill return a 404 when you would have expected the server to redirect tohttp://example.com/icons/, which actually exists. - Some proxies or DNS servers, especially in corporate environments, are configured to handle all requests successfully, even though they should have returned an error. The following result is the actual return of
wp_remote_head('https://example.xom')(notice the typo in the top‐level domain) behind such a proxy, treating a nonexistent domain as a regular 404 error.array(4) {[“headers”]=>array(6) {[“cache-control”]=>string(8) “no-cache”[“pragma”]=>string(8) “no-cache”[“content-type”]=>string(24) “text/html; charset=utf-8”[“proxy-connection”]=>string(10) “Keep-Alive”[“connection”]=>string(10) “Keep-Alive”[“content-length”]=>string(3) “762”}[“body”]=>string(0) “”[“response”]=>array(2) {[“code”]=>int(404)[“message”]=>string(9) “Not Found”}[“cookies”]=>array(0) {}}
Possibilities for Crafting HTTP Requests
The first obvious use of HTTP requests is to retrieve a remote document or particular information within a remote document: a Twitter user's last message, the current value of share stock, or JSON‐encoded data from a remote API service.
You can also send information to a remote document, such as a form or an HTTP API, and modify data from a client script.
These requests would be done using either GET or POST methods, sometimes with credentials (a login and password or another authentication mechanism) or other parameters. You can make such requests later in this chapter.
Another interesting application, using HEAD requests, is to check the state of a remote document without bothering to download its content. For instance, a broken link checker plugin could make sure your bookmarks in WordPress don't return a 404 header.
How to Make HTTP Requests in PHP
In basic PHP, without WordPress that is, there are several common ways to send HTTP requests. It is interesting to know the basics because you sometimes need to code a portion of code in a non‐WordPress environment.
The following examples all do the same thing: send a GET request to https://wordpress.org and display the content received (that is, their index page).
Using the HTTP Extension
You can use the HTTP extension to send a GET request to https://wordpress.org and display the content received.
<?php$r = new HttpRequest( 'https://wordpress.org/', HttpRequest::METH_GET );$r->send () ;echo $r->getResponseBody();?>
Using fopen() Streams
You can use fopen() streams to send a GET request to https://wordpress.org/ and display the content received.
<?phpif( $stream = fopen( 'https://wordpress.org/', 'r' ) ) {echo stream_get_contents( $stream );fclose( $stream );}?>
Using a Standard fopen()
You can use a standard fopen() to send a GET request to https://wordpress.org/ and display the content received.
<?php$handle = fopen( 'https://wordpress.org/', 'r' );$contents = '';while( !feof( $handle ) ) {$contents .= fread( $handle, 8192 );}fclose( $handle );echo $contents;?>
Using fsockopen()
You can use fsockopen() to send a GET request to https://wordpress.org/ and display the content received.
<?php$fp = fsockopen( 'www.example.com', 80, $errno, $errstr, 30 );if ( !$fp ) {echo “$errstr ($errno)<br/> ”;} else {$out = “GET / HTTP/1.1 ”;$out .= “Host: www.example.com ”;$out .= “Connection: Close ”;fwrite( $fp, $out );while ( !feof( $fp ) ) {echo fgets( $fp, 128 );}fclose( $fp );}?>
Using the CURL Extension
You can use the CURL extension to send a GET request to https://wordpress.org/ and display the content received.
<?php$ch = curl_init();curl_setopt( $ch, CURLOPT_URL, 'https://wordpress.org/' );curl_setopt( $ch, CURLOPT_HEADER, 0 );curl_exec( $ch );curl_close( $ch );?>
Too Many Ways?
Each way has drawbacks and advantages over others. Some are simple and quicker to write, and some allow more parameters for finer control, support different request methods, or are faster to execute. Notice, for instance, how burdensome it is to use fsockopen(), which needs the complete request headers, compared to using streams or the HTTP extension.
The problem is this: depending on the server setup and configuration, PHP version, or security settings, some methods won't be allowed or even available. When working for a specific client, you could adapt to its specific server architecture and use a method you know will work, but this is simply impossible when authoring a plugin you intend to release for broad use.
What you should do, simply put, boils down to this alternative: either test each method prior to using one or rely on WordPress’ HTTP API.
WORDPRESS’ HTTP FUNCTIONS
WordPress implements a smart and powerful class, named WP_Http and found in wp‐includes/class‐http.php, that can test each previously described method and automatically select the best one available on the current machine.
The HTTP API supports all the methods you need to use (
GET, POST, and HEAD) and enables fine‐tuning several parameters such as proxy tunneling.
The wp_remote_ Functions
You can execute an HTTP request within WordPress mostly using functions wp_remote_get(), wp_remote_post(), and wp_remote_head(), obviously for GET, POST, and HEAD requests.
These functions all operate the same way.
- The HTTP request is performed using the eponymous method.
- They accept two parameters, one required and one optional.
- They return an array or an object.
The syntax of these three functions follows:
<?php$get_result = wp_remote_get( $url, $args );$post_result = wp_remote_post( $url, $args );$head_result = wp_remote_head( $url, $args );?>
These three functions can be considered as simple shortcuts to the more generic wp_remote_request(). Indeed, the three preceding lines are equivalent to the three following ones:
<?php$get_result = wp_remote_request( $url, array( 'method' => 'GET' ) );$post_result = wp_remote_request( $url, array( 'method' => 'POST' ) );$head_result = wp_remote_request( $url, array( 'method' => 'HEAD' ) );?>
The function wp_remote_request() works the same way as the other wp_remote_* functions, so everything that follows applies to any wp_remote_ function.
You'll now learn what parameters they need and what data they return, and then you'll play with them.
wp_remote_* Input Parameters
The first parameter these functions need, $url, is a string representing a valid site URL to which the HTTP request will be sent. Supported protocols are HTTP and HTTPS; some transports might work with other protocols such as FTP, but don't assume this.
The second parameter, $args, is an optional array of parameters to override the defaults. The default parameters are the following array:
<?php$defaults = array ('method' => 'GET','timeout' => 5,'redirection' => 5,'httpversion' => '1.0','user-agent' => 'WordPress/5.3; https://example.com/','reject_unsafe_urls' => $url,'blocking' => true,'headers' => array (),'cookies' => array (),'body' => NULL,'compress' => false,'decompress' => true,'sslverify' => true,'sslcertificates' => ABSPATH . WPINC . '/certificates/ca-bundle.crt','stream' => false,'filename' => NULL,'limit_response_size' => NULL)?>
This array contains the default values when omitted. For instance, if you want to disguise your HTTP request as one made by a generic browser instead of identifying your blog in the user‐agent string, you would write the following:
<?php$args = array(‘user-agent’ => ‘Mozilla/5.0 (Macintosh; Intel Mac OS X 10.14; rv:72.0)Gecko/20100101 Firefox/72.0’,);$result = wp_remote_get( $url, $args );?>
In Chapter 4, “Security and Performance,” you learned that despite its trustful name, the PHP‐generated array $_SERVER should not be trusted. As you can see, it takes a single PHP line to forge and fake the content of, for example, $_SERVER['HTTP_USER_AGENT'].
Table 12‐3 contains a comprehensive description of the most important default values. You can consider the others either partially implemented, not always functional depending on the transport used, or simply of minor interest.
TABLE 12-3: Default Settings of wp_remote_ Functions Optional Parameters
| PARAMETER | SIGNIFICATION |
method |
Either GET, POST, or HEAD. Some transports (the HTTP or the CURL extension, for instance) may accept other rarely used methods such as PUT or TRACE, but should not be assumed. |
timeout |
A number of seconds: how long the connection should stay open before failing when no response. |
user‐agent |
The user‐agent used to identify “who” is performing the request. Defaults to WordPress/ followed by the version of WordPress running and the URL of the blog issuing the request. |
headers |
An array of additional headers. |
cookies |
An array of cookie values passed to the server. |
body |
The body of the request, either a string or an array, which is data submitted to the URL. |
wp_remote_* Return Values
All wp_remote_* functions return an array if the request has completed or an error object if it was unsuccessful.
Remote API Request Example
Now that you understand HTTP requests and the functions available for those requests, let's put it to use accessing a public API. In this example, you will use a public API from https://sampleapis.com, which is a great resource when learning to work with APIs. The website features several different APIs available to experiment with. Let's create a plugin that pulls horror movies from the Sample API service.
First you will register a custom menu for your plugin to display results from the API in the WordPress dashboard.
// Register a custom page for your pluginadd_action( 'admin_menu', 'pdev_create_menu' );function pdev_create_menu() {// Create custom top-level menuadd_menu_page( 'PDEV Movies Page', 'PDEV Movies','manage_options', 'pdev-movies', 'pdev_movie_api_results','dashicons-smiley', 99 );}
The preceding code registers your new menu and page, which then calls the pdev_movie_api_results() function. Next you'll register this function and use wp_remote_get() to retrieve movie data from the SampleAPI's Movie API. The remote request URL in this example is https://sampleapis.com/movies/api/horror.
// Request and display Movie API datafunction pdev_movie_api_results() {// Set your API URL$request = wp_remote_get( 'https://sampleapis.com/movies/api/horror' );
It's always good practice to check whether an error is returned before working with the data. You'll do this using the is_wp_error() function and checking the returned $request variable, as shown here:
// If an error is returned, return false to end the requestif( is_wp_error( $request ) ) {return false;}
Now that you've confirmed there are no errors, it's time to parse the data returned.
// Retrieve only the body from the raw response$body = wp_remote_retrieve_body( $request );// Decode the JSON string$data = json_decode( $body );
First, you'll use the wp_remote_retrieve_body() function to retrieve only the body of the raw response. The only required parameter for this function is the HTTP response returned from your wp_remote_get() call. Next, you'll use the json_decode() PHP function, which takes a JSON‐encoded string and converts it into a PHP variable.
You now have the Movie API data in a PHP array that you can loop through to display. The following code verifies the $data variable is not empty and then proceeds to loop through the array values:
// Verify the $data variable is not emptyif( ! empty( $data ) ) {echo '<ul>';// Loop through the returned datasetforeach( $data as $movies ) {echo '<li>';echo '<a href="https://www.imdb.com/title/' .esc_attr( $movies->imdb_id ) . '">';echo '<img src="' . esc_url( $movies->poster_url ) .'" height="75"><br/>';echo esc_html( $movies->title );echo '</a>';echo '</li>';}echo '</ul>';}
You now have a working plugin that pulls horror movie data from the SampleAPIs.com service. The movie image and title are displayed in a list, with a link out to IMDB to view more details about each movie. You also incorporated proper escaping functions for enhanced security, since you should never trust data coming from a third‐party system. This is a simple example of how to access an external API and work with the data it returns. Let's review the full plugin source code shown here:
<?php/*Plugin Name: Horror Movie API Example PluginPlugin URI: https://example.com/Description: Example using the HTTP API to parse JSON from a remotehorror movie APIAuthor: WROXAuthor URI: http://wrox.com*/// Register a custom page for your pluginadd_action( 'admin_menu', 'pdev_create_menu' );function pdev_create_menu() {// Create custom top-level menuadd_menu_page( 'PDEV Movies Page', 'PDEV Movies','manage_options', 'pdev-movies', 'pdev_movie_api_results','dashicons-smiley', 99 );}// Request and display Movie API datafunction pdev_movie_api_results() {// Set your API URL$request = wp_remote_get( 'https://sampleapis.com/movies/api/horror' );// If an error is returned, return false to end the requestif( is_wp_error( $request ) ) {return false;}// Retrieve only the body from the raw response$body = wp_remote_retrieve_body( $request );// Decode the JSON string$data = json_decode( $body );// Verify the $data variable is not emptyif( ! empty( $data ) ) {echo '<ul>';// Loop through the returned datasetforeach( $data as $movies ) {echo '<li>';echo '<a href="https://www.imdb.com/title/' .esc_attr( $movies->imdb_id ) . '">';echo '<img src="' . esc_url( $movies->poster_url ) .'" height="75"><br/>';echo esc_html( $movies->title );echo '</a>';echo '</li>';}echo '</ul>';}}
Unsuccessful Requests
In case of a malformed HTTP request or if the request cannot be performed for any other reason (site not responding, temporary connection problem, etc.), the result will be an object instance of WordPress’ class WP_Error, containing an error code and an error message, as illustrated in the following code snippet:
<?phpvar_dump( wp_remote_get( 'malformed-url' ) );?>
The result of this ill‐fated GET request follows:
object(WP_Error)#1212 (2) {["errors"]=>array(1) {["http_request_failed"]=>array(1) {[0]=>string(29) "A valid URL was not provided."}}["error_data"]=>array(0) {}}
Error objects returned by HTTP requests will contain the error code http_request_failed and a meaningful detailed diagnosis. Consider the following attempts:
<?php$bad_urls = array('malformed','irc://example.com/','http://inexistant',);foreach( $bad_urls as $bad_url ) {$response = wp_remote_head( $bad_url, array( 'timeout' => 1 ) );if( is_wp_error( $response ) ) {$error = $response->get_error_message();echo "<p>Trying $bad_url returned: <br/> $error </p>";}}?>
Notice a couple of things in this snippet:
- To speed up things because it's obvious these requests will fail and you don't want to wait for 5 seconds each, an additional timeout parameter is set to 1 second.
- Because HTTP requests return a
WP_Errorobject on failure, you can test the response using functionis_wp_error(). You'll learn more about dealing with errors and theWP_Errorclass in Chapter 15, “Debugging.”
Finally, look at the actual result of this code snippet:
Trying malformed returned:A valid URL was not provided.Trying irc://example.com/ returned:A valid URL was not provided.Trying http://inexistant returned:cURL error 6: Couldn't resolve host 'inexistant'
As you can see, the HTTP request functions can diagnose most scenarios, so you know you can rely on them if you need to troubleshoot unexpected behavior within your code.
Successful Requests
When the HTTP request has completed, wp_remote_ functions return a multidimensional array of four elements, containing the raw server response in four parts: ‘headers’, ‘body’, ‘response’, and ‘cookies’.
Consider the following request:
<?phpvar_dump( wp_remote_get( 'http://example.com/asdfgh' ) );?>
The output of this request will be akin to the following:
array(4) {[“headers”] => array(5) {[“date”] => string(29) “Thu, 16 Jan 2020 20:04:01 GMT”[“server”] => string(85) “Apache/2.4.41 mod_ssl/2.2.8 PHP/7.3”[“content-length”] => string(3) “648”[“connection”] => string(5) “close”[“content-type”] => string(25) “text/html; charset=utf-8”}[“body”]=> string(1256) “<html><head><title>404 Not Found</title></head><body>(... snip ...)</body></html>“[“response”] => array(2) {[“code”] => int(404)[“message”] => string(9) “Not Found”}[“cookies”] => array(0) {}}
The first thing you should note here is that despite sending an HTTP request to a nonexistent page, the request is still considered successful. Whenever the web server replies to the client request, no matter its reply, the HTTP transaction is complete.
The four primary elements of the response array consist of the following:
-
headers: The raw list of the server response as detailed in the first section of this chapter, minus the HTTP response code. -
body: The body of the server response, which is typically the page HTML content itself but can be JSON‐ or XML‐encoded data when polling a remote API, for instance. -
response: The server response code and its signification, as detailed in Table 12-1 and Table 12-2. This particular information is especially valuable. Despite the HTTP transaction being successful, its result may be totally different from what you expect. You should always check that you obtain 200 as a response code. -
cookies: If the server wants the client to store cookie information, that information will be included here. In case you need this information for any subsequent HTTP request, include the information as an additional optional parameter in the nextwp_remote_function call.
wp_remote_ Companion Functions
The array returned by wp_remote_ functions contains exhaustive information and as such may contain too much data if you need just a part of it.
Along with functions performing HTTP requests, you can use “companion” functions that enable quick access to a part of the returned array.
-
wp_remote_retrieve_response_code(): Returns just the response code (for example, 200) of an HTTP response -
wp_remote_retrieve_response_message(): Returns just the response message (for example, “OK”) -
wp_remote_retrieve_body(): Returns the body of the response -
wp_remote_retrieve_headers(): Returns all the headers of a server response -
wp_remote_retrieve_header(): Returns just one particular header from a server response
For example, to check if a link exists and does not return a 404 Not Found error, you can use the following code:
<?php$url = 'https://www.example.com/bleh';// Send GET request$response = wp_remote_get( $url );// Check for server responseif( is_wp_error( $response ) ) {$code = $response->get_error_message();wp_die( 'Requests could not execute. Error was: ' . $code );}// Check that the server sent a “404 Not Found” HTTP status codeif( wp_remote_retrieve_response_code( $response ) == 404 ) {wp_die( 'Web page not found' );}// So far, so goodecho 'Web page found!';?>
You use these simple companion functions more in the next examples and plugins.
Advanced Configuration and Tips
Thanks to these wp_remote_ functions, you are now able to perform most tasks involving HTTP requests in a standard WordPress environment. But not all environments are customary, and not all tasks are basic. Fortunately, the HTTP API is extensible and versatile.
For instance, it is frequent that networks in corporate environments are isolated behind a firewall or a proxy. You will now read how to bypass this and maybe treat HTTP responses differently.
In the following sections, you will also learn how to fine‐tune the behavior of the HTTP API, utilizing its hooks and filters, for example to log requests for troubleshooting.
Proxy Support
In computer networks, a proxy server is a server that acts as an intermediary between the client and the requested server.
A great aspect of the HTTP API, and another reason why it is superior to PHP native functions as detailed earlier, is that it supports connections through a proxy without additional complex configuration.
To enable proxy support, you simply need to have the user define the following constants:
<?phpdefine( 'WP_PROXY_HOST', 'firewall.corp.example.com' );define( 'WP_PROXY_PORT', '3128' );define( 'WP_PROXY_USERNAME', 'username' );define( 'WP_PROXY_PASSWORD', 'password' );?>
This is especially important for users in a corporate environment where proxies are common and can block all WordPress’ outgoing requests if not, or incorrectly, configured.
On a corporate network, where a firewall architecture can characteristically handle different connections toward the Internet and those staying on the intranet, another constant can be used to specify domains that should not go through the proxy, in a comma‐separated list.
<?php// these hosts will not go through the proxydefine( 'WP_PROXY_BYPASS_HOSTS', 'sales.example.com, hr.example.com' );?>
The blog domain and localhost are automatically added to this list, so you don't have to include them. Wildcards using * are supported, as in *.wordpress.org.
Also, when working with clients on a firewalled corporate intranet, a concern of your client's IT department may be to limit outgoing connections to a restricted white list of websites. If so, use constants WP_HTTP_BLOCK_EXTERNAL and WP_ACCESSIBLE_HOSTS like so:
<?php// block all requests through the HTTP APIdefine( 'WP_HTTP_BLOCK_EXTERNAL', true );// except for these hostsdefine( 'WP_ACCESSIBLE_HOSTS','api.wordpress.org, sales.example.com, partner.web' );?>
Including api.wordpress.org in the list of accessible hosts can ensure that the built‐in upgrading for core, plugins, and themes still work.
Filtering Requests and Responses
As any other piece of WordPress code poetry, the HTTP API makes considerable use of hooks, and by reading the source file of the WP_Http class, you can find several filters and actions triggered.
Example: Modify a Default Parameter
For instance, if you want all your plugins to show off your WordPress skills in server logs whenever they perform queries, add the following filter and function:
<?php// Hook into the filter that sets user agent for HTTP requestsadd_filter( 'http_headers_useragent', 'pdev_plugin_user_agent' );// Set your own user agentfunction pdev_plugin_user_agent() {global $wp_version;return "WordPress version $wp_version ; "."Need a WordPress specialist? Contact us! "."PDEV Studios www.example.com";}?>
This filter can set the new default value for the user agent string, which means that on a per‐request basis you can still override it, as in the previous example where you disguised it as a generic Internet browser.
Example: Log HTTP Requests and Responses
Hooks that can come in handy when debugging requests and server responses are the http_request_args and http_response filters, used to allow modification of the request's parameters right before the request is executed or just before the server responses are returned.
In the WP_Http class source (located in wp‐includes/class‐http.php), you can see that each request applied these two filters:
<?php// before the request is sent, you will find:$parsed_args = apply_filters( 'http_request_args', $parsed_args, $url );// once the response is processed, you will read:return apply_filters( 'http_response', $response, $parsed_args, $url );?>
You are now going to code a plugin that logs each HTTP request and its parameters and each server response into a flat text file. You can use pdev_http as a prefix throughout this plugin.
<?php/*Plugin Name: PDEV Log HTTP requestsPlugin URI: https://example.com/Description: Log all HTTP requests into a flat text file for further analysisAuthor: WROXAuthor URI: http://wrox.com*/// Hook into filtersadd_filter( 'http_request_args', 'pdev_http_log_request', 10, 2 );add_filter( 'http_response', 'pdev_http_log_response', 10, 3 );// Log requests.// Parameters passed: request parameters and URLfunction pdev_http_log_request( $r, $url ) {// Get request parameters formatted for display$params = print_r( $r, true );// Get date with format 2010-11-25 @ 13:37:00$date = date( 'Y-m-d @ H:i:s' );// Message to log:$log = <<<LOG$date: request sent to $urlParameters: $params--------------LOG;// Log message into flat fileerror_log( $log, 3, dirname( __FILE__ ).'/http.log' );// Don't forget to return the requests arguments!return $r;}// Log responses// Parameters passed: server response, requests parameters and URLfunction pdev_http_log_response( $response, $r, $url ) {// Get server response formatted for display$resp = print_r( $response, true );// Get date with format 2020-10-31 @ 13:37:00$date = date( 'Y-m-d @ H:i:s' );// Message to log:$log = <<<LOG$date: response received from $urlResponse: $resp--------------LOG;// Log message into flat fileerror_log( $log, 3, dirname( __FILE__ ).'/http.log' );// Don't forget to return the response!return $response;}?>
The two logging functions are similar. They receive from the filters several parameters that are then printed into a flat text file using PHP function error_log(); then they eventually return the unmodified filtered value.
Notice the syntax used here to delimit strings, called the heredoc syntax. The opening string delimiter is an identifier after <<<, and the closing delimiter is the identifier, not indented.
After you activate this plugin, it starts appending entries to the file http.log in the plugin's directory. This is an interesting plugin that demonstrates the inner working of WordPress’ core, because it will, for instance, log all transactions with api.wordpress.org when checking the latest version of plugins, themes, and core, or when fetching the feeds displayed in your dashboard.
BRINGING IT ALL TOGETHER
Now that you've learned about the primary HTTP API functions available and have a good understanding of HTTP requests, let's put it all together using the HTTP API to interact with the WordPress REST API. To do this, I recommend you create two test websites. One website will run the plugin to send requests to the REST API of the second website. Another option is to create a local Multisite setup with two sites in the network, as covered in Chapter 13, “Multisite.”
Create
Let's look at an example that creates a new post on an external WordPress website using the REST API. First, let's register a basic menu page in the Dashboard.
// Register a custom page for your pluginadd_action( 'admin_menu', 'pdev_create_menu' );function pdev_create_menu() {// Create custom top-level menuadd_menu_page( 'PDEV REST API FUN', 'PDEV REST API','manage_options', 'pdev-rest-api', 'pdev_create_new_post','dashicons-smiley' );}
Now you have an area to work with your code. Next, let's create a simple form that when submitted will trigger the request to create a new post.
<h1>Create a Post using the REST API</h1><p>Click the button below to create a new post on an external WordPresswebsite using the REST API</p><form method="post"><input type="submit" name="submit" class="button-primary"value="Create Post"/></form>
As you can see, there is nothing special here, just a simple HTML form. Now comes the fun part, defining the data you intend to send to the REST API for your new post, as shown here:
if ( isset( $_POST['submit'] ) ) {// Set the API URL to send the request$api_url = 'http://example.com/wp-json/wp/v2/posts';// Using Basic Auth, set your username and password$api_header_args = array('Authorization' => 'Basic ' . base64_encode( 'brad:pa55w0rd' ));// Create the new post data array$api_body_args = array('title' => 'REST API Test Post','status' => 'draft','content' => 'This is my test post. There are many like it, but thisone is mine.','excerpt' => 'Read this amazing post');
First you check whether the form submit button has been posted, using the isset() PHP function, and if the form has been submitted, we know it's time to create the new post. Next, you'll create variables to hold the new post information. The first variable is $api_url, which contains the URL to the API of the WordPress website you plan to create your new post on. This needs to be a different website from the one running the plugin you are creating.
Next, you'll define the $api_header_args array, which sends the basic auth credentials to the REST API. Remember, for basic auth to work, the website you are creating the new post on needs to be running the Basic Auth plugin located at https://github.com/WP-API/Basic-Auth. Simply replace the USERNAME and PASSWORD text with a real username and password to authenticate.
Finally, you'll create the $api_body_args array, which contains all of the data for your new post. In this example, you set the title, content, and excerpt fields. You are also setting the post to a draft status so it is not published publicly yet.
Now that all the request data has been set, it's time to fire off the request to the remote REST API. You'll use the wp_remote_post() HTTP API function to do this. You'll notice you are passing in the three variables you set previously: $api_url, $api_header_args, and $api_body_args.
// Send the request to the remote REST API$api_response = wp_remote_post( $api_url, array('headers' => $api_header_args,'body' => $api_body_args) );// Decode the body response$body = json_decode( $api_response['body'] );// Verify the response message was 'created'if( wp_remote_retrieve_response_message( $api_response ) === 'Created' ) {echo '<div class="notice notice-success is-dismissible">';echo '<p>The post ' . $body->title->rendered . ' has been createdsuccessfully</p>';echo '</div>';}
Once the request has been sent, you'll use json_decode() to decode the body response from the API. Using the wp_remote_retrieve_response_message() function, you can quickly check whether the response message is Created, which means the post was successfully created, and show a success message. That's it! You have just successfully created a new post on a remote WordPress website using the REST API!
Update
Now that you have created a new post using the REST API, let's send a request to update the post. To do this, you'll use much of the same code as before, with a few minor adjustments.
// Set the API URL to send the request$api_url = 'http://example.com/wp-json/wp/v2/posts/<ID>';// Using Basic Auth, set your username and password$api_header_args = array('Authorization' => 'Basic ' . base64_encode( USERNAME:PASSWORD' ));// Create the post data array to update$api_body_args = array('title' => 'UPDATED: REST API Test Post');// Send the request to the remote REST API$api_response = wp_remote_post( $api_url, array('headers' => $api_header_args,'body' => $api_body_args) );// Decode the body response$body = json_decode( $api_response['body'] );// Verify the response message was 'created'if( wp_remote_retrieve_response_message( $api_response ) === 'OK' ) {echo '<div class="notice notice-success is-dismissible">';echo '<p>The post ' . $body->title->rendered . ' has been updatedsuccessfully</p>';echo '</div>';}
First the $api_url needs to be updated to include the unique post ID you want to update. Simply replace <ID> with the post ID in the previous code sample. You'll pass the same basic auth credentials in your $api_header_args array. The $api_body_args array will include any data you want to update. In this example, you are going to update the post title, so set that to something different from the original.
Next, you'll send the request and decode the body response just as before. The final change is to verify the response message is OK, meaning the post was updated. That's it! When executing the code, the post ID defined in the request will receive an updated title.
Delete
You have successfully created and updated a post. The final step is to delete a post using the REST API.
// Set the API URL to send the request$api_url = 'http://example.com/wp-json/wp/v2/posts/<ID>/';// Using Basic Auth, set your username and password$api_header_args = array('Authorization' => 'Basic ' . base64_encode( 'USERNAME:PASSWORD' ));// Send the request to the remote REST API$api_response = wp_remote_post( $api_url, array('method' => 'DELETE','headers' => $api_header_args) );// Decode the body response$body = json_decode( $api_response['body'] );// Verify the response message was 'created'if( wp_remote_retrieve_response_message( $api_response ) === 'OK' ) {echo '<div class="notice notice-success is-dismissible">';echo '<p>The post ' . $body->title->rendered . ' has been deletedsuccessfully</p>';echo '</div>';}
The $api_url will match the update request, which requires a post ID to be set. You'll notice you are setting the method to DELETE in the wp_remote_post() call. This is what tells the REST API to delete the post based on the ID in the $api_url. The code will not successfully trash the post when executed.
Now let's review the entire plugin to create, update, and delete a post using the WordPress REST API. Remember to update the $api_url variable as well as the USERNAME and PASSWORD fields for basic auth to work.
<?php/*Plugin Name: REST API - Create, Update, and Delete Post ExamplesPlugin URI: https://example.com/Description: Create, update, and delete a new post using the WordPress REST APIAuthor: WROXAuthor URI: http://wrox.com*/// Register a custom page for your pluginadd_action( 'admin_menu', 'pdev_create_menu' );function pdev_create_menu() {// Create custom top-level menuadd_menu_page( 'PDEV REST API FUN', 'PDEV REST API','manage_options', 'pdev-rest-api', 'pdev_create_new_post','dashicons-smiley' );}function pdev_create_new_post() {if ( isset( $_POST['create-post'] ) ) {// Set the API URL to send the request$api_url = 'http://example.com/wp-json/wp/v2/posts';// Using Basic Auth, set your username and password$api_header_args = array('Authorization' => 'Basic ' . base64_encode( 'USERNAME:PASSWORD' ));// Create the new post data array$api_body_args = array('title' => 'REST API Test Post','status' => 'draft','content' => 'This is my test post. There are many like it, but thisone is mine.','excerpt' => 'Read this amazing post');// Send the request to the remote REST API$api_response = wp_remote_post( $api_url, array('headers' => $api_header_args,'body' => $api_body_args) );// Decode the body response$body = json_decode( $api_response['body'] );// Verify the response message was 'created'if( wp_remote_retrieve_response_message( $api_response ) === 'Created' ) {echo '<div class="notice notice-success is-dismissible">';echo '<p>The post ' . $body->title->rendered . ' has been createdsuccessfully</p>';echo '</div>';}}elseif ( isset( $_POST['update-post'] ) ) {// Set the API URL to send the request$api_url = 'http://example.com/wp-json/wp/v2/posts/<ID>/';// Using Basic Auth, set your username and password$api_header_args = array('Authorization' => 'Basic ' . base64_encode( 'USERNAME:PASSWORD' ));// Create the post data array to update$api_body_args = array('title' => 'UPDATED: REST API Test Post');// Send the request to the remote REST API$api_response = wp_remote_post( $api_url, array('headers' => $api_header_args,'body' => $api_body_args) );// Decode the body response$body = json_decode( $api_response['body'] );// Verify the response message was 'created'if( wp_remote_retrieve_response_message( $api_response ) === 'OK' ) {echo '<div class="notice notice-success is-dismissible">';echo '<p>The post ' . $body->title->rendered . ' has been updatedsuccessfully</p>';echo '</div>';}}elseif ( isset( $_POST['delete-post'] ) ) {// Set the API URL to send the request$api_url = 'http://example.com/wp-json/wp/v2/posts/<ID>/';// Using Basic Auth, set your username and password$api_header_args = array('Authorization' => 'Basic ' . base64_encode( 'USERNAME:PASSWORD' ));// Send the request to the remote REST API$api_response = wp_remote_post( $api_url, array('method' => 'DELETE','headers' => $api_header_args) );// Decode the body response$body = json_decode( $api_response['body'] );// Verify the response message was 'created'if( wp_remote_retrieve_response_message( $api_response ) === 'OK' ) {echo '<div class="notice notice-success is-dismissible">';echo '<p>The post ' . $body->title->rendered . ' has been deletedsuccessfully</p>';echo '</div>';}}?><h1>Create or Update a Post using the REST API</h1><p>Click the button below to create a new post on an external WordPresswebsite using the REST API</p><form method="post"><input type="submit" name="create-post" class="button-primary"value="Create Post"/><input type="submit" name="update-post" class="button-primary"value="Update Post"/><input type="submit" name="delete-post" class="button-primary"value="Delete Post"/></form><?php}
Resources
There are some great resources available for working with the REST and HTTP APIs. When looking for online help, it's important to look for newer articles and tutorials. Older examples, even from a year ago, could be using out‐of‐date methods.
The following are some resources to help you grow your knowledge on the APIs covered in this chapter:
- REST API Handbook: Official WordPress project handbook
- HTTP API Handbook: Official WordPress project handbook
- Kinsta Blog: Extensive overview of the WordPress REST and HTTP API
SUMMARY
It's easy to see how powerful the REST API in WordPress is. It truly transforms WordPress from a publishing platform to a true application framework that can be used for all sorts of interesting setups. This opens the door to endless possibilities when working with modern web applications and systems.