4
Security and Performance
SECURITY OVERVIEW
When building a secure plugin, you must take steps to protect against cross‐site scripting (XSS), cross‐site request forgery (CSRF), SQL injection, privilege escalation, and other vulnerabilities. Unless you're a security expert, this is enough to scare anyone away from programming. While these terms may seem a bit scary, they don't need to be if you follow the best practices laid out by WordPress.
Some of the best talent in the programming world is devoted to making sure WordPress stays secure and offers the necessary tools for plugin authors to keep their code secure. It's possible your plugin could be run on thousands or even millions of websites, so making sure that it is secure is the most important thing you can do for its users.
What Securing Your Plugin Is
Securing your plugin means properly dealing with vulnerabilities and making sure data that is input or output is reliable. You must prevent malicious attacks while also making sure that legitimate user input/output does not produce unexpected behavior.
What Securing Your Plugin Is Not
Securing your WordPress plugin code in WordPress is not a difficult or unachievable task that only security experts can do. WordPress provides nearly every function you'll ever need for making sure your plugins are secure.
USER PERMISSIONS
The first step toward writing a secure plugin is figuring out whether a user has permission to perform an action. Not checking user permission will open your plugin to a privilege escalation vulnerability, which would grant users without permission the ability to perform sensitive actions that they are allowed to do.
If you've ever tried to visit a WordPress admin page while logged in as a non‐administrator, you may have seen a message letting you know that you don't have sufficient privileges, as shown in Figure 4‐1.

FIGURE 4‐1: Insufficient privileges
WordPress uses a function named current_user_can() to check whether the user has the correct capability for viewing any admin page. It may check permission multiple times on a page for outputting different action links or buttons. In plugin development, you'll likely use this function extensively whenever you need to check whether a user can or cannot do something.
How to Check current_user_can()
When using the current_user_can() function, you'll check whether a user has permission to move forward with performing a sensitive action or output an error message and die. The following example checks whether the current user has permission to install plugins. If they do not, the code bails out with an error message.
<?phpif ( ! current_user_can( 'install_plugins' ) ) {wp_die( 'You do not have sufficient privileges to install plugins.' );}
Often, you'll want to check permission before outputting a link or some other HTML so that a user doesn't see actions in the UI they're not allowed to perform. The next example checks whether a user can manage options before outputting a link to the General Settings screen in the WordPress admin:
<?php if ( current_user_can( 'manage_options' ) ) {printf('<a href="%s">Manage Settings</a>',esc_url( admin_url( 'options-general.php' ) ));}
The install_plugins and manage_options strings in the previous two examples are called capabilities in the WordPress environment. Capabilities are a part of the user role system, which you'll learn more about in Chapter 9. For the purposes of security, you merely need to know whether the current user has a specific capability that you need to check against.
Do Not Check Too Early
Before checking whether a user has the correct authorization, you must wait until the current user's data has been set up. The current_user_can() function relies on wp_get_current_user(), a pluggable function. Pluggable functions can be overwritten by plugins. Therefore, they are not loaded until all plugins have been loaded.
Therefore, you must wait until WordPress has initialized before checking permission. The init hook is the earliest point in the load process that is a safe bet for such checks or any hook executed later.
Imagine that you wanted to build a plugin that provided a link to the user management screen to the WordPress toolbar (also called the admin bar). The toolbar has hooks that run after WordPress has initialized, so you can check whether a user has permission to edit users before appending the link.
See how the following complete plugin hooks into wp_before_admin_bar_render and checks whether the current user has the edit_users capability before adding a link to the toolbar:
<?php/*** Plugin Name: Users Toolbar Link* Plugin URI: http://example.com/* Description: Adds a toolbar link to the users admin screen.* Author: WROX* Author URI: http://wrox.com*/add_action( 'wp_before_admin_bar_render', 'pdev_toolbar' );function pdev_toolbar() {global $wp_admin_bar;if ( current_user_can( 'edit_users' ) ) {$wp_admin_bar->add_menu( ['id' => 'pdev-users','title' => 'Users','href' => esc_url( admin_url( 'users.php' ) )] );}}
NONCES
In the previous section of this chapter, you learned how to check whether a user has permission to do something. On the surface, this seems like it would be everything you need to make sure a user can take a particular action. However, that's not always the case. Nonces were created to validate whether a user intended to take an action.
Authority vs. Intention
If a user has permission to perform an action (i.e., their role is granted a capability), it means they have the authority to do so. Any time you're in your WordPress admin, you can click links to do all sorts of things, such as publish a post, edit a category, or manage options. Any time you click a link to take an action, WordPress will verify that you have the authority to do so by checking current_user_can().
But hackers are craftier than that. What happens if someone knew the exact URL on your site to delete a post, for example? They don't have the authority to perform an action because they don't have sufficient permission on your site, so the URL wouldn't work for them. However, what if they tricked you, an administrator with permission, into clicking a link for deleting a post? Or even a more destructive action, such as deleting a user account? You would have the authority to take these actions, but it wasn't your intention to do so. This is called a cross‐site forgery request.
What Is a Nonce?
A nonce, or a cryptographic nonce, is the abbreviation for “number used once.” In WordPress, a nonce is a short and seemingly random string that looks similar to a password. This string represents the following:
- One user
- One action, such as delete, update, or save
- One object, such as a post, term, or user
- One time frame that lasts 24 hours
You've probably seen these nonce strings in URLs in your WordPress admin from time to time. For example, the link to delete a user with the ID of 100 might look something like http://example.com/wp-admin/users.php?action=delete&user=100&_wpnonce=f73684c03c. The f73684c03c at the end of the URL is the nonce. It is valid for only one time frame (24 hours) for one user (you) to take a specific action (delete) on the specific object (user) with the ID of 100.
If another person managed to get this link, even if they had a user account, the link would be invalid. After 24 hours, the link will also be invalid for your user account, and a new nonce will be created for the given action. As you can see in Figure 4‐2, WordPress will output an expired link message if the nonce is invalid.

FIGURE 4‐2: Expired link message
How to Create and Verify Nonces
WordPress has two methods of adding nonces. One method is for attaching a nonce to a URL. The second method is for outputting a hidden nonce field in HTML forms.
Creating a Nonce URL
To create a nonce URL such as the delete users URL (http://example.com/wp-admin/users.php?action=delete&user=100&_wpnonce=f73684c03c), you would use the core wp_nonce:url() function.
<?phpwp_nonce_url( $url, $action = -1, $name = '_wpnonce' );
The first parameter of $url is the URL that you want to add a nonce to. The second parameter of $action is the string in which you build the nonce for one object and one action. The final parameter is a custom name for the nonce.
To build a delete‐user URL, your code might look like the following:
<?php$url = add_query_arg(['action' => 'delete','user' => 100],admin_url( 'users.php' ));return wp_nonce_url( $url, 'pdev_delete_user_' . 100 );// Returns (with unique nonce):// http://example.com/wp-admin/users.php?action=delete&user=100&_wpnonce=f73684c03c
Of course, this URL doesn't delete a user account by merely visiting it. The nonce would need to be verified and code written to actually delete the user.
Creating a Nonce Field
When building forms, you should always add a nonce field to verify the intention of the user submitting the form. WordPress provides the wp_nonce:field() for handling this.
Consider the following form that allows a user to enter their name. The first form field added is the nonce field, which is a hidden field and not shown to the user. The field can go anywhere within the <form> element. However, it's good practice to add it prior to adding any other fields so that you don't forget to add it later.
<form method="post" action=""><?php wp_nonce_field( 'pdev_nonce_action', 'pdev_nonce_name' ); ?><p><label>Enter your name:<input type="text" name="pdev_nonce_example" value="<?php echoesc_attr( $value ); ?>"/></label></p><?php submit_button( 'Submit', 'primary' ); ?></form>
Creating and Verifying a Nonce in a Plugin
Now take a look at how you would put all of this together to create a full plugin. The following code creates an admin page named “Nonce Example” with a form for entering a name. It adds a nonce field and verifies it upon submission of the form. If successfully verified, the name field value is saved in the database.
<?php/*** Plugin Name: Nonce Example* Plugin URI: http://example.com/* Description: Displays an example nonce field and verifies it.* Author: WROX* Author URI: http://wrox.com*/add_action( 'admin_menu', 'pdev_nonce_example_menu' );add_action( 'admin_init', 'pdev_nonce_example_verify' );function pdev_nonce_example_menu() {add_menu_page('Nonce Example','Nonce Example','manage_options','pdev-nonce-example','pdev_nonce_example_template');}function pdev_nonce_example_verify() {// Bail if no nonce field.if ( ! isset( $_POST['pdev_nonce_name'] ) ) {return;}// Display error and die if not verified.if ( ! wp_verify_nonce( $_POST['pdev_nonce_name'], 'pdev_nonce_action' ) ) {wp_die( 'Your nonce could not be verified.' );}// Sanitize and update the option if it's set.if ( isset( $_POST['pdev_nonce_example'] ) ) {update_option('pdev_nonce_example',wp_strip_all_tags( $_POST['pdev_nonce_example'] ));}}function pdev_nonce_example_template() { ?><div class="wrap"><h1 class="wp-heading-inline">Nonce Example</h1><?php $value = get_option( 'pdev_nonce_example' ); ?><form method="post" action=""><?php wp_nonce_field( 'pdev_nonce_action', 'pdev_nonce_name' ); ?><p><label>Enter your name:<input type="text" name="pdev_nonce_example"value="<?php echo esc_attr( $value ); ?>"/></label></p><?php submit_button( 'Submit', 'primary' ); ?></form></div><?php }
DATA VALIDATION AND SANITIZATION
Repeat the following sentence aloud: all unknown data is unsafe. Now one more time for good measure: all unknown data is unsafe.
This may seem like a paranoid view, but in computer programming it's healthy to be suspicious of all data going in and going out. Even if you've cleared both the authority and intent checks discussed earlier in this chapter, you should still think from the mind‐set that some third party has found a way around those checks and is giving your plugin malicious data.
In this section, you'll learn why filtering data is important, how to validate and sanitize data by type, and what WordPress functions to use to keep data secure.
The Need for Data Validation and Sanitization
To show the importance of validating and sanitizing data, review the following form code:
<?php $full_name = $_POST['full_name']; ?><form action="" method="POST"><label>Full Name:<input type="text" name="full_name" value="<?php echo $full_name; ?>"/></label><input type="submit" value="Submit"/></form>
This is a basic form that allows a user to enter their full name. However, there are two issues with the data in this case.
- The
$_POSTdata in a real‐world scenario would likely go to the database, so it must be sanitized to make sure that it's safe. - The
$full_namevariable on output as thevalueattribute must be escaped to make sure it doesn't break out of the HTML and allow something like a malicious script to run.
To illustrate the problems with this form, input the following examples and check the results:
- Nonmalicious example:
John “Average” Doe - Malicious input:
John”/>Password:<input name=”password” value=”1234” - Malicious input:
John“<script>alert(‘XSS’);</script>
Input 1 is an example of basic user input. Users input all sorts of characters both intentionally and unintentionally. It's your job to make sure this doesn't break things. The quotation marks in this case break the HTML in the form. They need to be encoded to their appropriate HTML entities.
Input 2 does the same thing as the first example. However, there is obvious malicious intent. Once the form is submitted, it breaks out of the HTML and creates an additional password field. The hacker here is potentially attempting to change a password if they get lucky. The extra HTML should've been stripped when the form was posted.
Input 3 is an example of cross‐site scripting. This is a serious vulnerability where hackers attempt to inject JavaScript to do bad things. For example, they may attempt to grab session or user cookies. The end goal is typically to gain access to privileged content or user accounts. If they're successful in gaining access, there's no limit to what they can do, such as taking down an entire site or adding hidden spam.
Figure 4‐3 illustrates the third example. As you can see, the form allows an arbitrary JavaScript code snippet to run. While an alert box is just an example, a malicious party could execute anything possible with JavaScript as if they had access to your site.
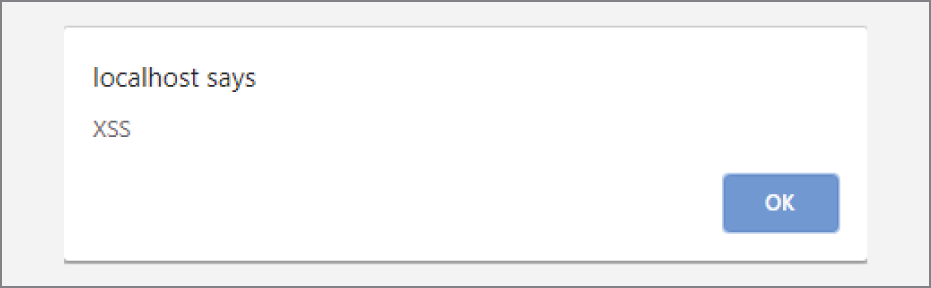
FIGURE 4‐3: Rogue JavaScript running
Now you can see why it's important to protect something as simple as a basic form on a web page from nonmalicious users with good intent as well as bad actors looking for ways to crack into a site. Remember that suspicion is healthy when dealing with untrusted data.
Good Practice: Identifying Potentially Tainted Data
Imagine that you created a survey to find out people's favorite fruit. Maybe you want to cross‐reference that by age so that a client can better serve their customers at their online fruit shop. Your form may have a text input for visitors to enter their age and a drop‐down for selecting from a predefined list of fruit. Consider the following code snippet that accepts the data that's input:
<?php$safe = [];$safe['age'] = absint( $_POST['age'] );$valid_fruit = ['banana','kiwi','watermelon'];$safe['fruit'] = 'watermelon';if ( in_array( wp_unslash( $_POST['fruit'] ), $valid_fruit, true ) ) {$safe['fruit'] = wp_unslash( $_POST['fruit'] );}
Notice that the first bit of code creates an empty array named $safe. It's good practice to create a separate variable early so that you can store data that has been validated or sanitized. Because you named it $safe, you'll recognize that it's the data that you'll want to send to the database or elsewhere after the form data has been processed.
Making sure that the age input is safe is relatively simple using WordPress' built‐in absint() function, which makes sure that the data is an absolute integer. If it cannot be validated as an absolute integer, 0 will be returned.
The code example also only allows fruits to input from a specific group of allowed fruits. If an invalid value is input, the “safe” value is set to a default value. This is called whitelist validation. While not always possible, whitelisting is the method you should always strive to use to validate data because it rules out any nonvalid input. You should rarely, if ever, use blacklist validation, which only disallows specific values.
Validating or Sanitizing Input?
Deciding whether to validate or sanitize input data is sometimes a tough choice. Ultimately, it comes down to a design decision on your part. After building plugins over time, you'll start to get a feel for what the best choice is for types of inputs. Some types are easier than others.
Discussed in the previous section, whitelist validation is the ideal way to handle data input. This method often works best with form inputs that don't allow the user to manually input data and have a limited set of options. Select drop‐downs, radio inputs, and checkboxes are perfect for this type of validation because the allowed input should come only from your predefined options. Whitelist validation is a no‐brainer in these cases.
Form fields that allow direct user input, such as text inputs or textareas, are where sanitization more often comes into play. Earlier in this chapter, you saw one method of handling an age input. The expected input is an integer. Invalid input becomes a 0. You may decide to not allow the form to be submitted unless it's a valid age. For example, 1000 is also a valid integer. You should probably be a little skeptical of someone claiming to be the longest‐living human ever. You may decide to validate that against an age range if it's important to your plugin. Or, you may decide that you'll allow any integer if the person's age isn't super important.
Imagine building a plugin with a user bio textarea. Validation probably isn't ideal in this scenario. There's more room for user error and no predefined options to choose from. Sanitization is your best bet. You'll want to use a function such as wp_kses() to allow a limited set of HTML or use wp_filter_nohtml_kses() to strip all HTML.
There are some specific questions you should consider when deciding between validating and sanitizing.
- Will it be an inconvenience to the user if you reject all invalid data and require they resubmit the form after making corrections (e.g., removing invalid characters from an otherwise valid integer for an age input)?
- Can you make some assumptions about what the data should be if it's invalid and simply sanitize it (e.g., stripping HTML should affect a user's bio text input)?
- What will you do with the data immediately upon submission (e.g., attempt to send an email to an invalid email address)?
Validating and Sanitizing Cookbook
In this section, you'll learn about the many functions that WordPress provides for validating and sanitizing data. PHP also provides methods for filtering input data that you should study at https://www.php.net/filter.
Integers
For many cases, you can use PHP's built‐in intval() to sanitize an integer or is_int() to determine whether a value is an integer. The following example shows both validating an integer value and sanitizing it:
<?php$value = 100;// Validate the integer.return intval( $value ) === 100;// Sanitize the integer.return intval( $value );
Sometimes you may need to make sure a value is a positive integer. PHP provides the abs() function for that. However, WordPress provides a wrapper function named absint() that combines intval() and abs(). See how the following example takes the input of a negative integer and returns the absolute value of the number:
<?php$value = -100;// Returns 100.return absint( $value );
Generally, integers are easy to handle with these basic functions. However, when dealing with large integers, you may have to consider that computer systems have a maximum signed integer range. On 32‐bit systems, that range is –2147483648 to 2147483647. On 64‐bit systems, the range is –9223372036854775807 to 9223372036854775807. Any integer outside that range will be set to the maximum possible.
The best way to deal with integers outside these ranges is to treat them as strings instead. You could use PHP's preg_replace() to remove anything that's not a number, as shown in the following example:
<?php$value = '100000000000000000000';// Strip anything that's not a digit.return preg_replace( '/d/', '', $value );
Another option is to use ctype_digit(), which is preferable to regular expressions. However, PHP's ctype functions may be disabled on some installations, so you need to have a fallback plan in place if you don't know whether it's enabled.
<?php$value = '100000000000000000000';// Strip anything that's not a digit.return ctype_digit( $value );
Arbitrary Text Strings
At times, you may have fields that allow a user to input arbitrary text strings, such as a text input or search field. WordPress provides the sanitize_text_field() function for this scenario, which will check for invalid UTF‐8 characters, convert < characters to their appropriate HTML entities, strip all HTML tags, and strip octets. It will also remove line breaks, tabs, and extra whitespace.
Consider the following example of user input:
<?php$value = "Jane Doe is a <em>super cool</em> person! ";return sanitize_text_field( $value );// Returns:// "Jane Doe is a super cool person!"
As you can see, WordPress’ sanitize_text_field() function removes all unwanted characters for you and leaves you with a nicely formatted text string.
There may be times when you want to strip all HTML tags but preserve other characters or text formatting. For those cases, you'll want to use WordPress’ built‐in wp_strip_all_tags() function as shown in the following snippet. Notice how the line break (
) is preserved, but the HTML is removed.
<?php$value = "John Doe is my <strong>best</strong> friend.<script>alert( 'hello');</script>";return wp_strip_all_tags( $value );// Returns:// "John Doe is my best friend."
You may be thinking that PHP has its own built‐in strip_tags() function, and you would be right. However, strip_tags() cannot properly handle more complex markup. Using the same input from the previous snippet, see how everything between the <script> tags is not removed.
<?php$value = "John Doe is my <strong>best</strong> friend.<script>alert( 'hello');</script>";return strip_tags( $value );// Returns:// "John Doe is my best friend.alert( 'hello' );"
The core WordPress wp_strip_all_tags() function should almost always be used in lieu of PHP's strip_tags() because this result is rarely what you'll want.
Key and Identifier Strings
At times, you'll need to validate or sanitize internal identifier strings, or what are sometimes called keys. Keys are strings that can contain only alphanumeric characters, underscores, or hyphens. WordPress has a function named sanitize_key() that converts all letters to lowercase and strips any unwanted characters. However, if you need to validate instead of sanitize, you'll need to use PHP's preg_match().
<?php$value = 'pdev_100';// Validate:return preg_match( '/^[a-z0-9-_]+$/', '', $value );// Sanitize:return sanitize_key( $value );
In the example code, the validation check merely tests if the key is valid, returning true or false. It does this by using a regular expression. Anything not matching a lowercase letter, number, underscore, or hyphen will cause the check to fail and return false. You can learn more about using regular expressions in PHP at https://www.php.net/manual/en/book.pcre.php.
Email Strings
When allowing users to input an email address, WordPress provides the is_email() function for validating and provides sanitize_email() for sanitizing the email address.
<?php$email = '[email protected]';// Validate.return is_email( $email );// Sanitize.return sanitize_email( $email );
It's important to note that neither of these functions checks whether the email address is real. They check only that the string follows a specific pattern. The only way to verify the email address is to send an email and have the recipient perform an action, such as click a verification link that returns them to the site.
Emails such as wrox@localhost, a format used in some local networks without a TLD, would be an invalid address. If building a plugin under such a system, you would need to create a check for known characters, such as @localhost, or validate against a list of known email addresses if possible.
URLs
URLs need to be handled differently based on whether you're outputting to the browser, saving to the database, or redirecting a user to another URL.
URLs in HTML
The most common use case for URLs is to output them to the screen. They need to be escaped prior to output using WordPress’ esc_url() function. This function removes some invalid characters and converts & characters to their HTML entity.
<?php $url = 'http://example.com'; ?><a href="<?php echo esc_url( $url ); ?>">Example</a>
The esc_url() function doesn't make sure a link exists. Its purpose is to make sure that the value passed in doesn't break HTML and is safe to use as an attribute.
URLs in a Database
When storing a URL in the database, such as via a plugin setting, you don't want ampersands or other characters converted to their HTML entities. Instead, you want to make sure they're sanitized and safe for storing in the database. WordPress provides the esc_url_raw() function for this task.
<?php$url = 'http://example.com';update_option( 'pdev_url_setting', esc_url_raw( $url ) );
As you can see in the preceding code snippet, the $url value is sanitized before being saved to the database. You can learn more about saving options in Chapter 3, “Dashboard and Settings.”
URLs in Redirects
For redirecting a user to another URL, WordPress provides the wp_redirect() function. This function both sanitizes the redirect URL and handles the redirect.
<?phpwp_redirect( 'http://example.com' );exit;
wp_redirect() is vulnerable to open redirects if the URL is unknown, such as a URL set by user input. The function does not validate whether the URL matches the current host. For that reason, it's always better to use wp_safe_redirect() when the intention is for the user to be redirected to a page on the current site.
<?phpwp_safe_redirect( admin_url( 'options-general.php' ) );exit;
Escaping HTML and Attributes
When outputting content to the browser in which you want to disallow HTML, you can use WordPress’ esc_html() function. Unlike wp_strip_all_tags() discussed earlier in this chapter, esc_html() will not remove the markup. Instead, it will convert <, >, and other characters to their character entities, as shown in the following example:
<?php$value = '<h2>Hello, world!</h2>';echo esc_html( $value );// Returns:// <h2>Hello, world!</h2>
Likewise, the esc_attr() function escapes unwanted characters that you don't want to break HTML when used as an attribute value. The following example shows how to make sure a variable is safe to use as an HTML element class:
<?php $class = 'example'; ?><p class="<?php echo esc_attr( $class ); ?>">The quick brown fox...</p>
HTML
At times, you may need to sanitize HTML to make sure that it's safe for input into the database or output on the front end. Often, this is when accepting data passed from a <textarea> field. Good examples of this are the WordPress post editor or its comment form on the front end.
Forcing Balanced Tags
The first function in your arsenal will be the core force:balance:tags() function. This function does not validate tags. However, it adds missing tags, as shown in the following code snippet:
<?php$html = '<p>I have a missing closing tag!';return force:balance:tags( $html );// Returns:// '<p>I have a missing closing tag!</p>';
The function will also properly balance tags that are out of order. Consider the following example where the <strong> and <em> tags are mismatched:
<?php$html = '<p>My superhero name is <strong><em>Super Jane</strong></em></p>';return force:balance:tags( $html );// Returns:// '<p>My superhero name is <strong><em>Super Jane</em></strong></p>';
Sanitizing HTML
WordPress includes a PHP script called KSES, which is a reverse acronym that stands for “KSES Strips Evil Scripts.” The script is useful for filtering untrusted HTML on input and output. There are multiple KSES functions. However, the primary function that you'll use is wp_kses(), which allows developers to pass in an array of allowed HTML elements and allowed attributes for each element.
Imagine you had an HTML string you wanted to return for output but only wanted to allow <strong> and <em> tags. wp_kses() allows you to limit the string, as shown in the following example:
<?php$allowed = ['strong' => [],'em' => []];$html = '<h1>A <strong>Bold</strong> and <em>Italic</em> Header</h1>';return wp_kses( $html, $allowed );// Returns:// A <strong>Bold</strong> and <em>Italic</em> Header
As you can see, the <h1> tag in the original $html string was stripped because it was not defined in the $allowed array of elements. You can take this further by also defining the allowed attributes for any allowed elements. See how the following $allowed array allows specific attributes:
<?php$allowed = ['strong' => ['class' => []],'em' => ['class' => []],'a' => ['href' => [],'title' => [],'class' => []]];
As you may guess, defining a huge list of elements and attributes can become unwieldy if you plan to allow many elements. wp_kses() is usually best when you have a specific subset of HTML that you want to allow. If you want to allow for almost any valid HTML but don't want to define the elements, it's usually better to use the wp_kses_data() function provided by WordPress, which only allows tags defined in WordPress’ allowed tags list.
Consider the following input where a malicious user passes in a <script> tag to run JavaScript. KSES will clean that up and make it safe for input or output.
<?php$html = '<p>Hello, world! My name is <strong>John Doe</strong>.I want to insert <script>alert( "XSS" );</script>';return wp_kses_data( $html );// Returns:// Hello, world! My name is <strong>John Doe</strong>. I want to insert// alert( "XSS" );
JavaScript
WordPress provides the esc_js() function for escaping quotes and ampersands while correcting line endings. This function is not meant for making entire JavaScript code blocks safe. Its purpose is for escaping JavaScript used in HTML attributes. The following code snippet shows a button that when clicked will create an alert box with the text that has been made safe for JavaScript:
<?php $value = 'Hello'; ?><button onclick="alert( '<?php echo esc_js( $value ); ?>' );">Click Me</button>
The usefulness of esc_js() is limited. Often, it's better to use wp_json_encode() combined with esc_attr() on output. A more likely scenario is that you'll need to pass custom data to a data attribute. Then, later use that in a custom script. Note how the following snippet adds a hex color code to the data‐pdev attribute:
<?php $data = [['color' => '#000']]; ?><div data-pdev="<?php echo esc_attr( wp_json_encode( $data ) ); ?>"></div>
That code would result in the following HTML output:
<div data-pdev="[{"color":"#000"}]"></div>
You should avoid outputting JavaScript directly in HTML if possible, even if you have PHP variables that need to be processed and filtered first. Instead, you should opt to use wp_localize_script() to make data available to your JavaScript files, which you'll learn about in Chapter 6.
Environment and Server Variables
In PHP, you cannot trust the $_SERVER array and must treat it as if it were any other unknown variable. Imagine that you wanted to display a welcome message based on where the current site visitor came from. You'd use the HTTP_REFERER key to get that data.
<?php if ( isset( $_SERVER['HTTP_REFERER'] ) ) : ?>Welcome, visitor from <?php echo $_SERVER['HTTP_REFERER']; ?>.<?php endif; ?>
The preceding code is unsafe. $_SERVER['HTTP_REFERER'] can easily be spoofed and used to execute a malicious script. Because you'd expect a URL in this scenario, you'd combine it with the esc_url() function.
<?php if ( isset( $_SERVER['HTTP_REFERER'] ) ) : ?>Welcome, visitor from <?php echo esc_url( $_SERVER['HTTP_REFERER'] ); ?>.<?php endif; ?>
Server variables can be as dangerous as any other type of unknown data. Always assume anything coming from $_SERVER, $_COOKIE, $_GET, $_POST, or any other super‐global is malicious. Then, validate or sanitize based on what type of data you expect.
Arrays of Data
At times, you'll need to sanitize an array of the same type of data. Instead of manually typing out a line of code to filter each item in the array or running a complicated loop, use PHP's array_map() function to map a sanitization function to each array value.
For example, the following code has an array of HTML classes that need to be sanitized for a <figure> element that wraps an image. You only need to pass the sanitize_html_class() function and the array of classes to array_map() to handle this for you.
<?php$classes = ['media','media-object','media-image'];$classes = array_map( 'sanitize_html_class', $classes );?><figure class="<?php echo esc_attr( join( ' ', $classes ) ); ?>"><img src="http://example.com/image.png" alt=""/></figure>
Of course, you'll also want to escape the final output with the esc_attr() function covered earlier in this chapter, which cleans up the final output.
<figure class="media media-object media-image"><img src="http://example.com/image.png" alt=""/></figure>
Nearly any sanitization or validation function can be combined with array_map(). You can also use a custom callback for more complex data. This function will be one of the most useful tools in the toolbox as you start building larger plugins.
Database Queries
Database queries are an important area to secure against SQL injection attacks. The following example shows a query for handling a user login, which is insecure. Take note of the $password variable.
<?php$login = 'hacker';$password = "123456' OR 1='1";return "SELECT * FROM users WHERE `login` = '$login' AND `pass` = '$password'";// Returns:// SELECT * FROM users WHERE `login` = 'hacker' AND `pass` = '123456' OR 1='1'
Because the variables are not escaped, the $password variable successfully exploits a vulnerability by closing out a quote mark and adding OR 1='1', which is always true. This would allow a malicious actor to successfully log into the site without having appropriate credentials.
To prevent this, you should use WordPress’ esc_sql() function to escape any variables passed into a SQL query. The following example shows how using this function ensures the quote marks from $password are escaped and cannot be exploited:
<?php$login = esc_sql( 'hacker' );$password = esc_sql( "123456' OR 1='1" );$sql = "SELECT * FROM users WHERE `login` = '$login' AND `pass` = '$password'";// Returns:// SELECT * FROM users WHERE `login` = 'hacker' AND `pass` = '123456' OR 1='1'
FORMATTING SQL STATEMENTS
WordPress provides API functions for nearly everything you'll ever need to do when getting, setting, updating, or deleting data in the database. You'll learn about most of these functions throughout this book. However, there are rare cases where you'll need to interact more directly with the database, and WordPress provides the tools necessary for handling this too.
The $wpdb Object
When interacting directly with the database, WordPress includes a wpdb class. On every page load, WordPress stores a single object instance of this class in the global $wpdb variable.
You should always use the $wpdb variable for database interactions instead of using PHP functions such as mysql_query() for two reasons.
- WordPress provides additional security functionality to protect against SQL injection attacks.
- Users may decide to use a different database engine such as PostGresSQL, so
mysql_*()functions may not work.
You can use the $wpdb object to access any of the tables in the database created by WordPress on installation. You can also access tables created by your plugin or tables from third‐party plugins.
Why wpdb Methods Are Superior
The $wpdb object allows you to read, insert, update, or delete data from database tables. The following is an example of using the PHP mysql_*() functions for connecting to a database and updating a post title:
<?php$title = esc_sql( 'New Post Title' );$id = absint( 100 );mysql_connect( DB_HOST, DB_USER, DB_PASSWORD )OR die( 'Could not connect: ' . msql_error() );mysql_select_db( DB_NAME );mysql_query( "UPDATE wp_posts SET post_title = '$title' WHERE ID = $id" );
There are two primary issues with this code. First, it is a lot of code to write for a simple database query. Writing more code allows for more potential mistakes. Second, the wp_posts table is hard‐coded, so it may not be correct. WordPress allows users to change the default wp_ prefix for table names to something custom. Compare the preceding code with the WordPress method of handling the same query, shown here:
<?php$title = esc_sql( 'New Post Title' );$id = absint( 100 );$wpdb->query( "UPDATE $wpdb->posts SET post_title = '$title' WHERE ID = $id" );
This is much shorter in length and easier to read. You can also see that $wpdb‐>posts points to the correct table for posts. If the user chose to use pdev_ as their table prefix, this would become pdev_posts.
You can even take this one step further and directly update an entire row in a table via the $wpdb‐>update() method. The following example performs the same action of updating a post's title for a given post ID:
<?php$data = [ 'post_title' => $title ];$where = [ 'ID' => $id ];$wpdb->update( $wpdb->posts, $data, $where );
You can also update multiple columns at once with this method by adding the keys and values to the $data array. This will save you from writing out longer queries.
All‐in‐One Methods
WordPress provides methods for interacting with an entire table row that are easier to use than memorizing SQL syntax and also handle sanitizing the data for you. In the previous section, you learned about the update() method, but WordPress also has an insert() method.
$wpdb‐>update()
When you want to update an existing row in a particular table, you should use the $wpdb‐>update() method, which accepts five parameters.
-
$table(required): The database table name to perform the update on. -
$data(required): An array of columns (keys) to update with the new values to insert into the row. The columns and values should be raw values and not SQL‐escaped. -
$where(required): An array of where clauses in the form of column and value pairs. -
$format(optional): An array of formats that get mapped to the values in the$dataarray. Use%sfor strings,%dfor integers, and%ffor floats. If the parameter is a string, it will be used to format all the values. -
$where_format(optional): An array of formats that get mapped to the$wherearray. It works the same as the$formatparameter.
Building from the previous example of updating the post title, imagine that you also wanted to change the post author. WordPress stores the post title as a string and the post author as an integer (user ID). The following code snippet shows how to format the code to update the post in the database:
<?php$data = ['post_title' => 'New Post Title','post_author' => 42];$where = ['ID' => $id];$format = ['%s', // Maps to post_title'%d' // Maps to post_author];$where_format = ['%d' // Maps to ID];return $wpdb->update( $wpdb->posts, $data, $where, $format, $where_format );// Returns number of updated columns on success and false on failure.
As you can see, this method provides a structured method for updating rows in a database table without having to write any SQL syntax or manually sanitize the data.
$wpdb‐>insert()
To insert a new row into a table, you should use the $wpdb‐>insert() method, which accepts three parameters.
-
$table(required): The database table name to perform the update on. -
$data(required): An array of columns (keys) to update with the new values to insert into the row. The columns and values should be raw values and not SQL‐escaped. -
$format(optional): An array of formats that get mapped to the values in the$dataarray. Use%sfor strings,%dfor integers, and%ffor floats. If the parameter is a string, it will be used to format all the values.
Assume you wanted to insert a new row into a custom table that had a column named column_1 that accepts a string input and column_2 that accepts an integer input. You could easily do this with $wpdb‐>insert().
<?php$data = ['column_1' => 'A text string','column_2' => 100];$format = ['%s','%d'];return $wpdb->insert( $wpdb->custom, $data, $format );// Returns number of updated columns on success and false on failure.
Common Methods
Sometimes, database queries will be more complex than a basic UPDATE or INSERT. You'll need to write some SQL syntax and use one of the core methods for interacting with the database.
Select a Variable
The $wpdb‐>get_var() method will return a single variable from the database. If no data is found, it will return null. The following example shows how to grab the number of published posts on a WordPress installation:
<?php$query = "SELECT COUNT(ID) FROM {$wpdb->posts} WHERE post_status = 'publish'";return $wpdb->get_var( $query );// Returns the number of published posts.
Select a Row
To select an entire row from the database, use the $wpdb‐>get_row() method. It allows you to return the row's data as an object (default), associative array, or numeric array. If no value is found, it will return null.
<?php$wpdb->get_row( string|null $query = null, string $output = OBJECT, int $y = 0 );
This function accepts three parameters:
-
$query(optional): The SQL query. -
$output(optional): The return type of the method. Acceptable values areOBJECT(returns an object),ARRAY_A(returns an associative array), andARRAY_N(returns a numeric array). -
$y(optional): The row to return. Note that rows are indexed from0.
Imagine you needed to grab the admin user and all of the user's data. You could do so with the following snippet:
<?php$query = "SELECT * FROM {$wpdb->users} WHERE user_login = 'admin'";return $wpdb->get_row( $query );
That code will return an object with each of the admin user's columns from the database.
object(stdClass) (10) {["ID"] => string(1) "1"["user_login"] => string(5) "admin"["user_pass"] => string(34) "xxxxxxx"["user_nicename"] => string(5) "admin"["user_email"] => string(23) "[email protected]"["user_url"] => string(24) "http://example.com"["user_registered"] => string(19) "2019-09-24 20:22:42"["user_activation_key"] => string(0) ""["user_status"] => string(1) "0"["display_name"] => string(14) "John Doe"}
Select a Column
To select an entire column or part of a column from a table, you should use the $wpdb‐>get_col() method.
<?php$wpdb->get_col( string|null $query = null, int $x = 0 );
This function accepts two parameters.
-
$query(optional): The SQL query. -
$x(optional): The column to return. Note that columns are indexed from0.
Assume you needed to grab the email address for every user for the WordPress installation. The following will return each of the emails as a numeric array:
<?php$query = "SELECT user_email FROM {$wpdb->users}";return $wpdb->get_col( $query );
The returned data would look similar to the following:
[0 => '[email protected]',1 => '[email protected]',2 => '[email protected]']
You could take that a step further and use those addresses to fire off an email to every user. The following example lets users know the site will be offline next Monday:
<?php$query = "SELECT user_email FROM {$wpdb->users}";$emails = $wpdb->get_col( $query );foreach ( $emails as $email ) {wp_mail($email,'Site Offline','The site will be offline next Monday.');}
Select Generic Results
To grab a set of generic results from multiple rows, use the $wpdb‐>get_results() method. It accepts a first parameter of a valid SQL query and an optional second return‐type parameter of OBJECT (default), ARRAY_A, or ARRAY_N.
You could do something more complex such as get all the years on a WordPress installation and count the number of posts.
<?php$query = "SELECT YEAR(post_date) AS `year`, count(ID) as postsFROM $wpdb->postsWHERE post_type = 'post' AND post_status = 'publish'GROUP BY YEAR(post_date)ORDER BY post_date DESC";return $wpdb->get_results( $query, ARRAY_A );
By using ARRAY_A for the return type, the preceding code will return an associative array similar to the following:
[[0] => ["year" => "2019","posts" => "32"],[1] => ["year" => "2018","posts" => "1"],[2] => ["year" => "2017","posts" => "3"]]
Generic Queries
WordPress also supports generic SQL queries via the $wpdb‐>query() method. The method returns an integer based on the number of rows affected or false if an error occurs.
Imagine you had a lot of spam users creating accounts with a common URL for the user website field. You could delete all of these users with one query.
<?php$query = "DELETE from {$wpdb->users}WHERE user_urlLIKE '%spam.example.com%'";return $wpdb->query( $query );
Any type of query is possible with the $wpdb‐>query() method. You're not limited to doing a simple SELECT as you can see with the preceding usage of DELETE.
Protecting Queries against SQL Injections
Before you begin building custom queries in a plugin, it's important that you familiarize yourself with the $wpdb‐>prepare() method. Often, you'll be handling dynamic data rather than hard‐coded example code. It's paramount that you protect your plugin's queries against an SQL injection attack.
The following example queries all the titles of the posts written by the user with an ID assigned to the $user_id variable. Because $user_id is unknown, and therefore untrusted, the query string needs to be sanitized for safety using the $wpdb‐>prepare() method before adding the query string to $wpdb‐>get_results().
<?php$user_id = 1;$unsafe_query = "SELECT post_titleFROM {$wpdb->posts}WHERE post_status = 'publish'AND post_author = %d";$safe_query = $wpdb->prepare( $unsafe_query, $user_id );return $wpdb->get_results( $safe_query );
When using $wpdb‐>prepare(), you use %s as a placeholder for strings and %d as a placeholder for integers. You don't need to add quotes around these placeholders.
SECURITY GOOD HABITS
Writing secure plugins is not about doing one thing right at one point in time. It's not something you set and forget. You must approach security at every point in the design of your plugin.
Humans are imperfect. You'll make a security mistake at some point in your plugin development career. All programmers do. It's not something to feel shame over. It's what you do when addressing security issues that matters, which means being proactive about getting a fix out to users to close the security hole as quickly and safely as possible.
The number‐one takeaway from this chapter is that you should trust nothing and no one.
However, there's no need to be scared away from building plugins because of potential security problems. If you stay mindful of the common issues and utilize the functions outlined in this chapter, you'll be well on your way to building plugins professionally.
Follow these simple practices and form good habits of them:
- Try to break your own code. Test various situations, add odd characters to inputs, and throw nonstandard scenarios at anything you build.
- Begin thinking about security from the start of your plugin. Don't wait until you get a working prototype or enter the beta testing phase before checking for potential exploits. Make it a habit to attempt to write secure code from the outset.
- As outlined in Chapter 2, “Plugin Framework,” document your code. Having good inline comments will help you understand whether a particular block of code is doing what it's supposed to do when you look at it later.
- Assume all unknown data is dangerous. This is worth repeating a few times.
PERFORMANCE OVERVIEW
WordPress provides two separate methods for caching data over a period of time.
- Cache API: By default, data persists only for a single page load, unless a user installs a caching plugin. This is useful when storing data from expensive operations.
- Transient API: This is a wrapper around the Options API discussed in Chapter 3. However, the transients are stored based on a maximum expiration date.
In the following sections, you'll learn how to use each when building your plugins. Both have their benefits for storing data that you'll need to later access without having to perform heavy operations over and over.
CACHING
Caching is a way to store data for later use. WordPress doesn't provide a single method of persistently storing cached data. Instead, it provides the Cache API, which is a standardized set of functions that all plugins can use. Because there's a singular API to use, caching plugins have a standard method for working with data that should be cached. This way, users can determine the ideal caching method for their own setups, which can vary based on where their website is hosted.
While WordPress doesn't persistently cache data out of the box, it does cache data on each page load. Therefore, even if a user doesn't have a caching solution in place, you can set and retrieve data multiple times on a single page load without fear of taxing the database or server.
WordPress uses the Cache API internally for many operations, so you don't always necessarily have to interact with the API in your own code. However, when you have data that is expensive to generate, you should cache it so that it can be loaded quickly.
Saving Cached Data
WordPress provides three primary functions for storing cached data.
<?phpwp_cache_add( int|string $key, mixed $data, string $group = '', int $expire = 0 );wp_cache_replace( int|string $key, mixed $data, string $group = '', int $expire = 0 );wp_cache_set( int|string $key, mixed $data, string $group = '', int $expire = 0 );
As you can see, each function looks similar. wp_cache_add() saves cached data. wp_cache_replace() replaces existing cached data. And wp_cache_set() is a combination of the previous two functions. In most situations, you'll use it as an all‐in‐one method simply because it handles both adding and replacing.
Each function accepts four parameters:
-
$key(required): A unique ID to cache the data by. This key doesn't have to be unique across multiple data groups but must be unique within a group. -
$data(required): The data that you want to store and access later. -
$group(optional): A group ID to store multiple pieces of cached data. -
$expire(optional): How long the data should be stored in number of seconds. By default, this is set to 0, which tells caching systems to store the data indefinitely.
Imagine you wanted to build a plugin that gathered five posts related to the current blog post by category. The first thing you'd need to do is perform a query that retrieved the posts. You could store the result of this query using the wp_cache_set() helper.
<?php$post_id = get_the_ID();$categories = get_the_category();$posts = get_posts( ['category' => absint( $categories[0]->term_id ),'post__not_in' => [ $post_id ],'numberposts' => 5] );if ( $posts ) {wp_cache_set( $post_id, $posts, 'pdev_related_posts', DAY_IN_SECONDS );}
Loading and Using Cached Data
When you need to load cache data, WordPress provides the wp_cache_get() function. You can retrieve data by key (first parameter) and group (second parameter). If no data is found, the function will return false.
Using the related posts example from the previous section, check whether there are posts cached. If so, you can output them as a list.
<?php$post_id = get_the_ID();$posts = wp_cache_get( $post_id, 'pdev_related_posts' );if ( $posts ) {echo '<ul>';foreach ( $posts as $post ) {printf('<li><a href="%s">%s</a></li>',esc_url( get_permalink( $post->ID ) ),esc_html( get_the_title( $post->ID ) ));}echo '</ul>';}
Deleting Cached Data
When you need to delete cached data, use the WordPress wp_cache_delete() function. Like wp_cache_get(), it accepts a $key and a $group as the first and second parameters. The function will return true on success and false on failure.
Building from the related posts example, use the following code to delete the current post's cached related posts data:
<?php$post_id = get_the_ID();return wp_cache_delete( $post_id, 'pdev_related_posts' );
Caching Data within a Plugin
In this section, you'll build a simple related posts plugin using the functions described in the previous sections. The plugin will append a related posts list to the end of the post content on single post views. It will do so using a filter on a hook named the_content. You'll learn more about hooks in Chapter 5.
There's a few things the plugin must do.
- Check whether the user is viewing the singular post.
- Attempt to get the cached related posts.
- If no cached data is found, query new posts and cache them.
- Append the related posts HTML to the post content.
<?php/*** Plugin Name: Related Posts* Plugin URI: http://example.com/* Description: Displays a list of related posts on singular views.* Author: WROX* Author URI: http://wrox.com*/add_filter( 'the_content', 'pdev_related_posts' );function pdev_related_posts( $content ) {// Bail if not viewing a single post.if ( ! is_singular( 'post' ) || ! in_the_loop() ) {return $content;}// Get the current post ID.$post_id = get_the_ID();// Check for cached posts.$posts = wp_cache_get( $post_id, 'pdev_related_posts' );// If no cached posts, query them.if ( ! $cache ) {$categories = get_the_category();$posts = get_posts( ['category' => absint( $categories[0]->term_id ),'post__not_in' => [ $post_id ],'numberposts' => 5] );// Save the cached posts.if ( $posts ) {wp_cache_set($post_id,$posts,'pdev_related_posts',DAY_IN_SECONDS);}}// If posts were found at this point.if ( $posts ) {$content .= '<h3>Related Posts</h3>';$content .= '<ul>';foreach ( $posts as $post ) {$content .= sprintf('<li><a href="%s">%s</a></li>',esc_url( get_permalink( $post->ID ) ),esc_html( get_the_title( $post->ID ) ));}$content .= '</ul>';}return $content;}
The plugin will output a Related Posts list that looks similar to Figure 4‐4.

FIGURE 4‐4: Related Posts list
TRANSIENTS
Sometimes you need to store temporary data in the database. For example, you may build a plugin that pulls your latest tweets from Twitter.com or fetches an RSS feed from a third‐party site. You wouldn't want to hit those websites for each page request on your site. Instead, you'd store the data for a limited time.
The Transient API is similar to the Options API with an added expiration component. Unlike the Cache API discussed earlier in this chapter, it does not require the use of a caching plugin to persistently store the data. However, if a caching plugin is installed and activated on the user's site, the Transient API will revert to using the Cache API.
Saving an Expiring Option
Imagine that you're building a plugin that pulled in a video tutorial on how to use WordPress from a third‐party site. The latest video is titled How to Install WordPress. You want to store the latest video for one day.
<?phpset_transient( 'pdev_video_tutorial', 'How to Install WordPress', DAY_IN_SECONDS );
The first parameter is the unique ID for your transient. It should be prefixed like any other global identifier, as discussed in Chapter 2. The second parameter is the latest video title. In reality, this can be any arbitrary data. The final parameter is the number of seconds to store the data. DAY_IN_SECONDS is a constant defined by WordPress for easily getting a day in seconds.
Retrieving an Expiring Option
When retrieving an option stored as a transient, you will use the get_transient() function provided by WordPress. Use this to grab the latest tutorial video title.
<?php$video = get_transient( 'pdev_video_tutorial' );
The $video variable will return one of two things.
- If the transient is stored in the database, it will return the value of the option.
- If retrieval fails or no value is stored, it will return
false.
Deleting an Expiring Option
Like with setting and getting transients, WordPress packages a delete_transient() function for deleting a transient from the database. You may need to use this to invalidate a transient, such as when uninstalling the plugin. To remove the tutorial video transient, use the following code:
<?phpdelete_transient( 'pdev_video_tutorial' );
Generally, you should rarely need to delete a transient. WordPress will automatically delete expiring transients from the database for you.
A Practical Example Using Transients
Now you can put together some basic plugin functions for setting and retrieving a tutorial video.
<?php// Fetches video from third-party website.function pdev_fetch_video_title() {// Connect to an API to fetch video.return $title;}// Returns the video title.function pdev_get_video_title() {// Get transient.$title = get_transient( 'pdev_video_tutorial' );// If the transient doesn't exist or is expired, refresh it.if ( ! $title ) {$title = pdev_fetch_video_title();set_transient( 'pdev_video_tutorial', $title, DAY_IN_SECONDS );}return $title;}
You'd need to actually interact with a remote API and make sure the data you retrieve is secure to create a working set of code. You'll learn more about getting remote data via WordPress' HTTP API in Chapter 12, “REST API.”
Technical Details
Because transients are volatile in nature, they benefit from caching plugins. There are various types of caching plugins that save data in different ways. Some cache systems store data in fast memory or in files on the server. While transients are stored in the database by default, you can never assume that's where they'll be when retrieving them. Always use the Transient API functions to ensure that you get the correct data.
Transient Ideas
Whenever you need to store data with a short lifetime, you should almost always use transients. The following list covers some examples of when you may want to use the Transient API:
- Displaying the latest dollar values for certain types of cryptocurrency such as Bitcoin or Ethereum on a cryptocurrency site
- Displaying the latest tweets from a Twitter account
- Showcasing the users who like a site's Facebook page
- Fetching an article from an RSS feed
- Pulling in a music playlist from a remote website
SUMMARY
In this chapter, you got an overview along with practical examples of securing data and optimizing data for performance. Security is far more important than optimization. An optimized website is useless if the data coming in or going out is not secure in the first place. Make security a priority from the first line of code you write and never trust unknown data. Then look for areas that will benefit from storing data via the Cache API or Transient API.