Modifying an RC car with Raspberry Pi is a wonderful project, but you can take this idea even further by modifying different toys with Raspberry Pi. One class of toys that are excellent candidates for our project are a set of robot toys by WowWee. You can purchase these toys from the company directly at http://wowwee.com/, but you can also find used versions of these toys on eBay for a significantly lower price.
In this chapter, you'll learn the following:
- How to send and receive voice commands
- How to interpret commands and initiate actions
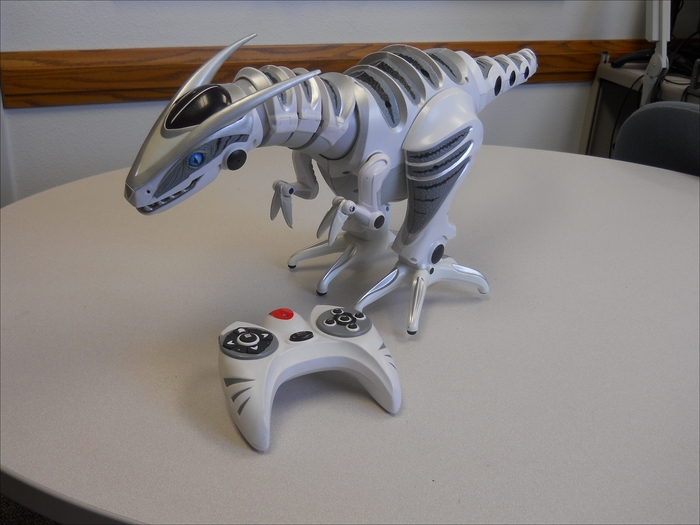
There are several toys that have excellent possibilities. One such toy is the WowWee Roboraptor. The following is an image of this robot:
Another option is the WowWee Robosapien. A picture of this robot is given in the following image:
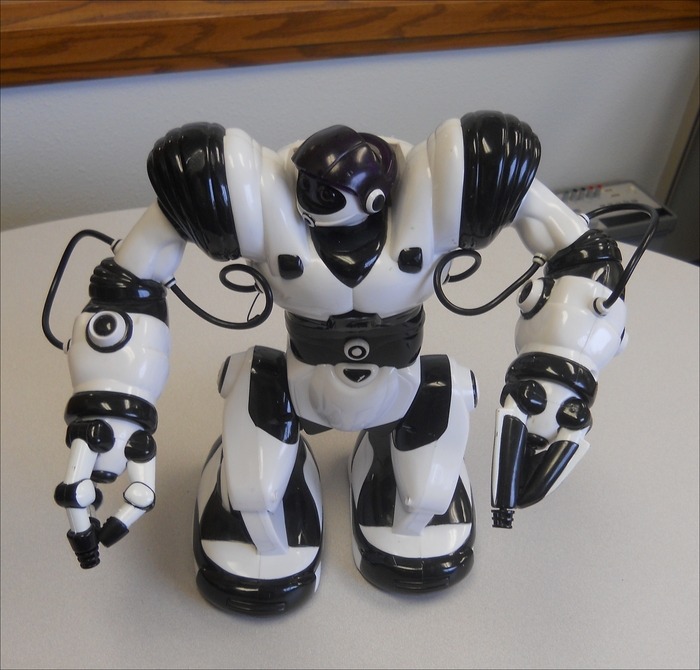
You'll use this robot for your project, as it has more functionality and is easier to modify. Specifically, you're going to connect to the internal serial bus so that you, not the remote, can send commands. You'll be adding Arduino UNO to handle the real-time communications between Raspberry Pi and the robot. Here are the steps:
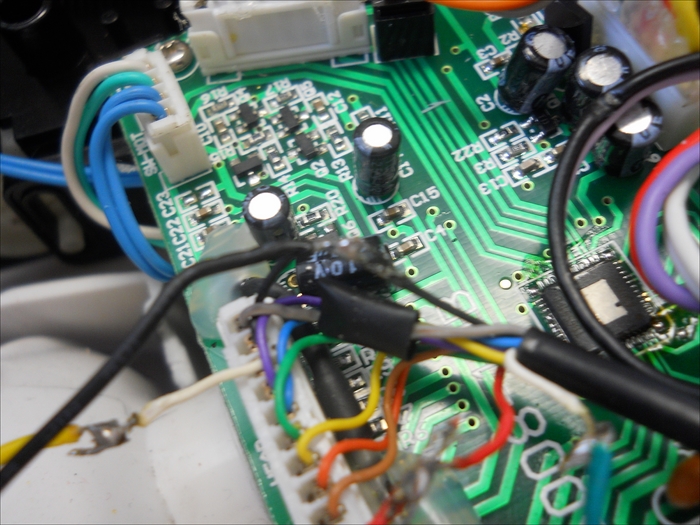
- First, you'll need to disassemble the robot to get the access to the main controller board. To do this, lay the robot face down, so that you have access to the back. Remove the plate at the back by unscrewing the four screws that hold it in place. Now, at the top of the exposed board, you will see the main connector. The following is a close-up of the connector:
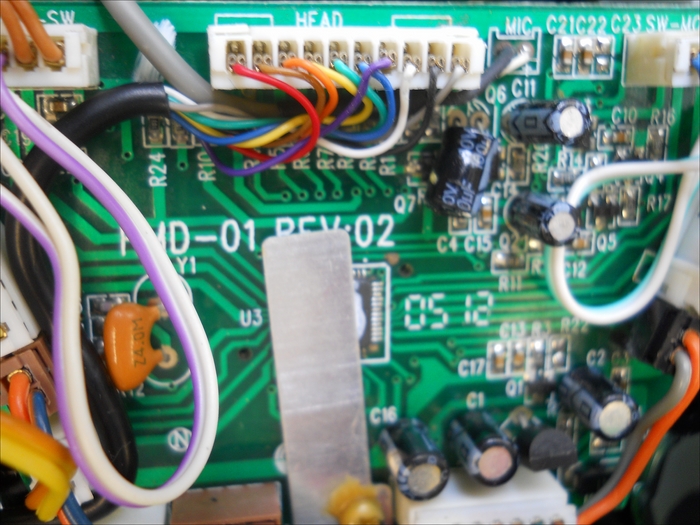
There are only two wires that you are interested in. The first is the black wire, it is the GND for the Robosapien system. The second is the white wire. This is the serial connection that controls the command for the Robosapien.
- So, you're going to want to connect a wire to the black wire, but you'll want both ends of the black wire to stay connected to the system. To do this, melt a bit of the insulation with a soldering iron and then solder another wire at this point. The following is an image:
- Now, snip the white wire and connect a wire to the end that is connected to the white header connector, similar to this image:
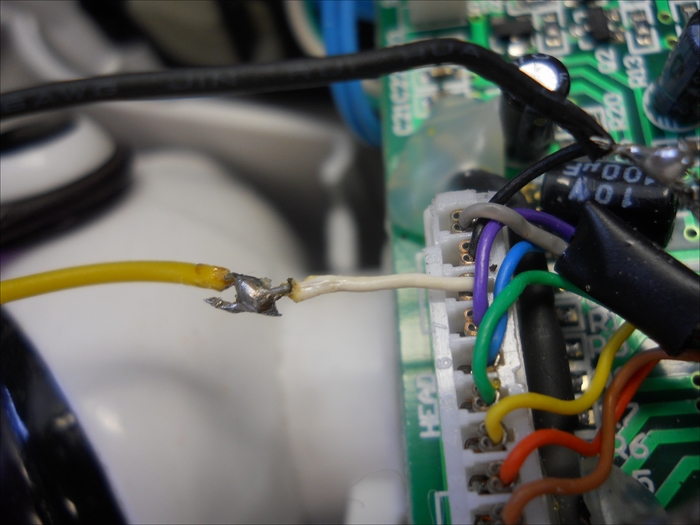
You may want to add some heat-shrink tubing to cover your connections.
- Finally, drill a hole in the back shell of the robot so that you can run both of these cables out of the unit, as shown in the following image:

- You should also drill two more holes on either side of the shell; you can use these to attach Raspberry Pi to the robot with cable ties. Now, you can put the shell back onto the robot.
- Now you'll connect these two wires to Arduino UNO. Other versions of the Arduino board could also be used for this purpose. The reason you'll need to use Arduino is that the bit patterns that are sent to the robot are at a fairly high rate and need to be created by a processor dedicated to this type of communication. This will allow Raspberry Pi to be involved in other processor-intensive activities, such as speech or object recognition, and yet keep the communication flowing at the right rate.
- Connect the GND wire to one of the GND pins on Arduino. Then, connect the other wire to Pin 9 on Arduino. These connections will look similar to the following:

- The final step is to create the code that will send the proper commands to the Arduino board. The code is listed as follows:
volatile int viRobsapienCmd = -1;  // A robosapien command sent over the UART request
// Some but not all RS commands are defined
#define RSTurnRight       0x80
#define RSRightArmUp      0x81
#define RSRightArmOut     0x82
#define RSTiltBodyRight   0x83
#define RSRightArmDown    0x84
#define RSRightArmIn      0x85
#define RSWalkForward     0x86
#define RSWalkBackward    0x87
#define RSTurnLeft        0x88
#define RSLeftArmUp       0x89
#define RSLeftArmOut      0x8A
#define RSTiltBodyLeft    0x8B
#define RSLeftArmDown     0x8C
#define RSLeftArmIn       0x8D
#define RSStop            0x8E
#define RSWakeUp          0xB1
#define RSBurp            0xC2
#define RSRightHandStrike 0xC0
#define RSNoOp            0xEF
#define RSRightHandSweep  0xC1
#define RSRightHandStrike2 0xC3
#define RSHigh5           0xC4
#define RSFart            0xC7
#define RSLeftHandStrike  0xC8
#define RSLeftHandSweep  0xC9
#define RSWhistle         0xCA
#define RSRoar            0xCE
int LedControl = 13;     // Show when control on
int IROut= 9;            // Where the echoed command will be sent from
int bitTime=516;          // Bit time (Theoretically 833 but 516)
///////////////////////////////////////////////////////////
// Begin Robosapien specific code
///////////////////////////////////////////////////////////
// send the command 8 bits
void RSSendCommand(int command) {
  Serial.print("Command: ");
  Serial.println(command, HEX);
  digitalWrite(IROut,LOW);
  delayMicroseconds(8*bitTime);
  for (int i=0;i<8;i++) {
    digitalWrite(IROut,HIGH);
    delayMicroseconds(bitTime);
    if ((command & 128) !=0) delayMicroseconds(3*bitTime);
    digitalWrite(IROut,LOW);
    delayMicroseconds(bitTime);
    command <<= 1;
  }
  digitalWrite(IROut,HIGH);
  delay(250); // Give a 1/4 sec before next
}
// Set up RoboSpapien functionality
void RSSetup()
{
  pinMode(IROut, OUTPUT);
  pinMode(LedControl,OUTPUT);
  digitalWrite(IROut,HIGH);
  RSSendCommand(RSBurp);
}

// Loop for RoboSapien functionality
void RSLoop()
{
  digitalWrite(LedControl,HIGH);
  // Has a new command come?
  if(viRobsapienCmd != -1)
    {
     RSSendCommand(viRobsapienCmd);
    viRobsapienCmd = -1;
    }
  digitalWrite(LedControl,LOW);
}
void setup()
{
  Serial.begin(9600);
  Serial.println("RobSapien Start");
  RSSetup();
}
void loop()
{
  if (Serial.available() > 0) {
    // read the incoming byte:
    char str = Serial.read();
    switch (str) {
      case 'a':
        viRobsapienCmd = RSTurnRight;
        break;
      case 'b':
        viRobsapienCmd = RSRightArmUp;
        break;
      case 'c':
        viRobsapienCmd = RSRightArmOut;
        break;
      case 'd':
        viRobsapienCmd = RSTiltBodyRight;
        break;
      case 'e':
        viRobsapienCmd = RSRightArmDown;
        break;
      case 'f':
        viRobsapienCmd = RSRightArmIn;
        break;
      case 'g':
        viRobsapienCmd = RSWalkForward;
        break;
      case 'h':
        viRobsapienCmd = RSWalkBackward;
        break;
      case 'i':
        viRobsapienCmd = RSTurnLeft;
        break;
      case 'j':
        viRobsapienCmd = RSLeftArmUp;
        break;
      case 'k':
        viRobsapienCmd = RSLeftArmOut;
        break;
      case 'l':
        viRobsapienCmd = RSTiltBodyLeft;
        break;
      case 'm':
        viRobsapienCmd = RSLeftArmDown;
        break;
      case 'n':
        viRobsapienCmd = RSLeftArmIn;
        break;
      case 'o':
        viRobsapienCmd = RSStop;
        break;
      case 'p':
        viRobsapienCmd = RSWakeUp;
        break;
      case 'q':
        viRobsapienCmd = RSBurp;
        break;
      case 'r':
        viRobsapienCmd = RSRightHandStrike;
        break;
      case 's':
        viRobsapienCmd = RSRightHandSweep;
        break;
      case 't':
        viRobsapienCmd = RSRightHandStrike2;
        break;
      case 'u':
        viRobsapienCmd = RSHigh5;
        break;
      case 'v':
        viRobsapienCmd = RSFart;
        break;
      case 'w':
        viRobsapienCmd = RSLeftHandStrike;
        break;
      case 'x':
        viRobsapienCmd = RSRightHandSweep;
        break;
      case 'y':
        viRobsapienCmd = RSLeftHandSweep;
        break;
      case 'z':
        viRobsapienCmd = RSWhistle;
        break;
      case 'A':
        viRobsapienCmd = RSRoar;
        break;
      default:
        viRobsapienCmd = RSNoOp;
    }
  }
  //RS routine
  RSLoop();
}
This Arduino code will take an input from the Serial Monitor, in this case, a USB connection from Raspberry Pi, and then turns it into the appropriate command for the WowWee robot. Once you have uploaded the code to Arduino, either using an external PC or Raspberry Pi, you can use the Arduino IDE's Serial Monitor capability to send individual letter commands, and the robot should respond to the commands.
Note
If you are unfamiliar with the Arduino IDE application, Arduino is well documented at https://www.arduino.cc/, including how to upload code and how to use the Serial Monitor to communicate with the Arduino.
Now that the robot works, you can add the following Python program that will send the commands we just saw:
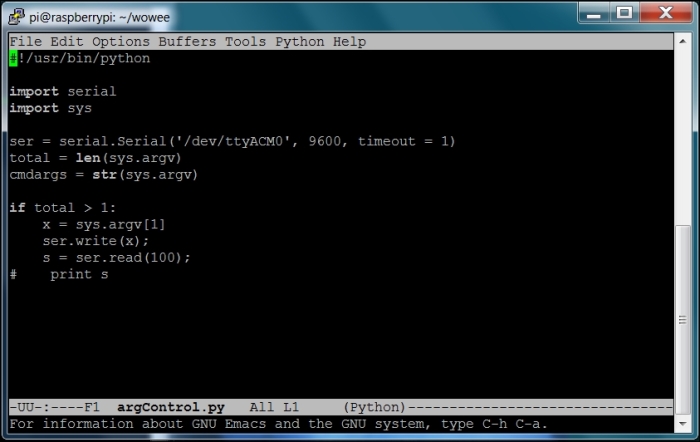
To run this program, type python argControl.py f, and the robot will respond to that command. To make this program executable without the python command, type chmod +x argControl.py, and you will now be able to run the program by typing ./argControl.py f. You'll need this later when you want to run this program from your voice control program.
Now that your robot knows how to respond to the commands from the Python program, you can now add the capability to your robot to respond to voice commands. You'll also add the capability to allow your robot to speak, this will make the robot more interactive.
To add these capabilities to your robot, you'll need to add some hardware. This project requires a USB microphone and speaker adapter. Raspberry Pi itself has an audio output but does not have an audio input. So, you'll need the following three pieces of hardware:
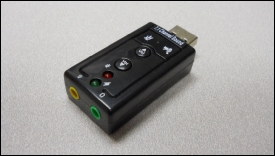

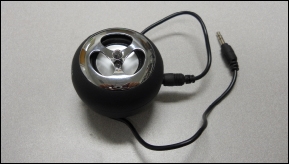
Fortunately, these devices are inexpensive and widely available. Make sure that the speaker is powered because your board will generally not be able to drive a passive speaker with enough power for your applications. The speaker can use either internal battery power or can get its power from a USB connection.
Now, we move on to allowing Raspberry Pi access these devices. You can execute the following instructions in either of the two following ways:
- If you are still connected to the display, keyboard, and mouse, log in to the system and use the GUI by opening an LXTerminal window
- If you are only connected through LAN, you can do all this using an SSH terminal window; and as soon as your board indicates that it has power, open up an SSH terminal window using PuTTY or any similar terminal emulator
Tip
Downloading the example code
You can download the example code files from your account at http://www.packtpub.com for all the Packt Publishing books you have purchased. If you purchased this book elsewhere, you can visit http://www.packtpub.com/support and register to have the files e-mailed directly to you.
Plug the devices into a USB port. Once the terminal window comes up, type cat /proc/asound/cards. You will get the following response:
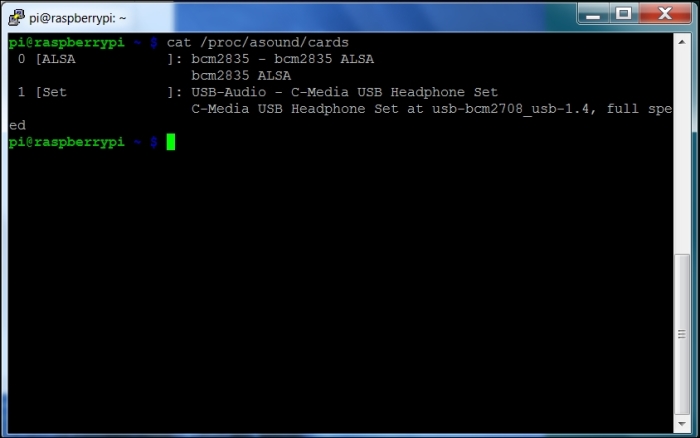
There are two possible audio devices. The first is the internal Raspberry Pi audio that is connected to the audio port and the second is your USB audio plugin. You could use the USB audio plugin to record the sound and Raspberry Pi for the audio output to play the sound. It is easier to just use the USB audio plugin to create and record sound.
First, you will play some music to test whether the USB sound device is working. You'll need to configure your system to search for your USB audio plugin and use it as the default plugin to play and record sound. To do this, you'll need to add a couple of libraries to your system. The first libraries are the Advanced Linux Sound Architecture (ALSA) libraries. These will enable your sound system on Raspberry Pi by performing the following steps:
- Install two libraries that are associated with ALSA by typing
sudo apt-get install alsa-base alsa-utils - Then, install some files that help in providing the sound library by typing
sudo apt-get install libasound2-dev
You'll use an application named alsamixer to control the volume of the input and output of your USB sound card. To do this, perform the following steps:
- Type
alsamixerin the Command Prompt. You will see a screen that will be similar to the following screenshot: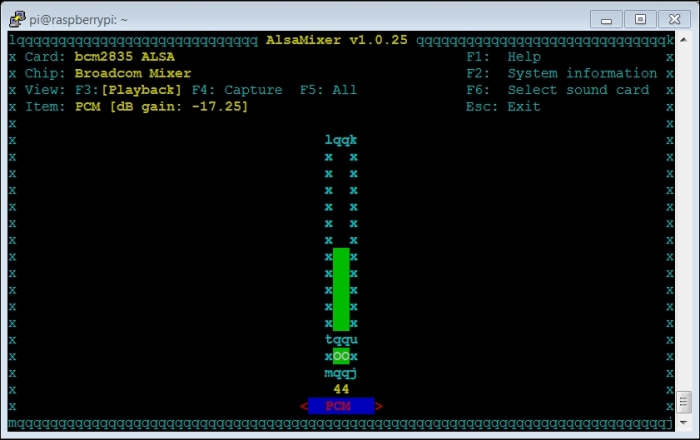
- Press F6 and select your USB sound device using the arrow keys. For example, refer to the following screenshot:

C-Media USB Audio Deviceis my USB audio device. You should now be able to see a screen that looks similar to the following screenshot: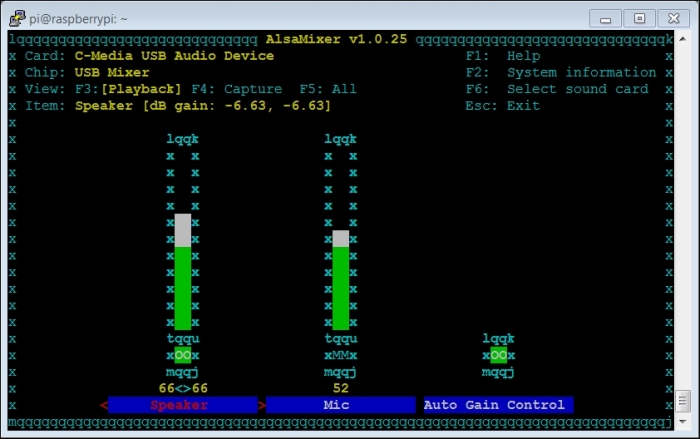
- You can use the arrow keys to set the volume for both, the speakers and the microphone. Use the M key to unmute the microphone. In the preceding screenshot,
MMis mute andoois unmute. - Let's make sure that our system knows about our USB sound device. At the Command Prompt, type
aplay –l. You should now be able to see the following screenshot:
If this does not work, try sudo aplay –l. You are going to add a file to your home directory with the name .asoundrc. This will be read by your system and used to set your default configuration. To do this, perform the following steps:
- Open the file named
.asoundrcusing the editor of your choice. - Type
pcm.!default sysdefault:Set. TheSetis the variable that appears right aftercard 1:in the output of theaplay –lcommand. - Save the file. The file should appear as follows:

This will tell the system to use your USB device as default. Reboot your system again.
Now you can play some music. To do this, you need a sound file and a device to play it. You can copy a simple .wav file to your Raspberry Pi. If you are using a Linux machine as your host, you can also use the scp command from the command line to transfer the file. You can download some music on Raspberry Pi using a web browser if you have a keyboard, mouse, and display connected. You are going to use the application named aplay to play your sound. Type aplay Dance.wav to see whether you can play music using the aplay music player. You will see the result (and hopefully, hear it) as shown in the following screenshot:
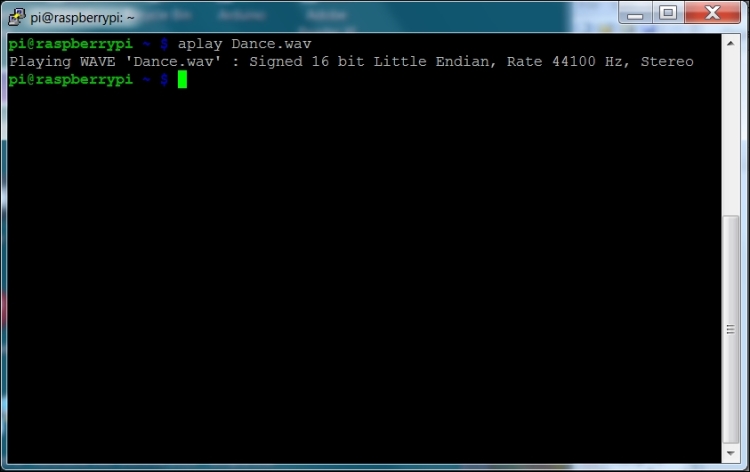
If you don't hear any music, check the volume you set with alsamixer and the power cable of your speaker. Also, aplay can be a bit finicky about the type of files it accepts, so you may be required to try different .wav files until aplay accepts one. One more thing to try, in case the system doesn't seem to know about the program, is to type sudo aplay Dance.wav.
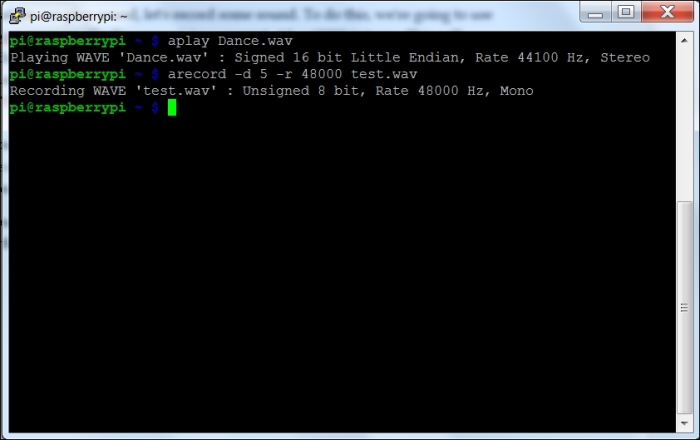
Now that you can play sound, you can also record some sound. To do this, you'll have to use the arecord program. At the prompt, type arecord -d 5 -r 48000 test.wav. This will record the sound at a sample rate of 48000 Hz per 5 seconds. Once you have typed the command, either speak into the microphone or make some other recognizable sound. You will see the following output on the terminal:
Once you have created the file, play it with aplay. Type aplay test.wav and you should be able to hear the recording. If you can't hear your recording, check alsamixer to make sure that your speakers and microphone are both unmuted.
Now you can play music or other sound files using your Raspberry Pi. You can change the volume of your speaker and record your voice or other sounds on the system. You're now ready for the next step.