The first step to access the functionality is to install the library associated with the control board, which can be found at http://www.monkmakes.com/?page_id=698. You'll create a Python code that will allow you to access the two motors, similar to what you did in the first chapter. The first part of the code, which should look almost the same as the code that you created in the first chapter, will look as follows:

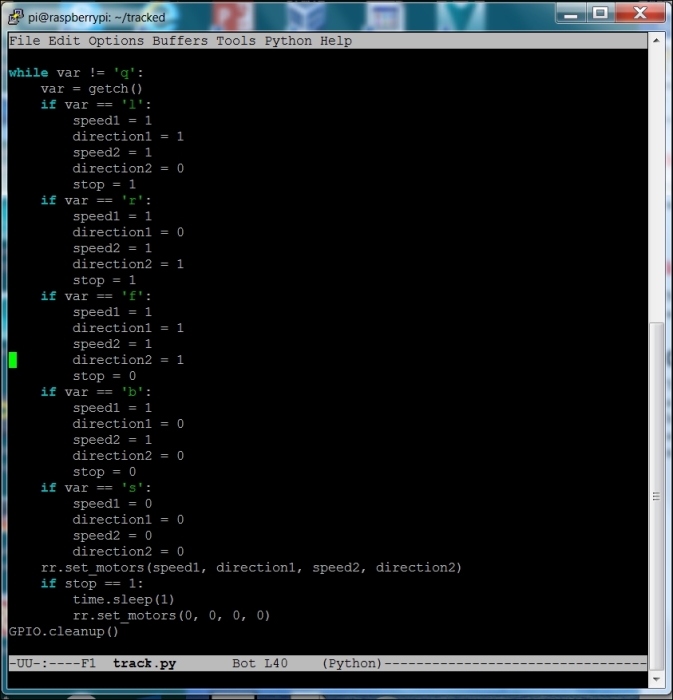
Now, the second part of the code that will drive the two different motors based on whether you want to go forward, backward, or turn right or left is as follows:

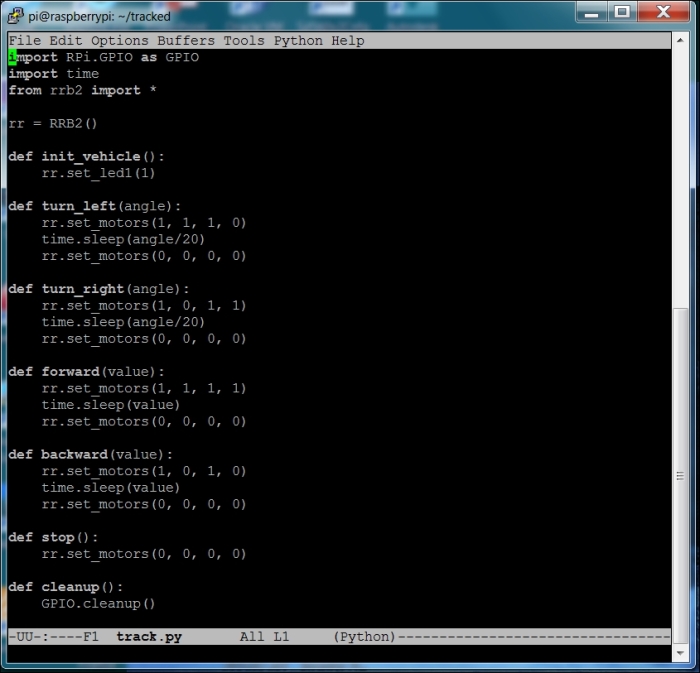
As previously discussed, the rr.set_motors() function allows you to specify the speed and direction of each motor independently. Now that you have the basic code to drive your tracked vehicle, you'll need to modify this code so that you can call these functions from another Python program. You'll also need to add some calibrated movement so that your tracked vehicle is able to turn at a certain angle and move forward a set distance. The following is what the code would look like:

The time.sleep(angle/20) command in the turn_right(angle) and turn_left(angle) functions allows the tracked vehicle to move for the right amount of time so that the vehicle moves through the desired angle. You many need to modify this number to get the correct angle of movement. The time.sleep(value) command moves the robot for a specific time based on the number stored in value. Now that you can move your tracked vehicle, you'll need to connect the sensors to it to know what is going on around the tracked vehicle.
