
The last step in creating the laser tag robots is to add the laser source and laser target, as well as the code that will let you fire the source and detect a hit on the target. First, you'll need to install the hardware.
Let's start with the laser source. You can just use a raw laser source, similar to the one shown in the following image:

They are inexpensive and available on eBay and other online electronics retailers. However, it is a bit easier if you get a laser source with a bit more supporting circuitry, as shown in the following:

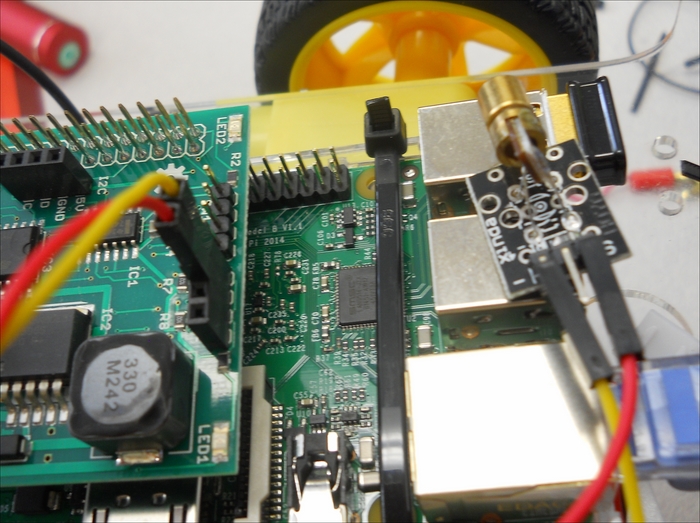
These are also available from a number of online retailers, you can find similar modules. All you need is a way to turn on your laser with a control signal from Raspberry Pi. In this module, you'll connect the device to one of the open collector outputs on the motor controller board, the GND pin to OC1 pin, and the S pin to other OC1 pin connection, as shown in the following image:
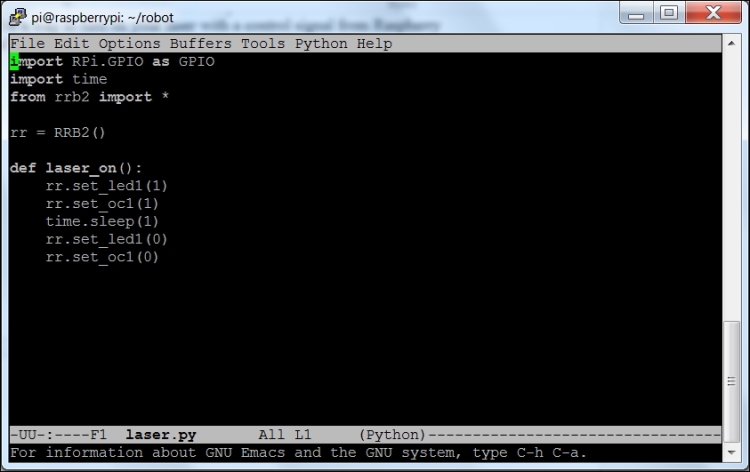
Now, just a bit of code to add a function to turn on the laser, as given in the following screenshot:
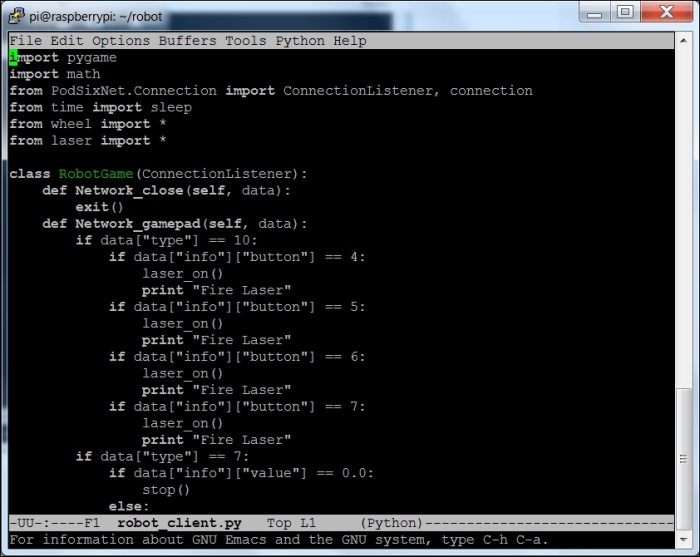
And finally, add the code we just saw to your main python file by importing it at the top of the file and then calling the function when a button is pressed, as given in the following screenshot:
Now when a button is pressed on the joystick, the laser should turn on. The final step in enabling your laser tag robot is to add the target. In this case, to keep it simple, you'll add a target device and simple python program, which you can run in another window, that will signal when the target has been hit.
There are several possible approaches to add a target. You can build your own target array using photo-sensitive resistors, as shown in the following image:

This is a bit difficult as Raspberry Pi doesn't have an analog-to-digital convertor (ADC). An easier way to do this is to add a simple laser sensor, similar to the one shown in the following image:

This target will sense when the laser has struck and then output a signal so that you know that you have been tagged. This particular device also has a laser source that is always on, but you'll want to put a piece of electrical tape over the source or it will give you away as you try to outwit your opponent. In this format, the sensor almost has a 180 degree sensitivity but you may want to put two sensors back to back if you want to be able to target the front and back of your wheeled robot simultaneously.
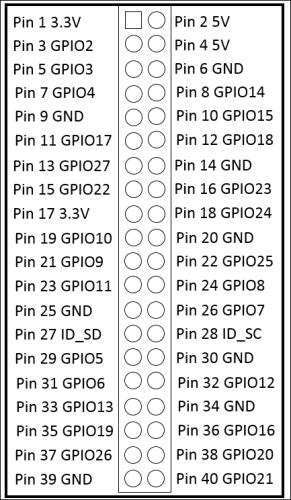
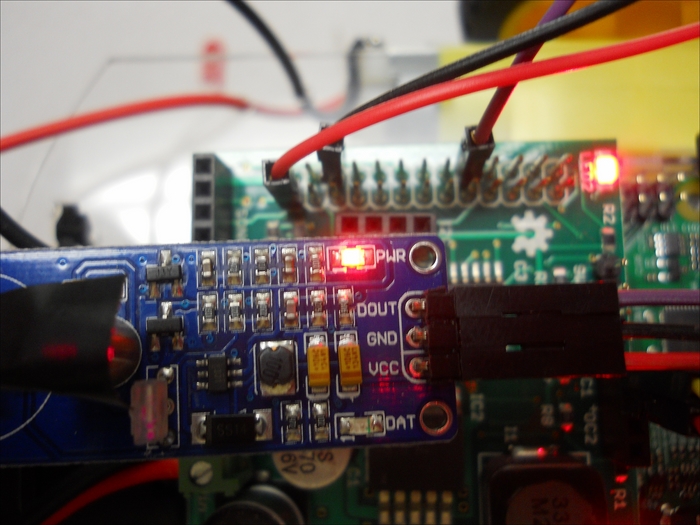
This device has three connections, a VCC, a GND, and a DOUT. You'll connect the VCC connector to the Pin 1 3.3V connector, the GND connector to the Pin 6 GND connector, and the DOUT connector to the Pin 18 GPIO 24 connector of the general purpose input/output (GPIO) pins of Raspberry Pi. The following is a layout of these pins:
The connections will look as shown in the following image:
Now for the code. It is quite simple, you'll query the input and when it goes from 1 to 0, you have a signal indicating that the laser has connected with your target. You register it, as shown in the following screenshot:

Now you'll mount your laser on the wheeled robot and laser target at the same height for all the combatants; access your wheeled robot remotely; open the webcam window, joystick control windows, and target detected window; and you're ready for a good game of laser tag.