You've had the opportunity to build lots of different types of robots, so now let's end with one that can be truly amazing, a robot that can fly.
In this chapter, you'll learn the following:
- Building the basic quadcopter platform
- Interfacing Raspberry Pi to the flight controller
- Discussing long range communications
- Using GPS for location
- Adding autonomous flight
Constructing the quadcopter hardware can be daunting; however, there are several excellent websites that can lead you through the process from component selection to build details and programming and controlling your quadcopter with a radio. The http://www.arducopter.co.uk/ website is a great place to start for those who are new to quadcopter flight. Go to http://copter.ardupilot.com/, which is another excellent website with lots of information.
For this project, you'll want to choose a project that uses the Pixhawk flight controller. There are other flight controllers that are significantly less expensive, but this particular flight controller provides easy access for Raspberry Pi. Here are some possible websites that can guide you through the construction process; http://learnrobotix.com/uavs/quadcopter-build/pixhawk/connecting-the-q-brain-esc.html, http://www.thedroneinfo.com/2015/06/06/build-a-quadcopter-with-pixhawk-flight-controller/, and http://www.flying-drone.co.uk/how-to-build-a-quadcopter-with-a-pixhawk-flight-controller-step-11/.
At http://copter.ardupilot.com/wiki/advanced-pixhawk-quadcopter-wiring-chart/, you'll find an excellent wiring diagram of how to hook everything up. Let's go through the steps of constructing our own quadcopter.
First, you'll need a frame. You'll be building a quadcopter of size 450 mm, one of the least expensive frames, which are available at most online retailers, with fiberglass arms, as shown in the following image:

Now, follow the steps to complete your quadcopter assembly:
- The first step is to build the quadcopter as the instructions suggest.
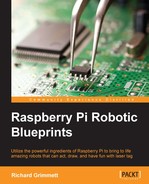
- The second step is to solder the four Electronic Speed Controllers (ESC), one to each motor, and the battery connection to the bottom plate. Here is an image of the bottom plate:
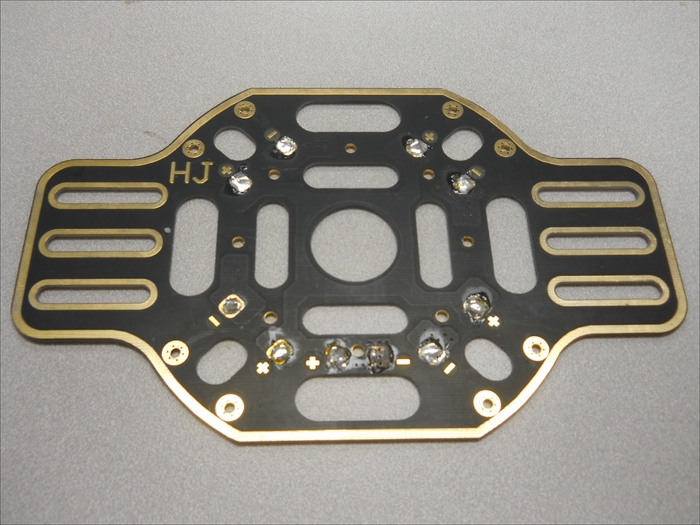
Notice the + and – connections; each connection will be soldered to all the ESCs. The following is an image of the motor controller:
The red and white wire connectors are the connectors that are soldered to the bottom plate of the frame. The other three connectors will connect to the motor.
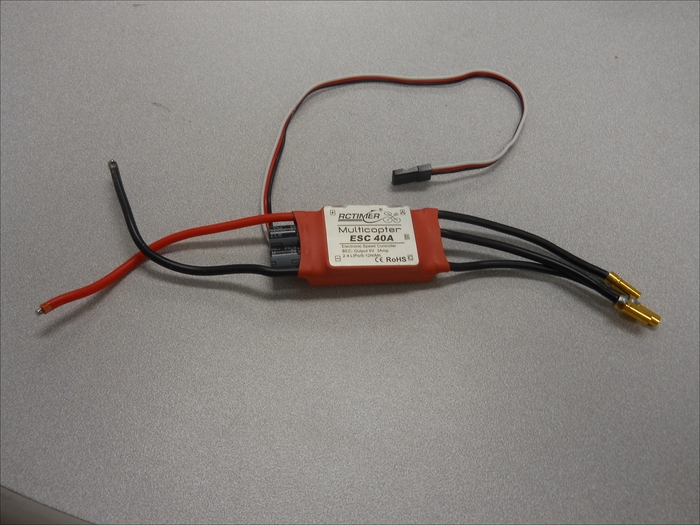
- The third step is to install the motors on the frame. You'll want motors in the 1000KV range, here is an image of such a motor:
Again, follow the instructions that came with your frame to attach the motor. Then attach the three connections that come from the ESC to the motor.
- One optional step is to add a landing gear set to the unit. There are many of these available. Here is an image of one that is very sturdy:

- Now you'll install Pixhawk on the frame and connect its associated electronics. The details are shown and described at http://copter.ardupilot.com/wiki/advanced-pixhawk-quadcopter-wiring-chart/. This will connect the Pixhawk to the ESCs, the battery, an RC transmitter, a telemetry radio, and a switch that will prevent the quadcopter from flying until you are ready.
- Eventually, you will install four propellers on the quadcopter; however, you will have to wait until you have calibrated the ESCs, motors, and RC transmitter to install them. You'll need four propellers, two that are designed to spin clockwise and other two that are designed to spin counter-clockwise. For this quadcopter, you'll want propellers that are 10 x 4.7 pitch. Here is an image of one such propeller:

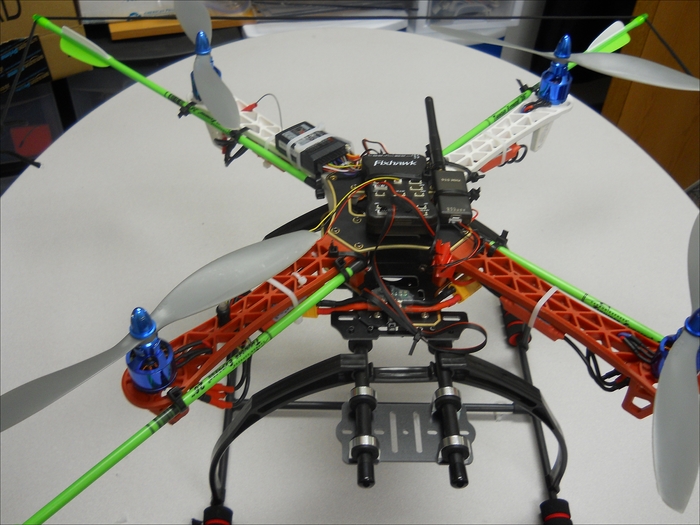
The following is an image of the entire quadcopter using the Pixhawk flight controller:
You'll want to build your quadcopter and fly it a bit with an RC transmitter/receiver pair. This will allow you to get familiar with your quadcopter and how it flies. It will also allow you to tweak all the settings to stabilize it. Once your quadcopter is stable, you can perform some simple autonomous flights. Let's start using the mission planning software, which runs on a remote computer.