
There are several approaches to building your biped platform. Perhaps the most simple is to purchase a set of basic parts; this is the example you'll see in this chapter. There are several kit possibilities out there, including one at http://www.robotshop.com/en/lynxmotion-biped-robot-scout-bps-ns-servos.html, a kit like the one offered at http://www.ebay.com/itm/10-DOF-Biped-Robot-Mechanical-Leg-Robot-Servo-Motor-Bracket-NO-Servo-Motor-good-/131162548695?pt=LH_DefaultDomain_0&hash=item1e89e5a9d7, or the one at http://www.amazon.com/gp/product/B00DR7GA4I/ref=oh_aui_detailpage_o04_s00?ie=UTF8&psc=1. This is the specific kit we'll use in this chapter.
In the end, your biped will work more like the legs of a Tyrannosaurus Rex of a human, but this will make it easier to program, and it will power down more gracefully. It will also be a bit more stable.
You'll also need 10 standard size servos. There are several possible choices, but Hitec servos are relatively inexpensive servos and you can get them at most hobby shops and online electronics retailers. One of the important steps in this process is to select the model of the servo. Servos come in different model numbers, primarily based on the amount of torque they can generate.
Torque is the force that the servo can exert to move the part connected to it. In this case, your servos will need to lift and move the weight associated with your biped, so you'll need a servo with enough torque to do this. However, there are different torque needs for your biped robot. The angle joints will not lift the entire leg, so they can be servos with a lower servo rating, for example, the HS-422 servos. For the knee servo, you'll need a more powerful servo. In this case, I suggest that you use model HS-645MGHB servos. The hip joint that lifts the leg is where you will need the most torque to be able to lift the leg. Here, too, I suggest that you use the model HS-645MG servos. You can also just use 10 HS-645MG servos for all the servos, but they are more expensive, so using different servos will save you some money.
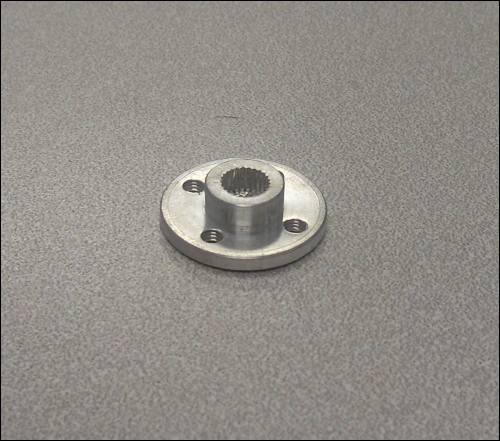
One final piece that you'll need is some metal servo horns. These servo horns are optional, but they will make your biped robot much more solid than the plastic servo horns that normally come with the servos. Here is a picture of one of these horns:
Here are the steps to assemble the biped:
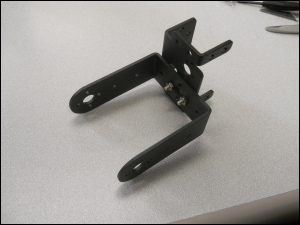
- Attach the first ankle servo to the foot. To do this, find the foot plate, as shown here:
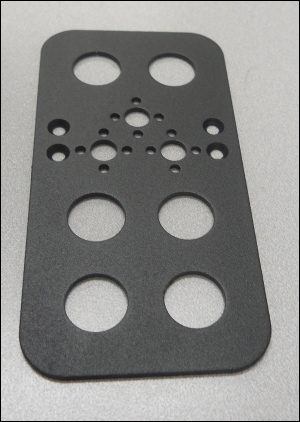
This is the bottom of the foot. Notice the beveled holes-you'll be using bevel-headed bolts to connect a servo bracket to the foot plate, as shown here:
- Make sure that the bottom of the foot is flat. Before you mount the servo to this bracket, you'll first connect a U-shaped bracket to this servo bracket using one of the bearings in the kit, like this:

- Finally, mount one of the servos in the bracket and connect the U-shaped bracket to the servo horn, as shown here:

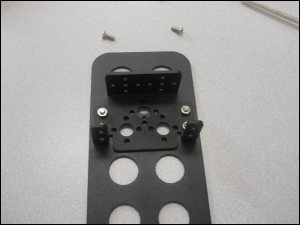
- This first servo should allow your biped to move the foot, tipping it side to side. Now, add the second ankle servo to the foot. This will allow your biped to tip the ankle front to back. To do this, connect a servo bracket to the assembly you just created, and then add a U bracket to this assembly, like this:
- Now, add the bracket to this assembly, like this:

- Now, you can add the knee servo to your biped. However, you'll first want to connect the upper leg, the longest U bracket, to a servo bracket, like this:
- Now, connect this assembly, using another bearing, to the lower leg that you have already built, like this:
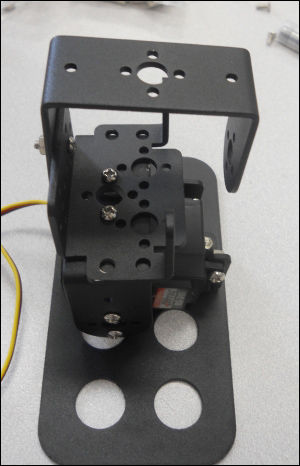
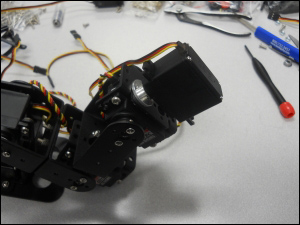
- Now, you can mount the knee servo in this place. If you have different servos, use a more powerful servo in the knee joint. Here is a picture:
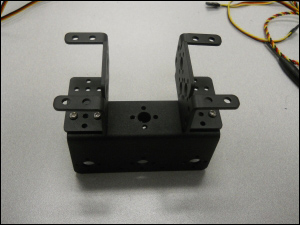
- The last step is to put the hip together. First, you'll put the servo that turns the leg, connecting it to a servo bracket, as shown here:

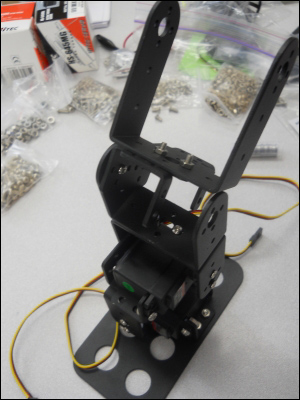
- Now, connect this servo bracket to the long U bracket, and mount the servo that lifts the entire leg. This is another place; if you are using different servos, you'll want to use a servo with a significant torque. The entire assembly should look like this:
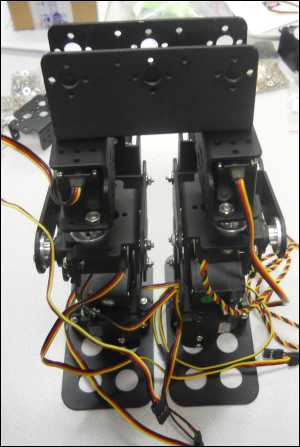
- Put the other leg together. It will be a mirror image of the first leg.
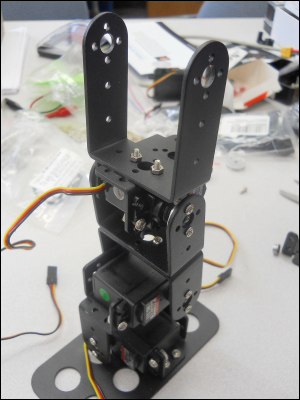
- Now, you'll connect both legs to the hip by first connecting a servo bracket connector to the hip piece, in two places, like this:
- Finally, mount the top of the leg servos into the brackets, like this:
Your biped is now ready to walk. Now that you have the basic hardware assembled, you can turn your attention to the electronics.