
To make your biped walk, you first need to connect the servo motor controller to the servos. The servo controller you are going to use for this project is a simple servo motor controller utilizing the USB from Pololu—Pololu item number 1354 is available at pololu.com—that can control 18 servo motors. Here is a picture of the unit:

Make sure that you order the assembled version. This piece of hardware will turn USB commands from Raspberry Pi into signals that control your servo motors. Pololu creates a number of different versions of this controller, and each one is able to control a certain number of servos. In this case, you may want to choose the 18 servo version, so that you can control all 12 servos with one controller, and you may also add an additional servo to control the direction of a camera or sensor. You could also choose the 12 servo version. One advantage of the 18 servo controller is the ease of connecting power to the unit via screw-type connectors.
There are two connections you'll need to make to the servo controller in order to get started: the first to the servo motors and the second to a battery.
First, connect the servos to the controller. In order to be consistent, let's connect your 12 servos to the connections marked 0 through 11 on the controller using this configuration:
|
Servo Connector |
Servo |
|---|---|
|
0 |
Right ankle in/out |
|
1 |
Right ankle front/back |
|
2 |
Right knee |
|
3 |
Right hip up/down |
|
4 |
Right hip turn |
|
5 |
Left ankle in/out |
|
6 |
Left ankle front/back |
|
7 |
Left knee |
|
8 |
Left up/down |
|
9 |
Left hip turn |
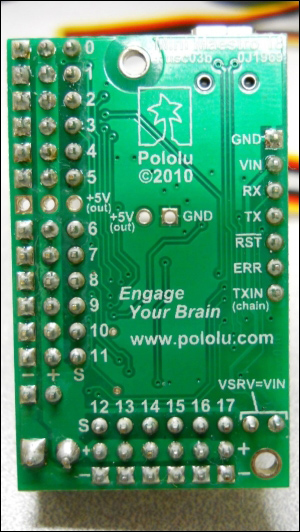
Here is a picture of the back of the controller; this will tell us where to connect our servos:
Now, you need to connect the servo motor controller to your battery. For this project, you can use a 2S RC LiPo battery; it will supply the 7.4 volts and the current required by your servos, which can be on the order of 2 amps. Here is a picture:
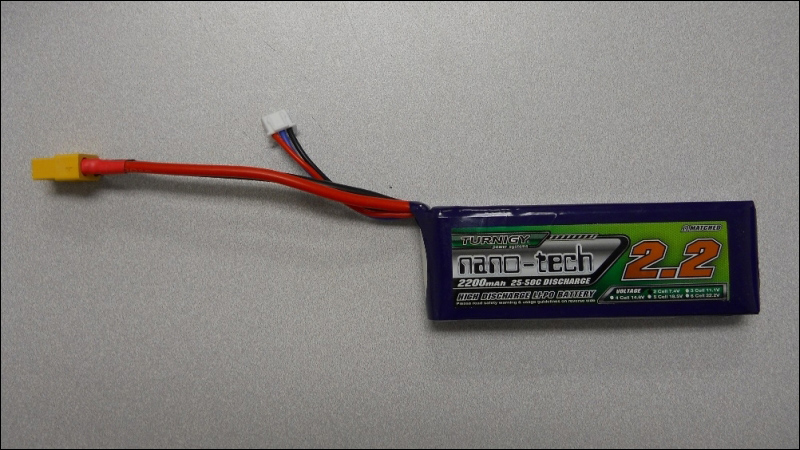
This battery will come with two connectors, one with larger gauge wires for normal usage and a smaller connector to connect to the battery recharger. You can use the XT60 Connector Pairs, solder some wires to the mating connector of the battery, and then insert the bare end of the wires into the servo controller.
Your system is now functional. You can connect the motor controller to your personal computer to check whether you can communicate with it. To do this, connect a mini USB cable between the servo controller and your personal computer.