Now that you have your camera connected, you can begin to access some amazing capabilities that have been provided by the open source community. Open a terminal window and type the following commands:
sudo apt-get update: You're going to download a number of new software packages, so it is good to make sure that everything is up to date.sudo apt-get install build-essential: Although you may have done this earlier, this library is essential to build OpenCV.sudo apt-get install libavformat-dev: This library provides a way to code and decode audio and video streams.sudo apt-get install ffmpeg: This library provides a way to transcode audio and video streams.sudo apt-get install libcv2.4 libcvaux2.4 libhighgui2.4: This command shows the basic OpenCV libraries. Note the number in the command. This will almost certainly change as new versions of OpenCV become available. If 2.4 does not work, either try 3.0 or search on Google for the latest version of OpenCV.sudo apt-get install python-opencv: This is the Python development kit needed for OpenCV, as you are going to use Python.sudo apt-get install opencv-doc: This command will show the documentation for OpenCV just in case you need it.sudo apt-get install libcv-dev: This command shows the header file and static libraries to compile OpenCV.sudo apt-get install libcvaux-dev: This command shows more development tools for compiling OpenCV.sudo apt-get install libhighgui-dev: This is another package that provides header files and static libraries to compile OpenCV.- Now type
cp -r /usr/share/doc/opencv-doc/examples /home/pi/. This will copy all the examples to your home directory.Now that OpenCV is installed, you can try one of the examples. Go to the
/home/pi/examples/pythondirectory. If you do anls, you'll see a file namedcamera.py. This file has the most basic code for capturing and displaying a stream of picture images. Before you run the code, make a copy of it usingcp camera.py myCamera.py. Then, edit the file to look like the following: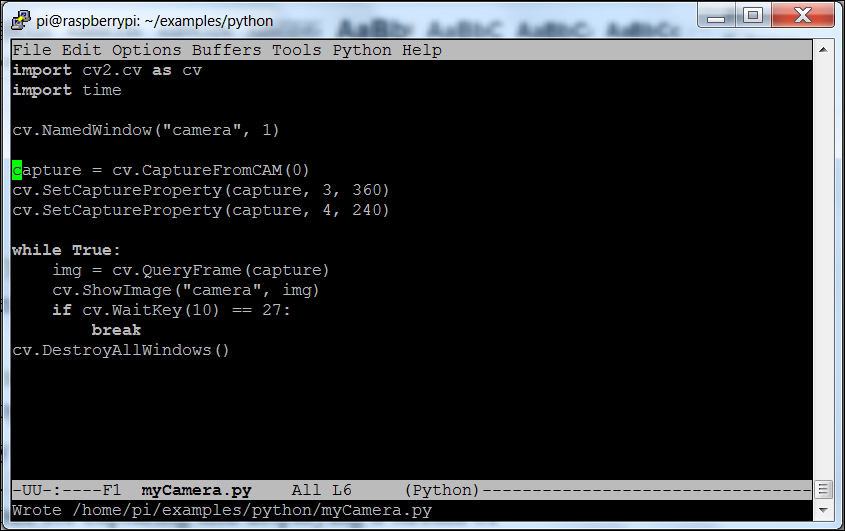
The two lines that you'll add are the two with the
cv.SetCaptureProperty; they will set the resolution of the image to 360 by 240. To run this program, you'll need to either have a display and keyboard connected to Raspberry Pi or use vncviewer. When you run the code, you should see the window displayed, as shown in the following image: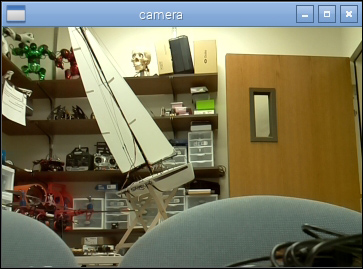
If you are using RaspiCam and don't see an image, you will need to run the
sudo modprobe bcm2835-v4l2command. Now you can see the outside world!You may want to play with the resolution to find the optimum settings for your application. Bigger images are great—they give you a more detailed view on the world—but they also take up significantly more processing power. You'll play with this more as you actually ask your system to do some real image processing. Be careful if you are going to use vncserver to understand your system performance, as this will significantly slow down the update rate. An image that is twice the size (width/height) will involve four times more processing. You can now use this capability to do a number of impressive tasks.