We might briefly note that the script is regular JavaScript, rather than ReactJS's JSX format, which allows mixing of HTML-like XML and JavaScript and has been called the tool that puts angle brackets in your scripts. Not all people will go with JSX, but the tool is worth knowing about if nothing else.
JSX has many merits and is worth considering. It is used by perhaps some, but not all non-Facebook ReactJS users, as well as by Facebook. Facebook has been careful to support JSX but has not required it to use ReactJS. For development purposes, JSX scripts can be loaded after a web page loads, from http://cdnjs.cloudflare.com/ajax/libs/react/0.13.3/JSXTransformer.js for example, and compiled in the browser. For production purposes, they need to be compiled in JavaScript, in which case you can run npm install jsx and then run the jsx compiler from the command line, as documented at https://www.npmjs.com/package/jsx.
In our script, we use an Immediately Invoked Function Expression (IIFE) so that our local variables, defined with the var keyword somewhere within the function or its dependencies, will be protected as private within a closure. This will avoid the concern of a shared mutable state (as it has a nonshared mutable state). A shared mutable state leaves the program's stability at the mercy of anyone who has sufficient access to modify the state. The function is wrapped in parentheses due to a quirk of JavaScript syntax, wherein a line beginning with a function is considered a function definition, so the following syntax will not work:
function() {
}();
The solution is to put the function within an enclosing pair of parentheses, and then it will work properly:
(function()
    {
    })();
Back to our main script!
Our main wrapper function begins nonreactively and imperatively by writing state variables that are only used in the function:
function()
{
  var game_over_timeout = 2000;
  var game_over_timestamp = 0;
  var height = 4;
  var tick_started = false;
  var width = 23;
  var chance_clear;
  var game_over;
  var level;
  var rows;
  var score;
  var position;
  var row;
Having declared—and in some cases, initialized—these variables, we move on to the function used to start the game. This initializes or reinitializes variables, but does not include initializing the level. It starts the game by setting the game_over variable to false, placing the player on level 1, setting a (horizontal) position at the beginning, over to the left of the screen/asteroid field in the first of the 23 characters' width, and a vertical position in row 1 (the row below the top, out of 4), a score of 0, and the chance of most spaces being clear (that is, free of asteroids and therefore safe for the player's ship to travel in) by the asteroids keep getting denser! This 5/6 is the start of an exponential decay in the chances of a space being asteroid-free each time the player goes to a new level. The latter is a parameter that can be adjusted to influence the overall difficulty of the game, a lower value making a more difficult-to-navigate field. Elsewhere, between levels, the chance that a space is clear decreases exponentially; the rate of exponential decay, or perhaps other aspects of that feature are also something that could be modified to affect the difficulty of the game between levels.
Here we see what the display looks like when the player has almost cleared the first level:
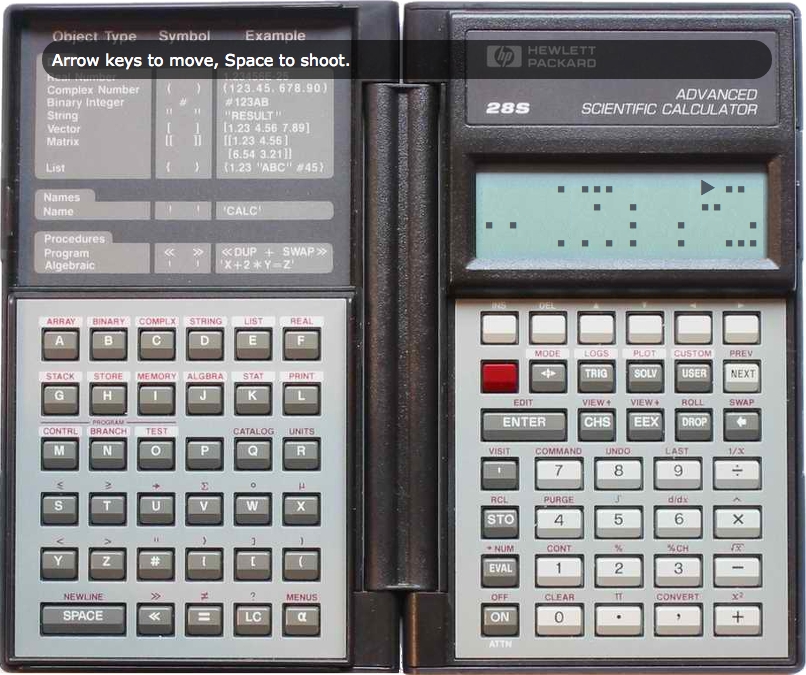
The levels that are generated have mostly spaces, with a random chance of an asteroid being present, but the space that holds the spaceship initially and the space in front of it are always clear. This is intended to allow the player to get some space to react, instead of an automatic death.
The function is invoked immediately after it is declared:
    var start_game = function()
    {
      game_over = false;
      level = 1;
      position = 0;
      row = 1;
      score = 0;
      chance_clear = 5 / 6;
    }
start_game();In the get_level() function, the level is built. The probability that a space is clear undergoes exponential decay (the first level, after decay, being .75, then .675, then .6075, and so on), with the density of asteroids increasing correspondingly, and then a rectangular array of arrays of characters is built (arrays of characters are used for collections of characters undergoing near-constant changes, rather than strings, which are immutable, even though the original implementation manipulated strings). Note that in internal representations here, things are represented by character codes: a for an asteroid, s for the player's ship, a space for a blank space, and so on. (Now it may be a bit strange to store an array of arrays of characters that are references to other characters. On the original legacy system, the approach that would now be obvious was not yet available. This could well be refactored out now, but this chapter is the one code chapter intended to resemble what it's like to get good results while dealing legacy code, and this wart's presence is intended. Most of the work most developers do includes interfacing with legacy functionality.) Initially, all the spaces are potentially populated with asteroids. After that, the ship's initial slot, and the space immediately in front of it, are cleared. This is an example:
var get_level = function(){
  level += 1;
  rows = [];
  result = {};
  chance_clear *= (9 / 10);
  for(var outer = 0; outer < height; ++outer)
  {
    rows.push([]);
    for(var inner = 0; inner < width; ++inner)
    {
      if (Math.random() > chance_clear)
      {
        rows[outer].push('a');
      }
      else
      {
        rows[outer].push(' ');
      }
    }
  }
  rows[1][0] = 's';
  rows[1][1] = ' ';
  return rows;
}
Although this function returns a grid of rows, the grid of rows will be assigned to be a field of an object that will be used with ReactJS. ReactJS works better with a property on an object than on an array.
The result of the preceding function call is stored in a field of the board variable, and an array is defined for keystrokes. At the end of a move, the last keystroke (if any) is taken from the keystrokes array, and then the array is emptied so that the ship moves according to the last keystroke (if any) entered during a turn. All other keystrokes are ignored:
    var board = {rows: get_level()};
    var keystrokes = [];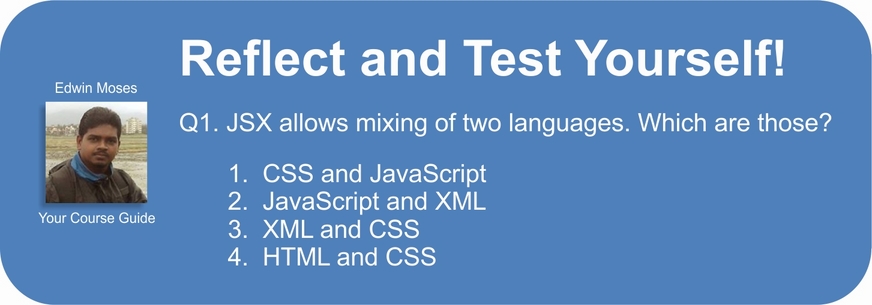
Now we will directly start interacting with ReactJS. We create a ReactJS class, working on a hash of functions with specific fields named as per the documentation. The componentDidMount() function and field, for instance, is a function invoked when a ReactJS component mounts. This means that more or less, it is displayed and represented in the DOM. In this case, we add event listeners to the document's body, rather than add something directly to the component in ReactJS. This is because we want to listen to key press/key down events, and it is difficult to get DIV to respond to these events. Therefore, the body has event listeners added. They will address event handlers in ReactJS, which are still meant to be defined as you would display them normally.
Note that some other types of events, such as some mouse events (at least), will register through ReactJS's usual means, as introduced here:
    var DisplayGrid = React.createClass({
      componentDidMount: function()
      {
        document.body.addEventListener("keypress",
        this.onKeyPress);
        document.body.addEventListener("keydown",
        this.onKeyDown);
      },
Components in ReactJS have properties and a state. Properties are something defined once and they cannot be changed. They are available from within ReactJS, and they should be treated as immutable. The state is mutable information. Both properties and the state are available within ReactJS. We can briefly comment that the shared mutable state is rightly treated by Facebook and ReactJS as begging for Heisenbugs. Here, we handle all of the mutable state from within a closure. The mutable state is not shared, nor should it be shared (in other words, it is a nonshared mutable state):
      getDefaultProps: function()
      {
        return null;
      },
      getInitialState: function()
      {
        return board;
      },
We next define the key down and key press event handlers as they would normally be used, as or at least as they would normally be handled if DIVs responded to key events. (We will in fact be monitoring the body, because key-related events, unlike a hover or mouse click, does not propagate to a containing DIV. This approximates how you would normally demonstrate event handling with ReactJS. The specific keys we are listening for, arrow keys and the spacebar, present a problem. In essence, arrow keys trigger key down events, but not key press events (most other keys generate key press events). This behavior is stupid, but it is deeply entrenched in JavaScript and is now more or less non-negotiable. We delegate to a common event handler that will handle both events. Here, key presses are converted to key codes: left or up arrow key to go up (or left, from the orientation of the game), right or down arrow key to go down (or right, from the orientation of the game), and the spacebar to shoot. These are represented in the keystrokes array by u, d, and s respectively:
      onKeyDown: function(eventObject)
      {
        this.onKeyPress(eventObject);
      },
      onKeyPress: function(eventObject)
      {
        if (eventObject.which === 37 ||
        eventObject.which === 38)
        {
          keystrokes.push('u');
        }
        else if (eventObject.which === 39 ||
        eventObject.which === 40)
        {
          keystrokes.push('d');
        }
        else if (eventObject.which === 32)
        {
          keystrokes.push('s');
        }
      },
At this point, we create the render() function, which is a core ReactJS member to define. What this render function does is create DIVs and SPANs that represent the grid of spaces and symbols as appropriate. The leaf nodes are positioned absolutely.
Having built the leaf SPAN nodes and then the intermediate DIVs, we build up to the main DIV element.
The out_symbol variable is a UTF-8 character and not an ASCII escape; this is for a very specific reason. ReactJS, although with a clearly documented escape hatch dangerouslySetInnerHTML() (see http://tinyurl.com/reactjs-inner-html), is normally set up to resist XSS (cross-site scripting) attacks. As such, its normal behavior is to escape angle brackets and much ampersand usage. This means that will be rendered as it is in source, rather than with a (non-breaking and non-collapsing) space. Therefore, the dingbat symbols that we use are not given as they might be elsewhere—with escape codes (though those are left in here in comments)—but symbols pasted in the JavaScript that are stored as UTF-8.
If you're not sure how to enter the dingbats, you can simply use something else. Alternatively, you can take the escapes in the comments, copy them to a Plain Old Simple HTML (POSH) file, and then copy and paste the half dozen symbols from the rendered POSH page in your JavaScript source with your editor. Your JavaScript source should be treated as UTF-8:
render: function()
{
var children = ['div', {}];
for(var outer = 0; outer <
this.state.rows.length; outer += 1)
{
var subchildren = ['div', null];
for(var inner = 0; inner <
this.state.rows[outer].length;
inner += 1)
{
(var symbol =
this.state.rows[outer][inner];)
var out_symbol;
if (symbol === 'a')
{
// out_symbol = '■';
out_symbol = '■';
}
else if (symbol === 's')
{
// out_symbol = '►';
out_symbol = '►';
}
else if (symbol === ' ')
{
// out_symbol = ' ';
out_symbol = ' ';
}
else if (symbol === '-')
{
out_symbol = '-';
}
else if (symbol === '*')
{
out_symbol = '*';
}
else
{
console.log('Missed character: '
+ symbol);
}
subchildren.push(
React.createElement('span',
{'style': {'position': 'absolute',
'top': 18 * outer - 20), 'left':
(12 * inner - 75)}}, out_symbol));
}
children.push(
React.createElement.apply(this,
subchildren));
}
return React.createElement.apply(this,
children);
}
});The children and subchildren defined in the preceding code populate the argument lists for React.createElement().
Having built things in an inner loop, we add a leaf node to the subchildren array. It is specified to be a span, with inline CSS styling delivered in a hash and content equal to the out_symbol variable. This in turn is added to the children array. It contains the rows of the screen, which in turn is built into the complete board.
In ReactJS, components are defined in React.createElement() and subsequently made available for use. The usual invocation for React.createElement() is something like React.createElement( 'div', null, ...), where the part represented by the ellipsis holds all the children. We use apply() to call React.createElement() with the initial Arg that is requested, and then, in the array, what the arguments should be.
This closes the render() field and the React.createElement() class definition. In the source code, we move on to the tick() function. It handles whatever is supposed happen at each turn. As of now, the code calls tick() at an interval of 300 milliseconds (0.3 seconds), although this is something that could be tweaked to influence the gameplay and perhaps refactored slightly so that the gameplay would accelerate with higher levels.
If the game is over, which can only be due to the ship crashing into an asteroid, nothing happens in the tick() call:
    var tick = function()
    {
      if (game_over)
      {
        return;
      }
Next, React.render() is called, specifying the class that is being rendered and what HTML element to render to. React.render() should be called at least each time you want things to render. If you call it once, it will render once, which means that it needs to be called repeatedly if you want repeated updates to show up. Here, we call it inside each call of the tick() method, asking to create an element based on DisplayGrid defined in a good chunk of the preceding code, and to put the rendered HTML into the DIV with the display ID:
    React.render(
      React.createElement(DisplayGrid, {}),
      document.getElementById('display'));
Here we see the screen as the player shoots an asteroid. The asteroid explodes into an asterisk!

If, in the previous turn, the ship shot an asteroid (which will be represented in the character symbols as zero or more hyphens and an asterisk to their right; the hyphens fill the space leading up to the asteroid that has been shot, and the asterisk represents the explosion as a shot hits the asteroid), we clear the slots that show the shot taken in that turn:
    for(var outer = 0; outer < height; outer += 1)
    {
      for(var inner = 0; inner < width; inner += 1)
      {
        if (board.rows[outer][inner] === '-' ||
        board.rows[outer][inner] === '*')
        {
          board.rows[outer][inner] = ' ';
        }
      }
    }
Having done this, we clear the variable indicating that a shot has been taken:
var shot_taken = false;
We clear the space where the ship was:
board.rows[row][position - 1] = ' ';
The keystrokes array is cleared at the end of each tick, and we pay attention to the last keystroke stored. In other words, we are attending to the last keystroke, if any, since the previous turn. Keystrokes do not accumulate between turns. At the end of a turn, the last keystroke is the only keystroke that wins.
The keystroke array stores key codes rather than exact keystrokes. Arrow keys have been processed such that a left or up arrow key press will store a u for up, a right or down arrow key press will store a d for down, and a spacebar press will store an s for shoot. If someone enters up or down, the ship moves up or down respectively within bounds:
    if (keystrokes.length)
    {
      var move = keystrokes[keystrokes.length – 1];
      if (move === 'u')
      {
        row -= 1;
        if (row < 0)
        {
          row = 0;
        }
      }
      else if (move === 'd')
      {
        row += 1;
        if (row > height - 1)
        {
          row = height - 1;
        }
      }
If the user shoots an asteroid, in the next turn, a row of hyphens will extend from the front of the ship to the asteroid, and the asteroid will become an asterisk, representing an explosion:
    else if (move === 's')
    {
      shot_taken = true;
      score -= 1;
      var asteroid_found = false;
      for(var index = position + 1; index <
      width && !asteroid_found; index += 1)
      {
        if (board.rows[row][index] === 'a')
        {
          board.rows[row][index] = '*';
          asteroid_found = true;
        }
        else
        {
          board.rows[row][index] = '-';
        }
      }
    }
    keystrokes = [];
  }
Note
Downloading the example code
You can download the example code files from your account at http://www.packtpub.com for all the Packt Publishing books you have purchased. If you purchased this book elsewhere, you can visit http://www.packtpub.com/support and register to have the files e-mailed directly to you.
If the user runs over, or collides with an asteroid, the game is over. Then we display a GAME OVER screen and stop further processing, like this:
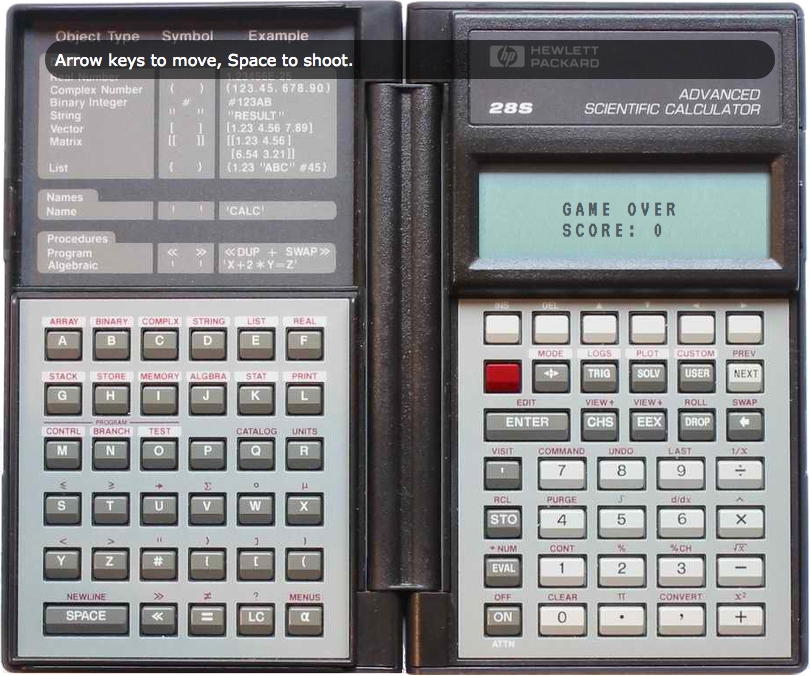
        if (position < width)
            {
            if (rows[row][position] === 'a')
                {
                game_over = true;
                game_over_timestamp = (new
                  Date()).getTime();
                (document.getElementById(
                  'display').innerHTML =
                  '<span style="font-size: larger;">' +
                  'GAME OVER' +
                  '<br />' +
                  'SCORE: ' + score + '</span>');
                return;
                }
As long as the user hasn't hit an asteroid, the game is still going on, and we replace the present slot in the row with a marker for the ship. Then we increment the player's (horizontal) position:
            board.rows[row] = board.rows[row].slice(0,
              position).concat(['s']).concat(
              board.rows[row].slice(position + 1));
            position += 1;
            }
If the user has "fallen off the right edge of the screen", we take the game to the next level:
        else
            {
            rows = get_level();
            score += level * level;
            position = 0;
            row = 1;
            }
        }
Having defined all of this, we start the game, and if we haven't started the ticks in motion, we do so with an interval of 300 milliseconds (a value that can be played with to make the game easier or harder; it might be made into a configurable interval that speeds up with the gameplay):
    start_game();
    if (!tick_started)
        {
        setInterval(tick, 300);
        tick_started = true;
        }
    })();